Home

Aesthetic Cells Formatting


The Cell's Background

Introduction

The cell background is the color or pattern that fills its inside. The default background of a cell is white. There are various options available to you if you want to change it.

Once again, the Ribbon provides the quickest means of configuring a cell or a group of cells. To paint a cell or a group with a color other than white, after selecting it, on the Ribbon, click Home. In the Font section, click the arrow of the Fill Color button and select a color.

The Fill Property Page

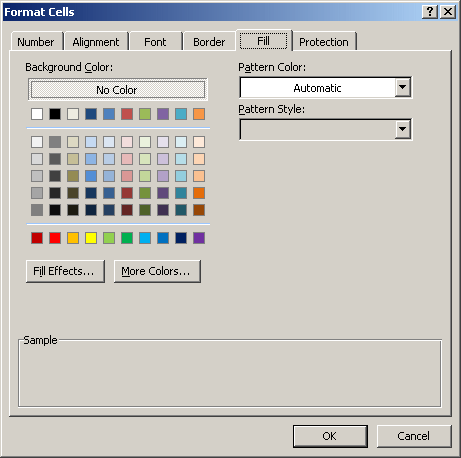
As we have seen so far, the Format Cells dialog box provides an extensive array of options for cell configuration. It is equipped with the Fill property page that displays a wide range of colors:


Fill

To change a cell background, use one of the colors on the Background Color section.

Practical Learning: Painting the Background of Cells

  1. Start Microsoft Excel and open the DAWN Report2.xlsx workbook
  2. Right Cell C2 and click Format Cells...
  3. In the Format Cells dialog box, click the Fill property page.
    In the Background Color section, click a light blue color (5th column, 2nd row in the list)
  4. Click OK
  5. On the Ribbon, click Page Layout
  6. In the Sheet Options section, in the Gridlines section, remove the check mark of the Gridlines check box
  7. Press Ctrl + Home

Cell Formatting With Font


Introduction

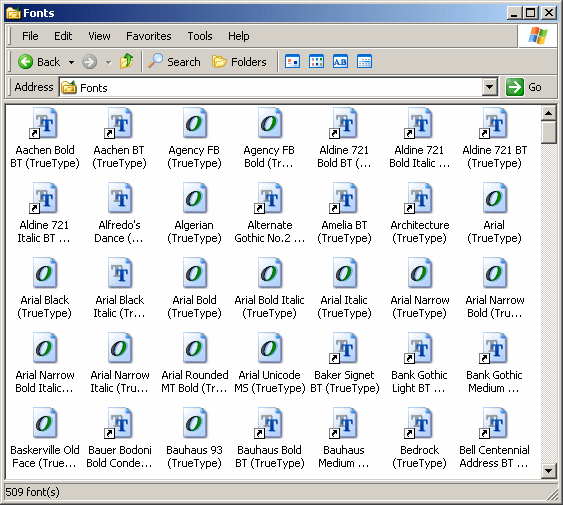
A font is an art effect made of designed symbols used to represent letters and other characters on a cell or a group of cells. A font is designed by an artist but usually follows a specific pattern. For example, a font designed to produce symbols readable in the US English language must be designed by a set of predetermined and agreed upon symbols. These English symbols are grouped in an entity called the English alphabet. When designing such a font, the symbols created should conform to a particular language. Because a font is primarily an art, one font can be different from another and a font is not necessarily a series of readable symbols.

Just like everything else in the computer, a font must have a name. A font is also designed to assume different sizes. Before using it on a worksheet, the font must have been installed. Microsoft Windows installs many fonts during setup. Microsoft Office 2007 also installs new fonts when it is setup.

The font used on the Microsoft Excel application to display its menus and the names of objects is controlled by the operating system. Unless you have a good reason, you should not be concerned with it.

The names of fonts installed on your computer can be seen in the Fonts window accessible from Control Panel. Here is an example:

Fonts of a computer

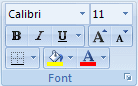
Microsoft Excel uses some default fonts to display the name of columns and rows on a worksheet. Another font is used by default to show the contents of cells. If you want to use a different font to display text in cells, you can changes these defaults. When changing the default font, in other words if you decide to change the default font, you should use only the most popular fonts that are more likely to be found on your user’s computers.

To assist you with setting the fonts of columns, the ribbon is equipped with a Font section in the Home tab:

Font

Practical Learning: Introducing Fonts

  1. Open the RTHS1.xlsx workbook:
     
    Rockfort Technical High School
  2. On the Ribbon Home if necessary.
    In Sheet1, Click cell B2 to activate it

The Name of a Font

You can make a worksheet user-friend by applying some fonts and colors to their content. A font is primarily known by its name as we saw in the above Fonts window. When starting a worksheet, Microsoft Office Excel 2007 applies a default font named Calibri to the cells. If you want, you can change it.

To change the font used by a cell or a group of cells:

  • Click the cell to activate it or select a group of cells. On the Ribbon, click Home. In the Font section:
    • Click the arrow of the Font combo box and select the desired font
    • Click the more options button More. This would open the Format Cells dialog box with the Font tab activated. In the Font property page, use the Font combo box to select the desired font
  • Right-click a cell and click Format Cells. Select a group of cells then right-click the selection and click Format Cells. In the Format Cells dialog box, click the Font tab. In the Font property page, use the Font combo box to select the desired font

Practical Learning: Selecting a Font

  1. While Cell B2 is selected, in the Font section of the Ribbon, click the arrow of the Font combo box and select Bell MT
  2. Right-click Cell B3 and click Format Cells...
  3. In the Format Cells dialog box, click Font. In the Font property page, scroll down in the Font combo box and select Garamond
  4. Click OK
  5. Save the workbook

The Size of a Font

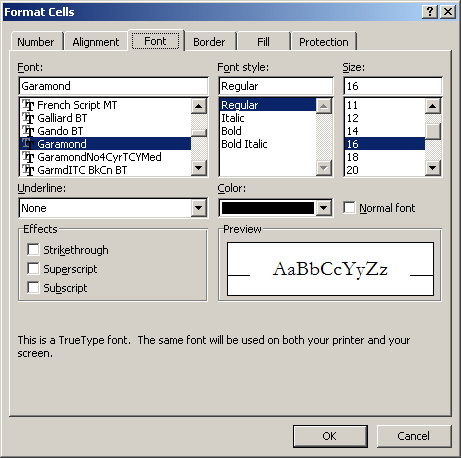
Besides its name, a font is also known for its size. The size defines how much height and proportional width would be used to represent the characters of the selected font.

To specify the font size used by a cell or a group of cells:

  • Click the cell to activate it or select a group of cells. On the Ribbon, click Home. In the Font section:
    • Click the arrow of the Font Size combo box and select the desired size
    • Click the more options button More. In the Font property page of the Format Cells dialog box, use the Size combo box to select the desired size
  • Right-click a cell and click Format Cells. Select a group of cells then right-click the selection and click Format Cells. In the Format Cells dialog box, click the Font tab. In the Font property page, use the Size combo box to select the desired font

When a font is installed, a set of font sizes is created in the Font Size combo box. You can use those numbers but you can also set a new one. To do this, instead of selecting a value in the Font Size combo box, type the desired number and press Enter or Tab. The operating system would calculate the size and apply it.

Practical Learning: Setting the Font Size of a Cell

  1. On the worksheet, click Cell B2
  2. In the Font section of the Home tab of the Ribbon, click the arrow of the Font Size combo box (the top-right combo box of the Font section) and click 22
  3. Click Cell B3
  4. In the Font section of the Ribbon, click the more options button
  5. In the Font property page of the Format Cells dialog box, scroll down in the Size combo box and select 16
     
    Font
  6. Press Ctrl + S to save the workbook

The Style of a Font

Another aspect of the appearance of a font is its style, which is a technique of drawing the characters of the text, depending on the font. This characteristic comes in four options:

Style Example
Regular Regular Text
Bold This text is bold
Italic Italicized section
Underline The words are underlined

By default, Microsoft Excel applies the Regular font style to the cells of a worksheet. You can change this characteristic if you want. To change the font style of a cell or a group of cells:

  • Click the cell or select a group of cells on the worksheet. In the Home tab of the Ribbon, in the Font section, 
  • Right-click a cell and click
  • Click the cell to activate it or select a group of cells. On the Ribbon, click Home. In the Font section:
    • Click the button that represents the desired style: Bold Bold, Italic Italic, or Underline Underline
    • Click the more options button More. In the Font property page of the Format Cells dialog box, select the desired option in the Font Style combo box
  • Right-click a cell and click Format Cells... Select a group of cells then right-click the selection and click Format Cells. In the Format Cells dialog box, click the Font tab. In the Font property page, select the desired style in the Font Style combo box

You can specify more than one style on a cell or a group of cells. To do this, click the button of the desired style. When a style is valid for a control, when you click that control, the style button is highlighted: Highlighted Bold, Highlighted Italic, or Highlighted Underline. To remove a style, click the undesired button. To add a style to another style, simply click the desired button. Based on this, you can have one, two or three buttons highlighted in the combination of your choice.

Practical Learning: Formatting With Styles

  1. Still in Sheet1, click cell B2
  2. In Font section of the Ribbon, click the Bold button Bold
  3. Click the arrow of the Font Color button and select Blue
  4. On the worksheet, right-click Cell B3 and click Format Cells...
  5. In the Format Cells dialog box, click Font if necessary.
    In the Font list, on the Font Style list, click Bold
  6. Click the arrow of the Color combo box and select Dark Blue, Text, Lighter 40% 
     
  7. Click OK on the Format Cells dialog box
  8. Format the other sections as follows:
     
  9. Save the workbook

Cells Formatting With Styles

A formatting style is a set of font, font size, color, and patterns designed to make a worksheet or one of its sections look good. Microsoft Excel is equipped with categories of styles. You can use those ones or create your own.

When applying a style, you decide to format various cells at the same time using a category of style that has been predefined. Therefore, you apply such a style to a cell or range of cells. By default, when you are typing data in a worksheet, you are already using a predetermined style made of a certain font (Calibri), a font size (11), a border, and background, etc. You can modify this style or create a new one.

To apply a style, you use the Styles section of the Ribbon.

Practical Learning: Formatting With Styles

  1. In Sheet1, select Cells B11:B17
  2. On the Ribbon, click Home if necessary. In the Styles, click the More button and select Output
  3. Select Cells B21:B32
  4. In the Styles section of the Ribbon, click the More button and select Output
  5. Select Cells C11:H17
  6. In the Styles section of the Ribbon, click the More button and click New Cell Style...
  7. Type Grades to replace the style name and click Format…
  8. In the Format Cells dialog box, click the Font tab. Change the font to Verdana, style Regular, size 10
  9. Click the Border property page
  10. In the Line Style section, click the thin line (1st column, 7th row)
  11. Click the Color combo box and select Tan, Background 2, Darker 10%
  12. In the Border section, click the top border, the bottom border, the left border, and the right border buttons:
     
    Format Cells
  13. On the Format Cells dialog, click OK
  14. On the Style dialog, click OK
  15. Click Cell I11
  16. In the Styles section of the Ribbon, click the More button and click New Cell Style...
  17. Type Text Entry to replace the style name and click Format…
  18. In the Format Cells dialog box, click the Font tab. Change the font to Verdana, style Regular, size 10
  19. Click the Color combo box and select Blue
  20. Click the Border property page
  21. In the Line Style section, click the thin line (1st column, 7th row)
  22. Click the Color combo box and select White, Background 1, Darker 50%
  23. In the Border section, click the bottom border
  24. On the Format Cells dialog, click OK
  25. On the Style dialog, click OK
  26. Select Cells I11:J17
  27. In the Styles section of the Ribbon, click Text Entry
  28. Select Cells C5:D5
  29. In the Styles section of the Ribbon, click Text Entry
  30. Select Cells G5:J5
  31. In the Styles section of the Ribbon, click Text Entry
  32. Select Cells C7:D7
  33. In the Styles section of the Ribbon, click Text Entry
  34. Select Cells G7:J75
  35. In the Styles section of the Ribbon, click Text Entry
  36. On the Ribbon, click View
  37. In the Show/Hide section, click the Gridlines check box
  38. Save the workbook
  39. Complete the worksheet as follows:

Conditional Formatting

Conditional Formatting allows you to define and apply formatting to some cells, text, and numbers based on criteria that you set. For example, you can format a time sheet to point out whenever an employee gets overtime. You can also use it to track the best sales people in a company by setting a quota that makes a cell range particular.

To use, define, and apply conditional formatting, first select the cells that will be considered. On the Ribbon, click Home. In the Styles section, click Conditional Formatting. A menu would display:

Conditional Formatting

You can use any criteria of your choice. The formatting could be applied to cells' values or a particular formula.

Practical Learning: Conditionally Formatting Cells

  1. Click Sheet2
     
  1. Select cells C5:G12.
  2. We are going to set as bad any grade that is under 12.50, then we will make it obvious on the worksheet.
    On the Ribbon, click Home if necessary. In the Styles section, click the Conditional Formatting button, position the mouse on Highlight Cells Rules, and click Less Than...
  3. In the dialog box that appears, in the left text box, type 12.50
  4. Click the right combo box and select Red Text
     
    Less Than
  5. In the Less Than dialog box, click OK
  6. Press Ctrl + Home to see the result
  7. Now we will set as excellent any grade that is above 15 and point it out. We will add the second conditional formatting to the first.
    Select cells C5:G12
  8. In the Style section of the Ribbon, click the Conditional Formatting button, position the mouse on Highlight Cells Rules, and click Greater Than
  9. Type 15
  10. Click the right combo box and select Custom Format...
  11. In the Format Cells dialog box, click the Font tab. Set the Font Style to Bold. Click the Color combo box and select Green
  12. In the Format Cells dialog box, click the OK
  13. In the Conditional Formatting dialog box, click OK
  14. Press Ctrl + Home to see the result:
     
  15. Save the workbook

Graphics And Drawing


Introduction

Microsoft Excel is equipped with drawing features that can be used to embellish a worksheet. If you have used Microsoft Office long enough, you are probably aware of its drawing tools. They allow you to draw lines, geometric shapes, various flowcharts, connectors, and banners, etc.

Practical Learning: Formatting Cells Content

  • Start Microsoft Excel and open the RTHS2.xlsx workbook.
    If necessary, click the Home worksheet to select it

Shapes

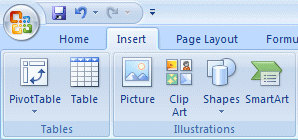
A shape is an aesthetic figure you draw on a worksheet. Microsoft Excel (in reality Microsoft Office) provides various figures and shapes you can use to enhance the appearance of your worksheet.

To access the shapes, on the Ribbon, click the Insert tab and use the buttons in the Illustration section:

Illustration

To draw a shape, in the Illustration section of the Ribbon, you can click Shapes. A window will display the various shapes that are available:

You can click the desired shape. Then, on the worksheet, click one of the extreme ends, drag to the other extreme, when you get a satisfying size and orientation, release the mouse. Once you release the mouse, the object will still be selected with various object handles of various sides and corners of the object. If you position your mouse on different handles or on the object, the mouse pointers will have different shapes.

This shape Allows you to
Move the whole object
Resize the object vertically
Resize the object horizontally
Resize the object in up-left down-right orientation
Resize the object in down-left up-right orientation
Change the corner of some shapes (is not available for all shapes)

Some objects don’t display all these mouse pointers and some may display different mouse shapes. If/when one of those unusual pointers comes up, you will be guided on its meaning.

Almost any shape you draw has a marking rectangular box around it. This allows you to work on the shape as an object. For example, you can use this box to move the object.

You can move any object to a new location on your screen. Sometimes you will want to select more than one object to manipulate the group. To select more than one object, click one of them, press and hold Shift, then click the other object(s). When you have created the group, release Shift.

A drawn object can be copied and pasted to another location on the same worksheet or to a different worksheet on the same workbook, in another workbook, or even to another document. To copy an object, click it. Then on the Ribbon, click Home. In the Clipboard section, click Copy, and proceed with pasting. You can copy one object or a group of objects. Using the Clipboard window of Microsoft Office 2007, you can copy up to 24 objects at once, then paste them to their new respective locations.

Microsoft Office WordArt

A Microsoft Office WordArt is a fancy formatted sentence whose features you can use to include a good-looking group of words that you type and embed in your worksheet.

To get a WordArt, on the Ribbon, click the Insert tab. In the Text section, click the WordArt button and click the desired format:

A label with Your Text Here would come up. You can then edit it to your liking.

Practical Learning: Creating WordArt

  1. On the Ribbon, click Insert
  2. In the Text section, click the WordArt button and, from the list, click Fill - None, Outline - Accent 6, Glow - Accent 6
  3. Type County School System
  4. Move the word art to the top left side of the work area
  5. While the word art is still selected, in the Format tab of the Ribbon, in the WordArt Style section, click the More button and, from the list of styles, click Gradient Fill - Accent 1, Outline - White
  6. Resize and re-position the title as you see fit but somewhere in the top-left section of the worksheet
     
  7. Save the workbook
  8. On the Ribbon, click Insert. In the Illustrations section, click Shapes and click the Line button.
  9. To draw a horizontal line, press and hold Shift
  10. Click in the lower-left side of the word art, drag the mouse in the right direction until you get to the lower-right side of the word art
  11. Release the mouse. You don’t have to be absolutely precise since you can still resize and move the line to meet your satisfaction.
  12. While the line is still selected, in the Format tab of the Ribbon, in the Shape Styles section, click the arrow of the Shape Outline button and click Dark Blue, Text 2, Lighter 40% Line Colors…
  13. While the line is still selected, press Ctrl + C to copy and press Ctrl + V to paste
  14. While the new line is selected, in the Format tab of the Ribbon, in the Shape Styles section, click the arrow of the Shape Outline button and click Dark Blue, Text 2
  15. While the new line is still selected, in the Format tab of the Ribbon, in the Shapes Styles section, click the arrow of the Shape Outline button. Position the mouse on Weight, and click 41/2 pt
     
  16. Save the workbook

ClipArt and Pictures

You can use pictures to enhance the appearance of your worksheets. You can use almost any kind of picture from almost any format. To get some pictures, you can access the Clip Art section of the Microsoft Office web site. You would have to download those pictures and install them on your computer. You can also use any pictures available to you.

To use a picture, on the Ribbon, click Insert. In the Illustration section, click the Picture button. This would open the Insert Picture dialog box. Locate and select a picture, then click Insert.

Microsoft Excel also allows you to completely change a worksheet’s background with a picture of your choice. To do that, on the Ribbon, click Page Layout. In the Page Setup section click the Background button. From the Sheet Background dialog box, locate and select the desired picture. Then click Insert.


Previous Copyright © 2007-2010, FunctionX Next