|
|
A timer is a non-spatial object that uses recurring
lapses of time from a computer or from an application. To work, every lapse
of period, the control sends a message to the operating system. The message
is something to the effect of "I have counted the number of lapses you asked
me to count".
|
As opposed to the time set on a computer, a timer is
partly but greatly under your control. Users do not see nor use a timer as
a control. As a programmer, you decide if, why, when, and how to use this
control.
|
 Practical
Learning: Introducing the Timer Control Practical
Learning: Introducing the Timer Control
|
|
- Start Microsoft Visual Studio
- To create a new application, on the main menu, click File -> New
Project...
- In the middle list, click MFC Application and set the name to
CurrentTime1
- Click OK
- In the first page of the wizard, click Next
- In the second page of the wizard, click Dialog based and click
Next
- In the third page of the wizard, click Finish
- On the dialog box, click the TODO label
- In the Properties window, change the following characteristics:
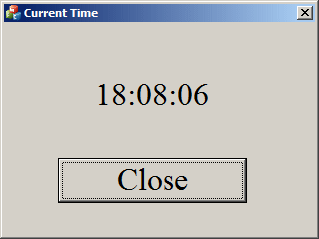
Caption: 00:00:00 AM
ID: IDC_CURRENT_TIME
- Click an unoccupied area of the dialog box
- In the Properties window, click Font (Size) then click ellipsis
button
- In the Font box, select Times New Roman
- In the Font Style, click Bold
- In the Size box, click 24
- Click OK

- Right-click the 00:00:00 AM label and click Add Variable...
- Set the Category to Value
- Make sure the type is set to CString and set the name to
m_CurrentTime
- Click Finish
Unlike most other controls, the MFC timer has neither
a button to represent it nor a class. To create a timer, you simply call
the SetTimer() member function of the CWnd
class. Its syntax is:
UINT SetTimer(UINT nIDEvent, UINT nElapse,
void (CALLBACK EXPORT* lpfnTimer)(HWND, UINT, UINT, DWORD));
This function call creates a timer for your
application. Like the other controls, a timer uses an identifier. This is
passed as the nIDEvent argument. As mentioned already, when it is
accessed, a timer starts counting up to a set value. Once it reaches that
value, it stops and starts counting again. The nElapse argument
specifies the number of milliseconds that the timer must count before
starting again. The lpfnTimer argument is the name of a procedure
that handles the timing event of the control. This argument can be set to
NULL, in which case the timing event would rest on the CWnd's
responsibility.
|
Practical
Learning: Using Timer Controls
|
|
- In the Class View, expand the CurrentTime1 project and click
CCurrentTime1Dlg
- In the lower part of the Class View, double-click OnInitDialog
- Change the event as follows:
BOOL CCurrentTime1Dlg::OnInitDialog()
{
    CDialogEx::OnInitDialog();

    // Add "About..." menu item to system menu.

    // IDM_ABOUTBOX must be in the system command range.
    ASSERT((IDM_ABOUTBOX & 0xFFF0) == IDM_ABOUTBOX);
    ASSERT(IDM_ABOUTBOX < 0xF000);

    CMenu* pSysMenu = GetSystemMenu(FALSE);
    if (pSysMenu != NULL)
    {
	BOOL bNameValid;
	CString strAboutMenu;
	bNameValid = strAboutMenu.LoadString(IDS_ABOUTBOX);
	ASSERT(bNameValid);
	if (!strAboutMenu.IsEmpty())
	{
		pSysMenu->AppendMenu(MF_SEPARATOR);
		pSysMenu->AppendMenu(MF_STRING, IDM_ABOUTBOX, strAboutMenu);
	}
    }

    // Set the icon for this dialog.  The framework does this automatically
    //  when the application's main window is not a dialog
    SetIcon(m_hIcon, TRUE);			// Set big icon
    SetIcon(m_hIcon, FALSE);		// Set small icon

    // TODO: Add extra initialization here
    SetTimer(1, 200, 0);

    return TRUE;  // return TRUE  unless you set the focus to a control
}
|
Characteristics of a Timer
|
|
When a timer is accessed or made available, it starts
counting. Once the nElapse value of the CWnd::SetTimer()
member function is reached, its sends a WM_TIMER message to the
application.
We saw that a timer is initiated with a call to
SetTimer(). When you do not need the timer anymore, call the
CWnd::KillTimer() member function. Its syntax is:
BOOL KillTimer(int nIDEvent);
The nIDEvent argument identifies the timer that
was created with a previous call to SetTimer().