Displaying a Bitmap
 |
Displaying a Bitmap |
|
Introduction |
|
A bitmap is a series of points (bits) arranged like a map so that, when put together, they produce a picture that can be written to, copied from, re-arranged, changed, manipulated, or stored as a a computer file. Bitmaps are used to display pictures on graphical applications, word processors, database files, or audience presentations. To display its product on a device such as a monitor or a printer, a bitmap holds some properties and follows a set of rules. There are various types of bitmap, based on the number of colors that the bitmap can display. First of all, a bitmap can be monochrome in which case each pixel corresponds to 1 bit. A bitmap can also be colored. The number of colors that a bitmap can display is equal to 2 raised to the number of pits/pixel. For example, a simple bitmap uses only 4 pits/pixel or 4 bpp can handle only 24 = 16 colors. A more enhanced bitmap that requires 8 bpp can handle 28 = 256 colors. Bitmaps are divided in two categories that control their availability to display on a device. |
|
A device-independent bitmap (DIB) is a bitmap that is designed to be loaded on any application or display on any device and produce the same visual effect. To make this possible, such a bitmap contains a table of colors that describes how the colors of the bitmap should be used on pixels when displaying it. The characteristics of a DIB are defined by the BITMAPINFO structure. A device-dependent bitmap (DDB) is a bitmap created from the BITMAP structure the dimensions of the bitmap.
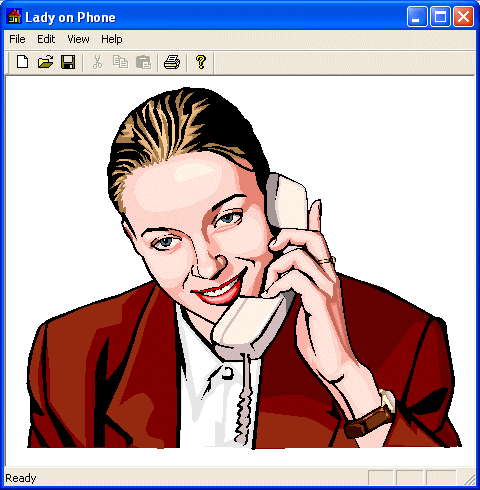
Unlike the other GDI tools, creating a bitmap usually involves more steps. For example, you may want to create a bitmap to display on a window. You may create another bitmap to paint a geometric area, in which case the bitmap would be used as a brush. Before creating a bitmap as a GDI object, you should first have a bitmap. You can do this by defining an array of unsigned hexadecimal numbers. Such a bitmap can be used for a brush. To create and manipulate bitmaps, the MFC library provides the CBitmap class. The use of this class depends on the type of bitmap you want to create and how you want to use that bitmap. One way you can use a bitmap is to display a picture on a window. To do this, you must first have a picture resource. Although the Image Editor built-in Microsoft Visual C++ is meant to help with regular application resources, it has a problem handling a bitmap that displays more than 16 colors. The remedy used is to import the bitmap you want to use. Once your bitmap is ready, call the CBitmap::LoadBitmap() method. Its syntaxes: BOOL LoadBitmap(UINT nIDResource); BOOL LoadBitmap(LPCTSTR lpszResourceName); The first version takes, as argument, the identifier of the bitmap you want to use. If the bitmap is recognized by its name, you can use the second version of this method and provide the lpszResourceName argument. Before selecting the newly created bitmap object, allocate a block of computer memory that would hold the bitmap and can then copy it to the actual device. This job can be taken care of by the CDC::CreateCompatibleDC() method. Its syntax is: virtual BOOL CreateCompatibleDC(CDC* pDC); This method takes a pointer to a device context. If it is successful, it returns TRUE or a non-zero value. If it is not, it returns FALSE or 0. Here is the bitmap used on this exercise:
|
|
|
void CBitmap1View::OnPaint()
{
	CPaintDC dc(this); // device context for painting

	// TODO: Add your message handler code here
	CBitmap BmpLady;
	CDC MemDCLady;

	// Load the bitmap from the resource
	BmpLady.LoadBitmap(IDB_LADY);
	// Create a memory device compatible with the above CPaintDC variable
	MemDCLady.CreateCompatibleDC(&dc);
	// Select the new bitmap
	CBitmap *BmpPrevious = MemDCLady.SelectObject(&BmpLady);

	// Copy the bits from the memory DC into the current dc
	dc.BitBlt(20, 10, 436, 364, &MemDCLady, 0, 0, SRCCOPY);

	// Restore the old bitmap
	dc.SelectObject(BmpPrevious);
	// Do not call CView::OnPaint() for painting messages
}
|

|
|
||
| Home | Copyright © 2003-2015, FunctionX | FunctionX |
|
|
||