Introduction to SQL and Transact-SQL

Introduction to SQL and Transact-SQL
The Structured Query Language
Introduction to Code
Although you will perform many of your database operations visually, some other operations will require that you write code. To assist with this, Microsoft SQL Server provides a code editor and various code templates.
 |
To open the editor:
This would open a new window and position it on the right side of the interface. |
 |
In our lessons, if you click File -> New -> Query With Current Connection on the main menu, or if you click the New Query button, or if you right-click the name of the server in the Object Explorer and click New Query, the window that displays will be called the Query Editor. |
Saving Code
Whether you have already written code or not, you can save the document of the code editor at any time. To save it:

You will be required to provide a name for the file. After saving the file, its name would appear on the tab of the document.
Introduction to SQL
After establishing a connection, you can take actions, such as creating a database and/or manipulating data. To provide the ability to create and manipulate a database, you use a data manipulation language (DML). The Structured Query Language, known as SQL, is a DML used on various computer systems to create and manage databases.
 |
SQL can be pronounced Sequel or S. Q. L. In our lessons, we will consider the Sequel pronunciation. For this reason, the abbreviation will always be considered as a word, which would result in "A SQL statement" instead of "An SQL statement". Also, we will regularly write, "The SQL" instead of "The SQL language", as the L already represents Language. |
Like other non-platform specific languages such as C/C++, Pascal, or Java, the SQL you learn can be applied to various database systems. To adapt the SQL to Microsoft SQL Server, the company developed Transact-SQL as Microsoft's implementation of SQL. Although Microsoft SQL Server highly adheres to the SQL standards, it has some internal details that may not be applied to other database systems.
|
|
Throughout our lessons, we will use "SQL" and "Transact-SQL". Most of the time:
|
 Practical Learning: Introducing Transact-SQL Code
The SQL Interpreter
As a computer language, the SQL is used to give instructions to an internal program called an interpreter. As we will learn in various sections, you must make sure you give precise instructions. SQL is not case-sensitive. This means that CREATE, create, and Create mean the same thing. It is a tradition to write SQL's own words in uppercase. This helps to distinguish SQL instructions with the words you use for your database. As we will learn in this and our other lessons, you use SQL by writing statements. To help you with this, Microsoft SQL Server provides a window, also referred to as the Query Editor, that you can use to write your SQL code. To access it, in the Object Explorer, right-click the name of the server and click New Query. In the same way, you can open as many instances of the New Query Editor as you want. When the Query Editor comes up, it displays a blank child window in which you can write your code. Every time you open a new query, it is represented with a tab. To switch from one code part to another, you can click its tab. To dismiss an instance of the query, first access it (by clicking its tab). Then, on the right side, click the close button |
|
In the next sections and lessons, we will learn various techniques of creating SQL statements with code. By default, when a new Query Editor appears, it is made of a wide white area where you write your statements:
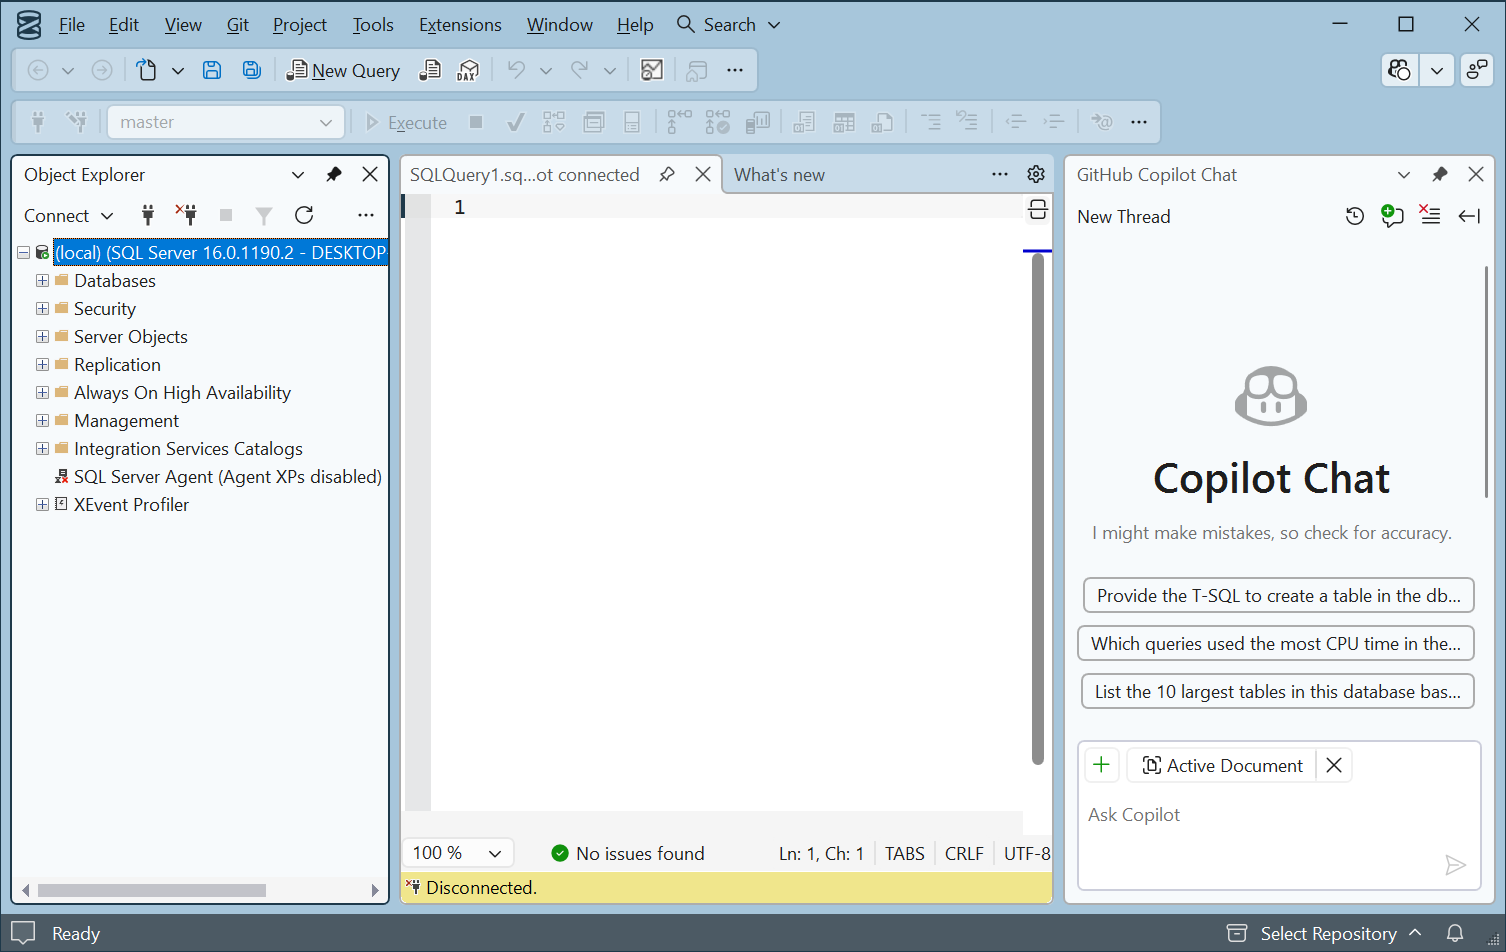
After writing a statement, you can execute it, either to make it active or simply to test it. To execute a statement:

When you execute code, the Query Editor becomes divided into two horizontal sections:
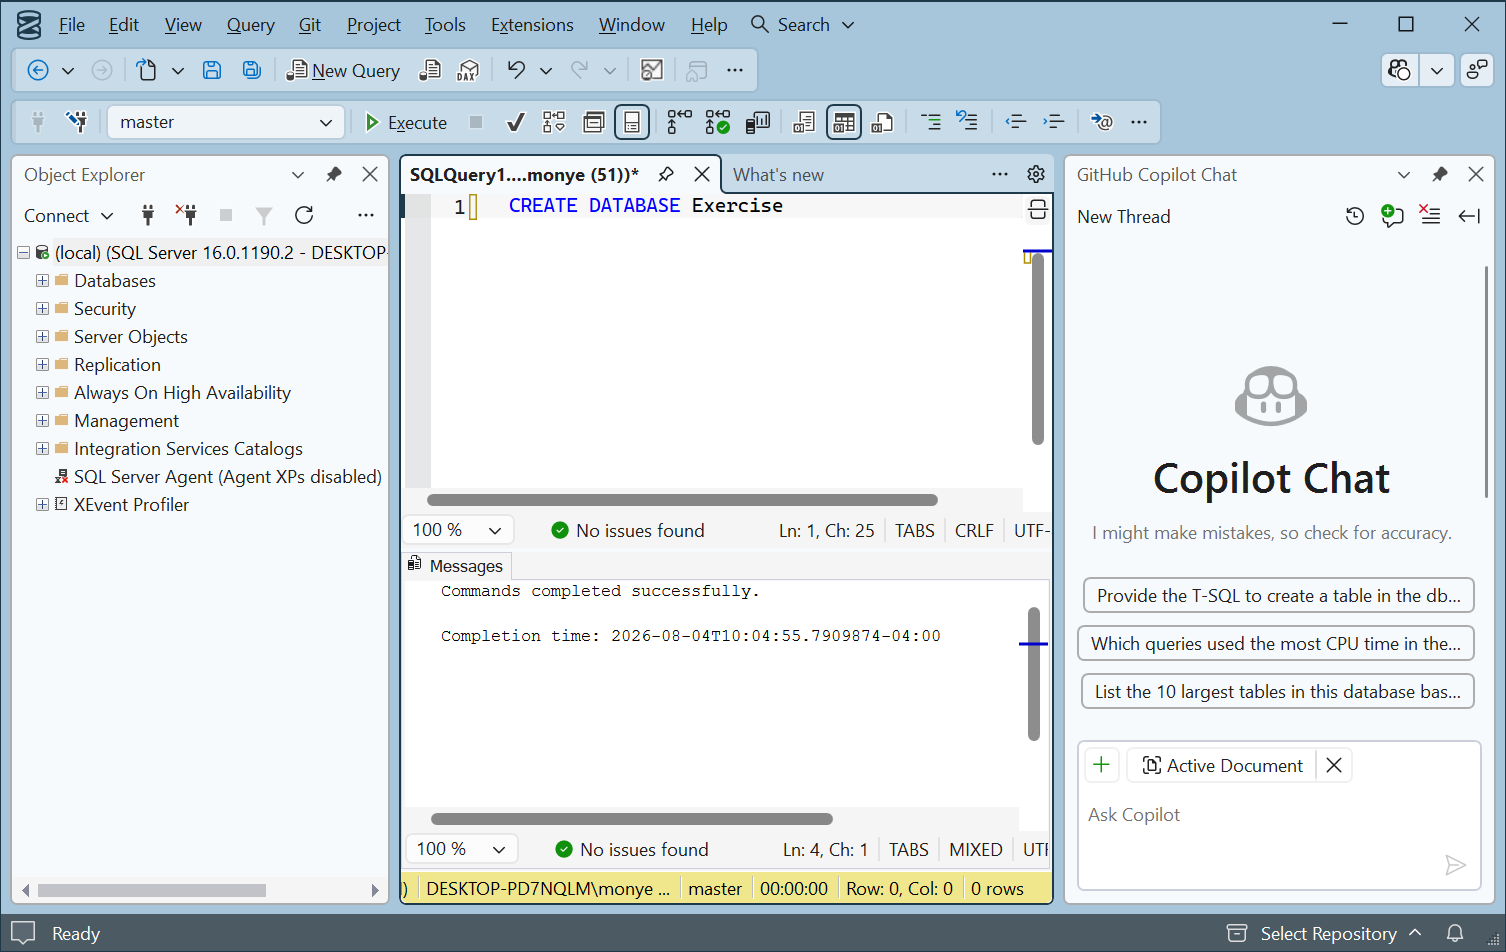
Also, when you execute code, the interpreter would first analyze it. If there is an error, it would display one or more lines of error text in its bottom section. Here is an example:
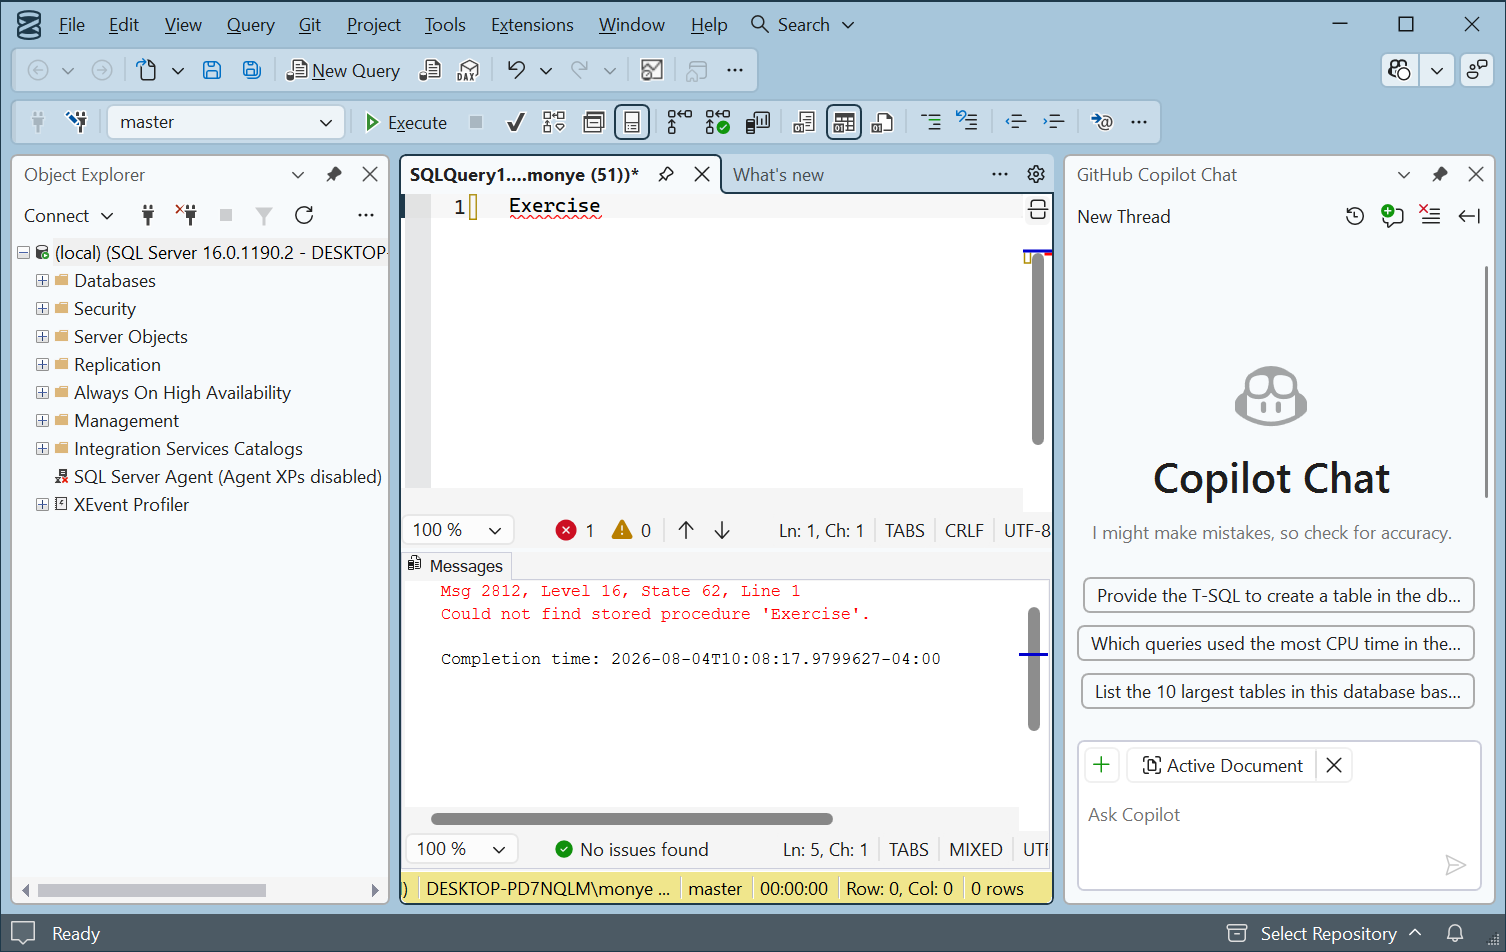
If there is no error in the code, what happens when you execute a statement depends on the code and the type of statement.
Accessories for SQL Code Writing
Code Colors
To make your code less boring, you can ask the Code Editor to apply colors to it. To do this, on the main menu, click tools -> Options... In the left tree, expand All Settings and Environment. Then click Fonts and Colors. You may be presented with a Fonts and Colors link:
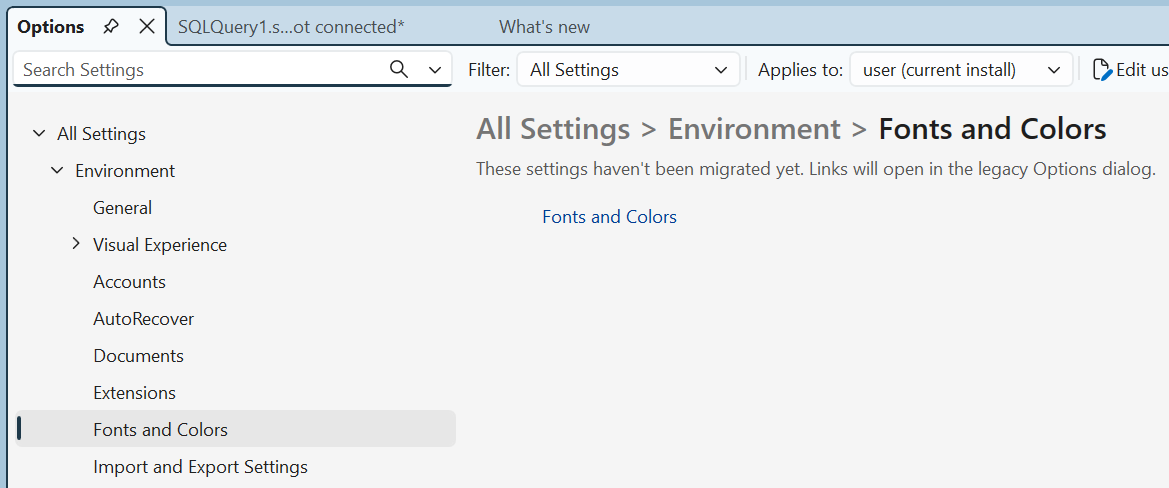
If that happens, click the Fonts and Colors link:
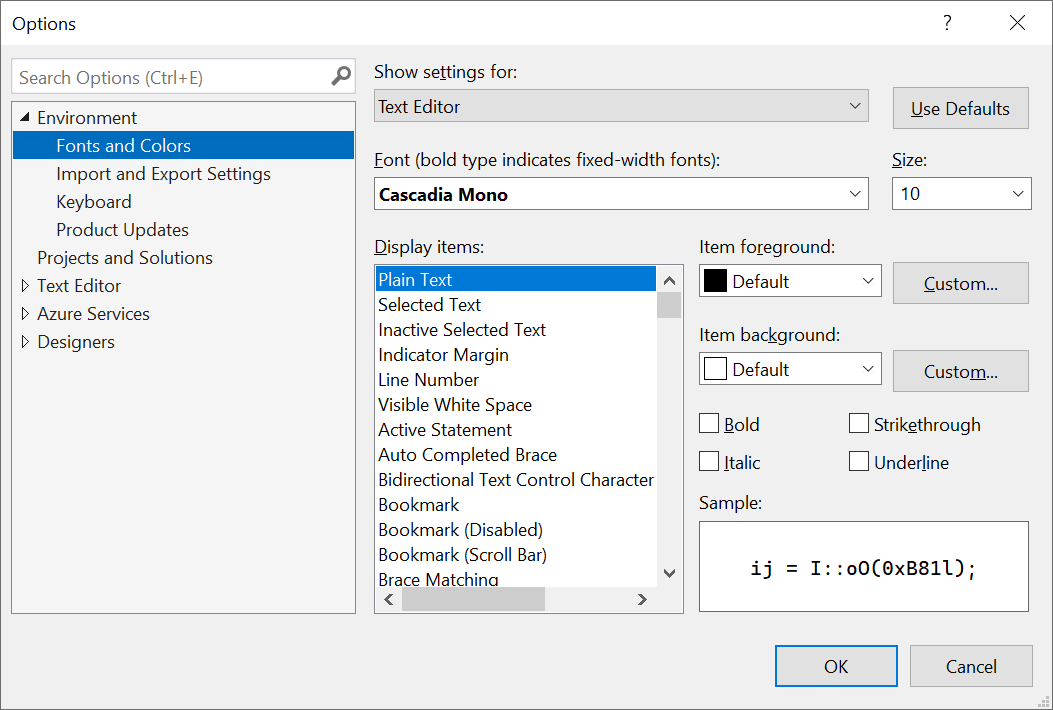
To specify a color, in the Display Items list box, click an option, then change its colors in the Item Foreground and the Item Background combo boxes. Both check boxes are filled with colors. If you want to use a color that is not in the list, click the corresponding Custom button and create a color.
Code Templates
To assist you with writing code, Microsoft SQL Server provides many templates you can customize. These are available in the Template Explorer. To access it, on the main menu, click View -> Template Explorer.
The Template Explorer shows its item in a tree list. Like most windows in Microsoft SQL Server, it is floatable and dockable:
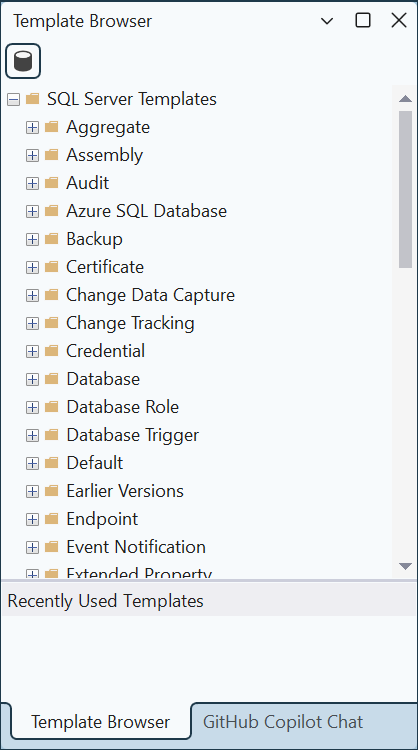
To use a code template, first start a Query Editor. In the Template Explorer, expand the category you want. Then drag the desired option and drop it in the Query Editor. The Query Editor doesn't have to be empty. This means that, if it contains some code already, you can drag a node from the Template Explorer and drop it where it would add the existing code. You can then edit the code any way you like.
Introduction
A comment is text that the SQL interpreter would not consider as code. As such, a comment is written any way you like. What ever it is made of would not be read. Transact-SQL supports two types of comments.
A Single-Line Comment A commont can be written for only one line, or one line at a time. To start such a comment, type a double-dash, --. Then, after --, write whatever you like of text. Anything on the right side of -- is part of a comment and would not be considered as code. Here is an example: -- Now that the database is not in the system, create it In the same way, you can write comments on many lines as long as each line starts with --. Here are examples: -- ============================================= -- Database: MotorVehicleDivision -- ============================================= |
|
A Multi-Line Comment
You can start a comment section with /* and end with */. You can write such a comment on one line. Here is an example:
/* First find out if the database we want to create exists already */
As seen in our introduction to comments, if you want to write comments on many lines, you can starts each line with --. As an alternative, you can use the /* and */ combination to expand the comment on many lines, as if you are creatomg a paragraph. To proceed, start a line with /*, include any kind of text you like, on as many lines as you want. To close the commented section, type */. Here is an example:
/* First find out if the MotorVehicleDivision database we
   want to create exists already.
   If that database exists, we don't want it anymore. So,
   delete it from the system. */
Other Topics on SQL Code Writing
The End of a Statement
In SQL, after writing a statement, you can end it with a semi-colon. In fact, if you plan to use many statements in one block, you should end each with a semi-colon. When many statements are used, some of them must come after others.
Prolonging a Line of Code
Sometimes you will write a long line of code that may disappear on the right side of the Code Editor. To interrupt a line and continue the code on the next line, the formula to use is:
Section 1 \
SSection 2
To start a section of code, add a backslash \, and continue the code on the next line.
To separate statements, that is, to indicate when a statement ends, you can use the GO keyword (in reality and based on SQL standards, it is the semi-colon that would be required, but the Microsoft SQL Server interpreter accepts GO as the end of a statement). The option to use GO is specified in the Batch Separator text box of the Query Execution section of the Options window:

Introduction to SQL Operations
Introduction to SQL Operators and Operands
An operation is an action performed on one or more values either to modify the value held by one or both of the values or to produce a new value by combining values. Therefore, an operation is performed by using at least one symbol and one value. The symbol used in an operation is called an operator. A value involved in an operation is called an operand.
 |
Like every language, SQL has some words used to carry its various operations. One of these words is PRINT. To display something in plain text as a result of a statement, type PRINT followed by what to display. Therefore, PRINT uses the following formula: PRINT WhatToPrint |
The item to display can be anything that is allowed and it is provided on the right side of PRINT (in future lessons, we will see many examples). If it is a regular constant number, simply type it on the right side of PRINT. Here is an example:
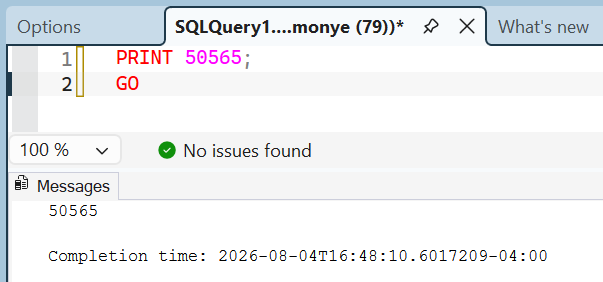
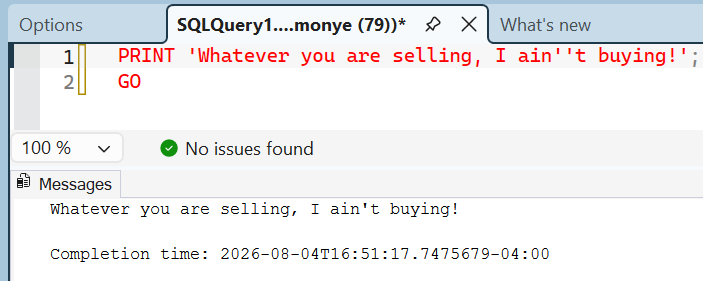
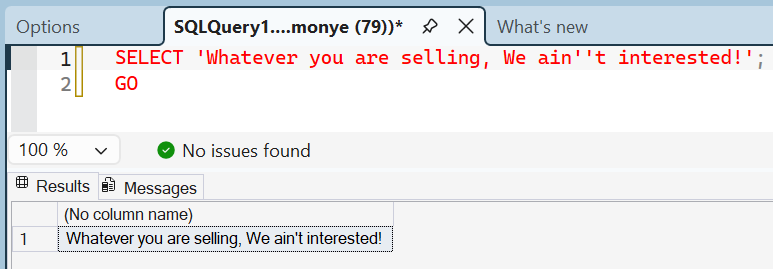
The item to display can also be an operation or the result of an operation. If you want to display a character, a word, or a sentence, include it between single-quotes. If you want to include a single-quote in your statement, double it; that is, write it twice. Here is an example:
You can also display an expression as a combination of number(s) and sentences (in future lessons, we will see many examples).
SELECT
The SELECT operator can be used, among other things, to display a value. The SELECT keyword uses the following syntax:
SELECT What
Based on this, to use it, where it is needed, type SELECT followed by a number, a word, a string, or an expression. The item to display follows some of the same rules as PRINT. Some of the differences between PRINT and SELECT are:
As done for PRINT, to display a sentence using SELECT, type it in single-quotes on the right side of this operator. Here is an executed example:
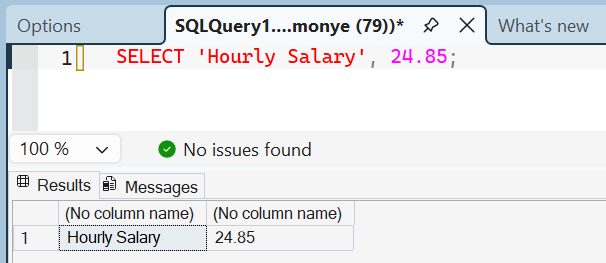
As mentioned already, unlike PRINT, SELECT can be used to display more than one value. The values must be separated by commas. Here is an example:
SELECT 'Hourly Salary', 24.85;
This would produce:
When you create a SELECT statement, what is on the right side of SELECT must be a value. Here is an example: SELECT 226.75; Based on this definition, instead of just being a value, the thing on the right side of SELECT must be able to produce a value. As we will see in the next sections, you can create algebraic operation on the right side of SELECT. Because we mentioned that the thing on the right side must produce a result, you can as well use another SELECT statement that itself produces a result. To distinguish the SELECT sections, the second one should be included in parentheses. Here is an example: SELECT (SELECT 448.25);
GO
When one SELECT statement is created after another, the second is referred to as nested. Just as you can nest one SELECT statement inside of another, you can also nest one statement in another statement that itself is nested. Here is an example: |
 |
SELECT (SELECT (SELECT 1350.75));
GO
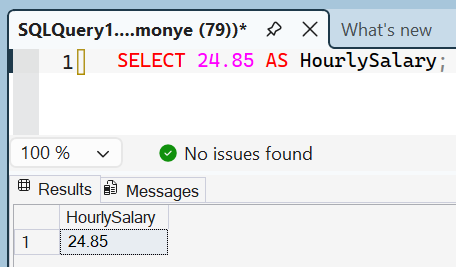
In the above introductions, we used either PRINT or SELECT to display something in the Query Editor. One of the characteristics of SELECT is that it can segment its result in different sections. SELECT represents each value in a section called a column. Each column is represented with a name also called a caption. By default, the caption displays as "(No column name)". If you want to use your own caption, on the right side of an expression, type the AS keyword followed by the desired caption. The item on the right side of the AS keyword must be considered as one word. Here is an example:
SELECT 24.85 AS HourlySalary;
This would produce:
There are three ways you can specify the item after AS. You can include the item:
SELECT 24.85 AS 'HourlySalary';
SELECT 24.85 AS [Hourly Salary];
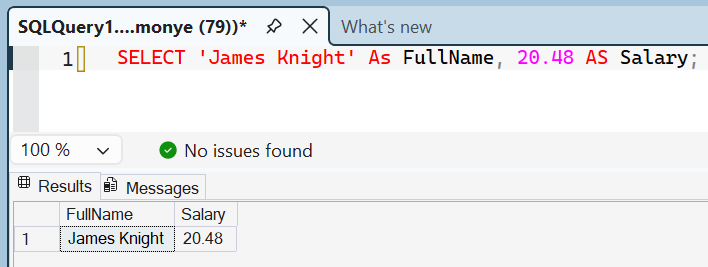
If you create different sections, separated by a comma, you can follow each with AS and a caption. Here is an example:
SELECT 'James Knight' As FullName, 20.48 AS Salary;This would produce:
SELECT 'James Knight' As [Full Name], 20.48 AS [Hourly Salary];SELECT 24.85 AS "HourlySalary";
Practical Learning: Closing Microsoft SQL Server
|
|
|||
| Previous | Copyright © 2007-2026, FunctionX | Last Update: Wednesday 05 August 2026, 12:54 | Next |
|
|
|||

 . If you had written code in the Query Editor, when you close it, you would be asked to save your code. If you want to preserve your code, save it.
