Assistance With Data Entry
A Default Value for a Field
Sometimes, most values of a field are the same. For
example, if you create a table for employment applications, most employees
would be from the same state and only some records would have a different
value for the state. If you have such a field in a table, you can provide a
common value for the field. During data entry, the user would change the
value only if it is different from the usual. Such a common value is
referred to as a default value.
To provide a default value to a field:
- In the Datasheet View of a table, on the Ribbon, click Fields. In the Properties section, click Default Value. This
would open the Expression Builder with = in the main text box. If you know
the constant value you want to use, type it. Then click OK
- In the Design View of a table, in the top section, click the field.
In the lower section of the window, click Default Value and type the desired value
The default value should be appropriately typed:
- If the field is text-based, you can type the default text included in double-quotes
- If the field is numeric, just type the number
- If the field is date-based and you want to specify a constant (fixed), type it between
two # signs
- If you want to use a (built-in) function, type if preceded by = and add the parentheses. If you are using the Expression Builder, in the
left list, expand Functions and expand Built-In Function. In the middle list,
click the category the function belongs to. From the right list, double-click
the desired function, then configure the function appropriately
 Practical Learning: Setting Default Values
- On the Ribbon, click File and click Open
- In the list of files, click College Park Auto-Repair1
- In the Navigatione Pane, right-click the RepairOrders table and click Design View
- In the top section of the window, click State
- In the bottom section, click Default Value and type MD
- In the top section of the window, click TaxRate
- In the bottom section, click Default Value and type 0.0775
- In the top section of the window, click DropOffDateTime
- In the bottom section, click Default Value and type =Month(Date()) & "/" & Day(Date$()) & "/" & Year(Date$()) & " " & Hour(Time$()) & ":" & Minute(Time$())
- Save the table
- In the Navigation Pane, right-click the RepairOrders form and click Design View
- On the form, click the DropOffDateTime text box and press Delete
- In the Tools section of the Ribbon, click Add Existing Fields
- From the Field List, drag DropOffDateTime and drop on the form where the previous text box was
- Format the label and the text box to appear like the previous text box was:
- Save the form and switch it to Form View
- Close the form
Validation Rule
A validation rule is a condition that the value entered in a field must meet in order to be valid. To
create a validation rule:
- If the table is displaying in the Datasheet View, on the Ribbon, click
Fields. In the Field Validation section, click Validation and click Field
Validation Rule
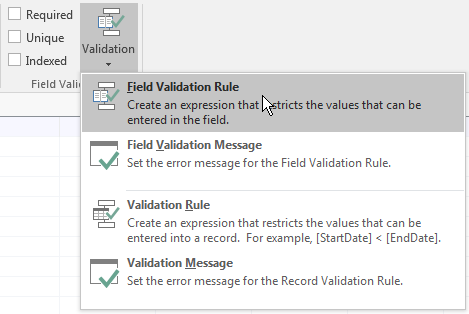
- If the table is displaying in the Design View, click the field. In the
lower section of the window, click Validation Rule and click its ellipsis
button

In both cases, the action would open the Expression Builder
where you can create a rule.
Validation Text
When the condition in the Validation Rule field is not respected, you can display a message box to let the user know. To
create the message:
- If the table is displaying in the Datasheet View, on the Ribbon, click
Fields. In the Field Validation section, click Validation and click Field
Validation Message. This would open the Enter Validation Message where you
can type the desired message:
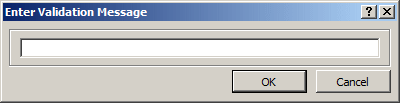
- If the table is displaying in the Design View, click the field. In the
lower section of the window, click Validation Text and type the desired
message
Practical Learning:
Introducing Logical Functions
- In the Navigation Pane, under Tables, double-click RepairOrders to open
it in the Datasheet View
- On the table, click the cell under Customer Name
- On the Ribbon, click Fields
- In the Field Validation section, click Validation and click Record
Validation Rule
- In the Expression Elements list, make sure RepairOrders is
selected.
In the Expression Categories list, double-click
CustomerName
- Type IS NOT NULL
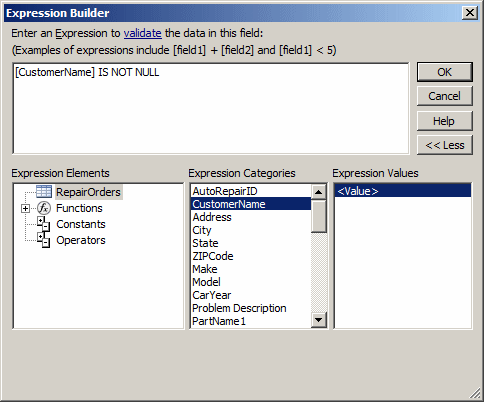
- Click OK
- In the Field Validation section, click Validation and click Record
Validation Message
- Type Make sure you specify the name of the customer
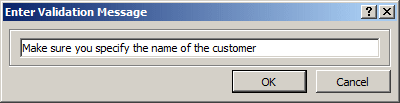
- Click OK
- Close the table
- In the Navigation Pane, under Forms, right-click RepairOrders and click Design View
- Click Jobs Performed
- Click the JobPerformed1 text box
- In the Property Sheet, click the Event tab
- Click On Lost
Focus and type
=IIf([JobPerformed1] Is Null, MsgBox("Specify
at least one of the jobs that were performed on the car"),"")
- Save the form
Value Required for a Field
If you think that there must be an entry for a particular field for each record, you can
require it from the user. When performing data entry, after creating a record,
the user cannot move to another record if a value for that field has not been
provided. You can specify that the value of a field is required when creating a
table, whether you are working in the Datasheet View or the Design View of the
table:
- In the Datasheet View, to
specify that the values of a field are required, click any cell of the
column. On the Ribbon, click Fields. In the Field Validation section, click the
Required check box. By default, the Required check box is not checked
- In the Design View, in the top
section, click the field. In the bottom section, click the arrow of the Required
field and set it to Yes. Its default value is No
Practical Learning: Specifying Required Fields
-
On the Ribbon, click File and click New
-
Click Blank Desktop Database and set the file name to Chemistr2
-
Click Create
- On the Ribbon, click File and click Options
- On the left side, click Current Database and, on the right side, under Document Window Options, click the Overlapping Windows radio button
- Click OK
- Read the message box and click OK
- Close the default table without saving it
- On the Ribbon, click Create and click Table Design
- Type AtomicNumber and press Tab
- Right-click AtomicNumber and click Primary Key
- Set its data type as Number and its caption as Atomic #
- In the top part, click the cell below AtomicNumber, type Symbol and press F6
- In the bottom part of the window, click Required, then click the arrow of the combo
box and select Yes
- Set the Field Size to 5
- In the top part, click the cell below Symbol, type AtomicWeight, and press Tab
- In the bottom part of the window, double-click Required to sets its value
to Yes
- Set the other properties as follows:
Data Type: Number
Field Size: Single
Caption: Atomic Weight
- Right-click the tab of the window and click Datasheet View
- When asked whether you want to save, click Yes
- Set the name name to Elements and click OK
- On the Ribbon, click Fields
- On the table, click a cell below Symbol
- In the Add & Delete section of the Ribbon, click Short Text
- Type ElementName and press Enter
- Click a cell below ElementName
- In the Field Validation section of the Ribbon, click the Required check box
- In the Properties section of the Ribbon, click
the Field Size text box and type 40
- Click Name &
Caption
- Click Caption, type Element Name and click OK
- Right-click the tab of the window and click Deesign View
- Add the following fields to the table:
| Field Name |
Field Size |
| Color |
40 |
| Phase |
32 |
-
To save the table, press Ctrl + S
The Nullity of a Field
When creating a table in SQL, to indicate that each record of a field must be specified, after the data type of a field, type
NOT NULL. Here is an example:
CREATE TABLE Departments
(
    DepartmentCode char(5) NOT NULL,
    DepartmentName char(50)
);Field
To indicate that a field can be left empty, either don't specify its nullity or set its option as NULL.
The Uniqueness of a Record
When data is entered in fields, it is possible to have the same value for a field in different records, such as two people who live
in the same state. This is considered as a duplicate value. In some other cases, this may not be acceptable. For example, you may not want two employees
to have the same employee number. In this case, you must make sure the records are unique.
If a table is displaying in the Datasheet View, to indicate that each record of a field must be unique, click any cell of that
column. Then, on the Ribbon, click Fields. In the Field Validation section, click the check box of the Unique option.
When creating a table in SQL, to indicate that each record of a field must be unique, after the data type of a field, type
UNIQUE. Here is an example:
CREATE TABLE Departments
(
    DepartmentCode char(5) unique,
    DepartmentName char(50)
);
Indexed Fields
Indexation is the ability to keep track of the records of a field such as checking when they are unique or duplicate. This characteristic
can be set when creating or configuring a table in either the Datasheet View or the Design View. In the Datasheet View, to specify the indexation of a field,
click any cell of the column. Then, on the Ribbon, click Fields. In the Field Validation section, click the check box of the Unique option.
In the Design View, in the top section,
click the field. In the bottom section, click the arrow of the Indexed property.
This characteristic can be set using one of 3 values:
- If set to No (its default), no duplicate value checking will be done
- If you want the database engine to check for duplicate but not necessary take any action, set this property to
Yes (Duplicates OK)
- If you don't want a duplicate value of the same field in different records, set the field's Indexed property to
Yes (No Duplicates)
Practical Learning: Controlling Indexed Fields
- In the upper section, click Symbol
- In the lower section, click Indexed to display its combo box. Click the arrow of the Indexed combo box and select
Yes (No Duplicates)
- In the upper section, click ElementName
- In the lower section, double-click Indexed then double-click it
again to set its value to Yes (No Duplicates)
- Close the table
- When asked whether you want to save the table, click Yes
Selecting, Copying and Pasting Records
Introduction
|
Record maintenance consists of selecting, copying,
pasting, updating, and/or deleting records, etc. To assist you with some
of these operations on a table or a form, the
Home tab of the Ribbon is equipped with a section named Find:
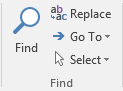
|
 |
Field Selection
You can select all of the values of one or a group of
columns, To select all values of a column, click the column header. To select
columns in a range, use the Shift key while selecting the columns on each range.
Some of the operations you will perform on one or
more records on a table require that the record(s) be selected first:
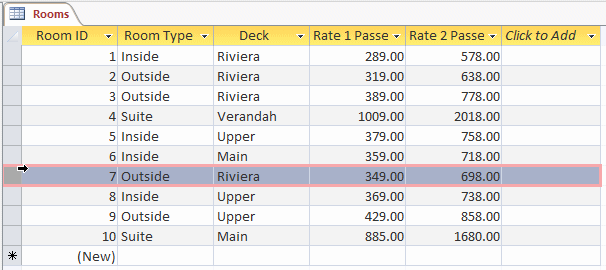
- To select a row or record in Datasheet View, position the mouse on the
desired row header:
Then click
- To select a record, click any cell on its row. On the Ribbon,
click Home. In the Find
section, click the Select button and click Select
- To select more than one record, click and hold your mouse
on one of their headers
Then drag to cover the other desired row or rows's
headers:
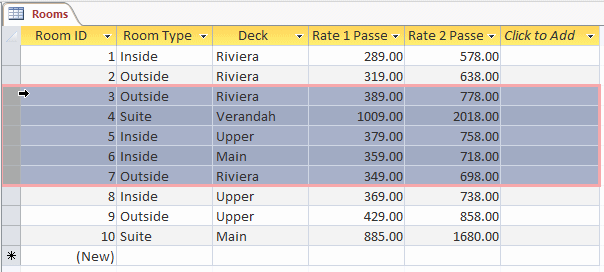
When all desired rows
are highlighted, release the mouse. Another technique used to select more than one row
consists of clicking one row that will be at one end, pressing and holding Shift, and then
clicking the row that will be at the other end.
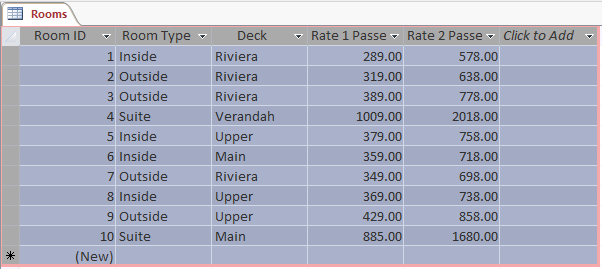
To select all records of a table:
- Press Ctrl +
A
- Click the button at the intersection of the column headers and the row
headers
This would produce:
Copying and Pasting Records
To copy the values of a column, position the mouse on the
column header, right-click, and click Copy:
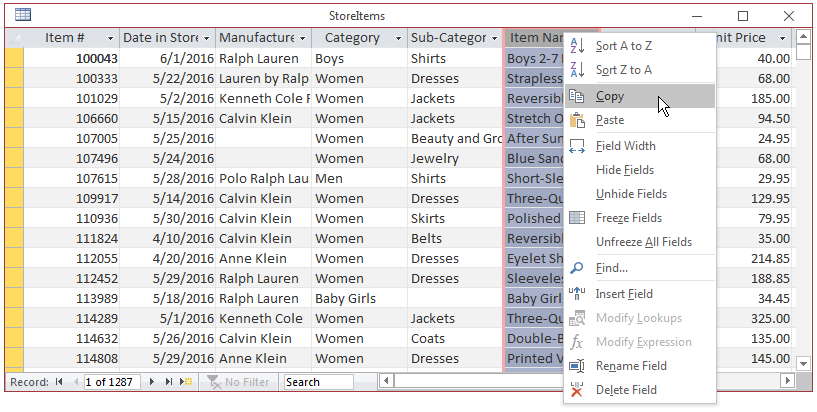
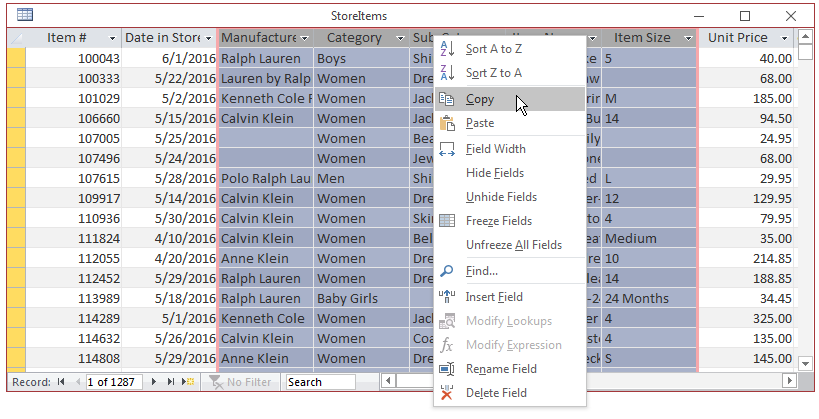
To copy records from many columns, first select the
columns. Then right-click one of the selected column headers and click Copy
After selecting (a) records, you can copy it/them and paste
them somewhere. For example, you can paste the records in any application that
accepts text.
Practical
Learning: Copying and Pasting Records
- Open the FunDS2 database
- In the Navigation Pane, double-click the StoreItems table
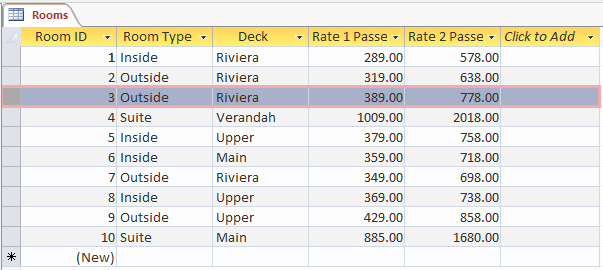
- Position the mouse cursor on the box left to 112055 and right-click:
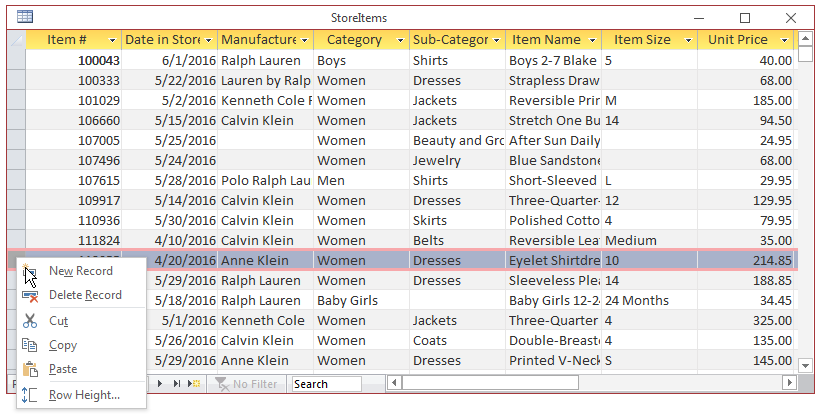
- In the menu that appears, click Copy
- Start Notepad
- Click Inside Notepad and click Paste
- Right-click the button at the intersection of the column headers and row
headers and click Copy

- Start Microsoft Excel
- In Sheet1, right-click Cell B4 and click Paste
- Close Microsoft Excel
- When asked whether you want to save, click No
Record Selection on a Form
Record selection on a form depends on the type of form.
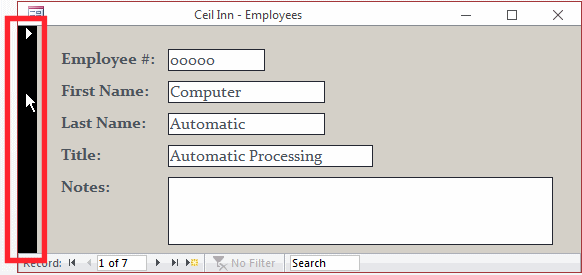
To select a record in a Form View, click the bar on the left side,
which is called the record selector:
To select a record in a tabular form, click its row header.
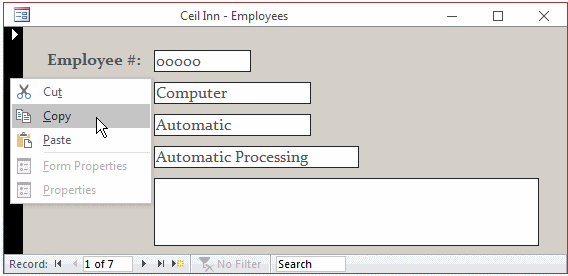
To copy a record,
right-click the record selector and click Copy:
Finding and Replacing Data
Editing Data
To edit a record, first locate the intended records, then
locate the field that contains the value. Use your knowledge of text processing
to edit the value.
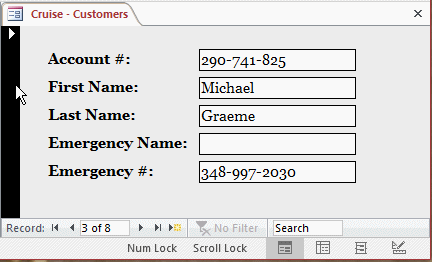
Practical Learning: Editing Data
- On the Ribbon, click File and click Open
- In the list of files, click Cruise1 (or open it from the files that
accompany these lessons)
- In the Navigation Pane, double-click the Customers table
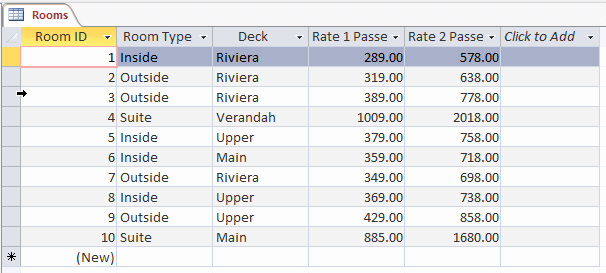
- Click the empty box under Last Name for Account # 415-939-497
- Type Harrison and press Enter
- Close the table
- In the Navigation Pane, double-click the Customers form
- Click the First Name text box
- Type Kelly
- Click the Next Record button
 to get to the next record
- Keep pressing Tab until you reach the empty Emergency Name text box
- Type Mariella Shuster
- Close the form
Finding the Data
To start looking for a value, click the Find button
 or press Ctrl + F. This would open the Find and Replace dialog box with
the Find tab selected:
or press Ctrl + F. This would open the Find and Replace dialog box with
the Find tab selected:

The Find and Replace dialog box is modeless, meaning you can
access the table or form in the background while the dialog box is present.
Practical Learning: Editing Data
- The Cruise1 database should still be opened.
In the Navigation Pane, double-click
the Customers table
- In the Find section of the Ribbon, click the Find button
- In the Find What combo box, type gra
- In the Look In combo box, select Current Document
- In the Match combo box, select Any Part of Field

- Click Find Next.
Notice that a second result is found
- Click Find Next again and notice the name Gradner
- Click Next again to see another result
- When the message box displays, read it and click OK
- Close the Find and Replace dialog box
- Close the Customers table
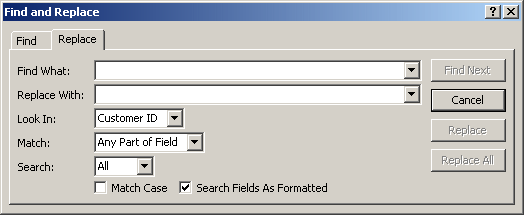
Replacing Data
To assist you in replacing data, the Find and Replace dialog
box has a Replace section. To get it, in the Find section of the
Ribbon, click the Replace button  or press Ctrl + H. This would open the Find and Replace dialog box with
the Replace tab selected:
or press Ctrl + H. This would open the Find and Replace dialog box with
the Replace tab selected:
Practical Learning: Editing Data
- The Cruise1 database should still be opened.
In the Navigation Pane, double-click
the Customers
form
- Press Ctrl + H (or, in the Find section of the Ribbon, click the Replace button )
- In the Find What combo box, type gradner
- In the Replace With combo box, type Gardner
- In the Look In combo box, select Current Document
- In the Match combo box, select Any Part of Field

- Click Find Next
- Once the value is found, click Replace
- Close the Find and Replace dialog box
- Close the form
- On the Ribbon, click File and click Openn
- In the list of files, click FunDS2
Updating and Deleting Records
Introduction
If you had not formally established a relattionship between
two tables but had indicated that the records from one table are fed to another
table, if you change the value of the (primary or foreign) key in one of the tables, the
other table may not receive the update. This is why a formal and well-managed
relationship is important.
When a record is changed in the primary key of a parent
table, it is a good idea for any record of the foreign
key, in the child table, to receive the same update. When a record of the
primary key is deleted, the child table should be notified. These are referred
to as enforcing referential integrity.
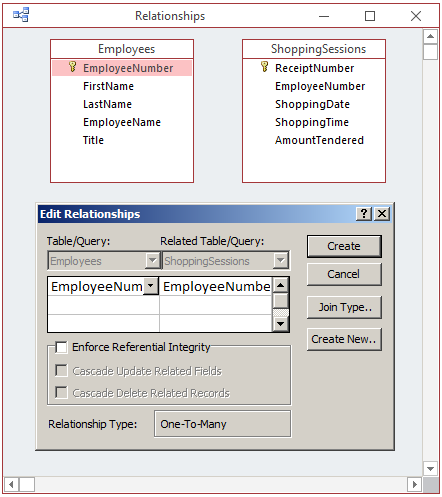
To enforce integrity when creating a relationship in the
Edit Relationship dialog box, click the the Enforce Referential Integrity check
box.
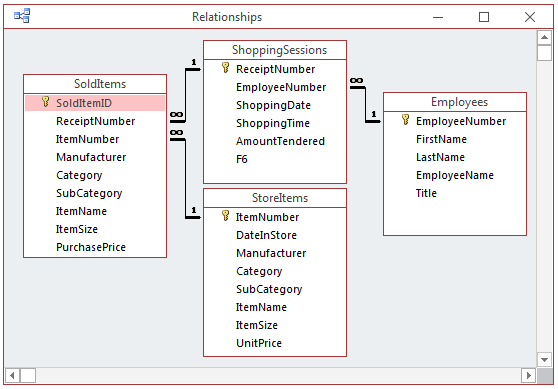
Practical Learning: Introducing Relationship Updates
- In the Navigation Pane, double-click the ShoppingSessions table
- Notice that the Employee # of the second record is 275594
- Close the ShoppingSessions table
- In the Navigation Pane, double-click the Employees table
- Change the 275594 Employee # to 200000
- Close the Employees table
- In the Navigation Pane, double-click the ShoppingSessions table
- Notice that the Employee # of the second record is still 275594
- Close the ShoppingSessions table
- In the Navigation Pane, double-click the Employees table
- Change the 20000 Employee # back to 275594
- Close the Employees table
- On the Ribbon, click Database Tools
- In the Relationships section, click the Relationships button

- In the Show Table dialog box, double-click Employees
- Double-click ShoppingSessions
- Click Close
- Drag EmployeeNumber from Employees and drop it on EmployeeNumber in
ShoppingSessions
Enforcing Record Updates on a Child Table
To make sure that a record in a foreign keyis is updated
when the same value in the primary key of a parent
table is changed, in the Edit Relationships dialog box, click the Cascade Update Related Fields.
Practical
Learning: Enforcing Record Updates on a Child Table
- In the Edit Relationships dialog box, click the Cascade Update Related
Fields check box
Enforcing Record Deletion on a Child Table
When a record is deleted in the parent table, you should
make sure the records from the child table are notified. To make this possible,
in the Edit Relationships table, click the Cascade Delete Related Records.
Practical
Learning: Enforcing Record Updates on a Child Table
- In the Edit Relationships dialog box, click the Cascade Delete Related
Records check box

- Click Create

- In the Relationships section of the Ribbon, click the Show Table button

- Double-click SoldItems and StoreItems
- Click Close
- Create the relationships based on primary keys and foreign keys
- Close the Relationships window
- When asked whether you want to save, click Yes
- In the Navigation Pane, double-click the ShoppingSessions table
- Notice that the Employee # of the second record is 275594
- Close the ShoppingSessions table
- In the Navigation Pane, double-click the Employees table
- Change the 275594 Employee # to 200000
- Close the Employees table
- In the Navigation Pane, double-click the ShoppingSessions table
- Notice that all the Employee #s that were 275594 have been changed to
20000
- Close the ShoppingSessions table
- In the Navigation Pane, double-click the Employees table
- Change the 20000 Employee # back to 275594
- Close the Employees table
Introduction to Record Printing
Table Printing
You can print data of a table, whether the table is opened or not. To print a closed table,
click it in the Navigation
Pane. Then click File. Click Print and click one of the three options:

In the same way, if
the table is opened in Datasheet View, click its tab to give it focus,
then click File -> Print and select to print or to
preview.
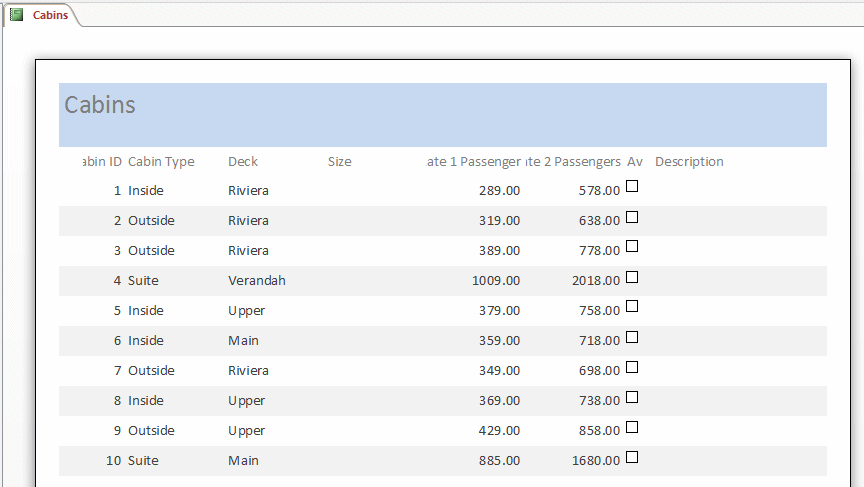
Practical Learning: Printing Tables
- In the Navigation Pane, click Customers: Table to select the table
- To print data from the table, click File, click Print
- Click Quick Print
- From the Navigation Pane, double-click the Cabins: Table to open
it
- Click File
- Click Print
- Click Print
- On the Print dialog box, click OK
- Close the table
Form Printing
You can print a form without opening it. Locate its name in the Navigation Pane and use the
same steps reviewed for a table.
When a form is opened, you have the option of printing all of its
records or the selected one. In the Form View, to print just one record, navigate to the record you would like to print, click
the Form Selection bar to select the record and proceed to print.
Practical Learning: Printing Forms
- From the Navigation Pane, double-click the Customers form to open it
- To navigate to the 3rd customer, click the Next Record button
twice
- Click File
- Click Print
- Click Print
- On the Print dialog box, click the Selected Record(s) radio button
- Click OK
- Verify that only the displaying customer's record was printed
- We will print records from 3 to 7.
Click the Next Record button
twice navigate to record number 3
- Click the Record Selector bar
- Press and hold Shift. Click the Next Record button
four times to display the seventh record (even though the record # still displays 3)
- Release Shift
- On the Ribbon, click File
- Click Print
- Click Print
- On the Print dialog box, click the Selected Record(s) radio button and click OK
- Verify that records from 3 to 7 have been printed
- Close the Cabins form
Reports Fundamentals
The Report Wizard
A report provides an object used to print
the records of a database. Microsoft Access provides wizards to quickly create reports.
Microsoft Access can help you quickly create a report using one of the pre-designed layouts. This is done using the Report Wizard. The Report Wizard is available from the Reports
section of the Create category of the Ribbon.
Practical Learning: Using the Report Wizard
- On the Ribbon, click Create
- In the Reports section, click Report Wizard
- On the first page of the wizard, click the arrow of the Tables/Queries combo box and select Table:
Cabins
- Click the Select All Fields button

- Click Next
- Accept the suggested Title of the report as Cabins and press Enter
Report Printing
The report is the favorite object used to print
data. As done with the other objects, you can print a report whether it is opened or not.
If you want to print a report
without opening it, in the Navigation Pane, locate the desired report and
click it to select it. Then, proceed from the File tab on the Ribbon as we reviewed
for the tables and the forms. In the same way, you can first open the report
from the Navigation Pane and use the Print menu from the Office Button the
same way we described for the other objects.
Practical Learning: Printing a Report
- The Cabins report should still be opened.
click File
- Click Print
- Click Print
Preview
- To start the printing process, in the Print section of the Print
Preview, click Print
- On the Print dialog box, select the printer and make sure the All
radio button is selected
- Click Properties, click the Portrait radio button (in the
Orientation section) and click OK
- To send the print job to the printer, on the Print dialog box, click
OK
- Close the Cabins report
- Close Microsoft Access
Record Management in a Table
Enforcing Record Updates on a Child Table
In the table that has a primary key, which is the parent
table, when a record is changed, it is a good idea for any record of the foreign
key, in the child table, to receive the same update. To make this happen, in the
Edit Relationships table, click the Cascade Update Related Fields.
Enforcing Record Deletion on a Child Table
When a record is deleted in the parent table, you should
make sure the records from the child table are notified. To make this possible,
in the Edit Relationships table, click the Cascade Delete Related Records.
Record Management on a Form
Record Selection
To select a record, click the bar on the left side,
which is called the record selector:
Copying/Pasting Records
To copy a record,
right-click the record selector and click Copy:
Right-click the record selector of an empty record and click Paste.
Finding and Replacing Data
Editing Data
To edit a record, first locate the value in the field.
Practical Learning: Editing Data
- Click File and click Open
- In the list of recent files, click Cruise2
- In the Navigation Pane, double-click Customers: Table to open it
- In record number 2, click the empty box under Last Name
- Type Harrison and press Enter
- Close the table
- In the Navigation Pane, double-click Customers : Form to
open the form
- Click the First Name text box
- Type Kelly
- Click the Next Record button
to get to the next record
- Keep pressing Tab until you reach the empty Emergency Name text box
- Type Mariella Shuster
- Close the form
Finding Data
|
To assist you with finding a value in a table or a form, the
Home tab of the Ribbon is equipped with a section named Find:
|
|
To start looking for a value, you can click the Find button
or you can press Ctrl + F. This would open the Find and Replace dialog box with
the Find tab selected:
The Find and Replace dialog box is modeless, meaning you can
access the table or form in the background while the dialog box is present.
Practical Learning: Editing Data
- The Cruise2 database should still be opened.
In the Navigation Pane, double-click Customers: Table to open it
- In the Find section of the Ribbon, click the Find button
- In the Find What combo box, type gra
- In the Look In combo box, select Current Document
- In the Match combo box, select Any Part of Field
- Click Find Next.
Notice that a second result is found
- Click Find Next again and notice the name Gradner
- Click Next again to see another result
- When the message box displays, read it and click OK
- Close the Find and Replace dialog box
- Close the Customers table
Replacing Data
To assist you in replacing data, the Find and Replace dialog
box has a Replace section. To get it, in the Find section of the
Ribbon, click the Replace button
or press Ctrl + H. This would open the Find and Replace dialog box with
the Replace tab selected:
Practical Learning: Editing Data
- The Cruise2 database should still be opened.
In the Navigation Pane, double-click Customers:
form to open it
- Press Ctrl + H (or, in the Find section of the Ribbon, click the Replace button )
- In the Find What combo box, type gradner
- In the Replace With combo box, type Gardner
- In the Look In combo box, select Current Document
- In the Match combo box, select Any Part of Field
- Click Find Next
- Once the value is found, click Replace
- Close the Find and Replace dialog box
- Close Microsoft Access
