|
If you don't have access to Microsoft SQL Server or cannot
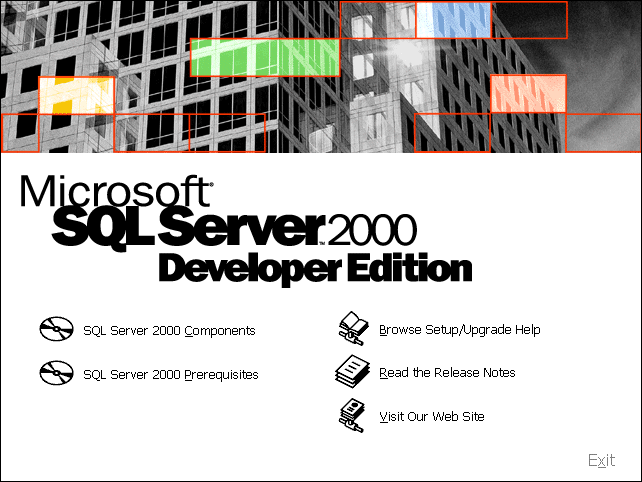
have it, you can use the second alternative: Microsoft SQL Server 2000 Desktop
Engine (MSDE). This is free software available from Microsoft. It obviously has
limitations with regards to SQL Server but it can be used for all the exercises
in our lessons.
To get MSDE, you can connect to the Microsoft
web site, do a search on MSDE and follow the links to download it.
|
 Practical
Learning: Installing MSDE Practical
Learning: Installing MSDE
|
|
- First download the MSDE from the Microsoft web site. To get it, go to http://www.microsoft.com
and do a search on MSDE. A link will let you know how to download it

- After downloading MSDE, click Open

- Read the license agreement. If you don't agree with it, click Cancel. If
you agree with it, click I Agree and continue with the wizard

- Accept the suggested Installation Folder and Finish
- Click Yes to create the MSDERelA new folder

- When the files have been installed in the folder, click OK
- Open the Command Prompt and switch to the folder where the MSDE files were
installed. By default, this would be C:\MSDERelA
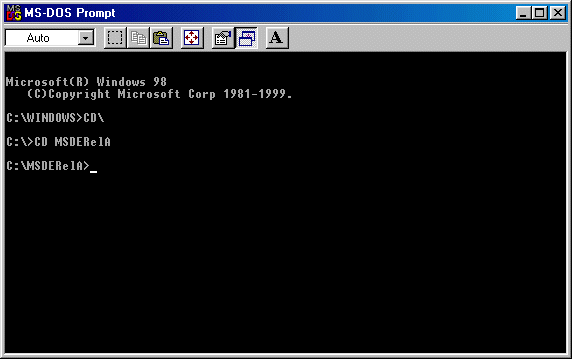
- To install Microsoft SQL Server 2000 Desktop Engine, type setup SAPWD="DesiredPassword"
where DesiredPassword will be the password of the Administrator
account . Here is an example:
setup SAPWD="FOotbAlli$tic"
- Press Enter and the installation will start
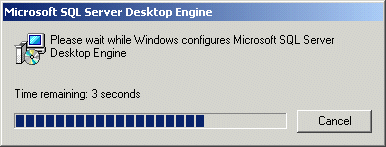
When the installation is over, you may be asked to restart the computer

- If so, click Yes
|
To use SQL Server or MSDE, it must start as a service. You
have two options. You can start it every time you want to use. You can
also make it start whenever the computer comes up from booting.
|
|
Practical
Learning: Starting and Stopping SQL Server
|
|
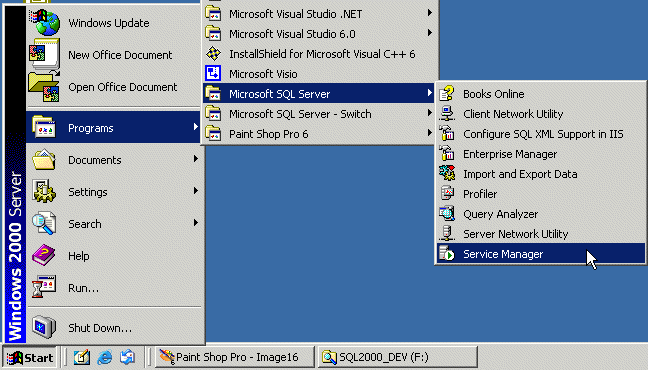
- To start SQL Server, on the Taskbar, click Start -> Programs
-> Microsoft SQL Server -> Service Manager
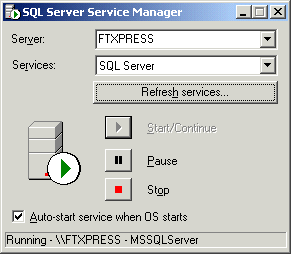
- On the SQL Server Service Manager dialog box, click the
Start/Continue button if necessary

- On the lower-right corner of the desktop, on the clock section of
the Taskbar, the button of SQL Server appears with a green play button

- Close the dialog box
- To stop the SQL Server service, double-click the SQL Server icon
on the Taskbar system tray
- On the SQL Server Service Manager dialog box, click the Stop button
- You will receive a confirmation message box. Click Yes.
|
|
Practical
Learning: Starting the SQL Server Service Automatically
|
|
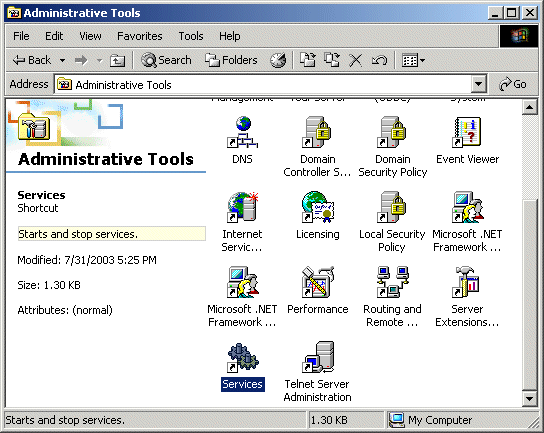
- Display the Control Panel window and double-click Administrative
Tools
- In the Administrative Tools window, double-click Services
- In the Services window, scroll to the middle of the right frame and
click MSSQLSERVER
- On the toolbar, click the Start Service button
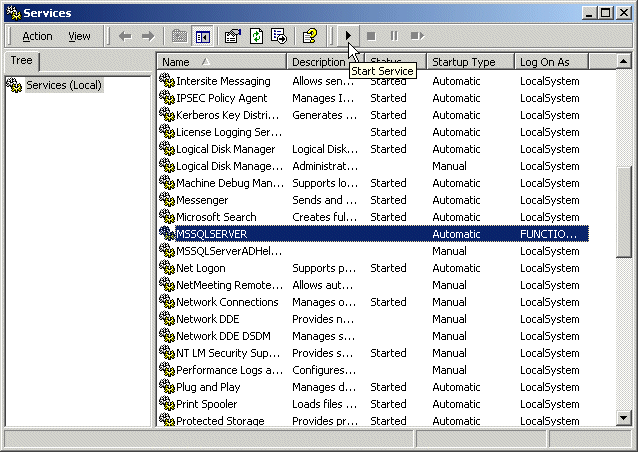
- Close the Services window
|
ADO.NET is a group of libraries used to create powerful
databases using various sources that include Microsoft SQL Server, Microsoft
Access, Oracle, XML, etc. ADO.NET relies on the .NET Framework's various classes
to process requests and perform the transition between a database system and the
user. The operations are typically handled through the DataSet class. While
ADO.NET is the concept of creating and managing database systems, the DataSet
class,
as we have introduced it so far, serves as an intermediary between the database
engine and the user interface, namely the Windows controls that the user uses to
interact with the computer. Still, remember that a DataSet object is used to manage
lists, any lists, not just those created using database environments such as
Microsoft SQL Server or Microsoft Access.
Besides using features of a database in an ADO.NET
application, you can also fully take advantage of XML as it is completely and
inherently supported by the DataSet class. To fully support XML in your
application, the .NET Framework is equipped with
the System.Xml.dll library. You may have noticed that, in previously
lessons, to use XML, we never had to import any library. This was possible
because, if you create a Windows Forms Application using the New Project dialog
box, the System.Xml.dll namespace is directly included in your
application. The classes that implement XML in the .NET Framework are defined in
the System::Xml namespace.
|
Getting Access to ADO.NET Libraries |
|
The classes used to create ADO.NET databases are defined in
the System::Data namespace and are stored in the System.Data.dll
library. If you create a Windows Forms Application from the New Project dialog
box, Visual Studio .NET would automatically include the System.Data.dll
library and add the System::Data namespace to your project, even if you
are not creating a database application. This makes it convenient. If you are
creating the application from scratch, in order to use ADO.NET, you must
remember to reference the System.Data.dll library and include the System::Data
namespace in your file(s).
|