Home

Windows Controls: The Save As Dialog Box


Introduction to the Save As Dialog Box


Overview of the Save As Dialog Box

Most of the applications allow a user to display an empty document. In other words, users are supposed to create files. Once a file has been created, a user would usually want to store the contents of that file on a media (hard drive, floppy disk, etc). Microsoft Windows provides a common dialog box for this purpose: The Save As dialog box:

Save As

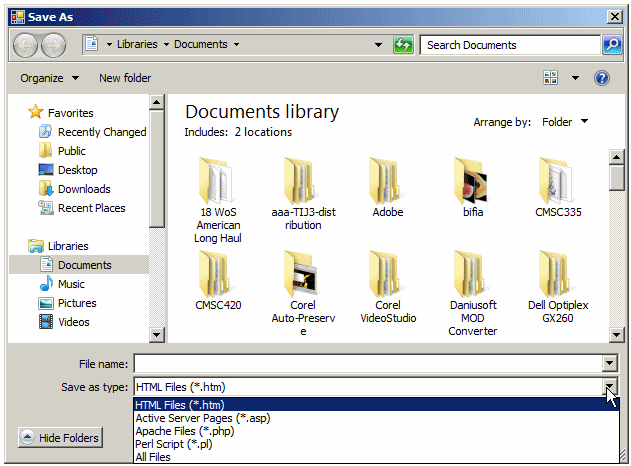
The primary role of the Save As dialog box is to allow users to store a file on the hard drive of the computer, on a portable media such as a floppy disk, or on a network drive. To make this efficient and complete, the user must supply two valuable pieces of information: the location and the name of the file. The location of a file is also known as its path.

The name of a file follows the directives of the operating system. On MS DOS and Windows 3.X, it had to be in an 8.3 format. The actual name had to have a maximum of 8 characters with restrictions on the characters that could be used. The user also had to specify three characters after a period. The three characters, known as the file extension, were used by the operating system to classify the file. That was all necessary for those 8-bit and 16-bit operating systems.

Various rules have changed. For example, the names of folders and files on Microsoft Windows >= 95 can have up to 255 characters. The extension of the file is mostly left to the judgment of the programmer but the files are still using extensions. Applications can also be configured to save different types of files; that is, files with different extensions.

To use the Save As dialog box, users usually click an item under the File menu. Here is how it works for most regular applications. The user creates a new file. If the user wants to save the file, she can click File -> Save. If the file was not previously saved, the application would call the Save As dialog box. If a file is displaying, whether it was saved previously or not, the user can also click File -> Save As... which also would call the Save As dialog box.

Two objects are particularly important on the Save As dialog box: The Save In combo box and the File Name edit box or combo box (the File Name box is made of a combo box to make it user-friendly but over all, users hardly use the list side of this combo box). Since Windows 95, the user does not have to specify an extension if the programmer makes it easy. To help with this, the Save As dialog box is equipped with a Save As Type combo box. This combo box allows the user to select one of the extensions. The available extensions have to be created by the programmer so the user can select from this preset list. If the programmer neglects this, the user would have no extension to select from. Although the file can still be saved, the operating system would not associate it with a known type of file. Therefore, if you specify a series of extensions, the user can select one of these and, in the File Name box, she can simply type a name for the file. If the user does not specify an extension, the operating system would allocate the extension of the Save As Type combo box. Users of regular commercial applications, such as word processors, spreadsheet programs, or databases, etc, are usually trained not to care about the extensions and let the application deal with that detail. In some other circumstances, the users must pay close attention to the extension they give a file (this is common on web development or graphics design).

After working on a Save As dialog box, the user can click Save or press Enter, which would validate her entries. To change her mind, regardless of what she did on the Save As dialog box, she can click Cancel or press Esc, which would dismiss the dialog box and ignore what she did (in reality, some actions cannot be ignored, such as creating a new file or folder inside of the Save As dialog box, deleting, cutting, or pasting files, etc; but if the user clicked Cancel or pressed Esc, the new file would not be saved).

Practical LearningPractical Learning: Introducing Common Dialogs

  1. Start Embarcadero RAD Studio
  2. To create a new project, on the main menu, click File -> New -> VCL Forms Application - C++Builder
  3. Change the Caption of the form to File Processing

Save As Dialog Box Creation

In the VCL, the Save As dialog box is performed using the TSaveDialog class. To visually add a file saving capability to your application, on the Dialogs property page of the Tool Palette, you can click the TSaveDialog button SaveDialog and click on a form.

Alternatively, if you cannot add a TSaveDialog control at design time, you can create one at run time when you need it in an event or a function. If you want the dialog box to be accessible to more than one event or function, you can declare a pointer to a TSaveDialog class. Here is an example:

private:
	AnsiString CurrentFile;
	TSaveDialog * dlgSave; // User declarations
public: // User declarations
	__fastcall TForm1(TComponent* Owner);
};

To make the control available to the form, you can initialize it in the constructor of the form as follows:

//---------------------------------------------------------------------------
__fastcall TForm1::TForm1(TComponent* Owner)
: TForm(Owner)
{
	dlgSave = new TSaveDialog(Form1);
}
//---------------------------------------------------------------------------

Eventually, when the form closes, you can make sure the memory occupied by the control is freed by deleting the dynamic control. This can be done in the OnDestroy event of the form:

//---------------------------------------------------------------------------
void __fastcall TForm1::FormDestroy(TObject *Sender)
{
	delete dlgSave;
	dlgSave = NULL;
}
//---------------------------------------------------------------------------


Characteristics of the Save As Dialog Box

To make sure that your application can open the allowed types of files for your application, depending on your goals, you should create a list of extensions that you want the users to be able to open. The allowed extensions form a group called a filter. The filter is like a funnel that selects the good items. For a text-based application, you may allow only text files, that is, files with a txt extension. For a rich text-based application, you may allow only Rich Text Format files, which are files with rtf extension. On the other hand, if you are creating an application for web files, you can allow as many file extensions as necessary, such as htm, html, php, asp, etc. As you may realize, text files or web files are all text-based files. This means that if you create a text-based or rich-text based application, you should allow the users to decide whether the file they are trying to open can be "read" by a text-based control. To provide this ability, you can specify an unknown extension specified as All Files.

To create a list of allowable extensions for your SaveDialog object, use the Filter property from the Object Inspector. At run time, you can create a list of file extensions as a string. If the Save dialog box will need only one extension, you can create the string using the following syntax:

Prompt|Extension

The Prompt is a section that defines what the user would see in the Save As Type combo box. An example would be 24-bit Bitmap. Such a string does not let the user know what actual extension the file would use. Therefore, as a courtesy, you can specify, between parentheses, the extension that would be applied if this extension is used. Therefore, the Prompt can be 24-bit Bitmap (*.bmp). In this case, the extension used would be bmp. The asterisk * lets the user know that whatever is provided as the file name would be used in place of the asterisk. The period indicates the separation from the file to its extension. This means that the characters on the left of the period would be the file name, the characters on the right side of the period would be used as the actual file extension.

To specify the extension that the operating system would use to associate to the file, you provide a second part of the string as Extension. In Microsoft Windows, most extensions are made of three characters. Some applications use a 2-letter extensions (for example Perl files have a pl extension) and some others use 4 letters (such as html for some HTML files). This depends on the programmer (or the company that is publishing the application). An example of a string the species an extension is:

24-bit Bitmap (*.bmp)|*.bmp

If you want to provide various extensions to your Save dialog box, you can separate them with a | symbol. An example would be:

HTML Files (*.htm)|*.htm|Active Server Pages (*.asp)|*.asp|Perl Script (*.pl)|*.pl

To make the extensions available to the SaveDialog control, you can assign the string to the Filter property. Here is an example:

//---------------------------------------------------------------------------
__fastcall TForm1::TForm1(TComponent* Owner)
: TForm(Owner)
{
	dlgSave = new TSaveDialog(Form1);
	dlgSave->Filter = L"HTML Files (*.htm)|*.htm|"
			  "Active Server Pages (*.asp)|*.asp|"
			  "Apache Files (*.php)|*.php|"
			  "Perl Script (*.pl)|*.pl|"
			  "All Files";
}
//---------------------------------------------------------------------------

This would produce:

Save As

Once you know the types of files that your application will be dealing with, you can make your dialog box friendly by displaying the most likely extension for a document created using your application. For example, if you create a Memo-based application, users are more likely to create a text file with it. If you create a RichEdit-based application, users are more likely to create a Rich Text Format file with it. This most likely extension is known as the default extension, it allows the user not to specify an extension. By simply providing a file name and clicking Save, the operating system would associate the file with the default extension. Of course, if you create a filter, the user can specify a desired allowed extension.

To specify the default extension for your SaveDialog object, type the desired extension in the DefaultExt field of the Object Inspector.

If you had created a Filter and if you provide a default extension for a SaveDialog object, make sure it is one of the file extensions specified in the Filter list.
 

Practical LearningPractical Learning:Using the Save As Dialog Box

  1. In the Tool Palette, click Dialogs
  2. In the Dialogs section, click the TSaveDialog button TSaveDialog and click the form
  3. While the SaveDialog1 button is still selected on the form, in the Object Inspector, click the DefaultExt field and type rtf
  4. Click Filter and click its ellipsis button
  5. Under File Name, type Rich Text Format (*.rtf) and press Tab
  6.  Under Filter, type *.rtf and press Tab
  7. In the section row, type Text Document (*.txt) and press Tab
  8. Type *.txt and press Tab
  9. In the third row, type All Files (*.*) and press Tab:
     
    Filter
  10. Click OK
  11. Click Title, type Save File As and press Enter
  12. Click an empty area on the form to select it
  13. In the Object Inspector, click the Events tab and double-click OnDblClick
  14. Implement the event as follows:
    //---------------------------------------------------------------------------
    void __fastcall TForm1::FormDblClick(TObject *Sender)
    {
        if( SaveDialog1->Execute() == True )
        {
    	ShowMessage(L"The Save button was clicked or Enter key was pressed"
    		    L"\nThe file would have been saved as " +
    		    SaveDialog1->FileName);
        }
        else
    	ShowMessage(L"The Cancel button was clicked or Esc was pressed");
    }
    //---------------------------------------------------------------------------
  15. Execute the application. To test the Save As dialog box, double-click anywhere on the form
     
  16. Close the application and return to your programming environment


Home Copyright © 2010-2016, FunctionX