Introduction to Classes

Introduction to Classes
Fundamentals of Classes
Introduction
Imagine you want to describe an object, such as a house. You can declare various variables that each holds one particular value such as the number of bedrooms, the number of doors, the market value of the house, etc. Here is an example:
string typeOfHouse;
int yearBuilt;
int numberOfBedrooms;
double price; |
 |
When/if you want to describe such a house, you would have to access each variable, one at a time. As opposed to a simple variable, you can use one or more variables to create one object that includes all the characteristics you want.
A class is a technique of using one or a group of characteristics to describe an object.
![]() Practical Learning: Introducing Classes
Practical Learning: Introducing Classes
Introduction to Creating a Class
There are various ways you can create a class. We will see different techniques in future lessons. For now, the basic way to start a class is from simple text where you would start with a keyword named class.
The Name of a Class
The class keyword is followed by a name. The name of a class primarily follows the rules of names of varibles:
The Body of a Class
To present its description, a class has members. The list of the members of a class is specified after the name of the class. The members are included between an opening curly bracket { and a closing curly bracket }. The section between the curly brackets is referred to as the body of the class. It would appear as follows:
class House { /* . . . */ }
In the same way, you can create as many classes as you want in your project. You can create many classes in the same document. Here is an example:
class House {}

class Person {}

class MortgageInformation {}
For your project, you can create each class in its own file or you can create various classes in different files.
Classes and Files
A class is created in a file. If you create a Console Application in Microsoft Visual Stuio, the studio automatically creates a C# file and creates a class in it. On the other hand, you can create a C# file and create a class in it.
A file can contain as many classes as necessary. One way you can organize the classes of your application is to put them in different files. A file can contain one or more classes. A file that contains (a) class(es) is a regular text-based file that has the extension .cs. To create a file for (a) class(es), start a text-based document, type your code, and save the file in the desired location. Normally, all files that belong the same application should be positioned in folders and sub-folders of the project. When saving the file, give it the extension .cs. If you are using Microsoft Visual Studio, there are various ways you can create a class and each would result in a new file for the class.
In the class, you can add the desired members such as regular variables. Here is an example:
class Number
{
}
![]() Practical Learning: Creating a Class
Practical Learning: Creating a Class
class Driver
{
}/* Piecework is the type of work that is paid on the number
* of items produced, the distance driven, etc.
* In this exercise, a business uses trucks driven by some
* employees or contractors to deliver some products.
* The drivers are paid based on the distance they travel to
* deliver one or many products. */
class Truck
{
}Introduction to the Class View
Microsoft Visual Studio provides many tools to help you create and manage the classes of your project. One of those tools is named the Class View. The Class View is not automatically available when you start a project. To display the Class View:
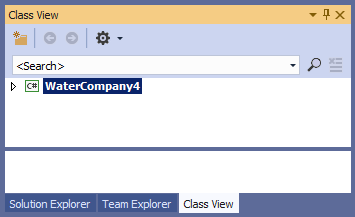
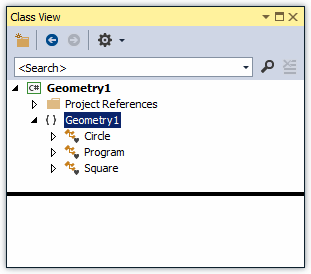
By default, the Class View displays in the same area as the Solution Explorer. The Class View displays the name of the current project:
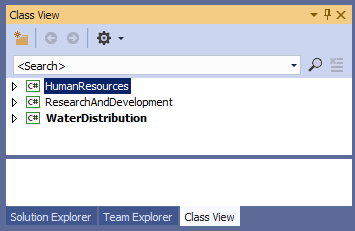
If you are working on a solution that involves many projects, the Class View would display each project on its node:
To view the members of a class, expand the node of a project and click the name of the class.
Managing Classes
Introduction
Microsoft Visual Studio provides many tools and visual objects used to manage classes of an application. The studio makes it possible to conveniently locate, edit, or rename a class (or one of its members).
The Types Combo Box
The middle-top section of the Code Editor is the Types combo box. It holds a list of the classes in the file that is currently displaying. You can display the list if you click the arrow of the combo box:
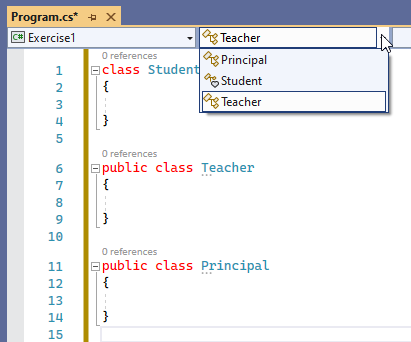
The top-right section of the Code Editor displays a combo box named Members. The Members combo box holds a list of the members of the class selected in the Types combo box. Therefore, before accessing the members of a particular class, you must first select that class in the Types combo box. Then, when you click the arrow of the Members combo box, the members of only that class display:
If you select an item from the Members combo box, the Code Editor jumps to that members and positions the cursor to the left of the member.
The Class View
One of the windows used to manage classes is called the Class View. To get the Class View:
The Class View is made of six sections. The title bar and the use of the Class View follow the same description as for the Solution Explorer:
The second part of the title bar is its toolbar ![]() .
.
The Class View New Folder button allows you to create and add a new folder to the project. The Back and the Forward buttons allow you to navigate among the classes.
Under the toolbar, there is another bar made of a combo box and a button. These allow you to search.
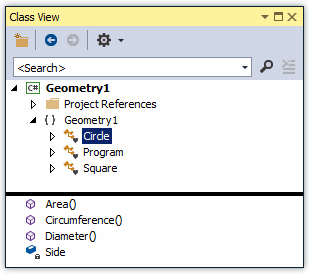
The body of the Class View is made of two sections. The first node of the upper section displays the name of the project. Under the project node, the names of classes display. The bottom section of the Class View is used to display the members of a class. To see the members of a class, you can click it in the top window. Here is an example:
Accessing a Class
As mentioned already, you can create as many classes as you want for your project. You can create each class in its own file or you can create many classes in the same file. After creating them, to access a class:
Renaming a Class
If you don't like the name a class is using, you can change it. The primary technique consists of locating it in your text editor or the Code Editor and edit its name. If you use that approach, you will also have to find every section where the name of the class is used. This can be cumbersome and lead to mistakes. If you are working in Microsoft Visual Studio Express, it provides a better solution and would take care of everything behind the scenes.
To rename a class in Microsoft Visual Studio:
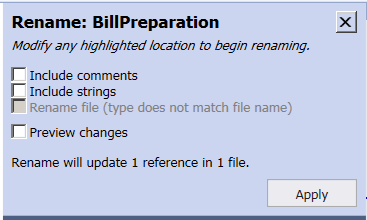
![]() Practical Learning: Renaming a Class
Practical Learning: Renaming a Class
using static System.Console;
The Default Class of a Project
If you create a Console Application in Microsoft Visual Studio, the studio creates file that contains a default class. That class is named Program. You can rename to any valid name you want.
Introduction to Using a Class
Creating an Object
Like any normal variable, to use a class in your program, you must first declare a variable for it. Declaring a variable of a class is also referred to as creating an object or creating an instance of a class.
As done with the variables we have used so far, to declare a variable for a class, use the name of the class followed by a name for the variable. Here is an example:
House property;

class House
{
}
The variable of a class can also be declared in the body of another class. Here is an example:
// Creating an object of a State class
State ca;

// Creating an instance of the House class
House property;

class House
{
}

class State
{

}
You can also declare variables of different classes in the body of, or outside a class. In C#, the order of appearance of the classes or their variables is not important. Here are examples:
State ca;
House condo;
State nc;

int choice;
House property;
string selection;
House candy;

class Region
{
    State sc;
    House nation;
    State wa;
}

class House
{
}

class State
{
    House family;
}
If various variables are using the same type, you can declare them using their common class name. Separate the names of variables with commas. Here are examples:
State ca;
Region pacific;
House condo;

House property, candy;

class Region
{
    State sc, wa;
}

class House
{
}

class State
{
    House family, combination, block;
}
Value Types and Reference Types
When you declare a variable of a regular type (string or number), such a value is referred to as a value type. In fact, when you access the value of the variable, you get the actual value itself. The value of such a variable is stored in a memory area referred to as the stack.
After declaring a variable for a class, whenever you need its object, you must use the address of the memory where the object is stored. This means that you are accessing the object using its reference. For this reason, an object created from a class is stored in a type of memory called the heap.
When declaring a variable for a class, to indicate that its value must be stored in the heap, you must initialize it using an operator called new. This operator can be followed by the name of the class followed by parentheses. Here is an example:
House property;

property = new House();

class House
{
}
![]() Practical Learning: Creating an Object
Practical Learning: Creating an Object
using static System.Console;

Truck trk = new Truck();
Driver drv = new Driver();
Introduction to the Members of a Class
Introduction to the Fields of a Class
Consider a class named House:
class House
{
}

As mentioned previously, the section between the curly brackets, { and }, of a class is referred to as its body. In the body of a class, you can create a list of the types that describe an object. These types are referred to as members of the class. At a minimum, these members are created like variables, and therefore are considered member variables.
A Field in a Class
In C#, a variable declared in the body of a class is called a field. Each field is declared as a normal variable with a data type followed by a name. The name of a variable follows the same rules we reviewed for names of variables. Here is an example of a class with a few fields:
class House
{
    int brightness;

    string security;
}
New Convention:From now on, in our lessons, to refer to a field that belongs to a class, we may write class-name.field-name This means that we are referring to the field field-name that is a member of the class class-name. |
Each field can be any of the types we have seen so far. For example, a field of a class can be a Boolean type. To create a Boolean field, declare a variable of type bool in the body of a class. Here is an example:
class Driver
{
    bool drivingUnderInfluence;
}
Managing the Fields of a Class
Introduction
To assist you with managing the fields of a class, the Code Editor is equipped with the Types and the Members combo boxes.
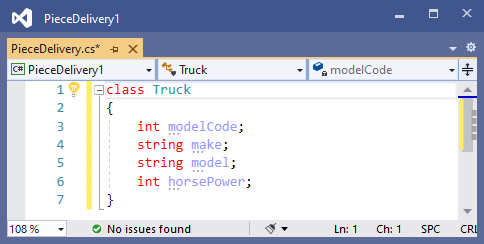
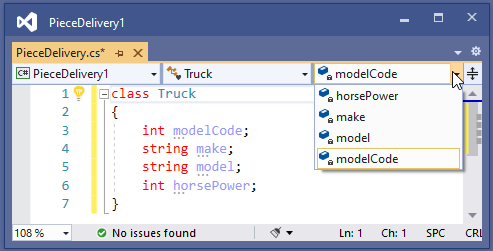
The middle combo box displays the class that is currently selected. The right combo box displays the members, such as fields of the class:
Accessing a Field
There are many ways you can access a field:
Renaming a Field
If you decide to use a different name for a field, you can change it. You can first locate the field in the file and use your knowledge of text editing. As an alternative, after opening the file that contains the class, on the main menu, click Edit -> Find & Replace -> Quick Find, type the name of the field, and click Find Next or Replace. This approach is useful if you want to visit every part where the field is used. If you know for sure that you want to rename a field and everywhere it has been used, Microsoft Visual Studio can assist you.
To rename a field in Microsoft Visual Studio:
Access Modifiers of Class Members
The Private Members of a Class
When it comes to visibility, the parts of an object fall into two main categories: those you can touch and those you don't have access to. The parts you cannot access or cannot see are referred to as private. When creating a class, to specify that a member must be hidden to outside objects, precede its declaration with a keyword named private. Here are examples:
class House
{
    string Location;

    // A private field
    private string floorPlan;
    // A private field
    private int Basement;
}
When a member is marked private, other members of the same class can access it. Objects outside the class and members of other classes cannot access a private member.
![]() Practical Learning: Adding Private Members to a Class
Practical Learning: Adding Private Members to a Class
using static System.Console;

int miles;
double pieceworkRate;

Truck trk = new Truck();
Driver drv = new Driver();
The parts of an object that other objects have access to are referred to as public. To indicate that a member of a class must be accessible outside the class, precede its declaration with a keyword named public. Here are examples:
class House
{
    // A public field
    public string BuildingPermit;
    // A public field
    public double MarketValue;
}
The public and private keywords are referred to as access levels.
By default, if you create a member (field, etc) in a class but don't specify its access level, the member is considered private and cannot be accessed from outside the class, that is by a non-member of that class. Therefore, to make a member accessible by other classes, you must mark it as public.
You can use a mix of public and private members in a class and there is no rule on which access level should be listed first or last. To reduce confusion as to what member is public or private, you should always specify the access level of each member.
![]() Practical Learning: Adding Public Members to a Class
Practical Learning: Adding Public Members to a Class
class Driver
{
    public string first_name;
    public string last_name;
}/* Piecework is the type of work that is paid on the number
* of items produced, the distance driven, etc.
* In this exercise, a business uses trucks driven by some
* employees or contractors to deliver some products.
* The drivers are paid based on the distance they travel to
* deliver one or many products. */
class Truck
{
public string make;
public string model;
}Sometimes you want your code to be shared among various languages such as C++/CLI, Visual Basic, F#, etc. In other words, code from these other languages should be able to "read" or access code written in a C# application. To make this possible, a C# class can be created as a public object.
If you want your class to be accessible to code written in other languages, precede the class keyword with the public keyword when creating it. Here is an example:
public class Number
{
    int minimum;
    string sign;
}
![]() Practical Learning: Adding Members to a Class
Practical Learning: Adding Members to a Class
/* Piecework is the type of work that is paid on the number
  * of items produced, the distance driven, etc.
  * In this exercise, a business uses trucks driven by some
  * employees or contractors to deliver some products.
  * The drivers are paid based on the distance they travel to
  * deliver one or many products. */
public class Truck
{
    public string make;
    public string model;
}public class Driver
{
public string first_name;
public string last_name;
}The Internal Members of a Class
Normally, when you create a class, you may want to access its members in various of the project. That is, you may want other classes of the same project to access one or more members of the class, but you may not want other projects to access such a member. If you want to create a member of a class so that only objects of the same project can access that member, you can mark it with the internal keyword.
Initializing an Object
After creating a member of a class, to access it from another class, first declare a variable of its class as we know already. To actually access the member, use the period operator ".".
After declaring an instance of a class, you can access each of its members and assign it the desired value. Here is an example:
House prop = new House(); prop.PropertyType = "Condominium"; prop.Bedrooms = 2; prop.MarketValue = 165820; class House { public string PropertyType; public int Bedrooms; public double MarketValue; } |
 |
Once a field has been initialized, you can use the period operator to access it and retrieve its value:
using static System.Console;

House prop = new House();

prop.PropertyType = "Condominium";
prop.Bedrooms = 2;
prop.MarketValue = 165820;

WriteLine("=//= Altair Realtors =//=");
WriteLine("Properties Inventory");
Write("Property Type: ");
WriteLine(prop.PropertyType);
Write("Bedrooms: ");
WriteLine(prop.Bedrooms);
Write("Parmet Value: ");
WriteLine(prop.MarketValue);

class House
{
    public string PropertyType;
    public int    Bedrooms;
    public double MarketValue;
}
This would produce:
=//= Altair Realtors =//=
Properties Inventory
Property Type:  Condominium
Bedrooms: 2
Market Value:  165820
Press any key to continue . . .
![]() Practical Learning: Using Classes
Practical Learning: Using Classes
using static System.Console;

int miles;
double pieceworkRate;

Truck trk = new Truck();
Driver drv = new Driver();

drv.first_name = "Lilianne";
drv.last_name = "Gleason";
trk.make = "Ford";
trk.model = "E-350 Rockport Cutaway";
miles = 748;
pieceworkRate = .47;

WriteLine(" - Piece Work Delivery -");
WriteLine("============================================");
WriteLine("Driver:         " + drv.first_name + " " + drv.last_name);
WriteLine("Truck Details:  " + trk.make + " " + trk.model);
WriteLine("--------------------------------------------");
WriteLine("Miles Driven:   {0}", miles);
WriteLine("Piecework Rate: {0}", pieceworkRate);
WriteLine("Gross Salary:   {0}", miles * pieceworkRate);
WriteLine("============================================");- Piece Work Delivery - ============================================ Driver: Lilianne Gleason Truck Details: Ford E-350 Rockport Cutaway -------------------------------------------- Miles Driven: 748 Piecework Rate: 0.47 Gross Salary: 351.56 ============================================ Press any key to close this window . . .
using static System.Console;

int miles;
double pieceworkRate;

Truck trk = new Truck();
Driver drv = new Driver();

drv.first_name = "Lilianne";
drv.last_name = "Gleason";
trk.make = "Ford";
trk.model = "E-350 Rockport Cutaway";

WriteLine("Enter the values for the delivery");
Write("Miles Driven:   ");
miles = int.Parse(ReadLine());
Write("Piecework Rate: ");
pieceworkRate = double.Parse(ReadLine());

WriteLine(" - Piece Work Delivery -");
WriteLine("============================================");
WriteLine("Driver:         " + drv.first_name + " " + drv.last_name);
WriteLine("Truck Details:  " + trk.make + " " + trk.model);
WriteLine("--------------------------------------------");
WriteLine("Miles Driven:   {0}", miles);
WriteLine("Piecework Rate: {0}", pieceworkRate);
WriteLine("Gross Salary:   {0}", miles * pieceworkRate);
WriteLine("============================================");Enter the values for the delivery Miles Driven: 1137 Piecework Rate: 0.47 - Piece Work Delivery - ============================================ Driver: Lilianne Gleason Truck Details: Ford E-350 Rockport Cutaway -------------------------------------------- Miles Driven: 1137 Piecework Rate: 0.47 Gross Salary: 534.39 ============================================ Press any key to close this window . . .
Generating a Class
To create a class, you can also use skeleton code to start a class:
A class with the default name MyClass would be added. You can accept that name or change it.
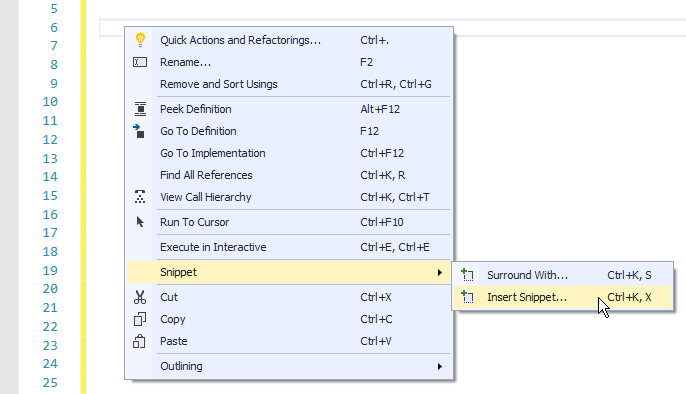
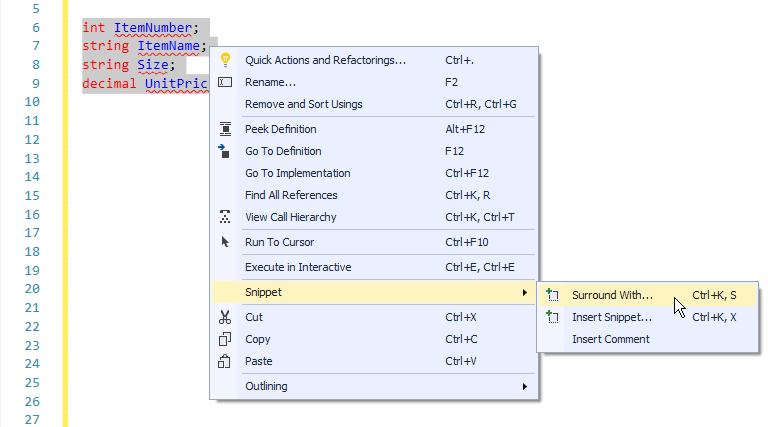
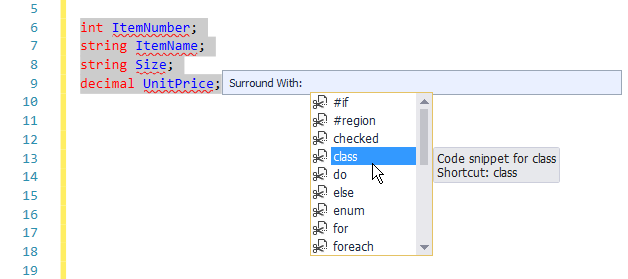
![]() Practical Learning: Ending the Lesson
Practical Learning: Ending the Lesson
|
|
|||
| Previous | Copyright © 2001-2023, C# Key | Sunday 30 April 2023, 14:34 | Next |
|
|
|||