Home

SQL and Databases


Database Creation


Introduction

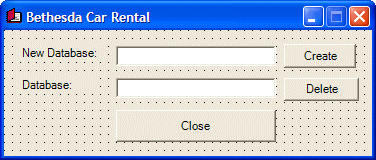
Probably before using a database, you must first have one. In the previous lesson, we saw that there were different ways to connect to a server. 

The SQL is very flexible when it comes to names. In fact, it is very less restrictive than C#. Still, there are rules you must follow when naming the objects in your databases:

  • A name can start with either a letter (a, b, c, d, e, f, g, h, i, j, k, l, m, n, o, p, q, r, s, t, u, v, w, x, y, z, A, B, C, D, E, F, G, H, I, J, K, L, M, N, O, P, Q, R, S, T, U, V, W, X, Y, or Z), a digit (0, 1, 2, 3, 4, 5, 6, 7, 8, or 9), an underscore (_) or a non-readable character. Examples are _n, act, %783, Second
  • After the first character (letter, digit, underscore, or symbol), the name can have combinations of underscores, letters, digits, or symbols. Examples are _n24, act_52_t
  • A name cannot include space, that is, empty characters. If you want to use a name that is made of various words, start the name with an opening square bracket and end it with a closing square bracket. Example are [Full Name] or [Date of Birth]

Because of the flexibility of SQL, it can be difficult to maintain names in a database. Based on this, there are conventions we will use for our objects. In fact, we will adopt the rules used in C/C++, C#, Pascal, Java, and Visual Basic, etc. In our databases:

  • A name will start with either a letter (a, b, c, d, e, f, g, h, i, j, k, l, m, n, o, p, q, r, s, t, u, v, w, x, y, z, A, B, C, D, E, F, G, H, I, J, K, L, M, N, O, P, Q, R, S, T, U, V, W, X, Y, or Z) or an underscore
  • After the first character, we can use any combination of letters, digits, or underscores
  • A name will not start with two underscores
  • A name will not include one or more empty spaces. That is, a name will be made in one word
  • If the name is a combination of words, at least the second word will start in uppercase. Examples are dateHired, _RealSport, FullName, or DriversLicenseNumber
 

Creating a Database

The command to create a database in SQL uses the following formula:

CREATE DATABASE DatabaseName

The CREATE DATABASE (remember that SQL is not case-sensitive, even when you include it in a C# statement) expression is required.

The DatabaseName factor is the name that the new database will carry. Although SQL is not case-sensitive, as a C# programmer, you should make it a habit to be aware of the cases you use to name your objects.

As done in C#, every statement in SQL can be terminated with a semi-colon. Based on this, the above formula would be:

CREATE DATABASE DatabaseName;

To create a database with code, simply pass a CREATE DATABASE statement (including the name of the database) to a MySqlCommand object.


Practical LearningPractical Learning: Creating a Database

  1. Start SharpDevelop
  2. To create a new application, on the Start Page, click the New Combine button
  3. In the Categories tree of the New Project dialog box, make sure that C# is selected; otherwise, select C#.
    In the Templates list, click Windows Application
  4. Set the Name to BCR1
  5. Change the Location to a directory of your choice 
     
  6. Click Create
  7. In the Projects section of the left frame, expand the Combine and the BCR1 nodes
  8. Right-click References and click Add Reference
  9. In the Add Reference dialog box, click the .NET Assembly Browser tab and click the Browse button
  10. In the Open dialog box, locate the folder where your MySQL Connector Net is installed and display it in the Look In combo box
  11. Double-click Bin followed by your version of the .NET Framework
     
  12. Click MySql.Data.dll
     
  13. Click Open
     
  14. After making sure that the assembly has been selected, in the Add Reference dialog box, click OK
  15. In the lower section of the main window, click Design to access the design section of the form
  16. Add a Button to the form and change its properties as follows:
    (Name): btnCreateDB
    Text:     Create Database
     
  17. Double-click the Create Database button
  18. In the top section of the file, include the MySql.Data.MySqlClient namespace 
  19. Implement the Click event of the button as follows:
     
    /*
     * Created by SharpDevelop.
     * User: Administrator
     * Date: 6/26/2005
     * Time: 3:50 PM
     * 
     * To change this template use Tools | Options | Coding | Edit Standard Headers.
     */
    using System;
    using System.Drawing;
    using System.Windows.Forms;
    using MySql.Data.MySqlClient;
    
    namespace BCR1
    {
    	/// <summary>
    	/// Description of MainForm.
    	/// </summary>
    	public class MainForm : System.Windows.Forms.Form
    	{
    		. . . No Change
    		
    		void BtnCreateDBClick(object sender, System.EventArgs e)
    		{
    MySqlConnection conDatabase = new MySqlConnection("Data Source=localhost;" +
    			                         "Persist Security Info=yes;" +
    			                         "UserId=root; PWD=Whatever;");
    MySqlCommand cmdDatabase = new MySqlCommand("CREATE DATABASE BCR1;", conDatabase);
    			
    			conDatabase.Open();
    			
    			cmdDatabase.ExecuteNonQuery();
    			conDatabase.Close();
    		}
    		
    	}
    }
  20. Execute the application
  21. Click the Create Database button
  22. Close the form and return to your programming environment
  23. To allow the user to specify the name of the database, change the design of the form as follows:
     
    Control Name Text
    Label   New Database:
    TextBox txtNewDatabase  
    Button btnCreateDB Create
  24. Double-click the Create button and change its code as follows:
     
    void BtnCreateDBClick(object sender, System.EventArgs e)
    {
    	string strNewDatabase = this.txtNewDatabase.Text;
    			
    	if( strNewDatabase == "" )
    		return;
    			
    	MySqlConnection conDatabase = new MySqlConnection("Data Source=localhost;" +
    		                                       "Persist Security Info=yes;" +
    		                                       "UserId=root; PWD=Whatever;");
    MySqlCommand cmdDatabase = new MySqlCommand("CREATE DATABASE " + strNewDatabase + ";",
    			                                            conDatabase);
    			
    	conDatabase.Open();
    			
    	cmdDatabase.ExecuteNonQuery();
    	conDatabase.Close();
    			
    	this.txtNewDatabase.Text = "";
    	this.txtNewDatabase.Focus();
    }
  25. Execute the application
  26. Enter a string in the text box and click Create
  27. Close the form and return to your programming environment
 

Database Maintenance


Deleting a Database

If you have created a database but don't need it anymore, you can delete it. To delete a database, you use the DROP DATABASE instruction followed by the name of the database. The formula used is:

DROP DATABASE DatabaseName

Before deleting a database in SQL, you must make sure the database is not being used or accessed by some one else or by another object.


Practical LearningPractical Learning: Deleting a Database

  1. To allow the user to delete a database, change the design of the form as follows:
     
    Control Name Text
    Label   New Database:
    TextBox txtNewDatabase  
    Button btnCreateDB Create
    Label   Database
    TextBox txtDeleteDB  
    Button btnDeleteDB Delete
    Button btnClose Close
  2. Double-click the Delete button and implement its code as follows:
     
    void BtnDeleteDBClick(object sender, System.EventArgs e)
    {
    	string strDatabase = txtDeleteDB.Text;
    	if( strDatabase == "" )
    		return;
    			
    	string strDROP = "DROP DATABASE " + strDatabase + ";";
    MySqlConnection conDatabase = new MySqlConnection("Data Source=localhost;" +
    		                              "Persist Security Info=yes;" +
    		                              "UserId=root; PWD=Whatever;");
    MySqlCommand cmdDatabase = new MySqlCommand(strDROP, conDatabase);
    			
    	conDatabase.Open();
    	cmdDatabase.ExecuteNonQuery();
    	conDatabase.Close();
    			
    	txtDeleteDB.Text;
    	txtDeleteDB.Focus();
    }		
  3. Return to the form and double-click the Close button
  4. Implement its event as follows:
     
    void BtnCloseClick(object sender, System.EventArgs e)
    {
    	Close();
    }
  5. Execute the application
  6. In the Database text box, type BCR1 and click Delete
  7. After using it, to close the form, click the Close button
 

Previous Copyright © 2005-2016, FunctionX Next