Home

The Tables of a Database


Database Tables


Introduction

Tables are the foundation of organizing lists of items. This concept is valid regardless of the type of list. As a database application is primarily a list of things, the SQL uses the same approach at organizing information. Before creating a table, you must specify what database it would belong to.

Practical Learning Practical Learning: Introducing Tables

  1. Start Microsoft Visual C++ .NET or Microsoft Visual Studio .NET and create a new Windows Forms Application named Countries1
  2. In the Solution Explorer, right-click References and click Add Reference...
  3. In the Add Reference dialog box, click Browse...
  4. In the Select Component dialog box, locate the folder where your MySQL Connector Net is installed and display it in the Look In combo box
  5. Double-click bin followed by your version of the .NET Framework
     
  6. Click MySql.Data.dll
     
  7. Click Open
  8. After making sure that the assembly has been selected, in the Add Reference dialog box, click OK
  9. In the top section of the file, under the other using lines, type:
     
    using MySql.Data.MySqlClient;
  10. Add a new button to the form and change its properties as follows:
    (Name): btnCreateDB
    Text: Create Statistics Database
  11. Double-click the Create Statistics Database button
  12. To create a database for this lesson, implement the code as follows:
     
    private: System::Void btnCreateDB_Click(System::Object *  sender, System::EventArgs *  e)
    {
    	 String *strConnection = S"CREATE DATABASE CountriesStats;";
     	 MySqlConnection *conDatabase = new 
    		MySqlConnection(S"Data Source=localhost;Persist Security Info=yes;");
    	 MySqlCommand *cmdDatabase = new MySqlCommand(strConnection, conDatabase);
    
    	 conDatabase->Open();
    
    	 cmdDatabase->ExecuteNonQuery();
    	 conDatabase->Close();
    }
  13. Execute the application and click the Create button
  14. Close the form and return to your programming environment
 

Table Creation

The statement used to create a new table uses the following formula

CREATE TABLE TableName

The CREATE and TABLE keywords must be used to let SQL know that you want to create a table. The TableName factor specifies the name of the new table. The TableName can use the rules and suggestions we reviewed for the database objects.

After specifying the name of the table, you must list the columns of the table. The list of columns starts with an opening parenthesis "(". The list ends with a closing parenthesis ")". Each column must be separated from the next with a comma, except for the last column. You can include all columns on the same line if possible as follows:

CREATE TABLE Country(Column1, Column2, Column3)

There are two primary pieces of information you must specify for each column: its name and its type. Therefore, the syntax of creating a column is:

ColumnName DataType Options

To programmatically create a table, you can follow the same formula rules of creating a table using SQL code. Once the statement is ready, you can pass it to a MySqlCommand object. To execute the statement, you can call the SqlCommand.ExecuteNonQuery() method.


The Name of a Table

While creating a table, you must name it. If you are creating a table using SQL code, you must name your table using the above formula of CREATE TABLE TableName.

The name of a table:

  • Can be made of digits only. For example you can have a table called 148
  • Can start with a digit, a letter, or an underscore
  • Can be made of letters, digits, and spaces

Besides these rules, you can make up yours. In our lessons, the name of a table

  • Will start with a letter, in uppercase or lowercase. Examples are Employees, Accounts
  • If made of a combination of words, it will have each part start in uppercase. Examples are BookCategories, CustomersBankAccounts.

As implied above, to create a table, you must include at least one column. In the next lesson, we will have more details on how to create and manage columns.


Practical Learning Practical Learning: Creating Tables

  1. Change the design of the form as follows:
     
    Control Name Text
    Button btnCreateDB Create Statistics Database
    Button btnCreateContinents Create Continents
    Button btnCreateCountries Create Countries
  2. Double-click the Create Continents button and implement its code as follows:
     
    private: System::Void btnCreateContinents_Click(System::Object *  sender, System::EventArgs *  e)
    {
    	 String *strCreate = S"CREATE TABLE Continents(ContinentName char);";
    
    	MySqlConnection *conDatabase = new 
    MySqlConnection(S"Data Source=localhost;Database='CountriesStats';Persist Security Info=true;");
    	MySqlCommand    *cmdDatabase = new MySqlCommand(strCreate, conDatabase);
    
    	conDatabase->Open();
    
    	cmdDatabase->ExecuteNonQuery();
    	conDatabase->Close();
    }
  3. Return to the form and double-click the Create Countries button
  4. Implement the event as follows:
     
    private: System::Void btnCreateCountries_Click(System::Object *  sender, System::EventArgs *  e)
    {
    	 String *strCreate = S"CREATE TABLE Countries(CountryName char);";
    
    	MySqlConnection *conDatabase = new 
     MySqlConnection(S"Data Source=localhost;Database='CountriesStats';Persist Security Info=true");
    	 MySqlCommand    *cmdDatabase = new MySqlCommand(strCreate, conDatabase);
    
    	 conDatabase->Open();
    
    	 cmdDatabase->ExecuteNonQuery();
    	 conDatabase->Close();
    }
  5. Execute the application
  6. Click the different buttons to create the tables
  7. Close the form
 

Table Maintenance


Renaming a Table

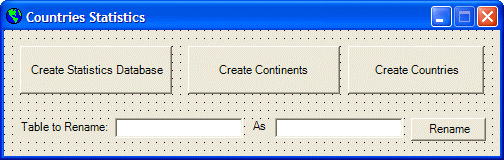
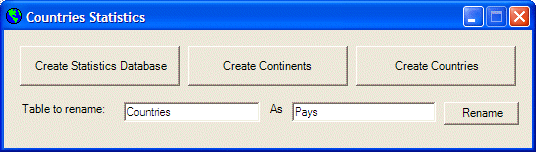
If you have a table whose name is not appropriate, you can change it. Before renaming a table, make sure this is what you want to do and make sure you can take care of it in your code.

To rename a table in MySQL, use the following formula:

RENAME TABLE ExistingName TO NewName;

When using this formula, replace the ExistingName factor with the name of the table you want to rename. Replace the NewName factor with the name you want the table to have after renaming it.

Here is an example:

Enter password: ********
Welcome to the MySQL monitor.  Commands end with ; or \g.
Your MySQL connection id is 1 to server version: 4.1.12a-nt

Type 'help;' or '\h' for help. Type '\c' to clear the buffer.

mysql> USE CountriesStats;
Database changed
mysql> RENAME TABLE Countries TO Pais;
Query OK, 0 rows affected (0.59 sec)

mysql>

To rename a table in a C# code, pass the sp_rename code as string to a MySqlCommand object and call the SqlCommand.ExecuteNonQuery() method.


Practical Learning Practical Learning: Renaming a Table

  1. Change the design of the form as follows:
     
    Control Name Text
    Button btnCreateDB Create Statistics Database
    Button btnCreateContinents Create Continents
    Button btnCreateCountries Create Countries
    Label   Table to Rename
    TextBox txtExistingTblName  
    Label   As
    TextBox txtNewTblName  
    Button btnRenameTable Rename
  2. Double-click the Rename button and implement its code as follows:
     
    private: System::Void btnRenameTable_Click(System::Object *  sender, System::EventArgs *  e)
    {
                    String *strExistingName = txtExistingTblName->Text;
    	String *strNewName = txtNewTblName->Text;
    
    	if( strExistingName->Equals(S"") )
    	{
    		MessageBox::Show(S"To rename a table, you must provide a "
    				S"valid name for an existing table");
    		return;
    	}
    	if( strNewName->Equals(S"") )
    	{
    		MessageBox::Show(S"To rename a table, you must provide the name "
    				S"that will replace the existing name of the table");
    		return;
    	}
    
    String *strConnection = String::Concat(S"RENAME TABLE ", strExistingName, S" TO ", strNewName, S";");
    	MySqlConnection *conDatabase = new 
    MySqlConnection(S"Data Source=localhost;Database='CountriesStats';Persist Security Info=yes;");
    	MySqlCommand *cmdDatabase = new MySqlCommand(strConnection, conDatabase);
    
    	conDatabase->Open();
    
    	cmdDatabase->ExecuteNonQuery();
    	conDatabase->Close();
    
    	txtExistingTblName->Text = S"";
    	txtNewTblName->Text = S"";
    	txtExistingTblName->Focus();
    }
  3. Execute the application and fill out the form as follows:
     
  4. Click Rename
  5. Close the form and return to your programming environment

Removing a Table

If you have a table you don't need anymore in your database, you can remove it. Before performing this operation, you should make sure you are familiar with the role of the table. In fact, you should try to delete only a table you know you have created and you don't need anymore. If you work in a team environment and you find a table that may have been created by someone else, you should enquire before deleting it.

The code used to delete a table uses the following formula:

DROP TABLE TableName

The DROP TABLE expression is required and it is followed by the name of the table as TableName. Here is an example:

DROP TABLE FriendsOfMine;

If you are working from C++ code, create a DROP TABLE TableName; expression and pass it to a MySqlCommand object before calling the SqlCommand::ExecuteNonQuery() method.

It is extremely important to know that, when working with the DROP TABLE TableName statement, you would not receive any warning. If you are working in a Windows Forms Application, you should create your own warning in a message box to make sure that the user really wants to delete the table.


Practical Learning Practical Learning: Finalizing the Application

  1. Add a new button to the form and change its properties as follows:
    (Name): btnDropDatabase
    Text: Delete Countries Statistics
  2. Double-click the new button and implement its event as follows:
     
    private: System::Void btnDropDatabase_Click(System::Object *  sender, System::EventArgs *  e)
    {			 
    	String *strDeleteDB = S"DROP DATABASE CountriesStats;";
    	MySqlConnection *conDatabase = new MySqlConnection(S"Data Source=localhost;"
    		                                                  S"Persist Security Info=yes;");
    	MySqlCommand *cmdDatabase = new MySqlCommand(strDeleteDB, conDatabase);
    			
    	conDatabase->Open();
    	cmdDatabase->ExecuteNonQuery();
    	conDatabase->Close();
    }
  3. Execute the application and click the newly added button
  4. Close the form


Previous Copyright © 2005-2016, FunctionX Next