Home

Microsoft Windows Server 2008 Installation


Small Business Server Installation

This installation is for Small Business Server 2008. To start the installation, insert the operation system's DVD in the drive and boot from. While the computer is booting, watch the screen and you should receive a message that asks you to press a key if you want to install from CD. If, press Enter.

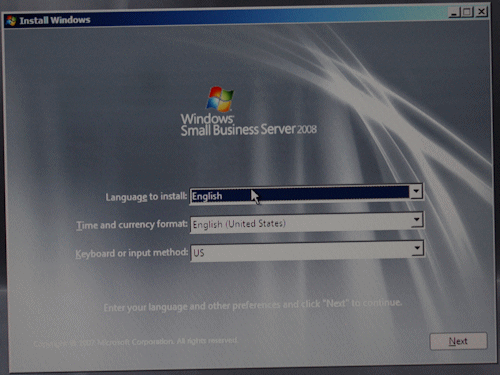
A dialog box titled Install Windows should display, asking you to specify the Language To Install, the Time And Currency Format, and the Keyboard Or Input Method. Normally, you should accept the default; if not change them as you see fit:

Microsoft Windows Small Business Server 2008 Installation

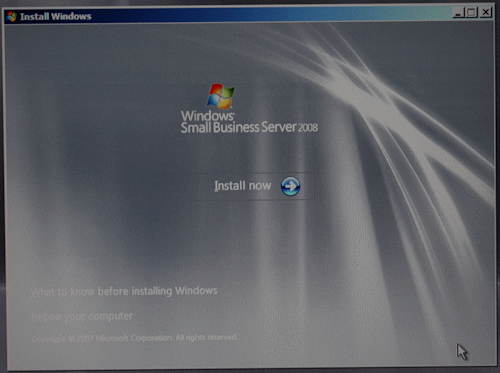
Click Next. The second page of the wizard will display a button (or link) titled Install Now:

Microsoft Windows Small Business Server 2008 Installation

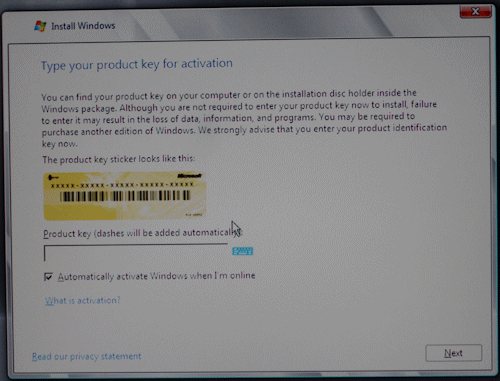
Click Install Now. You will be prompted for the Product Key:

Microsoft Windows Small Business Server 2008 Installation

Enter it if you have it. If you don't have it, click Next (a message box will ask you if you want to enter your product key now, click No).

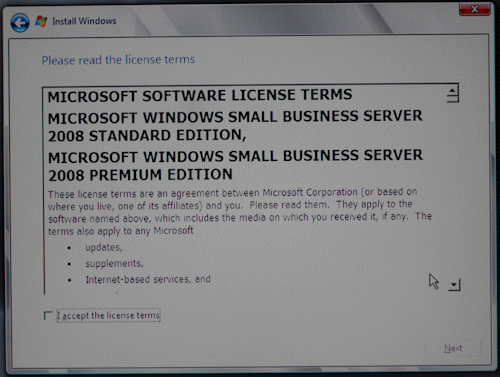
The licensing contract will come up:

Microsoft Windows Small Business Server 2008 Installation

Read it. If you agree with it, click the I Accept The License Terms check box. Click Next.

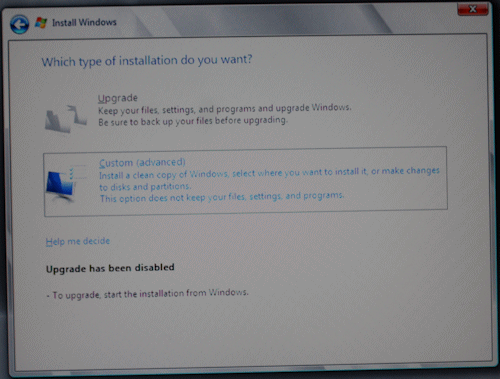
The next page may ask you whether you want to upgrade or perform a new installation:

Microsoft Windows Small Business Server 2008 Installation

In most cases, you should perform a new installation. Click your selection.

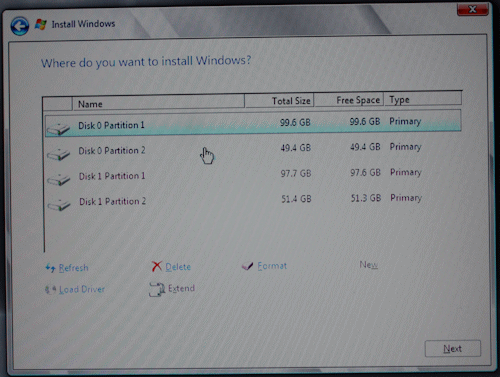
The next screen allows you to select and/or create partitions. If in doubt, accept the defaults. Selection the partition where you want to install the operating system:

Microsoft Windows Small Business Server 2008 Installation

After making your selection, click Next. The installation will start copying files.

When the installation has finished copying the files, the computer will reboot. You don't have to do anything. When it has finished rebooting, the installation would continue. At one time, the computer will reboot again.

After a while, a window titled Install Windows Small Business Server 2008 will display. Read its text abd click Next.

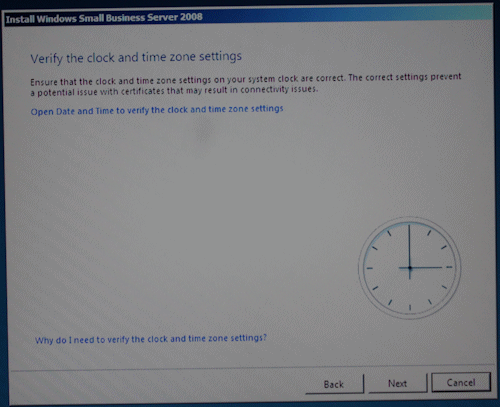
The next screen asks you to set your calendar and clock:

Microsoft Windows Small Business Server 2008 Installation

To change the calendar and clock, click Open Date and Time ... After making your selection, click OK.

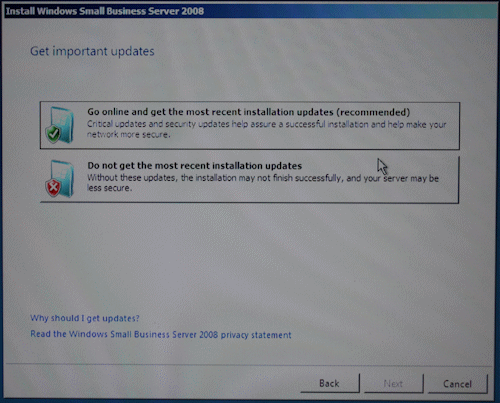
Click Next. The next screen asks you check for updates:

Microsoft Windows Small Business Server 2008 Installation

If your computer is connected to the Internet, click the first option. The next screen asks you to enter information about your business. After filling the form, click Next.

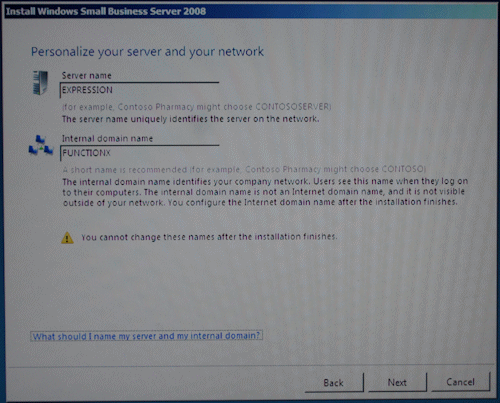
Accept or enter a name for the server. This name will be the one by which other computers on the network recognize this server. That name will also be used on the intranet. The name shouold be unique among the other computers on your network. Other people can use that in the Address Bar of a browser, inside your network, to access some web pages on that computer (we will see how). For our example, we use the name expression.

Accept or change the name of the internal domain. This name will be used to identify the network inside your intranet, not on the Internet. You can choose a name that identifies your business. You can even use a name of an existing web site because this name will not be accessible on the Internet. When the installation is over, the operating system will create a network that uses the name of the domain + .local. This means that the name you select here will be used as your intranet web site. The extension will be .local (not .com).

For our example, we use the name functionx. This means that the installation will create a web site for us, named functionx.local.

The name of the server will be used to access it as its own intranet web site. For our example, other computers in the same network will be able to access the server by typing http://expression.functionx.local in the Address Bar of the browser. Of course, this means that you will have to communicate this address to your users, in case you need to.

The name of the computer and that of the domain must be distinct:

Microsoft Windows Small Business Server 2008 Installation

The bad news is that you should carefully choose these names. If you are not sure, leave the installation opened and think of names or plan them as long as you can, until you are ready. As the installation says, once these names have been entered and once you click Next, you will not be able to change them. After specifying the names, click Next.

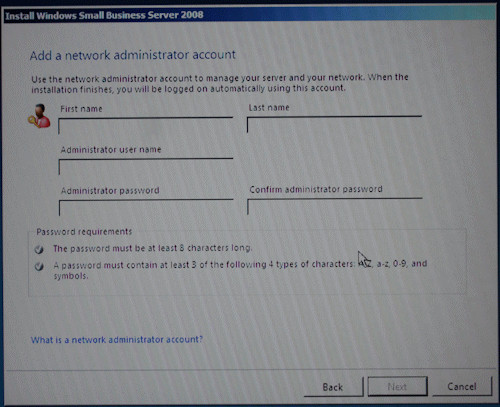
The next screen asks you to enter the credentials for the administrator account. This will consist of a first name, a last name, a username, and the administrator's password:

Microsoft Windows Small Business Server 2008 Installation

The next screen will be about security. After making the selections, click Next. The next screen shows a summary of the previous forms. After reading it, click Next

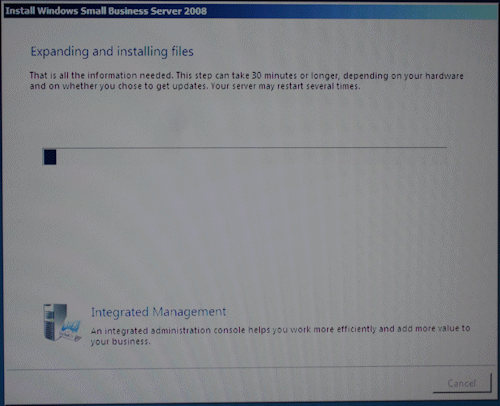
The installation will then start:

Microsoft Windows Small Business Server 2008 Installation

When file copying is over, the computer will reboot. When it has rebooted, the installation will resume. This is the longest and probably the most boring phase of the installation.

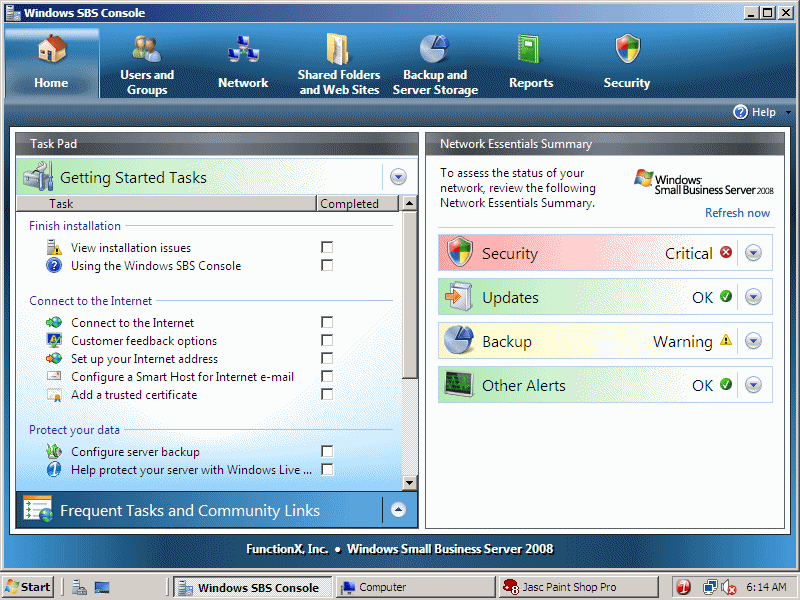
When the whole installation is over, you will get a window titled Windows SBS Console:

Microsoft Windows Small Business Server 2008 Installation


Connecting the Server to the Internet

The next step is probably to connect the server to the Internet. It will be used to connect other computers to the Internet. You should first make sure that:

  • The cable (sometimes a telephone cable, sometimes the cable like that of TV cable, etc) from the ISP (or from the wall) is connected to your modem
  • A cable connects your modem to the router
  • A cable connects your server to the router
  • Cables connect your other computers to the router
  • Both the modem and the router are ON

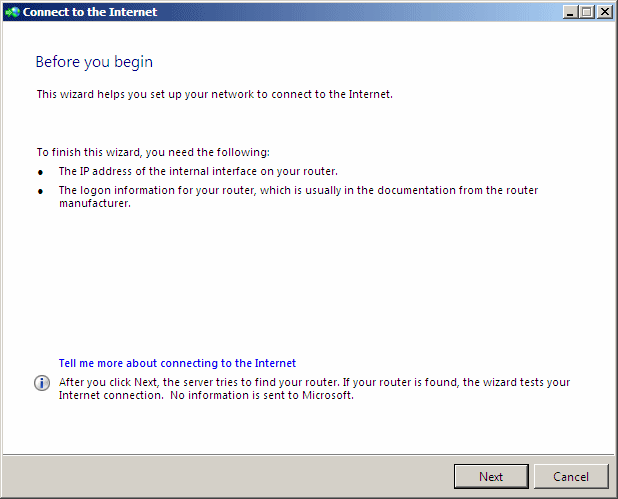
To start, in the Windows SBS Console, click Connect to the Internet. In the first page of the wizard, read the text:

Connect to the Internet

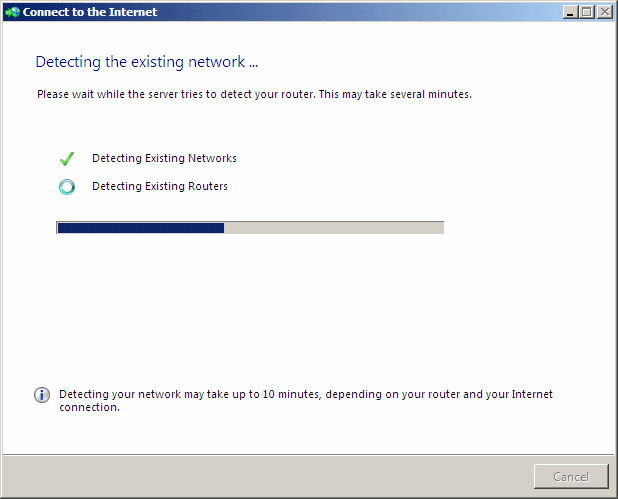
Click Next. In the second page, the wizard will make an attempt to detect the router:

Connect to the Internet

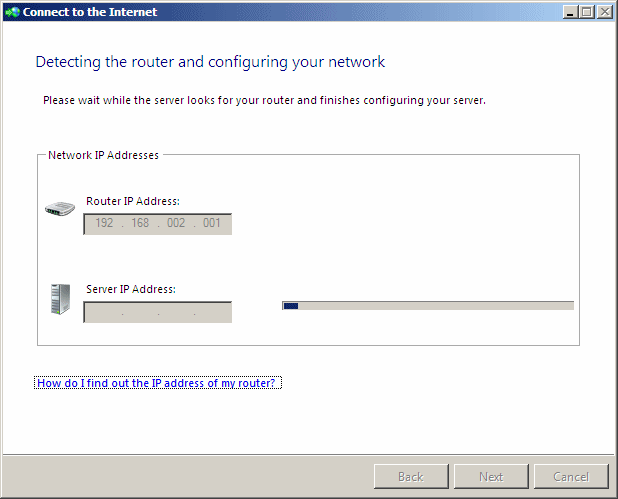
Click Next. If you are asked to enter the Router IP Address, type 192.168.002.001 (if you want, in the Server IP Address, type 192.168.002.003). Click Next:

Connect to the Internet

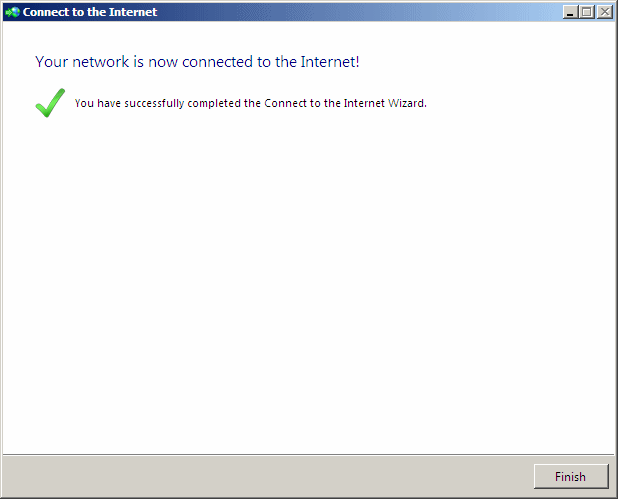
If you receive an error, click Finish and start again (it should work the second time; in reality, what may happen is that the wizard will have to detect the router, get the right IP address from it, and use it). Once you have succeeded, click Finish:

Connect to the Internet

To test the Internet connection, start your browser and change the address to something like http://www.yahoo.com or http://www.bn.com.

Joining a Workstation to the Domain: Example 1

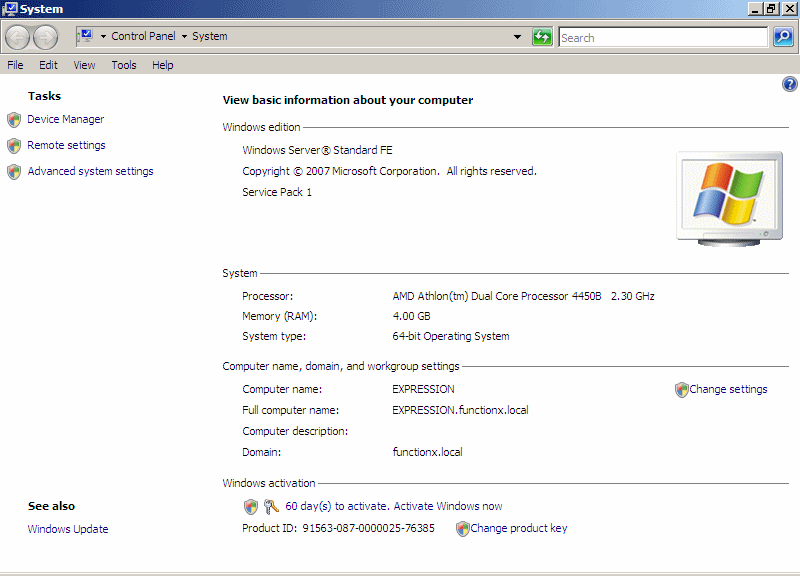
Next, you should connect the other computers (named clients, or workstations, of client workstations) to the domain. To do this, on the Taskbar, click Start, right-click Computer, and click Properties. You should see the computer name and the name of the domain:

Connect to the Internet

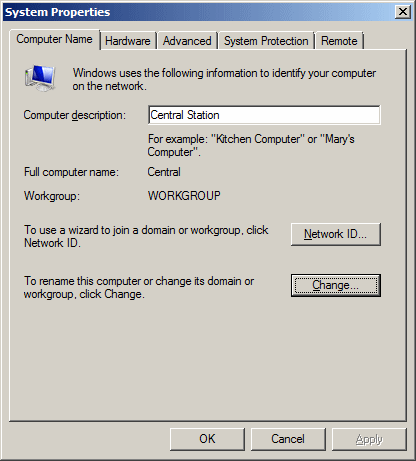
Click Change Settings. Click Continue. Notice the (full) name of the computer (and the address we mentioned that your users will use as the address in a browser): Also notice the name of the domain (this name will be used to access some files in the other computers of the same network):

System Properties

Notice that the Change button is disabled, which means that you can change neither the name of the computer, nor the name of the domain). After viewing, click OK.

Just to make sure you can connect to the domain, you should reboot. When the computer comes up, press Ctrl + Alt + Delete. Make sure the right

Next, you must join the other computers to the domain. You have two options. You can first create an account for each computer on the domain (on the server), but this is not important. Another option, kind of faster, is to directly join the domain; the server will automatically create the account. To join the domain, make sure the other computer you want to use has a cable connected to the router and it has the right operating system (Microsoft Windows XP Professional, Windows 7 Professional, Windows 7 Ultimate (some versions of Linux also can join)).

Start the other computer. Click Start, right-click Computer, and click Properties. Click Change Settings:

System Properties

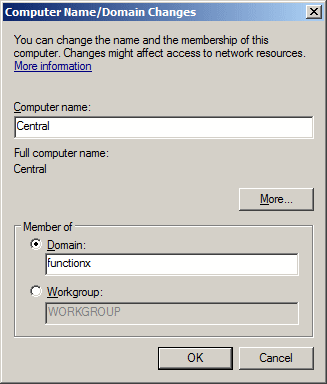
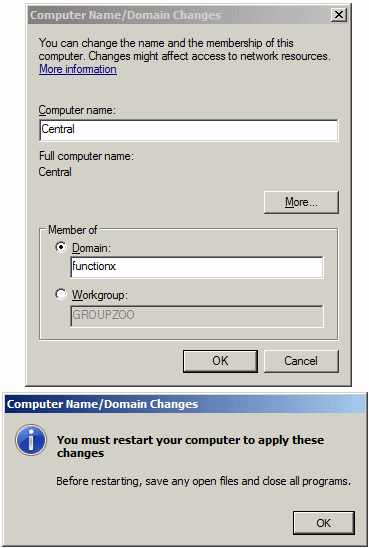
Click Change... Click the Domain radio button. In the corresponding text box, enter the name of the domain with the domain extension:

Computer Name/Domain Name

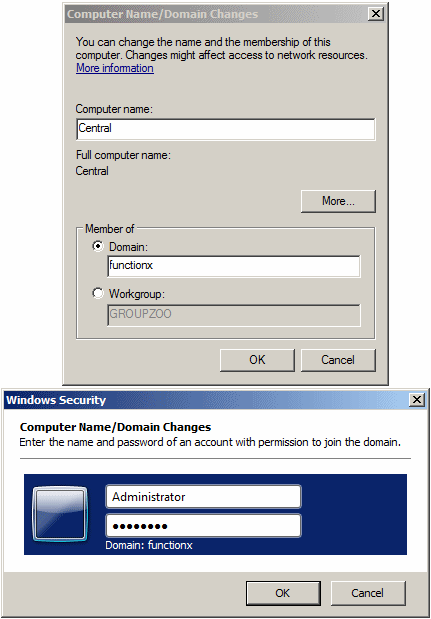
Click OK. You will be asked to provide a user name and a password. These credentials must be those of an account that can join a domain. You can use the account that was created during the installation of the server (an alternative is to go to the server, create a separate account with admin rights, and use it) (you can also use the Administrator account but this is not a good solution; normally, the Administrator is disabled):

Computer Name/Domain Name

After entering the username and the password, click OK. If you receive an error, consider the following section. If you don't receive an error, skip this section.

Possible Errors:

  • If you use the Administrator account and receive an error when you click OK, go back to the server, click Start -> Administrative Tools -> Active Directory Users and Computers; click Continue; in the left frame, expand the name name of the domain, click Users; in the right frame, right-click Administrator and click Properties; in the Account Options section, remove the check mark of Account Is Disabled; click OK
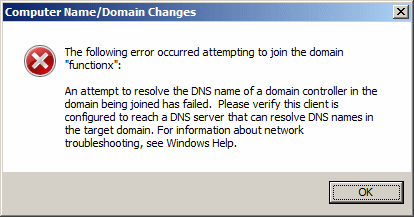
  • In some cases, you may receive an error message that "An attempt to resolve the DNS Name ..." failed:
     
    Computer Name/Domain Name

    This could happen if you were using computer on its own or it was a member of a workgroup and not an actual domain. Before resolving this, first get the IP address of the server. There are various ways you can go it. Go to the server computer:
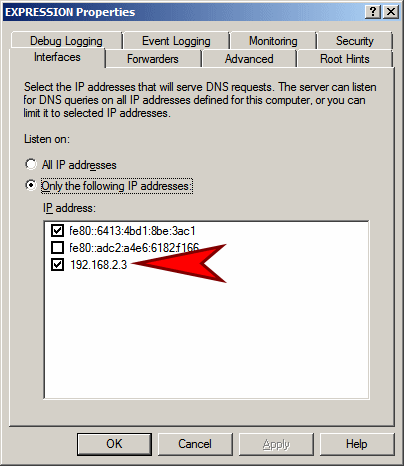
    • Click Start -> Administrative Tools -> DNS. In the left frame, right-click the name of the server and click Properties. Get the IP address that has 4 sections:
       
      DNS Properties

      Click Cancel
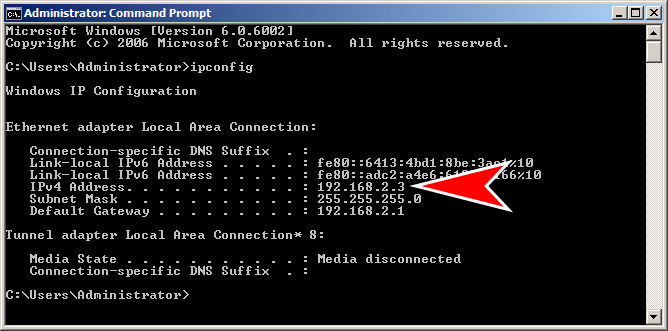
    • Click Start and click Command Prompt (you can also click Start, then type cmd in the text box and press Enter). Type ipconfig and press Enter. Get the IP address on the right side of IPv4 Address)
       
      Command Prompt
    • Click Start -> Control Panel. Click Network and Sharing Center. Click View Status. Click Details. Get the IP address on the right side of IPv4 DNS Server
    On the computer that needs to join the domain, click Start -> Control Panel. Click View Network Status and Tasks. Click Local Area Connection. Click Properties, Click Internet Protocol Version 4 (TCP/IPv4). Click Properties. Click Advanced. Click DNS. Click Add... Type the IP address of the server. Click OK. Click OK. Click OK. Click Close. Click Close. Try joining the domain again

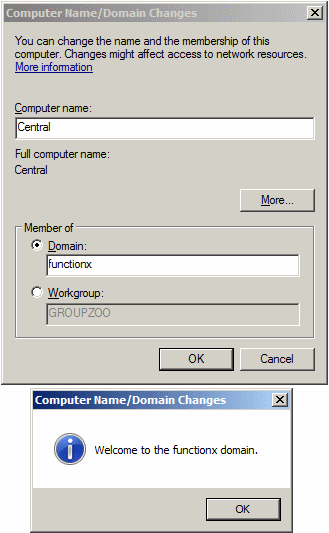
The computer will then try to connect to the server and join the domain. If it is successful, you will receive a message welcoming you to the domain:

Computer Name/Domain Name

Click OK. You will receive a message telling that you will have to reboot:

Computer Name/Domain Name

Click OK. In the System Properties dialog box, click Close. When asked to reboot, click Restart Now.

Joining a Workstation to the Domain: Example 2

In Microsoft Windows 7, there is another technique you can use to join the domain.

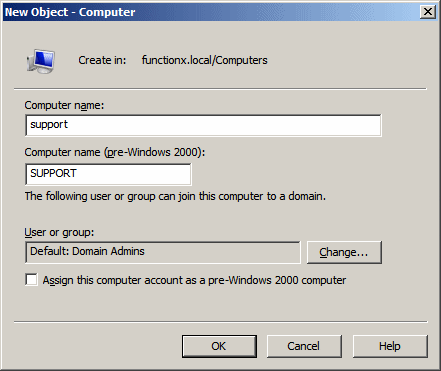
To start, login to your server (this step is optional). Click Start -> Administrative Tools -> Active Directory Users and Computers. In the left frame, right-click Computers -> New Computer. Enter the name of the computer that will join the domain:

New Object - Computer

Click OK.

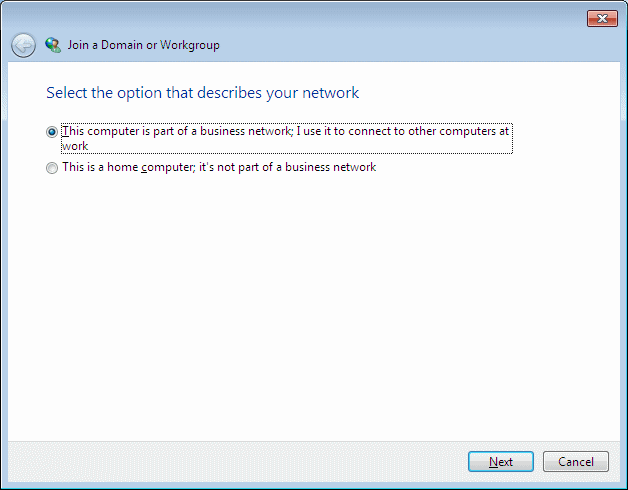
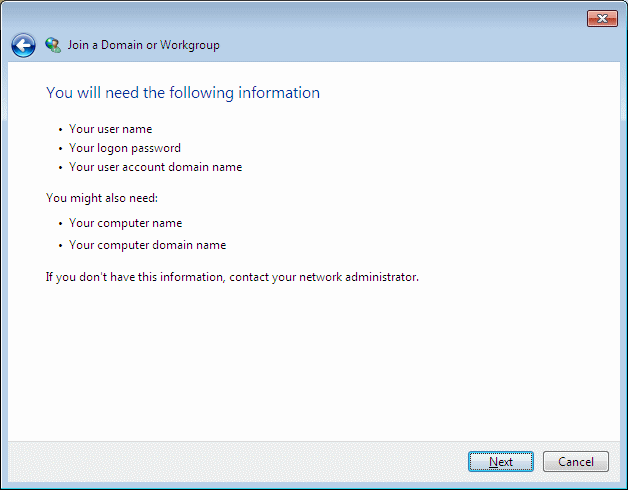
In the computer that needs to join the domain, as done in the previous example, display the System Properties dialog box (you can click Start, right-click Computer, and click Properties, then click Change Settings). In the Computer Name property page, click Network ID. In the first page of the wizard, make sure the first radio button is selected or click it:

Joining a Domain

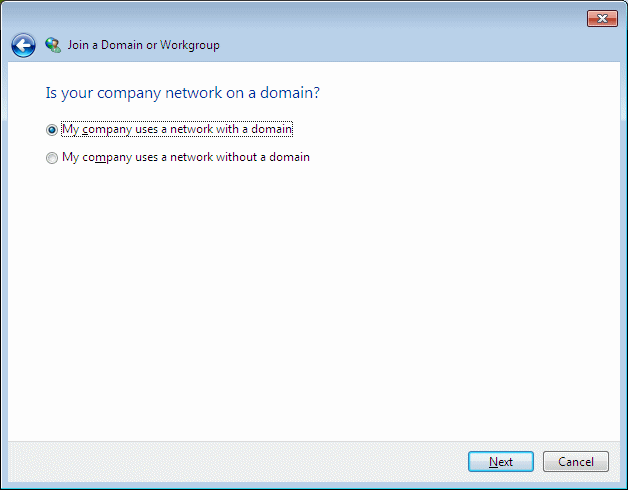
Click Next. In the second page of the wizard, make sure the first radio button is selected or click it:

Joining a Domain

Click Next. The third page of the wizard will show a message:

Joining a Domain

After reading it, click Next. In the third page, type a username, a password, and name of the domain:

Joining a Domain

Click Next. If an account was already created on the server for this computer, a message box will let you know:

Joining a Domain

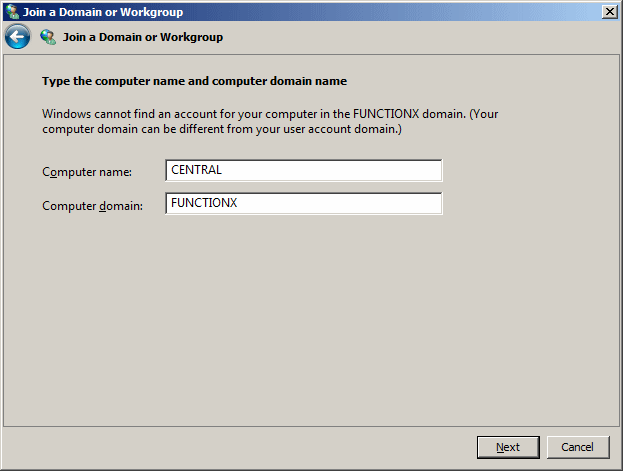
If an account for the computer was not yet created on the server, you may receive a message that the computer name was not found in the domain. In this case, enter the domain name again:

Joining a Domain

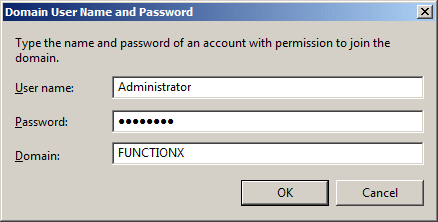
Click Next. You will be asked to enter a user name who has the right to join a domain. Also type the password and domain name:

Joining a Domain

Click Next. You will be asked to login. Enter a username and a password that can join a computer to a domain. Also type the domain name.

Joining a Domain

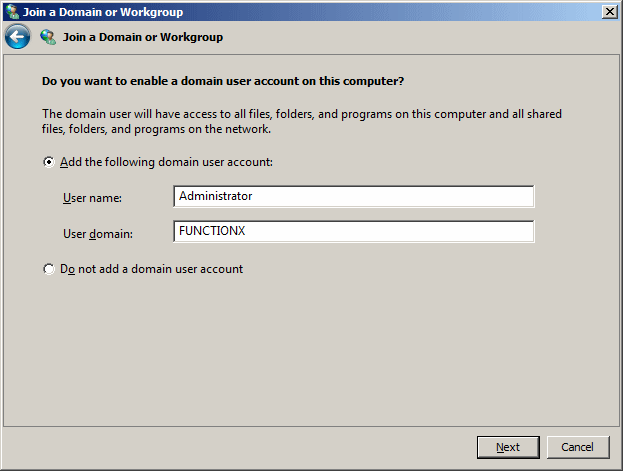
You will be asked whether you want to enable a domain user account on the computer:

Joining a Domain

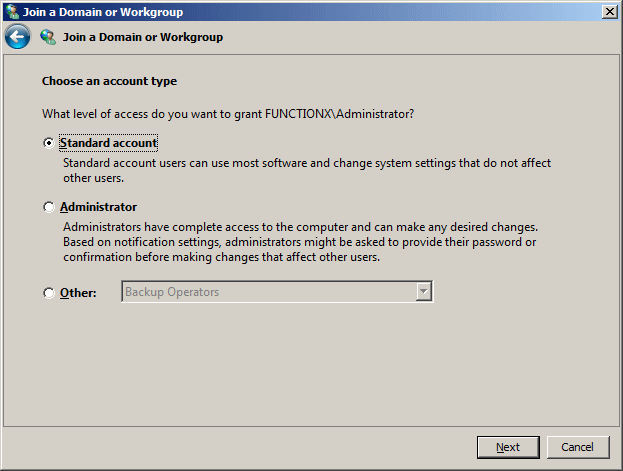
After reading, click Next. The next page of the wizard allows you to specify the type of account you want to create locally. In most cases, you should accept a Standard Account:

Joining a Domain

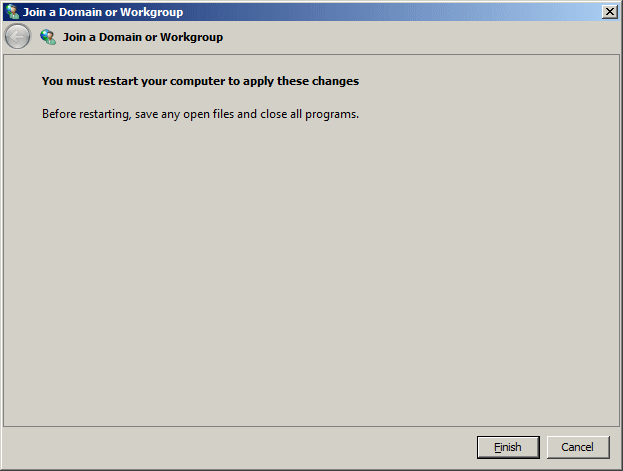
Click Next. You will be reminded that you must reboot:

Joining a Domain

Click Finish. On the System Properties dialog box, click OK. When asked to restart (first save any files that need to be saved), click Restart Now.

When the computer comes up, to login, press Ctrl + Alt + Delete. Set the user name as DomainName\username. An example would be functionx\pkatts, then enter the password. Click the right pointing button.


Home Copyright © 2010-2016, FunctionX