Installing Microsoft SQL Server

A database is one or more lists of values. A computer database is one whose values are stored in a computer medium such as a hard disk. A desktop database is one that is used in one computer. A client/server database is a database that is stored in one computer named a server and other computers named clients connect to the server to access and use the database.

Microsoft SQL Server is an application used to create computer databases for the Microsoft Windows family of server operating systems. Microsoft SQL Server provides an environment used to generate databases that can be accessed from workstations, the Internet, or other media such as a personal digital assistant (PDA).

Introduction to Microsoft SQL Server

To follow our lessons, you must have access to a computer in which Microsoft SQL Server 2012 is installed. To start, you must have a computer that runs an appropriate operating system. If you are just learning, you can use a computer that runs Microsoft Windows XP Professional, Microsoft Windows Vista, Microsoft Windows 7, Microsoft Windows Server 2003, Microsoft Windows Server 2008, or Microsoft Winidows Server 2012.

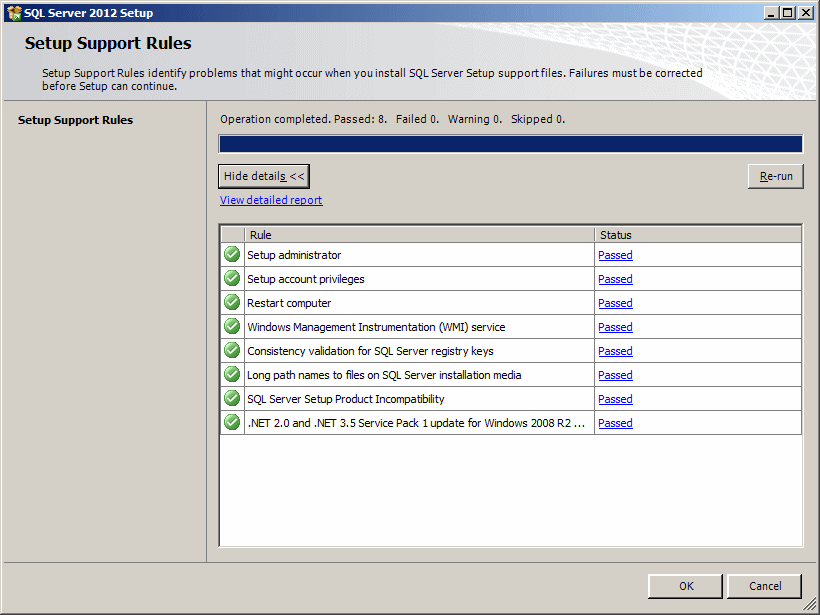
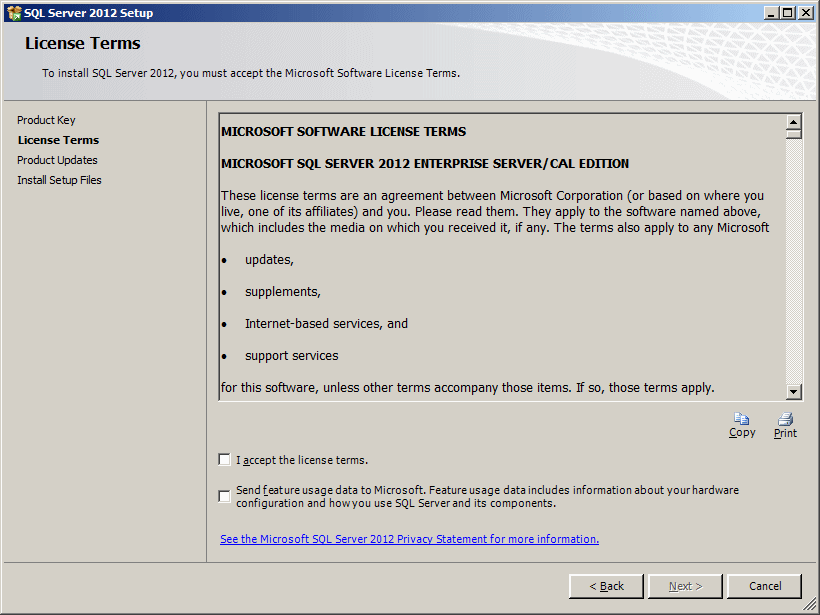
There are various ways to install Microsoft SQL Server, such as installing on the one computer where it will also be used.

Practical LearningPractical Learning: Installing Microsoft SQL Server

  1. Start the computer
  2. Insert the DVD in the drive. You may (should) receive a dialog box with a Run SETUP.EXE link:
     
    AutoPlay

    If so, click Run SETUP.EXE. Otherwise, click Open Folder, then double-click Default.htm, click the version you want to install, and double-click setup
  3. The installation will start:
     

    Installation

    In the left section, click Installation
     

    Installation

  4. If you are only interested in studying database design and development in Microsoft SQL Server, on the right side, click New SQL Server Stand-Alone Installation or Add Features to an Existing Installation.
    The installation would start:
     
    SQL Server 2012 Installation


    Setup

  5. Click OK
  6. The next page of the wizard asks you to enter a product key. Type it and click Next
  7. The License Terms page is presented to you. Read it. If you don't agree with the license, click Cancel:
     

    License Agreement


    Otherwise, click the I Accept check box:
  8.  Click Next
     

    Microsoft SQL Server 2008 Setup

  9. Read the messages and click Install
  10. You may receive a warning message about the firewall:
     

    Firewall warning


    For now, ignore it (there is no true justfication in trying to disable the firewall, the installation will proceed fine).
    Click Next
     

    Firewall warning

  11. The next page of the wizard is for the setup rolect. After making your selecti0n, click Next
  12. The next page allows you to specify what you want to install and what would be left out. Make your selections:
     

    Feature Selection


    The eventual location of Microsoft SQL Server is specified in the bottom text box
  13. After making your selections, click Next
     

    Feature Selection

  14. The next page runs and checks the rules of the installation.
    Check Next
  15. The next page allows you to name the instance of Microsoft SQL Server (and to specify where the server would be installed). In most cases, you should accept the suggested name of the instance as MSSQLSERVER:
     

    Instance


    After making your selections, click Next
  16. The next page mostly allows you to check and confirm the disk space:

    Disk Space


    After checking it, click Next
  17. The next page presents a summary of the server configuration:
     

    Server Configuration


    After checking it, click Next
  18. In the next page, specify the account used as the administrator. To do this, you can click Add Current User:
     

    Database Engine Configuration

  19. Click Next
  20. The next step allows you to specify an account for the analysis services. Click Add Current User
     

    Analysis Services Configuration


  21. Click Next.
    The Reporting Services Configuration page displays

    Reporting Services Configuration

  22. Click Next. If the Distributed Replay Controller page displays, click Add Current User
     

    Installation Rules


    Click Next
  23. The Installation Configuration Reules oage may come up:
     

    Distributed Replay Controller


    Click Nex
  24. The next page presents the Distributed Replay Client
     

    Distributed Replay Client


    Click Next
  25. The next page presents the error reporting
     

    Distributed Replay Client


    Click Next
  26. We get back to the Installation configuration Rules.
    Click Next
  27. The next page gives you a summary of tests that were performed before the installation:


    Ready to Install


    To start the installation, click Install 
  28. The installation would start and a progress bar would indicate the evolution. This can take a while
     

    Installation Progress

  29. When this phase is over, the next page will let you know that the installation is over
     

    Installation


    After reading the message, click Close
  30. Restart the computer

Home Copyright © 2008-2022, FunctionX, Inc. Next