Introduction to Queries
|
Introduction to Queries |
After creating a table and populating it with records, you may want to see what you can do with data stored in it. One of the most commonly performed operations by the users of a database is to look for data or to isolate data that responds to a particular criterion. Looking for data that is conform to a criterion is referred to as querying. The result of retrieving data based on a criterion is called a query. As a database developer, you perform queries by passing instructions to the database engine. This is done using some special reserved words. In SQL Server, data analysis can be performed using Enterprise Manager or the SQL Query Analyzer.
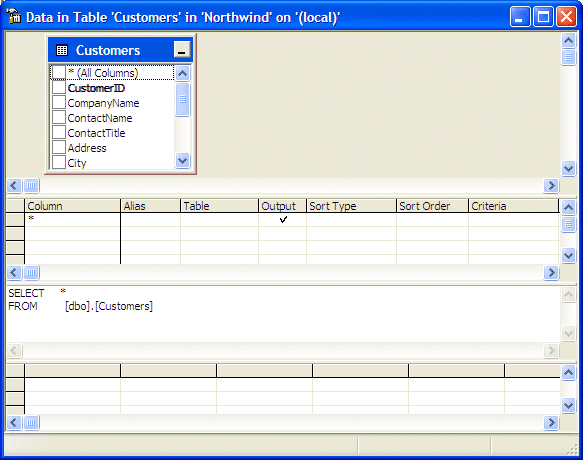
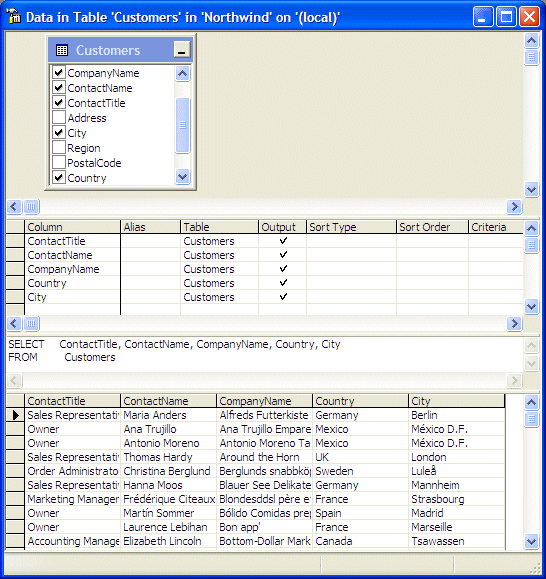
To create a query in Enterprise Manager, you can right-click a table, position the mouse on Open Table, and click Query. This would display the Data In Table window:
The Data In Table window is divided in four sections:
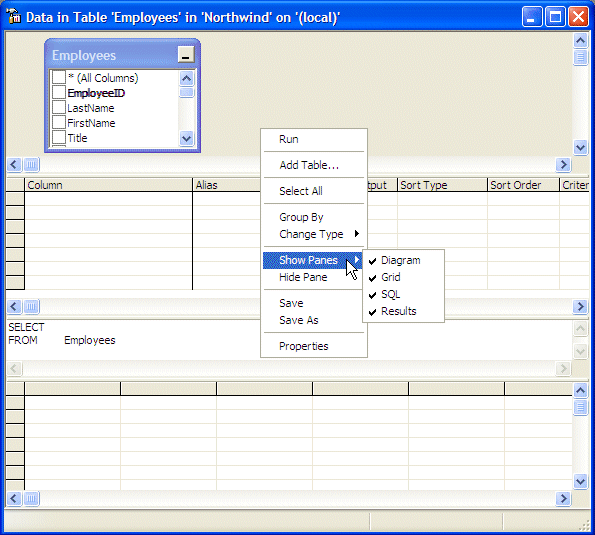
By default, the Data In Table window displays all these sections. If you don't want a particular section or some sections not to display, you can hide them. To hide a certain section, you can right-click it and click Hide Pane. To hide any section, you can right-click anywhere in the window, position the mouse on Show Panes and click one of the selections:
A check mark on the left side of a name means its window is displaying. The absence of a check mark means the section is hidden. This means that, to display a hidden section, you can click it. |
|
Column Selection |
|
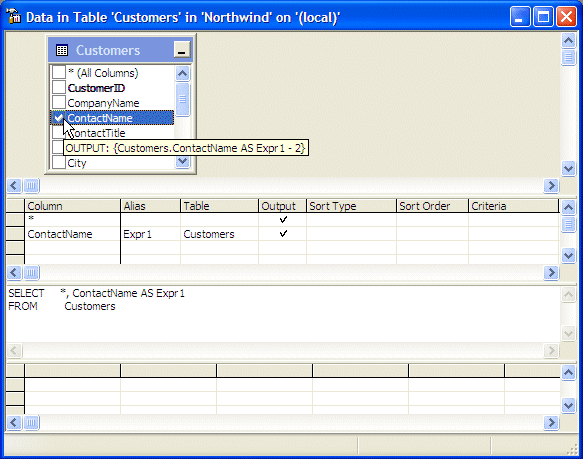
A query is primarily built by selecting one or more columns whose data you want to view. In the top section of the Data In Table window, to select a column, you can click the check box on the left side of the name:
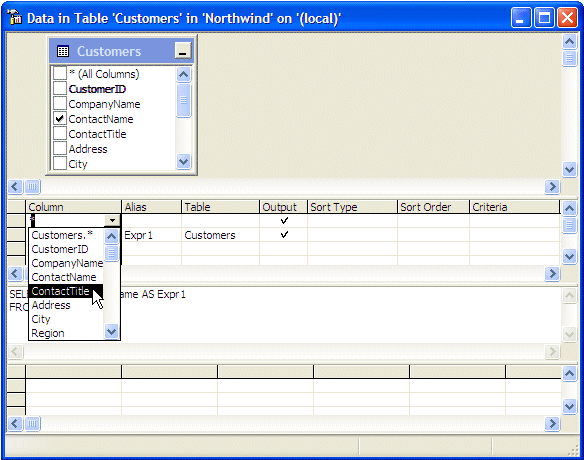
After you have clicked the check box of a column, it becomes selected in the second section also and its name appears in the SQL statement. Another technique used to select a column consists of clicking a box under the Column header of the second section. This would reveal that it is a combo box. You can then click the arrow of the combo box to display the list and select a column from that list:
Notice that, in the second section, if you click a combo box that already contains a column but select another, the previous one would be replaced by the new one. Also, after selecting a column in the second section, its check box becomes selected in the table (in the top section) and its name gets added to the SQL statement. If you know the name of a column that you want to add, which you can see in the top section, you can directly enter it in the SQL statement. Any of the above three techniques allows you to select one or more columns to build the desired query. |
|
Query Execution |
|
After creating a query, you can view its result. To
view this result, you must execute the query. To do this, you can
right-click anywhere in the Data In Table window and click Run.
Alternatively, on the toolbar, you can click the Run button After executing the query, the bottom section gets filled with data from only the selected column(s) of the table. Here is an example:
|
|
|
||
| Previous | Copyright © 2004-2012, FunctionX | Next |
|
|
||