Details on Queries and Data Analysis
|
Details on Queries and Data Analysis |
In your SELECT statement, after specifying the column(s) as we have done so far, when you execute the query, the name of each column would appear as the column header. Fortunately, you can display any string of your choice for a column header. To specify a column header other than the name of the column, if you are using the Data In Table window of a query, type the desired string in the Alias column corresponding to the column. Here is an example:
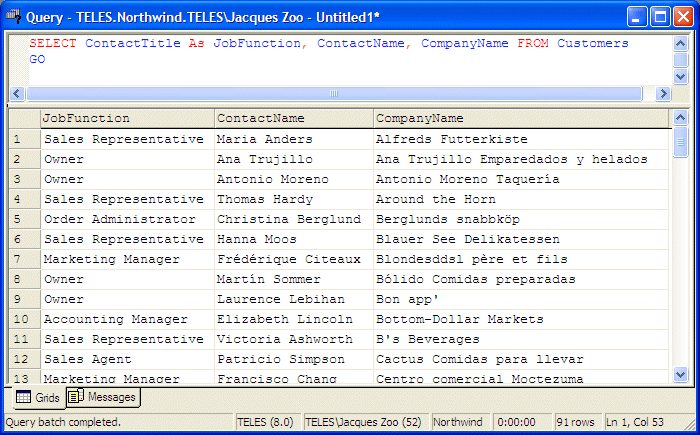
If you are using a Query window from the SQL Query Analyzer or if you are writing your SELECT statement, on the right side of the column name, type AS followed by the desired name of the column header. If the desired column header is in one word, you can simply type it. Here is an example: |
SELECT ContactTitle As JobFunction, ContactName, CompanyName FROM Customers
GO
|
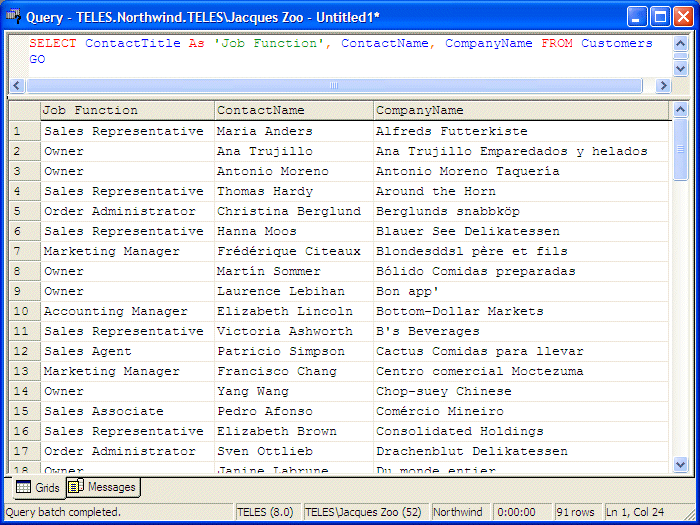
If you want the column header to appear with more than one word, you can include them as a string in single-quotes. Here is an example: |
SELECT ContactTitle As 'Job Function', ContactName, CompanyName FROM Customers
GO
|
Alternatively, you can include the desired column header between an opening square bracket "[" and a closing square bracket "]". Here is an example: |
SELECT ContactTitle As [Job Function], ContactName, CompanyName FROM Customers
GO
|
A Combination or Expression of Columns |
|
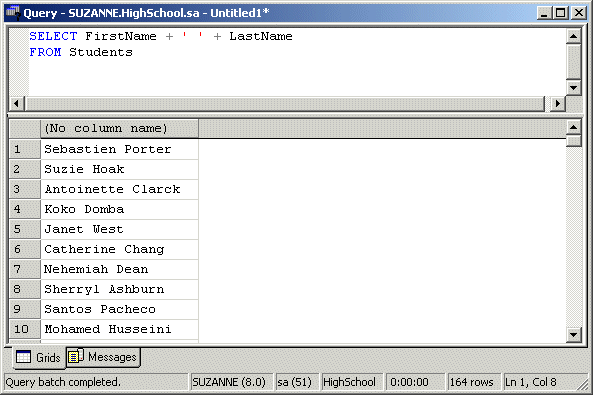
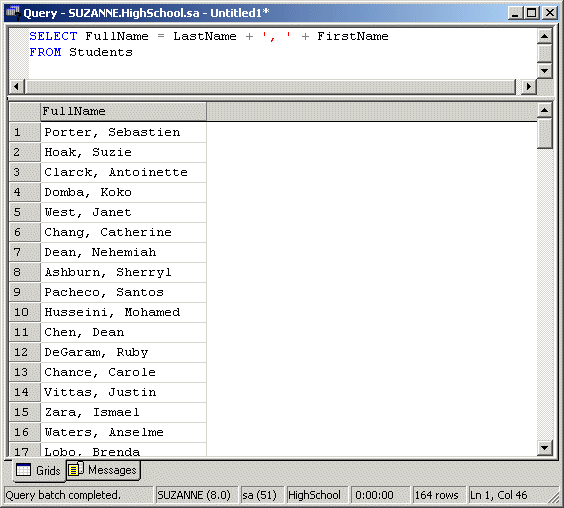
Using the SELECT keyword, we have learned to create a list of isolated columns. These columns were rendered separate of each other. Instead of having separate columns, you can combine them to create a string or a value that is in fact an expression. For example, you can combine a first name and a last name to create a full name. An expression that combines columns can be performed on text-based columns. such as a first name being added to a last name to get a full name. Another expression can use a date on the table, add a number to it to get a date on another day. An expression can also be used to perform a calculation on two or more columns such as employees weekly hours multiplied by their hourly salary to get their weekly salary. The most common operator used is the addition. It can be used to combine two or more strings to get a new one. Here is an example: |
|
The addition can also be used on numeric values. All other arithmetic operators can be used. For example, you can multiply a weekly hours value to an hourly salary to get a weekly salary. The statement of such an expression can be written as follows: SELECT WeeklyHours * HourlySalary FROM Payroll |
|
The Assignment Operator |
|
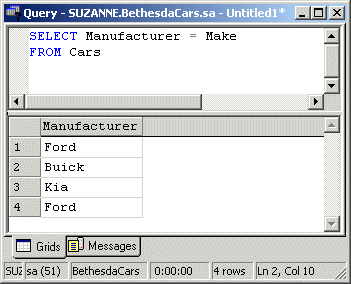
If you just create a regular expression using arithmetic operators as done above, the new column would not have a name as you can see on the above screenshot. The SQL allows you to specify a different name for any column during data analysis or a name for an expression. This is dine using the assignment operator "=". To change the name of a column during data analysis, on the right side of SELECT, type the desired name, followed by the assignment operator, followed by the actual name of the column. Here is an example: |
|
Notice that the new name is the one that appears as the column header. In the same way, if you create an expression, you can assign it to a name of your choice. Here is an example: |
|
List Arrangement |
|
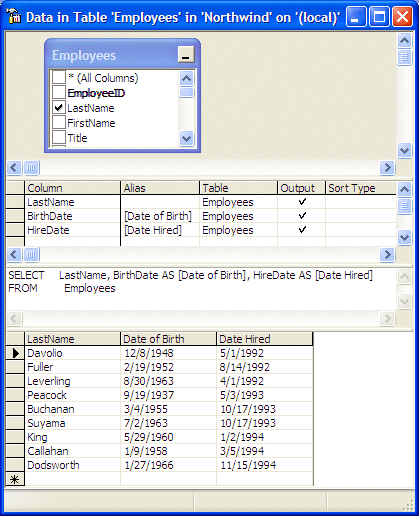
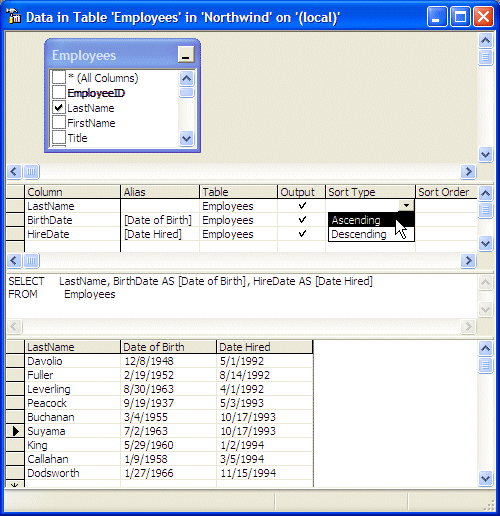
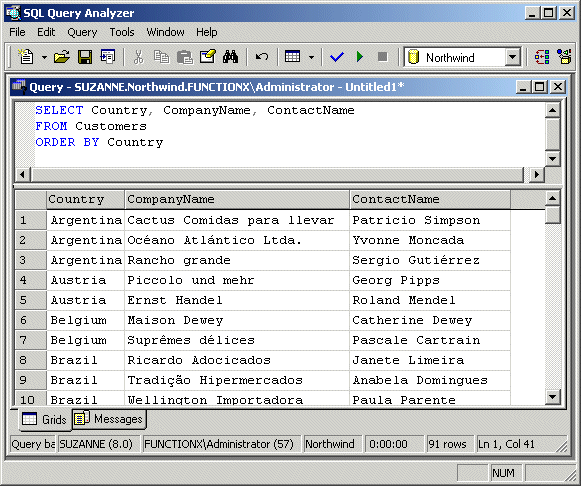
The lists of records we got above with the SELECT statement were presented in the same order they are presented in the table. SQL allows you to arrange records in alphabetical order, in chronological order or in numeric incremental order. After selecting a series of columns, you may want to list the records following an alphabetical order from one specific field. To get an alphabetical or an incremental order of records, you must let the database know what field would be used as reference. To specify the order, if you are using a query in the Data In Table window, in the second section of the window, under the Sort Type column, click the corresponding box of the desired column. This would reveal that it is a combo box. Then click the arrow of that combo box and make your selection:
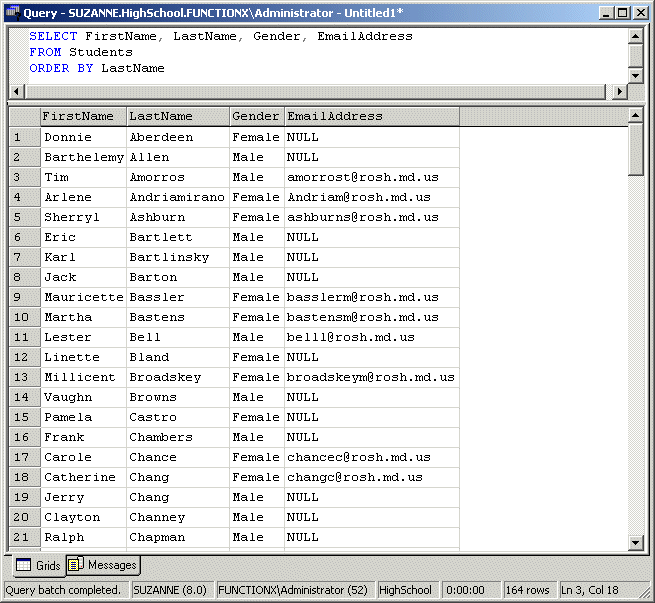
After selecting the desired Sort Type, you can execute the query. In SQL, to specifying the sorting order, use the ORDER BY expression. The syntax used would be: SELECT What FROM WhatObject ORDER BY WhatField; The column used as the basis must be recognized as part of the selected columns. For example, to get a list of students in alphabetical order based on the LastName column, you can use the following statement:
This would produce: In the same way, you can get the list of girls followed by the list of boys by ordering the list in alphabetical order based on the Gender. The statement to produce this ca be written as follows:
As another example, to list all students arranged in alphabetical order by their last name, you can change the statement as follows:
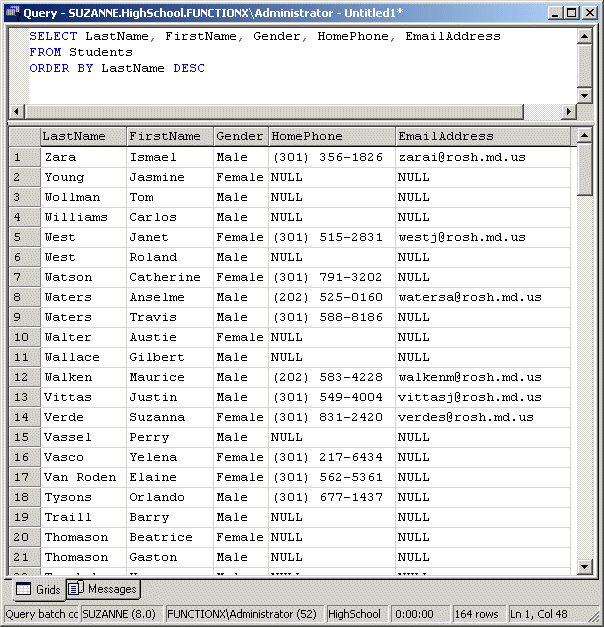
By default, records are ordered in ascending order. Nevertheless, the ascending order is controlled using the ASC keyword specified after the based field. For example, to sort the last names in ascending order including the first and last names, you would use a statement as follows:
On the other hand, if you want to sort records in reverse order, you can use the DESC keywords instead. It produces the opposite result to the ASC effect. Here is an example:
This would produce: On the bottom section of the lower part of the Query window, notice that 164 records were displayed as specified by 164 rows. |
|
|
|
|
|
||
| Previous | Copyright © 2004-2012, FunctionX | Next |
|
|
||