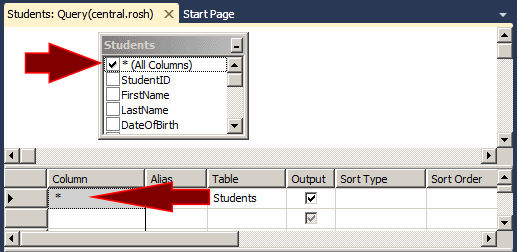
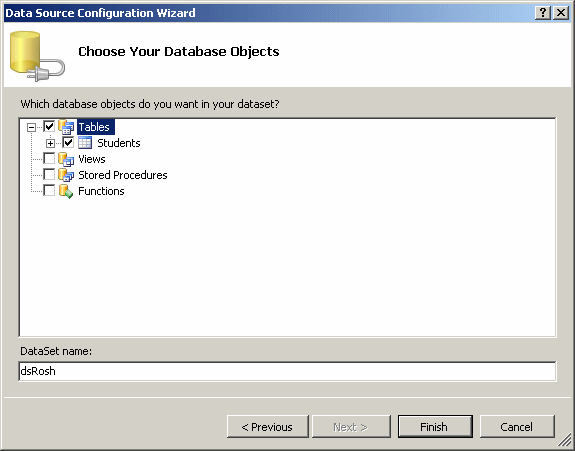
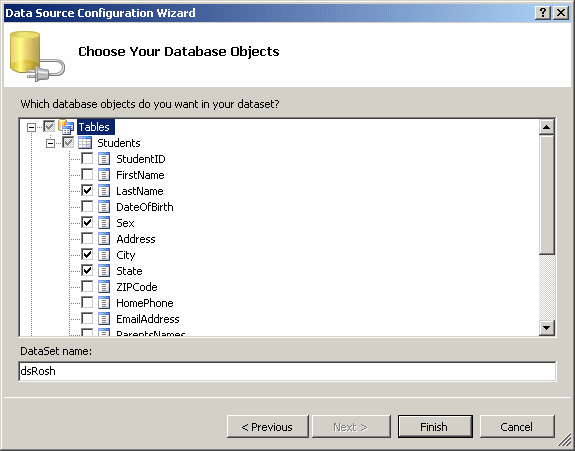
If you are creating a connection using the Data Source Configuration Wizard, to select all columns from a table, you can click the check box of the table that holds the fields. Here is an example:
The SQL provides its own means of performing this operation. The most fundamental keyword used by SQL is SELECT. In order to process a request, you must specify what to select. To perform data selection, the SELECT keyword uses the following syntax: SELECT What FROM WhatObject;
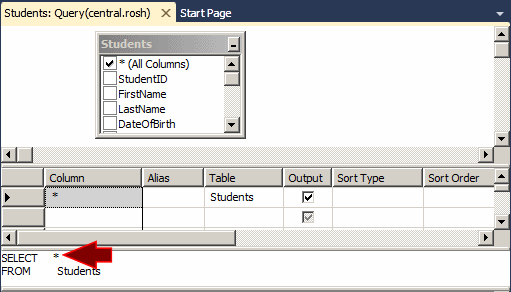
To select everything from a table, if you are working in the table view, in the SQL section, you can type * after the SELECT operator:
If you are writing your SQL statement, you can use the asterisk as the What factor of your SELECT statement. Here is an example: SELECT * FROM Students; You can also qualify the * selector. If you are working in the table view, you have various alternatives:
If you are writing your SQL statement, to qualify the * selector, precede * with the name of the table followed by the period operator. Here is an example: SELECT Students.* FROM Students; In Lesson 13, we saw that you could create an alias for a table by preceding a column with a letter or a word and a period operator, and then entering the name of the table followed by that letter or word. If you are working in the Microsoft SQL Server Management Studio, in the Table window, type the desired alias string in the Alias column corresponding to the column. If you are manually writing your SQL statement, on the left side of .*, type an alias name for the table. Then, after FROM, on the right side of the table, enter the alias name again. Here is an example: SELECT std.* FROM Students std; After writing the expression, if you are working in the table window, you must execute the SQL statement to see its result.
As opposed to selecting all fields, you can select one particular column or a few columns whose data you want to view. If you are working from the table design:
If you are creating a database connection using the Data Source Configuration Wizard, to select one or more columns from a table, first expand the table. Then click the check box of each of the columns you want to include. Here is an example where the LastName, the Sex, the City, and the State boxes are checked:
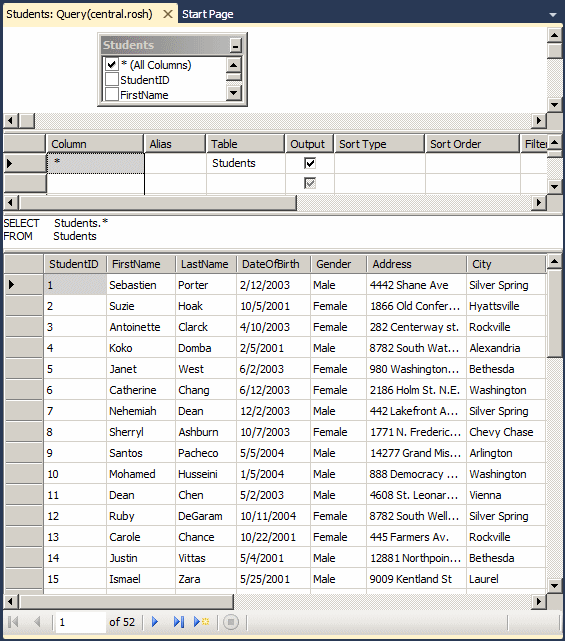
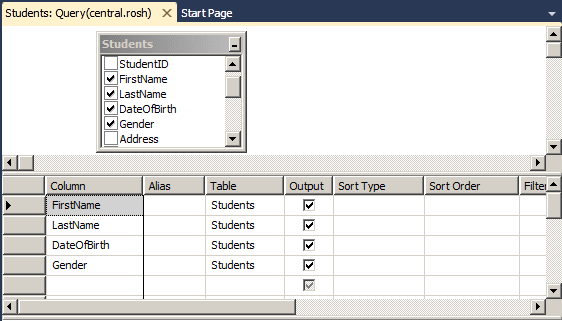
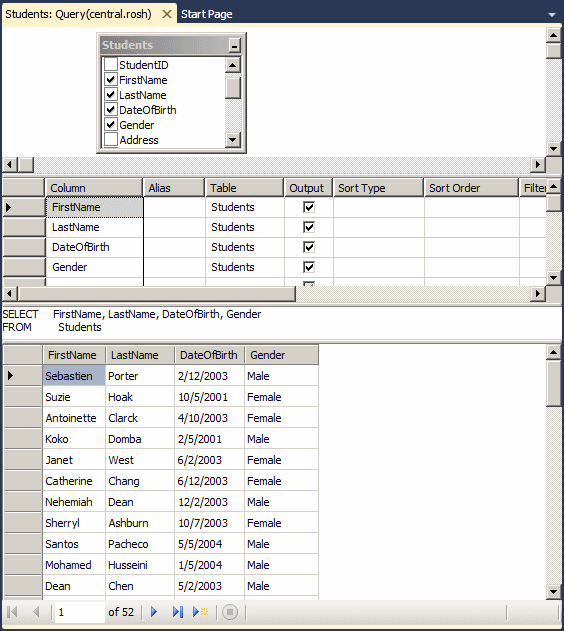
Once again, the SQL provides its own means of selecting some columns from a table. To do this, you can replace the What factor in our formula with the name of the desired columns. To select one column, in the What factor, specify the name of that column. For example, to get the list of last names of students, you would create the following statement: SELECT LastName FROM Students; You can also qualify a column by preceding it with the name of the table followed by the period operator. Here is an example: SELECT Students.LastName FROM Students; When you execute the statement, it would display only the column that contains the last names. To create a SELECT statement that includes more than one column, in the What factor of our syntax, enter the name of each column, separating them with a comma except for the last column. The syntax you would use is: SELECT Column1, Column2, Column_n FROM WhatObject; For example, to display a list that includes the first name, the last name, the sex, the email address, and the home phone of records from a table called Students, you would create the SQL statement as follows: SELECT FirstName, LastName, DateOfBirth, Gender FROM Students; After specifying the column(s) or after including them in your SELECT statement, when you execute the SQL statement, the name of each column would appear as the column header. Here is an example:
Once again, you can qualify each column by preceding it with the name of the table followed by the period operator. Here is an example: SELECT Students.FirstName,
Students.LastName,
Students.DateofBirth,
Students.Gender
FROM Students;
You do not have to qualify all columns, you can qualify some and not qualify some others. The above statement is equivalent to: SELECT Students.FirstName,
LastName,
Students.DateOfBirth,
Gender
FROM Students;
Once again, remember that you can use an alias name for a table by preceding each column with a letter or a word and a period operator, and then entering the name of the table followed by that letter or word. Here is an example: SELECT std.FirstName, std.LastName, std.DateOfBirth, std.Gender FROM Students std; If you specify a column to select from a table, every record would come up. This can cause the same value to repeat over and over. Sometimes you want to show each value only once. To get such a result, you can use the DISTINCT keyword before the name of the column in the SELECT statement. In most cases, you would get a better result if you select only one column. Still, you can use as many columns as you want.
If you create a SELECT statement, when you select a column, you must specify its name. If you are working in the table view in Microsoft SQL Server Management Studio or in Microsoft Visual Studio, the name of a column would display as the column header in the Results section. The string that displays in the column header is called a caption. As an alternative, if you want, you can display the caption of your choice. To create the alias of a column if you are working in the table view of Microsoft SQL Server Management Studio or in Microsoft Visual Studio, in the Criteria section, under the Column header, select a column. Under the Alias column header, enter the desired name of the alias. If you are using a query window or if you are writing your SELECT statement, on the right side of the column name, type AS followed by the desired name of the column header. If the desired column header is in one word, you can simply type it. Here is an example: SELECT FirstName,
LastName,
City AS City
FROM Students;
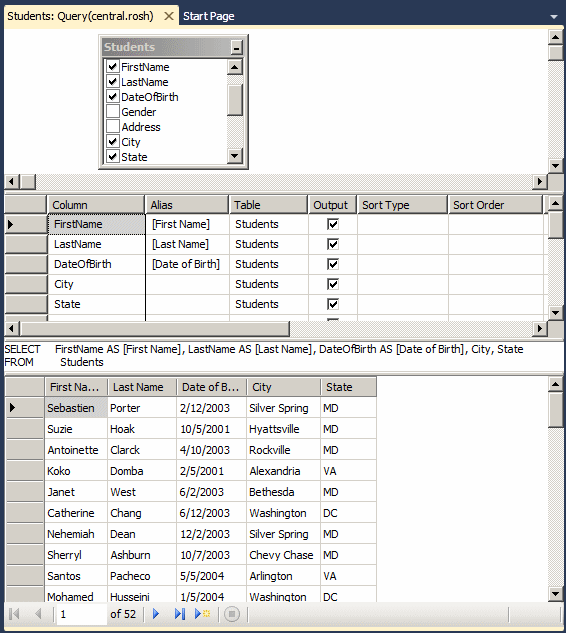
If you want the column header to appear with more than one word, you can provide the words as a string in single-quotes or between the square brackets: [ and ] . Here are examples: SELECT FirstName AS [First Name],
LastName AS [Last Name],
DateOfBirth AS [Date of Birth],
City AS [City],
State
FROM Students;
This would produce:
By qualifying each column, the above statement can also be written as follows: SELECT Students.FirstName AS [First Name],
Students.LastName AS [Last Name],
Students.DateOfBirth AS [Date of Birth],
Students.City AS [City],
Students.State
FROM Students;
It can also be written as follows: SELECT dbo.Students.FirstName AS [First Name],
dbo.Students.LastName AS [Last Name],
dbo.Students.DateOfBirth AS [Date of Birth],
dbo.Students.City AS [City],
dbo.Students.State
FROM Students;
It can also be written as follows: SELECT std.FirstName AS [First Name],
std.LastName AS [Last Name],
std.HomePhone AS [Phone Number],
std.ParentsNames AS [Names of Parents]
FROM Students std;
GOSELECT std.FirstName AS [First Name],
std.LastName AS [Last Name],
std.DateOfBirth AS [Date of Birth],
std.City AS [City],
std.State
FROM Students;
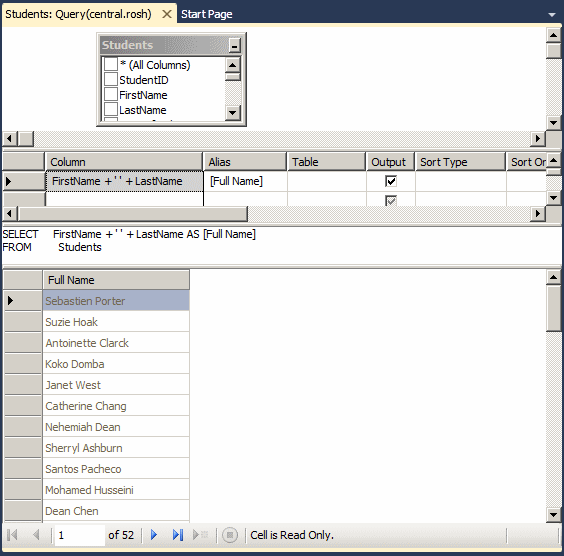
Using the SELECT keyword, we have learned to create a list of isolated columns. These columns were separate of each other. Instead of having separate columns, you can combine them to create a string or a value that is in fact an expression. For example, you can combine a first name and a last name to produce a full name as an expression. Another expression can use a date on the table, add a number to it to get a date on another day. An expression can also be used to perform a calculation on two or more columns such as employees weekly hours multiplied by their hourly salary to get their weekly salary. The most common operator used is the addition. It can be used to combine two or more strings to get a new one. If you are working in the table view of Microsoft SQL Server Management Studio or Microsoft Visual Studio, under the Column header, type the expression. If you are writing your SQL statement, after SELECT, type the expression. After FROM, you must still specify what table holds the column(s) involved in the expression. Here is an example: SELECT FirstName + N' ' + LastName FROM Students; This type of expression would appear without a caption in the Results section. To specify the caption of the column, use the alias features we reviewed in the previous section. Here is an example:
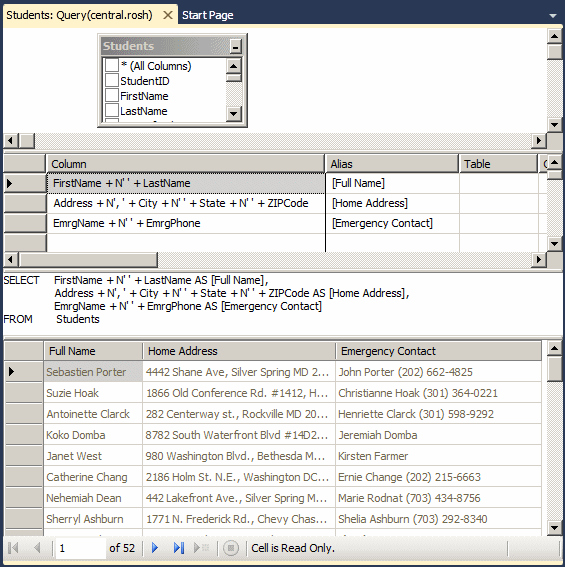
The addition can also be used on numeric values. All other arithmetic operators can be used. For example, you can multiply a weekly hours value to an hourly salary to get a weekly salary. The statement of such an expression can be written as follows: SELECT WeeklyHours * HourlySalary FROM Payroll Just as you can create one expression, you can add as many expressions as you want in the SELECT operation of a table. You can also create an alias for an expression to give it the desired name. To do this, on the right side of the expression, type AS followed by the name. AS we learned earlier, if the alias is in more than one word, include it in either single quotes or square brackets. Here is an example: SELECT FirstName + N' ' + LastName AS [Full Name],
Address + N', ' + City + N' ' + State + N' ' + ZIPCode AS [Home Address],
EmrgName + N' ' + EmrgPhone AS [Emergency Contact]
FROM Students
This would produce:
If you just create a regular expression using arithmetic operators, the new column would not have a name. The SQL allows you to specify a different name for any column during data selection or a name for an expression. This is done using the assignment operator "=". To change the name of a column during data selection in the table view in Microsoft SQL Server Management Studio or in Microsoft Visual Studio, in your SQL statement, on the right side of SELECT, type the desired name, followed by the assignment operator, followed by the actual name of the column. Here is an example: SELECT EmergencyName = EmrgName FROM Students; If you want to use more than one column, type each and assign it the desired name, separate them with commas. Here is an example: SELECT LastName,
EmergencyName = EmrgName,
EmergencyPhone = EmrgPhone
FROM Students;
You can also include the name between single-quotes or the square brackets. Here are examples: SELECT LastName + N', ' + FirstName AS [Full Name],
[Emergency Name] = EmrgName,
'Emergency Phone' = EmrgPhone
FROM Students;
|
|||||||||||||||||||||||||||||||||||