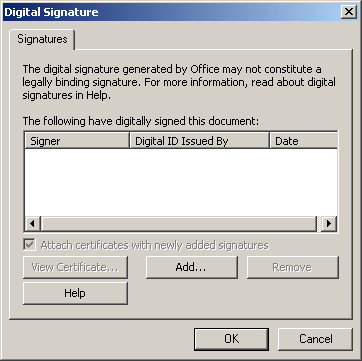
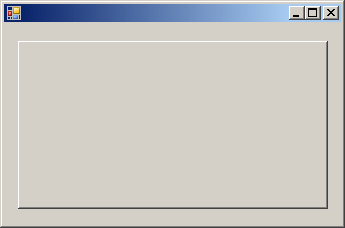
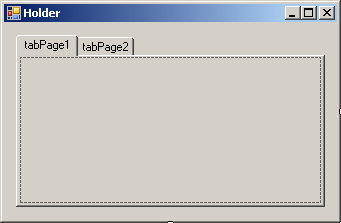
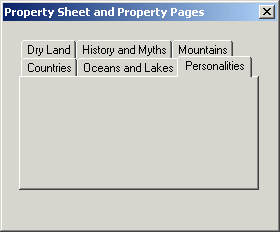
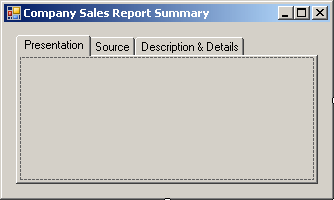
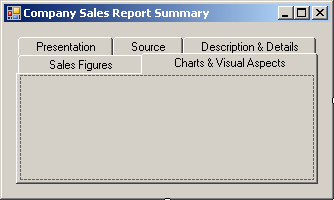
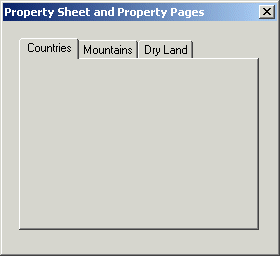
In most other cases, a property page appears in a group with other pages. It functions like a group of pieces of paper placed on top of each other. Each piece is represented by a tab that allows the user to identify it: 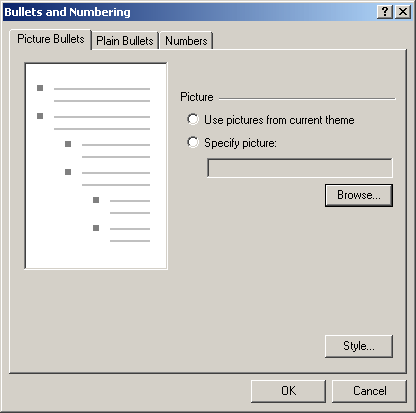 To use a property page, the user clicks the header, also called tab, of the desired page. This brings that page up and sends the other(s) in the background: 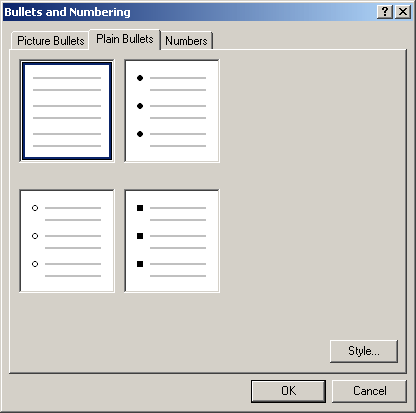 If the user needs access to another page, he or she can click the desired tab, which would bring that page in front and send the previously selected page to the back. The pages are grouped and hosted by an object called a property sheet. Like a form, the property pages of a property sheet are simply used to carry or hold other controls. The major idea of using a property sheet is its ability to have many controls available in a relatively smaller area.
The property pages of a property sheet are also referred
to as tab controls. To support property pages, the .NET Framework provides a
class named TabControl. At design time, to add a property sheet to
your application, in the Containers section of the Toolbox, click TabControl
To programmatically create a property sheet, declare a variable of type TabControl, allocate memory for it using the new operator. Like all other objects, a tab control must have a name. After declaring the variable and initializing it, add it to the Controls collection of its container. Here is an example of creating a tab control: using System;
using System.Drawing;
using System.Windows.Forms;
public class Exercise : System.Windows.Forms.Form
{
TabControl tclPropertySheet;
public Exercise()
{
InitializeComponent();
}
private void InitializeComponent()
{
Text = "Domain Configuration";
Size = new Size(345, 228);
StartPosition = FormStartPosition.CenterScreen;
tclPropertySheet = new TabControl();
tclPropertySheet.Location = new Point(14, 16);
tclPropertySheet.Size = new Size(310, 170);
Controls.Add(tclPropertySheet);
}
}
public class Program
{
static int Main()
{
System.Windows.Forms.Application.Run(new Exercise());
return 0;
}
}
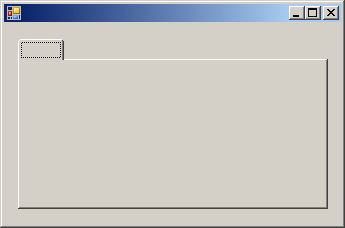
This would produce:
If you want the property sheet to occupy the whole form or to occupy a section of it, you can specify this using the Dock property.
As mentioned previously, a tab control is made of tabs. These are the actual objects that make up a tab control. A tab control can have one or more of them. If you create only a tab control in your application, it is useless and does not play its intended role. To make it useful, you must add property pages to it.
To support property pages, the .NET Framework provides the TabPage class. Because the property pages completely depend on the tab control, the TabPage class is not represented in the Toolbox. If you want to add a tab page to a tab control, the TabControl class is equipped with a property named TabPages, which is of type TabPageCollection. TabPageCollection is a collection class that implements the IList, the ICollection, and the IEnumerable interfaces. If you create a tab control at design time by taking it from the Toolbox and adding it to a form, the tab control gets automatically equipped with two tabs. Here is an example:
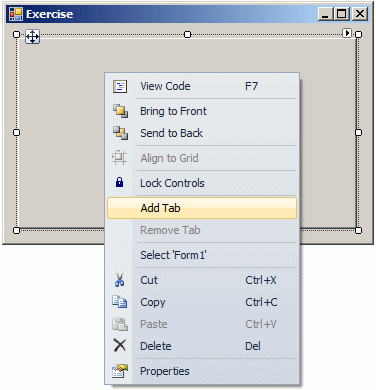
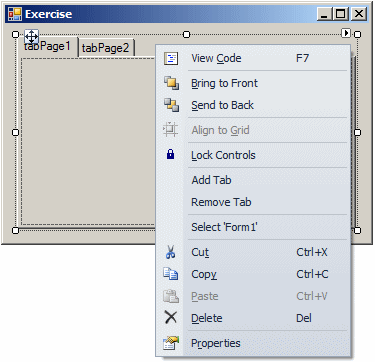
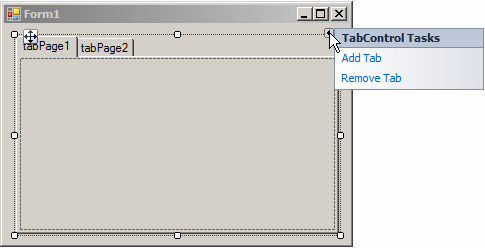
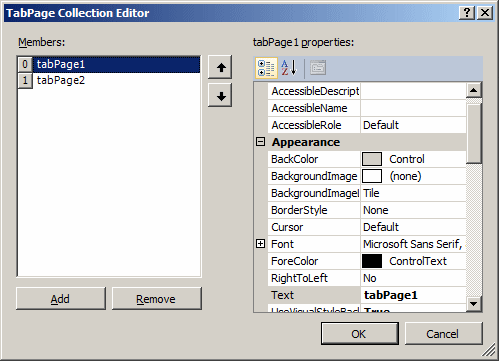
At design time, to add a property page, you have various options:
If you create the tab pages at design time, like all other controls, the names of tab pages are cumulative. As you add them, the first would be named tabPage1, the second would be named tabPage2, etc. If you plan to programmatically refer to the tab pages, you should give each a more meaningful name. As done with any other control, to set the name of a property page, after selecting it, in the Properties window, change the value of the (Name) field. To programmatically create a property page, declare a variable of type TabPage, allocate memory for it using the new operator, and add it to the Controls collection of its eventual tab control. Here is an example: public class Exercise : System.Windows.Forms.Form
{
TabControl tclPropertySheet;
TabPage pgeController;
public Exercise()
{
InitializeComponent();
}
private void InitializeComponent()
{
Text = "Domain Configuration";
Size = new Size(345, 228);
StartPosition = FormStartPosition.CenterScreen;
tclPropertySheet = new TabControl();
tclPropertySheet.Location = new Point(14, 16);
tclPropertySheet.Size = new Size(310, 170);
pgeController = new TabPage();
tclPropertySheet.Controls.Add(pgeController);
Controls.Add(tclPropertySheet);
}
}
This would produce:
Alternatively, you can declare a variable of type TabPage, allocate memory for it using the new operator, and add it to the TabPages collection of its tab control. Here is an example: public class Exercise : System.Windows.Forms.Form
{
TabControl tclPropertySheet;
TabPage pgeController;
TabPage pgeAccount;
public Exercise()
{
InitializeComponent();
}
private void InitializeComponent()
{
Text = "Domain Configuration";
Size = new Size(345, 228);
StartPosition = FormStartPosition.CenterScreen;
tclPropertySheet = new TabControl();
tclPropertySheet.Location = new Point(14, 16);
tclPropertySheet.Size = new Size(310, 170);
pgeController = new TabPage();
tclPropertySheet.Controls.Add(pgeController);
pgeAccount = new TabPage();
tclPropertySheet.TabPages.Add(pgeAccount);
Controls.Add(tclPropertySheet);
}
}
If you have added a tab page by mistake or you don't want a particular page anymore, you can remove it. To remove a property page, first click its tab to select it. Then,
To programmatically delete a tab control, call the Remove() method of the TabPages property.
Many of the effects you will need on pages have to be set on the TabControl control and not on individual pages. This means that, to manage the characteristics of pages, you will change the properties of the parent TabControl control. At any time, whether working on the TabControl control or on one of its tab pages, you should first know what object you are working on by selecting it. To select the TabControl control itself, you have three main options:
At run time, neither the user nor you would really need to select a tab control. On the other hand, with code, you can refer to the tab control using its name.
Before manipulating a tab page, you must first select it. You various options:
As described in our introduction, to select a property page, the user can click its tab. To programmatically select a tab page, you have various options. We mentioned already that the tab pages are added cumulatively. The application keeps track of their position. To keep track of the positions of the tab pages, the TabControl class is equipped with a property named SelectedIndex. Based on this, to select a tab page using its position, assign the desired index to this property. Here is an example: private void button1_Click(object sender, EventArgs e)
{
tabControl1.SelectedIndex = 1;
}
You can also call the TabControl.SelectTab() method. In this case, pass the tab index to the method. An alternative is to select a tab page using its object name. To support this, the TabControl class is equipped with the SelectedTab property. Using it, to select a tab page, assign its name to the SelectedTab property. Here is an example: private void button1_Click(object sender, EventArgs e)
{
tabControl1.SelectedTab = tabPage3;
}
You can also call the TabControl.SelectTab() method. In this case, pass the name of the tab to the method. Both the TabControl.SelectedIndex and the TabControl.SelectedTab property are read/write. This means that, besides selecting a property page, you can use them to find out what tab page is currently selected. To do this, simply get the value of the control at the time you are accessing it.
Like any other visual window, the tab control uses such properties as the the Location (Right and Top values), the Size (Width and Height values), the tab stop (TabStop), the tab index (TabIndex), the cursor (Cursor), etc. After adding the TabControl control to your form and after adding one or more tab pages, the property pages are created where the TabControl control is positioned and their dimensions are used by the tab control. This means that, if you want a different position, a smaller or larger property sheet, you must modify the dimensions of the TabControl control and not those of the tab pages, even though each tab page has a Location property and dimensions (the Size property). To programmatically find out the location and size of a property sheet, the TabControl class is equipped with a property named DisplayRectangle that produces a Rectangle value. Here is an example of using it: private void Exercise_Load(object sender, EventArgs e)
{
Rectangle rctLocationSize = tabControl1.DisplayRectangle;
textBox1.Text = rctLocationSize.Left.ToString();
textBox2.Text = rctLocationSize.Top.ToString();
textBox3.Text = rctLocationSize.Width.ToString();
textBox4.Text = rctLocationSize.Height.ToString();
}
Probably the first obvious characteristic of a tab page is the word or string that identifies it to the user. That is, the string that displays on the tab of a property page. This is known as its title or its caption. If you create your tab pages at design time, by default, the captions are set cumulatively as the pages are added. Usually you will not use these titles because they are meaningless. To display a custom title for a property page, on the form, select the tab control:
To programmatically change the title of a property page, assign a string to its Text property. Here is an example: using System;
using System.Drawing;
using System.Windows.Forms;
public class Exercise : System.Windows.Forms.Form
{
TabControl tclPropertySheet;
TabPage pgeController;
public Exercise()
{
InitializeComponent();
}
private void InitializeComponent()
{
Text = "Domain Configuration";
Size = new Size(345, 228);
StartPosition = FormStartPosition.CenterScreen;
tclPropertySheet = new TabControl();
tclPropertySheet.Location = new Point(14, 16);
tclPropertySheet.Size = new Size(310, 170);
pgeController = new TabPage();
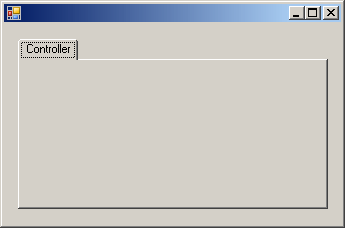
pgeController.Text = "Controller";
tclPropertySheet.Controls.Add(pgeController);
Controls.Add(tclPropertySheet);
}
}
public class Program
{
static int Main()
{
System.Windows.Forms.Application.Run(new Exercise());
return 0;
}
}
This would produce:
When the user positions the mouse on a tab, you can (slightly) change the color of the caption to blue. To support this, the TabControl class is equipped with the HotTrack Boolean property. Its default value is False. At design time, to specify this value, select the control and, in the Properties window, select the desired option of the HotTrack field. To programmatically set this property, assign the true or false value to the property. Here is an example: private void InitializeComponent()
{
Text = "Domain Configuration";
Size = new Size(345, 228);
StartPosition = FormStartPosition.CenterScreen;
tclPropertySheet = new TabControl();
tclPropertySheet.Location = new Point(14, 16);
tclPropertySheet.Size = new Size(310, 170);
tclPropertySheet.HotTrack = true;
pgeController = new TabPage();
pgeController.Text = "Controller";
tclPropertySheet.Controls.Add(pgeController);
Controls.Add(tclPropertySheet);
}
When you specify the caption of a tab page, the string displays from the left to the right side of the tab area. If you want, you can specify how much space should be left empty on the left side of the caption. This space is referred to as padding. To support this, the TabControl class is equipped with a property named Padding. The Padding property is of type Point. During design, to specify the amount of padding, select the tab control on the form. In the Properties window, click the + button of the Padding field, type the desired amounts of the X and the Y values. To programmatically specify the padding amount, assign a Point value to the Padding property of your TabControl object.
A tab is meant to show a relatively short caption that indicates to the user what the tab page contains. If you want to provide more information, you can display a more explicit tool tip that would display when the user positions the mouse on the tab. To support the tooltips on tabs, the TabControl class is equipped with a Boolean property named ShowToolTips. Therefore, if you want the tabs to displays the tool tips, first set this property to True. To show a tool tip on a tab, select it on the tab control and, in the Properties window, enter a string in the ToolTipText field.
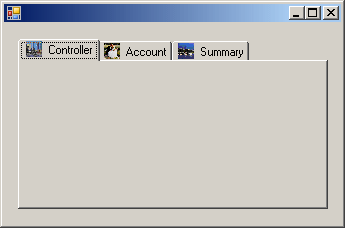
Besides, or instead of, the caption, you can display an icon on the tab of one or more or some selected tabs of your control. To start, you should create an image list and add some images or icons to it. After creating the image list, to associate it with the tab control, on the form, select the control. In the Properties window, click the arrow of the ImageList field and select the image list. To specify the image list with code, first create the image list, visually or programmatically. To associate the image list with the tab control, assign the name of the image list to the ImageList property of the tab control. Here is an example: To visually specify the image to display on a tab:
Before programmatically using the images on a tab control, you must first create an ImageList object and then assign it to the tab control. Here is an example: public class Exercise : System.Windows.Forms.Form
{
TabControl tclPropertySheet;
ImageList lstImages;
public Exercise()
{
InitializeComponent();
}
private void InitializeComponent()
{
Text = "Domain Configuration";
Size = new Size(345, 228);
StartPosition = FormStartPosition.CenterScreen;
tclPropertySheet = new TabControl();
tclPropertySheet.Location = new Point(14, 16);
tclPropertySheet.Size = new Size(310, 170);
tclPropertySheet.HotTrack = true;
lstImages = new ImageList();
lstImages.Images.Add(Image.FromFile(@"E:\Programs\image1.jpg"));
lstImages.Images.Add(Image.FromFile(@"E:\Programs\Image2.jpg"));
lstImages.Images.Add(Image.FromFile(@"E:\Programs\Image3.jpg"));
tclPropertySheet.ImageList = lstImages;
}
}
After assigning an image list to the tab control, to programmatically specify the image to display on a tab, assign an index from an ImageList object to the tab page. To support this, the TabPage class is equipped with a property named ImageIndex that is of type int. Here is an example: public class Exercise : System.Windows.Forms.Form
{
ImageList lstImages;
TabPage pgeController;
TabPage pgeAccount;
TabPage pgeSummary;
TabControl tclPropertySheet;
public Exercise()
{
InitializeComponent();
}
private void InitializeComponent()
{
Text = "Domain Configuration";
Size = new Size(345, 228);
StartPosition = FormStartPosition.CenterScreen;
tclPropertySheet = new TabControl();
tclPropertySheet.Location = new Point(14, 16);
tclPropertySheet.Size = new Size(310, 170);
tclPropertySheet.HotTrack = true;
lstImages = new ImageList();
lstImages.Images.Add(Image.FromFile(@"E:\Programs\image1.jpg"));
lstImages.Images.Add(Image.FromFile(@"E:\Programs\Image2.jpg"));
lstImages.Images.Add(Image.FromFile(@"E:\Programs\Image3.jpg"));
tclPropertySheet.ImageList = lstImages;
pgeController = new TabPage();
pgeController.Text = "Controller";
pgeController.ImageIndex = 1;
tclPropertySheet.Controls.Add(pgeController);
pgeAccount = new TabPage();
pgeAccount.Text = "Account";
pgeAccount.ImageIndex = 2;
tclPropertySheet.TabPages.Add(pgeAccount);
pgeSummary = new TabPage();
pgeSummary.Text = "Summary";
pgeSummary.ImageIndex = 0;
tclPropertySheet.TabPages.Add(pgeSummary);
Controls.Add(tclPropertySheet);
}
}
Here is an example of what this would produce:
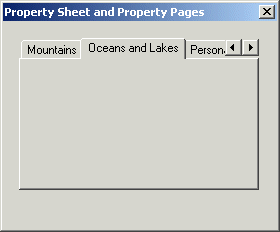
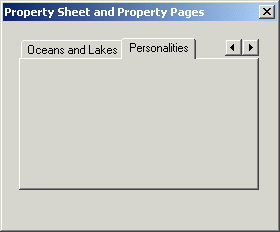
If you have many tab pages and the width of the tab control cannot show all tabs at the same time, the control would add two navigation arrows to its top right corner to let the user know that there are more property pages:
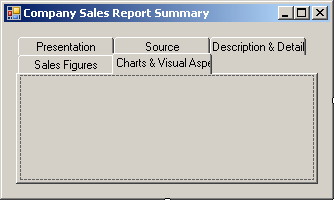
By default, the navigation buttons would come up because the control uses a property that controls their availability. If you do not want the navigation arrows, select the tab control and, in the Properties window, set the MultiLine property to True. This would create cascading tabs and the user can simply select the desired property page from its tab:
Of course, you can also do this programmatically by assigning the TabControl.MultiLine to true. After setting the MultiLine property to true, depending on the number of tab pages, the control may have 2, 3 or more rows. To find out the number of rows that the tab control contains, you can get the value of the RowCount property of the TabControl class. This property is of type int.
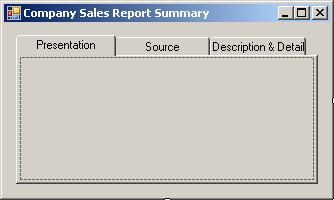
When you specify the caption of a property page, its is resized to accommodate the string. This means that the tab would get enlarged or narrowed, depending on the length of the caption. As an alternative, you can make all tabs use the same width. To support this, the TabControl class is equipped with a property named SizeMode. The SizeMode property is based on the TabSizeMode enumeration that has three members: Normal (the default), Fixed, and FillToRight. To control the size mode at design time, on the form, select the tab control. In the Properties window, click SizeMode and select the desired option: Normal: Each tab would be resized to fit its caption:
Fixed: The designer would find out what tab has the longest caption. It would then use that length as the common width of all the other tabs:
If the tab control's MultiLine property is set to true, the designer would get the length of the longest string of the first (top) row:
That length would be used as the common length to all the tabs on all rows:
FillToRight: This option is valid only if the MultiLine property is set to true. With this option, the tabs on each row would be resized so that the total length of the rows fit the width of the tab control:
Besides, or in addition to, the size mode, you can control the widths of the tab by specifying your own width. To do this, first set the SizeMode property to true. Then, use the ItemSize property of the tab control to specify how much width you want to apply to all tabs of the control.
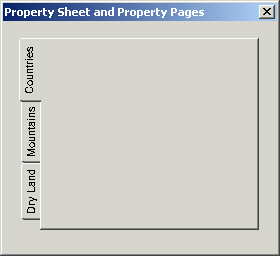
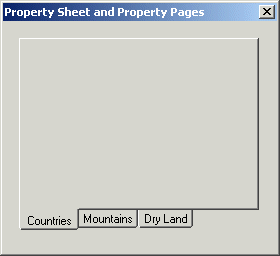
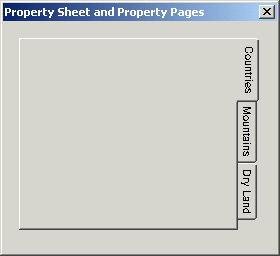
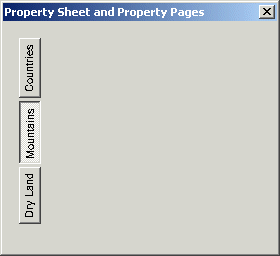
As you are adding pages to a TabControl control, the tabs of the pages are positioned on the top border of the TabControl area. You can reposition them to the left, the right, or the bottom borders of the control. The placement of the tab is set using the Alignment property of the TabControl control. The possible values of this property are Top, Left, Right, and Bottom:
To support the alignment of the tabs of a property sheet, the TabControl class is equipped with a property named Alignment. This property is based on the TabAlignment enumeration and its members are Bottom, Left, Right, and Top. To programmatically control the alignment of the tabs, assign the desired value to the tab control. Here is an example: public class Exercise : System.Windows.Forms.Form
{
TabPage pgeController;
TabPage pgeAccount;
TabControl tclPropertySheet;
public Exercise()
{
InitializeComponent();
}
private void InitializeComponent()
{
Text = "Domain Configuration";
Size = new Size(345, 228);
StartPosition = FormStartPosition.CenterScreen;
tclPropertySheet = new TabControl();
tclPropertySheet.Location = new Point(14, 16);
tclPropertySheet.Size = new Size(310, 170);
tclPropertySheet.HotTrack = true;
tclPropertySheet.Alignment = TabAlignment.Left;
pgeController = new TabPage();
pgeController.Text = "Controller";
tclPropertySheet.Controls.Add(pgeController);
pgeAccount = new TabPage();
pgeAccount.Text = "Account";
tclPropertySheet.TabPages.Add(pgeAccount);
Controls.Add(tclPropertySheet);
}
}
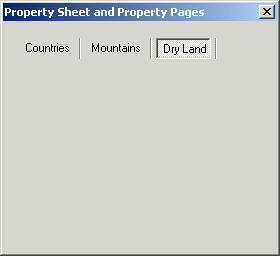
If you want to create a discrete property sheet and do not want to display the traditional tabs, you can replace the tabs with buttons. This is controlled by the Appearance property that presents three options: Normal (the default), Buttons, and FlatButtons. The Normal and the Buttons values can be used on all four views. The FlatButtons option is available only if the Alignment property is set to Top.
To support the option of showing tabs or buttons, the TabControl class is equipped with the Appearance property that is based on the TabAppearance enumeration. Therefore, to specify this option, assign the desired value to your TabControl object. Here is an example: public class Exercise : System.Windows.Forms.Form
{
TabPage pgeController;
TabPage pgeAccount;
TabPage pgeSummary;
TabControl tclPropertySheet;
public Exercise()
{
InitializeComponent();
}
private void InitializeComponent()
{
Text = "Domain Configuration";
Size = new Size(345, 228);
StartPosition = FormStartPosition.CenterScreen;
tclPropertySheet = new TabControl();
tclPropertySheet.Location = new Point(14, 16);
tclPropertySheet.Size = new Size(310, 170);
tclPropertySheet.HotTrack = true;
tclPropertySheet.Appearance = TabAppearance.FlatButtons;
pgeController = new TabPage();
pgeController.Text = "Controller";
tclPropertySheet.Controls.Add(pgeController);
pgeAccount = new TabPage();
pgeAccount.Text = "Account";
tclPropertySheet.TabPages.Add(pgeAccount);
pgeSummary = new TabPage();
pgeSummary.Text = "Summary";
tclPropertySheet.TabPages.Add(pgeSummary);
Controls.Add(tclPropertySheet);
}
}
|
|||||||||||||||||||||||||||||||||||||||||||||||||||||||||||||||||||||||||||||||||||

