Introduction to Threading

Introduction to Threading
Foundations of Threading
Introduction to Processes
A computer application is made of one or various sub-applications that perform relatively small operations. The main purpose of a program is to do something, such as performing calculations in a spreadsheet or storing values in the computer memory. To make this possible, the operating system must be able to launch or execute a program. This involves millions (or billions) of operations performed and processed behind-the-scenes in the computer. For this reason, a computer application is called a process.
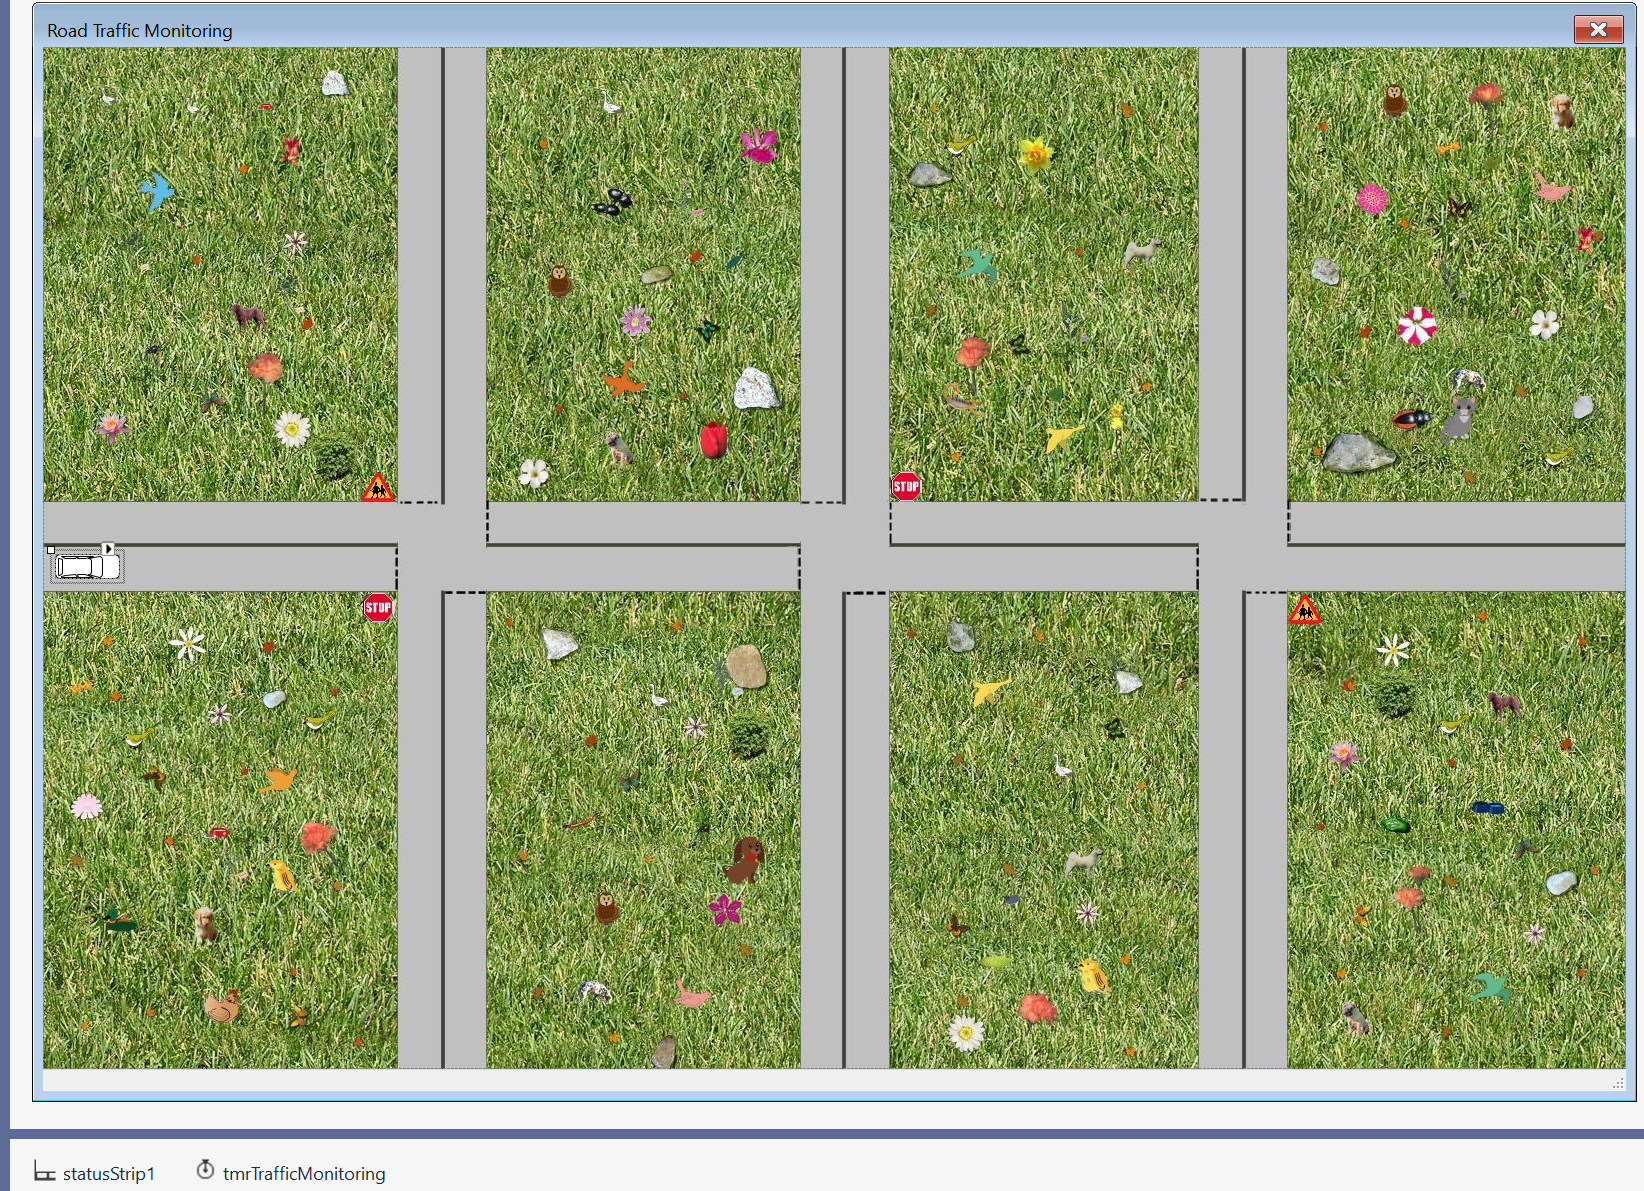
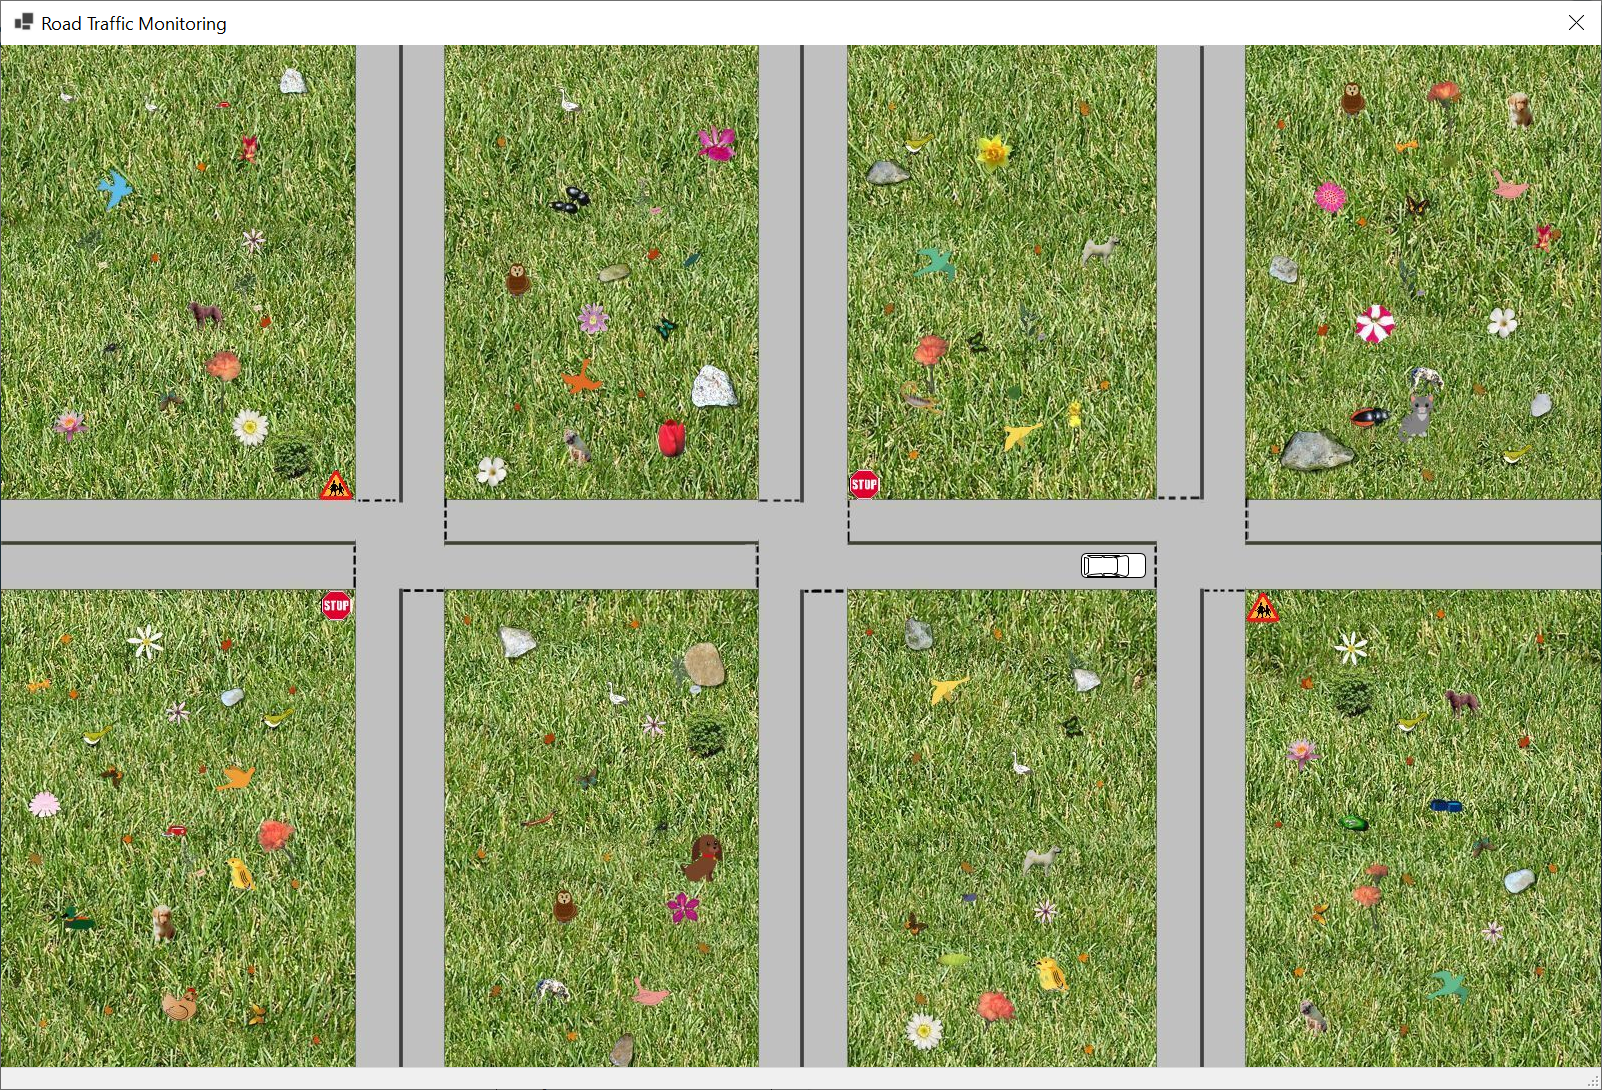
![]() Practical Learning: Introducing Threading
Practical Learning: Introducing Threading

![]()
FormBorderStyle: FixedDialog
Text:            Road Traffic Monitoring
Size:            1622,1100
MaximizeBox:     False
MinimizeBox:     False
Image:    RoadMap1.jpg
SizeMode: AutoSize
(Name):   pbxRoadMap
Image:    LRVehicle1.png
SizeMode: AutoSize
(Name):   pbxLRVehicle
Enabled:  True
Interval: 10
(Name):   tmrTrafficMonitoring
Creating a Process
The Win32 library is equipped with various types of functions to create and manage processes. To start, the function used to create a process has the following syntax:
BOOL WINAPI CreateProcess
(
  _In_opt_     LPCTSTR lpApplicationName,
  _Inout_opt_  LPTSTR lpCommandLine,
  _In_opt_     LPSECURITY_ATTRIBUTES lpProcessAttributes,
  _In_opt_     LPSECURITY_ATTRIBUTES lpThreadAttributes,
  _In_         BOOL bInheritHandles,
  _In_         DWORD dwCreationFlags,
  _In_opt_     LPVOID lpEnvironment,
  _In_opt_     LPCTSTR lpCurrentDirectory,
  _In_         LPSTARTUPINFO lpStartupInfo,
  _Out_        LPPROCESS_INFORMATION lpProcessInformation
);
To support processes, the .NET Framework provides a class named Process that is defined in the System.Diagnostics namespace.
To visually create a process, after starting a Windows Forms App project, from the Components section of the Toolbox, click Process and click the form. To give you more information about a process, the .NET Framework provides a class named ProcessStartInfo, also defined in the System.Diagnostics namespace.
Introduction to Threads
Overview
As mentioned previously, a process or application is made of small sub-programs that take care of internal operations of a computer application:
For example, in a graphics application, one sub-program can be in charge of arranging a series of bits (1s and 0s) in order to produce a clear or recognizable picture. Another sub-program can check the correctness of bits and retrieve their particular arrangement (of the bits) to display them on the monitor screen to produce a meaningful picture. Another sub-program can take care of keeping the arranged bits on the screen so the picture or graphics would not randomly vibrate, and so on. Another sub-program may be in charge of displaying an application on the screen, to the user.
The sub-programs are put (or work) together to produce the results sought by a user. Of course, these sub-programs work behind-the-scenes (and of course, the user doesn't care about what is happening). These small sub-applications are called threads.
In order for a process to perform its desired operation(s), the operating system must give it (allocate to it) the resources that are necessary. There are low-level resources that involve the hardware and high-level resources. Examples of low-level resources are the processor's ability to perform calculations, the processor's time used to perform a calculation or concentrate on some job a process needs, the processor's ability to consider that a certain job is more important (or requires priority) than (as compared to) another job, the motherboard's ability to carry (transport) information (data) from one side of the computer to another, a (hard, optical, USB, etc) drive's ability to read or write 1s and 0s, etc. Examples of high-level resources are the name of the application that is using the resources, the folder or the directory in which the application is installed, the permissions used to deal with the process, the ability to start or stop a process.
Obviously, this simplistic description would involve millions or billions of operations. A thread is something, anything, that needs and receives the operating system's attention to perform a particular operation. As a result, a process is in fact one or a series of threads that perform the necessary operations.
Single-Tasking Environment
A single-tasking environment is an operation that is performed. When that operation ends, the next operation starts and in fact, one operation must wait for the previous one to complete.
Multi-Tasking Environment
When computers were performing a limited number of operations and processors were simple, the operating system was solely in charge of dealing with threads. Nowadays, computers and processors have become complex and we have become demanding with them. In fact, a typical computer or user nowadays needs to do many things at the same time, in what we have designated as multitasking.
Modern processors are now equipped with many internal sub-processors, called cores, that can internally, but also independently, and simultaneously, perform many individual operations. As a result, you can create such individual operations for your application so that many individual operations can be performed at the same time instead of one operation waiting for the previous one to end. Welcome to the world of multi-tasking.
In reality, multitasking is not new. For a long time, the operating systems have been able to do many things at the same time. Still, multi-tasking programming was left to geniuses. Fortunately, processors manufacturers and operating systems builders have been developing and enhancing application programming tremendously. As a result, you can easily create a multi-tasking application.
Creating a Thread
Introduction
Multi-tasking programming consists of deciding how threads should manage your application. You start by creating one or more threads in your application and specifying what they should do. The Win32 library is equipped with a function used to create a thread. Its syntax is:
HANDLE WINAPI CreateThread
(
  _In_opt_   LPSECURITY_ATTRIBUTES lpThreadAttributes,
  _In_       SIZE_T dwStackSize,
  _In_       LPTHREAD_START_ROUTINE lpStartAddress,
  _In_opt_   LPVOID lpParameter,
  _In_       DWORD dwCreationFlags,
  _Out_opt_  LPDWORD lpThreadId
);
A thread created in C/C++ (or classic Visual Basic, or Delphi, or Assembly, etc) is referred to as an unmanaged thread.
To support the ability to create threads, the .NET Framework provides a sealed class named Thread:
public sealed class Thread : CriticalFinalizerObject,
                             _Thread
A thread created in the .NET Framework, using the Thread class, is referred to as managed. This class is defined in the System.Threading namespace. The easiest way to create a thread is to declare a variable based on this class. To let you initialize the variable, the Thread class is equipped with four constructors and there is no default constructor. The easiest constructor takes a delegate argument that specifies the method that will carry the operation of the thread. Its syntax is:
public Thread(ThreadStart start);
This constructor takes an argument based on a delegate named ThreadStart:
public delegate void ThreadStart();
This means that the method associated with the delegate takes no argument and returns nothing. This also means that you must have a method, and you have various options:
void ShowMessage()
{

}
You can then declare a variable of type ThreadStart, initialize it using the new operator, and pass the name of the method as argument. Here is an example:
namespace ThreadingFundamentals
{
    public partial class Exercise : Form
    {
        public Exercise()
        {
            InitializeComponent();
        }

        void ShowMessage()
        {
        }

        private void Form1_Load(object sender, EventArgs e)
        {
            ThreadStart tsFundamentals = new ThreadStart(ShowMessage);
        }
    }
}
You can then pass the ThreadStart variable to the Thread constructor we introduced earlier. Here is an example:
namespace ThreadingFundamentals
{
    public partial class Exercise : Form
    {
        public Exercise()
        {
            InitializeComponent();
        }

        void ShowMessage()
        {
        }

        private void Exercise_Load(object sender, EventArgs e)
        {
            ThreadStart tsFundamentals = new ThreadStart(ShowMessage);

            Thread thLauncher = new Thread(tsFundamentals);
        }
    }
}namespace ThreadingFundamentals
{
public partial class Exercise : Form
{
public Exercise()
{
InitializeComponent();
}
void ShowMessage()
{
}
private void InitializeComponent()
{
Thread thLauncher = new Thread(new ThreadStart(ShowMessage));
}
}
}namespace ThreadingFundamentals
{
public partial class Exercise : Form
{
public Exercise()
{
InitializeComponent();
}
void ShowMessage()
{
}
private void Exercise_Load(object sender, EventArgs e)
{
Thread thLauncher = new Thread(ShowMessage);
}
}
}namespace ThreadingFundamentals
{
public partial class Exercise : Form
{
public Exercise()
{
InitializeComponent();
}
private void Exercise_Load(object sender, EventArgs e)
{
Thread thLauncher = new Thread(() =>
{
});
}
}
}So far, we created the needed function or method in the main class of the project. Otherwise, you can create the function or method in a class of your choice. Here is an example:
namespace ThreadingFundamentals
{
    public partial class Exercise : Form
    {
        public Exercise()
        {
            InitializeComponent();
        }

        private void Exercise_Load(object sender, EventArgs e)
        {
            Working work = new Working();

            ThreadStart tsFundamentals = new ThreadStart(work.ShowMessage);

            Thread thLauncher = new Thread(tsFundamentals);
        }
    }

    class Working
    {
        public void ShowMessage()
        {

        }
    }
}
Creating Many Threads
As opposed to one, you may need to have various threads in your application. You can create each thread before using it. Here are examples:
namespace ThreadingFundamentals
{
    public partial class Exercise : Form
    {
        public Exercise()
        {
            InitializeComponent();
        }
        void ShowMessage()
        {

        }

        void Solve()
        {
        }

        void Count() { }

        private void Exercise_Load(object sender, EventArgs e)
        {
            ThreadStart tsFundamentals = new ThreadStart(ShowMessage);
            ThreadStart tsSolution = new ThreadStart(new ThreadStart(Solve));
            ThreadStart tsPerform = new ThreadStart(Count);
        }
    }
}
Primary Operations on a Thread
The Apartment Area of a Thread
When an application starts, or to manage a running program, the operating system allocates the necessary resources for it, such as the appropriate amount of memory. To manage the resources used by the threads of an application, the operating system also reserves an area, called an apartment, that those threads can consult for available resources. The characteristics of an apartment are defined in an enumeration named ApartmentState:
public enum ApartmentState { MTA, STA, Unknown };
In reality, to let you specify how an application (process) will manage the apartment, the .NET Framework provides two attributes. The members of the ApartmentState enumeration are:
[STAThread]
public static int Main()
{
    return 0;
}To assist you with management or inquiries related to an apartment, the Thread class is equipped with methods named GetApartmentState() and SetApartmentState(). Their syntaxes are:
public ApartmentState GetApartmentState();
public void SetApartmentState(ApartmentState state);
As you can see, the combination of these two methods results in a (an undefined) property.
Starting a Thread
Obviously, you are not the only one creating threads, or your application is not the only one running in the computer. As a result, when you create a thread, you are simply informing the operating system that you will use a thread, but you must specify when to execute that thread. To support this operation, the Thread class is equipped with an overloaded method named Start. The simplest version uses the following syntax:
public void Start();
As you can see, this is a simple method. It takes no argument and returns nothing. In the same way, if you had created many threads, you can execute (or start) each when you want.
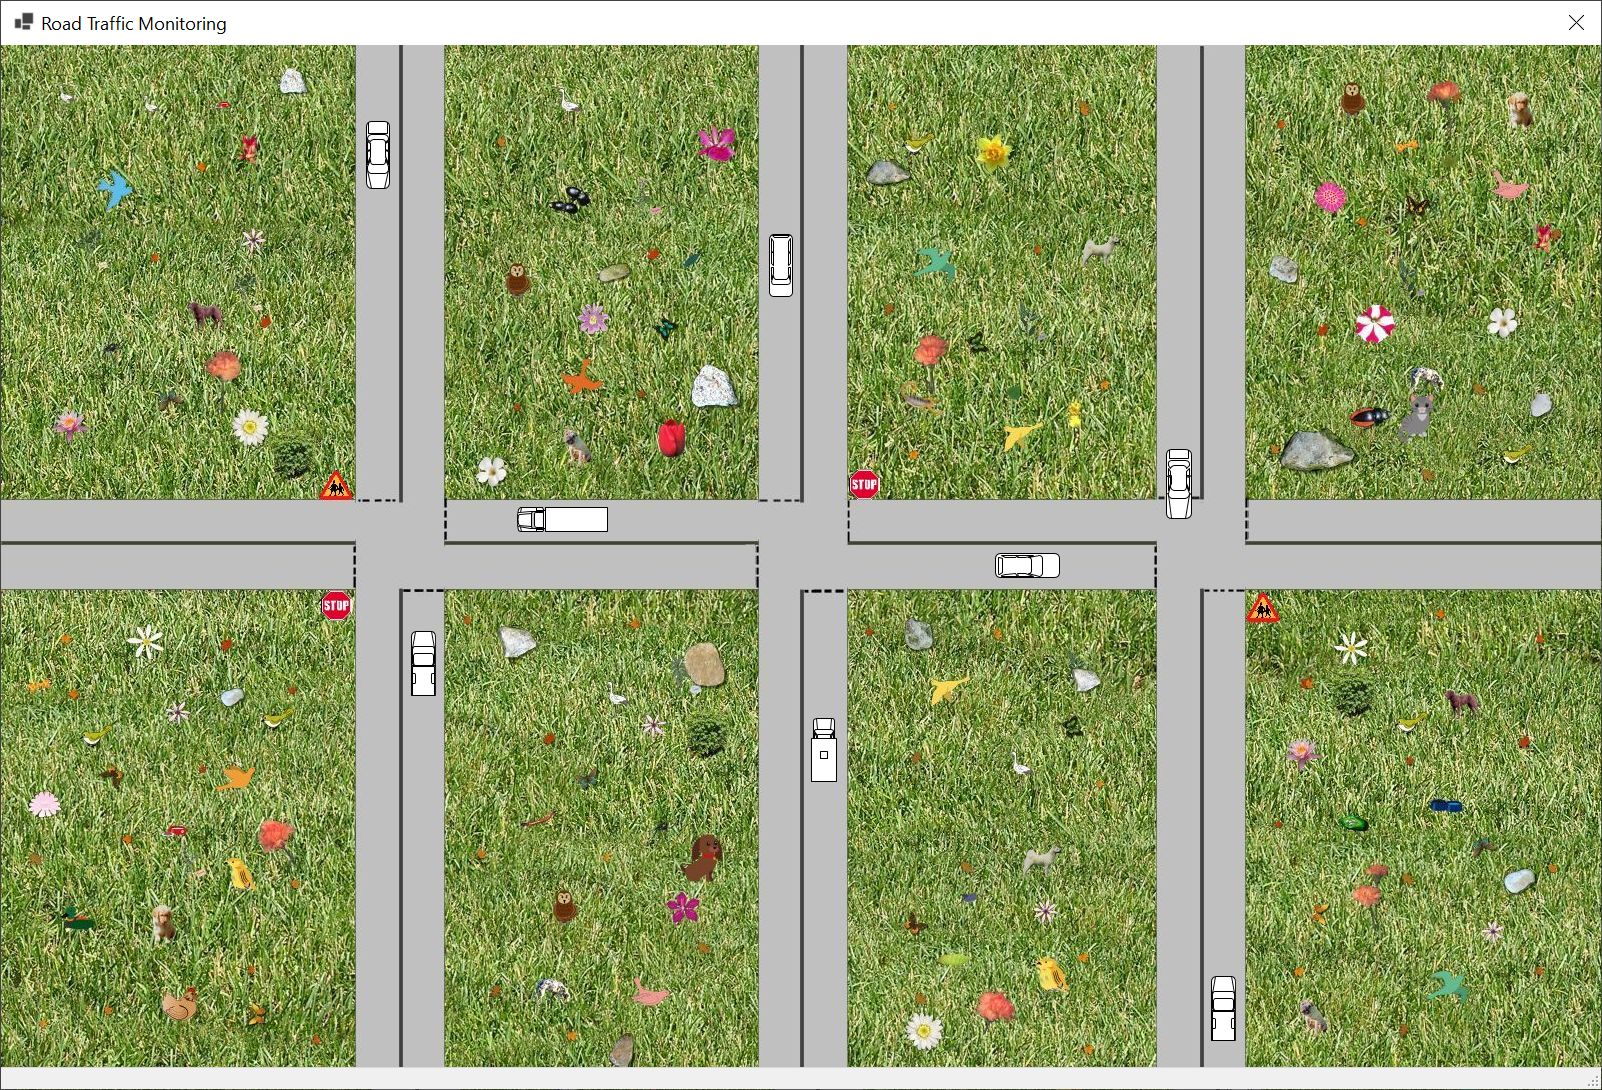
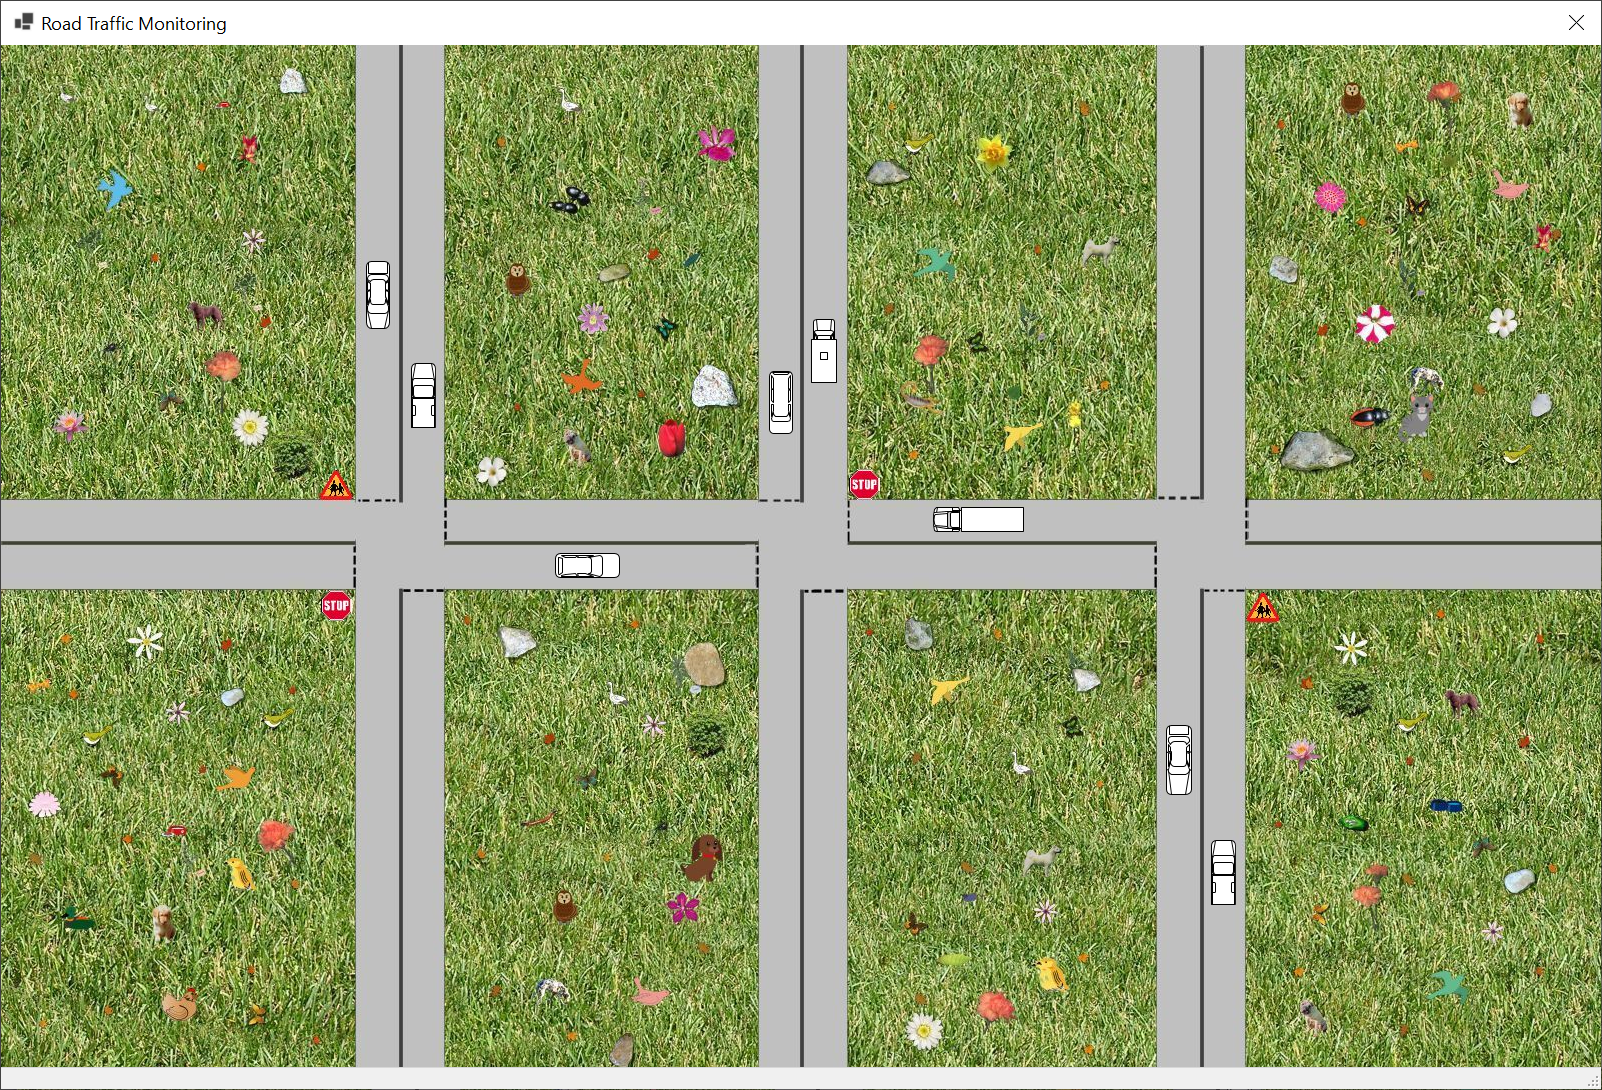
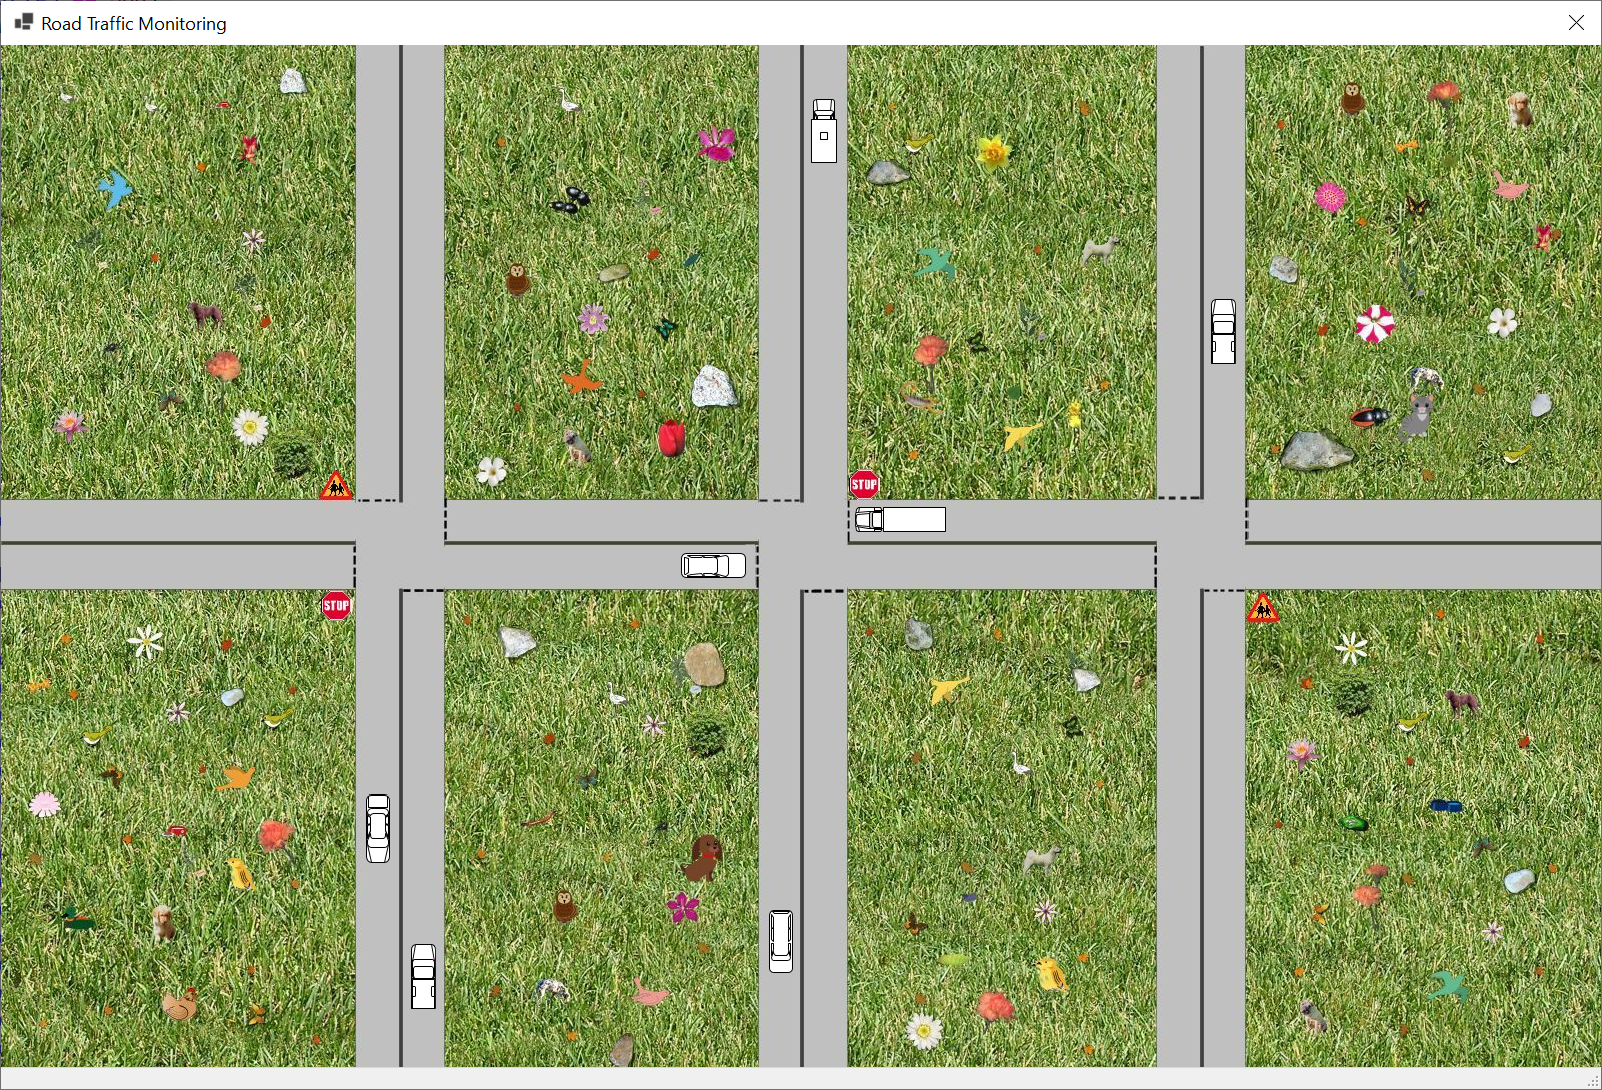
![]() Practical Learning: Starting a Thread
Practical Learning: Starting a Thread
namespace TrafficMonitoring11
{
    public partial class TrafficMonitoring : Form
    {
        int xPosition;
        int yPosition;

        public TrafficMonitoring()
        {
            InitializeComponent();
        }

        private void Form1_Load(object sender, EventArgs e)
        {
            Random rndNumber = new Random();

            xPosition = rndNumber.Next(0, 1024);
            yPosition = 508;
        }

        void MoveVehicle()
        {
            if (xPosition < pbxRoadMap.Width)
                xPosition++;
            else
                xPosition = -100;
        }

        private void pbxRoadMap_Paint(object sender, PaintEventArgs e)
        {
            pbxLRVehicle.Location = new Point(xPosition, yPosition);
        }

        private void tmrTrafficMonitoring_Tick(object sender, EventArgs e)
        {
            ThreadStart tsVehicle = new ThreadStart(MoveVehicle);
            Thread thVehicle = new Thread(tsVehicle);

            thVehicle.Start();

            pbxRoadMap.Invalidate();
        }
    }
}

![]()
![]()
Image:    RLVehicle.png
SizeMode: AutoSize
(Name):   pbxRLVehicle
Image:    TBVehicle1.png
SizeMode: AutoSize
(Name):   pbxTBVehicle1
Image:    TBVehicle2.png
SizeMode: AutoSize
(Name):   pbxTBVehicle2
Image:    TBVehicle3.png
SizeMode: AutoSize
(Name):   pbxTBVehicle3
Image:    BTVehicle1.png
SizeMode: AutoSize
(Name):   pbxBTVehicle1
Image:    BTVehicle2.png
SizeMode: AutoSize
(Name):   pbxBTVehicle2
Image:    BTVehicle3.png
SizeMode: AutoSize
(Name):   pbxBTVehicle3
namespace RoadTrafficMonitoring1
{
    public partial class TrafficMonitoring : Form
    {
        int xLeftRightVehicle, yLeftRightVehicle;
        int xRightLeftVehicle, yRightLeftVehicle;
        int xTopBottomVehicle1, yTopBottomVehicle1;
        int xTopBottomVehicle2, yTopBottomVehicle2;
        int xTopBottomVehicle3, yTopBottomVehicle3;
        int xBottomTopVehicle1, yBottomTopVehicle1;
        int xBottomTopVehicle2, yBottomTopVehicle2;
        int xBottomTopVehicle3, yBottomTopVehicle3;

        public TrafficMonitoring()
        {
            InitializeComponent();
        }

        private void TrafficMonitoring_Load(object sender, EventArgs e)
        {
            xLeftRightVehicle  =    0;
            yLeftRightVehicle  =  508;
            xRightLeftVehicle  = 1510;
            yRightLeftVehicle  =  462;
            xTopBottomVehicle1 =  365;
            yTopBottomVehicle1 =   38;
            xTopBottomVehicle2 =  768;
            yTopBottomVehicle2 =  154;
            xTopBottomVehicle3 = 1165;
            yTopBottomVehicle3 =  332;
            xBottomTopVehicle1 =  410;
            yBottomTopVehicle1 =  650;
            xBottomTopVehicle2 =  810;
            yBottomTopVehicle2 =  765;
            xBottomTopVehicle3 = 1210;
            yBottomTopVehicle3 =  965;
        }

        void MoveVehicle()
        {

        }

        private void pbRoadMap_Paint(object sender, PaintEventArgs e)
        {
            pbxLRVehicle.Location  = new Point(xLeftRightVehicle,  yLeftRightVehicle);
            pbxRLVehicle.Location  = new Point(xRightLeftVehicle,  yRightLeftVehicle);
            pbxTBVehicle1.Location = new Point(xTopBottomVehicle1, yTopBottomVehicle1);
            pbxTBVehicle2.Location = new Point(xTopBottomVehicle2, yTopBottomVehicle2);
            pbxTBVehicle3.Location = new Point(xTopBottomVehicle3, yTopBottomVehicle3);
            pbxBTVehicle1.Location = new Point(xBottomTopVehicle1, yBottomTopVehicle1);
            pbxBTVehicle2.Location = new Point(xBottomTopVehicle2, yBottomTopVehicle2);
            pbxBTVehicle3.Location = new Point(xBottomTopVehicle3, yBottomTopVehicle3);
        }

        void DrawLeftRightVehicle()
        {
            if( xLeftRightVehicle < 1535 )
                xLeftRightVehicle++;
            else
                xLeftRightVehicle = 0;
        }

        void DrawRightLeftVehicle()
        {
            if( xRightLeftVehicle < 0 )
                xRightLeftVehicle = 1510;
            else
                xRightLeftVehicle--;
        }

        void DrawTopBottomVehicle1()
        {
            if( yTopBottomVehicle1 < 985 )
                yTopBottomVehicle1++;
            else
                yTopBottomVehicle1 = 30;
        }

        void DrawTopBottomVehicle2()
        {
            if( yTopBottomVehicle2 < 988 )
                yTopBottomVehicle2++;
            else
                yTopBottomVehicle2 = 30;
        }

        void DrawTopBottomVehicle3()
        {
            if( yTopBottomVehicle3 < 985 )
                yTopBottomVehicle3 += 2;
            else
                yTopBottomVehicle3 = 30;
        }

        void DrawBottomTopVehicle1()
        {
            if( yBottomTopVehicle1 < 30 )
                yBottomTopVehicle1 = 988;
            else
                yBottomTopVehicle1 -= 2;
        }

        void DrawBottomTopVehicle2()
        {
            if( yBottomTopVehicle2 < 30 )
                yBottomTopVehicle2 = 988;
            else
                yBottomTopVehicle2 -= 3;
        }

        void DrawBottomTopVehicle3()
        {
            if( yBottomTopVehicle3 < 30 )
                yBottomTopVehicle3 = 988;
            else
                yBottomTopVehicle3--;
        }

        private void tmrTrafficMonitoring_Tick(object sender, EventArgs e)
        {
            ThreadStart tsLeftRightVehicle = new ThreadStart(DrawLeftRightVehicle);
            Thread thLeftRightVehicle = new Thread(tsLeftRightVehicle);

            ThreadStart tsRightLeftVehicle = new ThreadStart(DrawRightLeftVehicle);
            Thread thRightLeftVehicle = new Thread(tsRightLeftVehicle);

            Thread thTopBottomVehicle1 = new Thread(new ThreadStart(DrawTopBottomVehicle1));
            Thread thTopBottomVehicle2 = new Thread(new ThreadStart(DrawTopBottomVehicle2));
            Thread thTopBottomVehicle3 = new Thread(new ThreadStart(DrawTopBottomVehicle3));
            Thread thBottomTopVehicle1 = new Thread(new ThreadStart(DrawBottomTopVehicle1));
            Thread thBottomTopVehicle2 = new Thread(new ThreadStart(DrawBottomTopVehicle2));
            Thread thBottomTopVehicle3 = new Thread(new ThreadStart(DrawBottomTopVehicle3));

            thLeftRightVehicle.Start();
            thRightLeftVehicle.Start();
            thTopBottomVehicle1.Start();
            thTopBottomVehicle2.Start();
            thTopBottomVehicle3.Start();
            thBottomTopVehicle1.Start();
            thBottomTopVehicle2.Start();
            thBottomTopVehicle3.Start();

            pbxRoadMap.Invalidate();
        }
    }
}
namespace RoadTrafficMonitoring1
{
    public partial class TrafficMonitoring : Form
    {
        int xLeftRightVehicle, yLeftRightVehicle;
        int xRightLeftVehicle, yRightLeftVehicle;
        int xTopBottomVehicle1, yTopBottomVehicle1;
        int xTopBottomVehicle2, yTopBottomVehicle2;
        int xTopBottomVehicle3, yTopBottomVehicle3;
        int xBottomTopVehicle1, yBottomTopVehicle1;
        int xBottomTopVehicle2, yBottomTopVehicle2;
        int xBottomTopVehicle3, yBottomTopVehicle3;

        Thread thLeftRightVehicle;
        Thread? thRightLeftVehicle;
        Thread? thTopBottomVehicle1;
        Thread? thTopBottomVehicle2;
        Thread? thTopBottomVehicle3;
        Thread? thBottomTopVehicle1;
        Thread? thBottomTopVehicle2;
        Thread? thBottomTopVehicle3;

        public TrafficMonitoring()
        {
            InitializeComponent();
        }

        private void TrafficMonitoring_Load(object sender, EventArgs e)
        {
            xLeftRightVehicle  =    0;
            yLeftRightVehicle  =  508;
            xRightLeftVehicle  = 1510;
            yRightLeftVehicle  =  462;
            xTopBottomVehicle1 =  365;
            yTopBottomVehicle1 =   38;
            xTopBottomVehicle2 =  768;
            yTopBottomVehicle2 =  154;
            xTopBottomVehicle3 = 1165;
            yTopBottomVehicle3 =  332;
            xBottomTopVehicle1 =  410;
            yBottomTopVehicle1 =  650;
            xBottomTopVehicle2 =  810;
            yBottomTopVehicle2 =  765;
            xBottomTopVehicle3 = 1210;
            yBottomTopVehicle3 =  965;
        }

        void MoveVehicle()
        {

        }

        private void pbRoadMap_Paint(object sender, PaintEventArgs e)
        {
            pbxLRVehicle.Location  = new Point(xLeftRightVehicle,  yLeftRightVehicle);
            pbxRLVehicle.Location  = new Point(xRightLeftVehicle,  yRightLeftVehicle);
            pbxTBVehicle1.Location = new Point(xTopBottomVehicle1, yTopBottomVehicle1);
            pbxTBVehicle2.Location = new Point(xTopBottomVehicle2, yTopBottomVehicle2);
            pbxTBVehicle3.Location = new Point(xTopBottomVehicle3, yTopBottomVehicle3);
            pbxBTVehicle1.Location = new Point(xBottomTopVehicle1, yBottomTopVehicle1);
            pbxBTVehicle2.Location = new Point(xBottomTopVehicle2, yBottomTopVehicle2);
            pbxBTVehicle3.Location = new Point(xBottomTopVehicle3, yBottomTopVehicle3);
        }

        void DrawLeftRightVehicle()
        {
            if( xLeftRightVehicle < 1535 )
                xLeftRightVehicle++;
            else
                xLeftRightVehicle = 0;
        }

        void DrawRightLeftVehicle()
        {
            if( xRightLeftVehicle < 0 )
                xRightLeftVehicle = 1510;
            else
                xRightLeftVehicle--;
        }

        void DrawTopBottomVehicle1()
        {
            if( yTopBottomVehicle1 < 985 )
                yTopBottomVehicle1++;
            else
                yTopBottomVehicle1 = 30;
        }

        void DrawTopBottomVehicle2()
        {
            if( yTopBottomVehicle2 < 988 )
                yTopBottomVehicle2++;
            else
                yTopBottomVehicle2 = 30;
        }

        void DrawTopBottomVehicle3()
        {
            if( yTopBottomVehicle3 < 985 )
                yTopBottomVehicle3 += 2;
            else
                yTopBottomVehicle3 = 30;
        }

        void DrawBottomTopVehicle1()
        {
            if( yBottomTopVehicle1 < 30 )
                yBottomTopVehicle1 = 988;
            else
                yBottomTopVehicle1 -= 2;
        }

        void DrawBottomTopVehicle2()
        {
            if( yBottomTopVehicle2 < 30 )
                yBottomTopVehicle2 = 988;
            else
                yBottomTopVehicle2 -= 3;
        }

        void DrawBottomTopVehicle3()
        {
            if( yBottomTopVehicle3 < 30 )
                yBottomTopVehicle3 = 988;
            else
                yBottomTopVehicle3--;
        }

        private void tmrTrafficMonitoring_Tick(object sender, EventArgs e)
        {
            ThreadStart tsLeftRightVehicle = new ThreadStart(DrawLeftRightVehicle);
            thLeftRightVehicle = new Thread(tsLeftRightVehicle);

            ThreadStart tsRightLeftVehicle = new ThreadStart(DrawRightLeftVehicle);
            thRightLeftVehicle = new Thread(tsRightLeftVehicle);

            thTopBottomVehicle1 = new Thread(new ThreadStart(DrawTopBottomVehicle1));
            thTopBottomVehicle2 = new Thread(new ThreadStart(DrawTopBottomVehicle2));
            thTopBottomVehicle3 = new Thread(new ThreadStart(DrawTopBottomVehicle3));
            thBottomTopVehicle1 = new Thread(new ThreadStart(DrawBottomTopVehicle1));
            thBottomTopVehicle2 = new Thread(new ThreadStart(DrawBottomTopVehicle2));
            thBottomTopVehicle3 = new Thread(new ThreadStart(DrawBottomTopVehicle3));

            thLeftRightVehicle.Start();
            thRightLeftVehicle.Start();
            thTopBottomVehicle1.Start();
            thTopBottomVehicle2.Start();
            thTopBottomVehicle3.Start();
            thBottomTopVehicle1.Start();
            thBottomTopVehicle2.Start();
            thBottomTopVehicle3.Start();

            pbxRoadMap.Invalidate();
        }
    }
}Suspending a Thread
For some reason (and it will be up to you), you will not always want your thread to run eternally. At some point, you may want to ask it to wait for some time and resume later. This operation is referred to as pausing or suspending the activities of a thread. Once again, you have various options. To support the ability to pause a thread, the Thread class is equipped with an overloaded static method named Sleep. One of its versions uses the following syntax:
public static void Sleep(int millisecondsTimeout);
With this version, you pass the number of milliseconds during which the thread must wait before resuming its activities.
The other version of the Thread.Sleep() method takes a TimeSpan argument. Its syntax is:
public static void Sleep(TimeSpan timeout);
![]() Practical Learning: Putting a Thread to Sleep
Practical Learning: Putting a Thread to Sleep
namespace TrafficMonitoring11
{
    public partial class TrafficMonitoring : Form
    {
        int xPosition;
        int yPosition;

        public TrafficMonitoring()
        {
            InitializeComponent();
        }

        private void Form1_Load(object sender, EventArgs e)
        {
            Random rndNumber = new Random();

            xPosition = rndNumber.Next(0, 1024);
            yPosition = 508;

            pbxRLVehicle.Visible  = false;
            pbxBTVehicle1.Visible = false;
            pbxBTVehicle2.Visible = false;
            pbxBTVehicle3.Visible = false;
            pbxTBVehicle1.Visible = false;
            pbxTBVehicle2.Visible = false;
            pbxTBVehicle3.Visible = false;
        }

        void MoveVehicle()
        {
            // If the car comes to the first Stop sign,
            // it must stop/wait for 10 seconds before continuing
            if( xPosition == 280 )
                Thread.Sleep(1000);
            // If the car comes to the second Stop sign, it must stop/wait for 5 seconds
            if( xPosition == 680 )
                Thread.Sleep(500);
            // If the car comes to the third Stop sign, it must stop/wait for 15 seconds
            if( xPosition == 1080 )
                Thread.Sleep(1500);


            if( xPosition < (pbxRoadMap.Width + 200) )
                xPosition++;
            else
                xPosition = -500;
        }

        private void pbxRoadMap_Paint(object sender, PaintEventArgs e)
        {
            pbxLRVehicle.Location = new Point(xPosition, yPosition);
        }

        private void tmrTrafficMonitoring_Tick(object sender, EventArgs e)
        {
            ThreadStart tsVehicle = new ThreadStart(MoveVehicle);
            Thread thVehicle = new Thread(tsVehicle);

            thVehicle.Start();

            pbxRoadMap.Invalidate();
        }
    }
}

namespace RoadTrafficMonitoring1
{
    public partial class Form1 : Form
    {
        int xLeftRightVehicle, yLeftRightVehicle;
        int xRightLeftVehicle, yRightLeftVehicle;
        int xTopBottomVehicle1, yTopBottomVehicle1;
        int xTopBottomVehicle2, yTopBottomVehicle2;
        int xTopBottomVehicle3, yTopBottomVehicle3;
        int xBottomTopVehicle1, yBottomTopVehicle1;
        int xBottomTopVehicle2, yBottomTopVehicle2;
        int xBottomTopVehicle3, yBottomTopVehicle3;

        Thread? thLeftRightVehicle;
        Thread? thRightLeftVehicle;
        Thread? thTopBottomVehicle1;
        Thread? thTopBottomVehicle2;
        Thread? thTopBottomVehicle3;
        Thread? thBottomTopVehicle1;
        Thread? thBottomTopVehicle2;
        Thread? thBottomTopVehicle3;

        public Form1()
        {
            InitializeComponent();
        }

        private void Form1_Load(object sender, EventArgs e)
        {
            xLeftRightVehicle  =    0;
            yLeftRightVehicle  =  508;
            xRightLeftVehicle  = 1510;
            yRightLeftVehicle  =  462;
            xTopBottomVehicle1 =  365;
            yTopBottomVehicle1 =   38;
            xTopBottomVehicle2 =  768;
            yTopBottomVehicle2 =  154;
            xTopBottomVehicle3 = 1165;
            yTopBottomVehicle3 =  332;
            xBottomTopVehicle1 =  410;
            yBottomTopVehicle1 =  650;
            xBottomTopVehicle2 =  810;
            yBottomTopVehicle2 =  765;
            xBottomTopVehicle3 = 1210;
            yBottomTopVehicle3 =  965;
        }

        void MoveVehicle()
        {

        }

        private void pbxRoadMap_Paint(object sender, PaintEventArgs e)
        {
            pbxLRVehicle.Location  = new Point(xLeftRightVehicle, yLeftRightVehicle);
            pbxRLVehicle.Location  = new Point(xRightLeftVehicle, yRightLeftVehicle);
            pbxTBVehicle1.Location = new Point(xTopBottomVehicle1, yTopBottomVehicle1);
            pbxTBVehicle2.Location = new Point(xTopBottomVehicle2, yTopBottomVehicle2);
            pbxTBVehicle3.Location = new Point(xTopBottomVehicle3, yTopBottomVehicle3);
            pbxBTVehicle1.Location = new Point(xBottomTopVehicle1, yBottomTopVehicle1);
            pbxBTVehicle2.Location = new Point(xBottomTopVehicle2, yBottomTopVehicle2);
            pbxBTVehicle3.Location = new Point(xBottomTopVehicle3, yBottomTopVehicle3);
        }

        void DrawLeftRightVehicle()
        {
            /* If the car comes to a Stop sign,
             * it must stop/wait for 5 seconds before continuing. */
            if ((xLeftRightVehicle == 280) || (xLeftRightVehicle == 680) || (xLeftRightVehicle == 1080))
                Thread.Sleep(1000);

            if (xLeftRightVehicle < 1935)
                xLeftRightVehicle++;
            else
                xLeftRightVehicle = -400;
        }

        void DrawRightLeftVehicle()
        {
            // If the car comes to a Stop sign, it must
            // stop/wait for 5 seconds before continuing
            TimeSpan waitTime = new TimeSpan(0, 0, 2);

            if ((xRightLeftVehicle == 452) || (xRightLeftVehicle == 854) || (xRightLeftVehicle == 1255))
                Thread.Sleep(waitTime);

            if (xRightLeftVehicle < -500)
                xRightLeftVehicle = 2000;
            else
                xRightLeftVehicle--;
        }

        void DrawTopBottomVehicle1()
        {
            /* If the car comes to a Stop sign,
             * it must stop/wait for 7.5 seconds before continuing. */
            if (yTopBottomVehicle1 == 380)
                Thread.Sleep(500);

            if (yTopBottomVehicle1 < 985)
                yTopBottomVehicle1++;
            else
                yTopBottomVehicle1 = -220;
        }

        void DrawTopBottomVehicle2()
        {
            if (yTopBottomVehicle2 == 378)
                Thread.Sleep(650);

            if (yTopBottomVehicle2 < 985)
                yTopBottomVehicle2++;
            else
                yTopBottomVehicle2 = -240;
        }

        void DrawTopBottomVehicle3()
        {
            if (yTopBottomVehicle3 == 376)
                Thread.Sleep(550);

            if (yTopBottomVehicle3 < 985)
                yTopBottomVehicle3++;
            else
                yTopBottomVehicle3 = -200;
        }

        void DrawBottomTopVehicle1()
        {
            TimeSpan waitTime = new TimeSpan(0, 0, 5);

            if (yBottomTopVehicle1 == 560)
                Thread.Sleep(waitTime);

            if (yBottomTopVehicle1 < 30)
                yBottomTopVehicle1 = 988;
            else
                yBottomTopVehicle1--;
        }

        void DrawBottomTopVehicle2()
        {
            TimeSpan waitTime = new TimeSpan(0, 0, 2);

            if (yBottomTopVehicle2 == 560)
                Thread.Sleep(waitTime);

            if (yBottomTopVehicle2 < 30)
                yBottomTopVehicle2 = 988;
            else
                yBottomTopVehicle2--;
        }

        void DrawBottomTopVehicle3()
        {
            TimeSpan waitTime = new TimeSpan(0, 0, 2);

            if (yBottomTopVehicle3 == 560)
                Thread.Sleep(waitTime);

            if (yBottomTopVehicle3 < 30)
                yBottomTopVehicle3 = 988;
            else
                yBottomTopVehicle3--;
        }

        private void pbxRoadMap_Click(object sender, EventArgs e)
        {

        }

        private void tmrTrafficMonitoring_Tick(object sender, EventArgs e)
        {
            ThreadStart tsLeftRightVehicle = new ThreadStart(DrawLeftRightVehicle);
            thLeftRightVehicle = new Thread(tsLeftRightVehicle);

            ThreadStart tsRightLeftVehicle = new ThreadStart(DrawRightLeftVehicle);
            thRightLeftVehicle = new Thread(tsRightLeftVehicle);

            thTopBottomVehicle1 = new Thread(new ThreadStart(DrawTopBottomVehicle1));
            thTopBottomVehicle2 = new Thread(new ThreadStart(DrawTopBottomVehicle2));
            thTopBottomVehicle3 = new Thread(new ThreadStart(DrawTopBottomVehicle3));
            thBottomTopVehicle1 = new Thread(new ThreadStart(DrawBottomTopVehicle1));
            thBottomTopVehicle2 = new Thread(new ThreadStart(DrawBottomTopVehicle2));
            thBottomTopVehicle3 = new Thread(new ThreadStart(DrawBottomTopVehicle3));

            thLeftRightVehicle.Start();
            thRightLeftVehicle.Start();
            thTopBottomVehicle1.Start();
            thTopBottomVehicle2.Start();
            thTopBottomVehicle3.Start();
            thBottomTopVehicle1.Start();
            thBottomTopVehicle2.Start();
            thBottomTopVehicle3.Start();

            pbxRoadMap.Invalidate();
        }
    }
}

A Thread in Infinite Timeout
If you had created many threads, when necessary, you can suspend those you want when you want. Here is an example that uses two threads. In this example, we have one car moving from left to right and another vehicle moving from right to left. Whenever a vehicle comes to a Stop sign, it must stop and wait a few seconds:
namespace TrafficMonitoring1
{
    public partial class TrafficMonitoring : Form
    {
        int xLeftRightVehicle, yLeftRightVehicle;
        int xRightLeftVehicle, yRightLeftVehicle;


        public TrafficMonitoring()
        {
            InitializeComponent();
        }

        private void Form1_Load(object sender, EventArgs e)
        {
            Random rndNumber = new Random();

            xLeftRightVehicle = rndNumber.Next(0, 1024);
            yLeftRightVehicle = 508;
            xRightLeftVehicle = rndNumber.Next(0, 1024);
            yRightLeftVehicle = 490;
        }

        void DrawLeftRightVehicle()
        {
            if( xLeftRightVehicle == 286 )
                Thread.Sleep(5000);
            if( xLeftRightVehicle == 688)
                Thread.Sleep(7500);
            if( xLeftRightVehicle == 1086)
                Thread.Sleep(5000);

            if (xLeftRightVehicle < pbxRoadMap.Width )
                xLeftRightVehicle++;
            else
                xLeftRightVehicle = -100;
        }

        void DrawRightLeftVehicle()
        {
            if ((xRightLeftVehicle == 450) || (xRightLeftVehicle == 850) || (xRightLeftVehicle == 1248))
                Thread.Sleep(4250);

            if (xRightLeftVehicle < -100)
                xRightLeftVehicle = pbxRoadMap.Width;
            else
                xRightLeftVehicle--;
        }

        private void pbxRoadMap_Paint(object sender, PaintEventArgs e)
        {
            pbxLRVehicle.Location = new Point(xLeftRightVehicle, yLeftRightVehicle);
            pbxRLVehicle.Location = new Point(xRightLeftVehicle, yRightLeftVehicle);
        }

        private void tmrTrafficMonitoring_Tick(object sender, EventArgs e)
        {
            Thread thLeftRightVehicle = new Thread(new ThreadStart(DrawLeftRightVehicle));
            Thread thRightLeftVehicle = new Thread(new ThreadStart(DrawRightLeftVehicle));

            thLeftRightVehicle.Start();
            thRightLeftVehicle.Start();

            pbxRoadMap.Invalidate();
        }
    }
}
The let you suspend a thread indefinitely, the .NET Framework provides the very short static Timeout class that is equipped with only two constant-value fields as members. They are named Infinite and InifiniteTimeSpan:
public const int Infinite;
public static readonly TimeSpan InfiniteTimeSpan;
Based on this, to indefinitely put a thread to sleep, pass Timeout.Infinite as argument to the Thread.Sleep() method. Here is an example:
using System.Threading;

namespace TrafficMonitoring1
{
    public partial class TrafficMonitoring : Form
    {
        int xLeftRightVehicle, yLeftRightVehicle;
        int xRightLeftVehicle, yRightLeftVehicle;


        public TrafficMonitoring()
        {
            InitializeComponent();
        }

        private void Form1_Load(object sender, EventArgs e)
        {
            Random rndNumber = new Random();

            xLeftRightVehicle = rndNumber.Next(0, 1024);
            yLeftRightVehicle = 508;
            xRightLeftVehicle = rndNumber.Next(0, 1024);
            yRightLeftVehicle = 490;

            pbxBTVehicle1.Visible = false;
            pbxBTVehicle2.Visible = false;
            //pbxBTVehicle3.Visible = false;
            pbxTBVehicle1.Visible = false;
            pbxTBVehicle2.Visible = false;
            pbxTBVehicle3.Visible = false;
        }

        void DrawLeftRightVehicle()
        {
            if( xLeftRightVehicle == 286 )
                Thread.Sleep(5000);
            if( xLeftRightVehicle == 688 )
                Thread.Sleep(7500);
            if( xLeftRightVehicle == 1086 )
                Thread.Sleep(Timeout.Infinite);

            if (xLeftRightVehicle < pbxRoadMap.Width )
                xLeftRightVehicle++;
            else
                xLeftRightVehicle = -100;
        }

        void DrawRightLeftVehicle()
        {
            if( xRightLeftVehicle == 450 )
                Thread.Sleep(2500);
            if( xRightLeftVehicle == 850 )
                Thread.Sleep(4250);
            if( xRightLeftVehicle == 1248)
                Thread.Sleep(Timeout.Infinite);

            if (xRightLeftVehicle < -100)
                xRightLeftVehicle = pbxRoadMap.Width;
            else
                xRightLeftVehicle--;
        }

        private void pbxRoadMap_Paint(object sender, PaintEventArgs e)
        {
            pbxLRVehicle.Location = new Point(xLeftRightVehicle, yLeftRightVehicle);
            pbxRLVehicle.Location = new Point(xRightLeftVehicle, yRightLeftVehicle);
        }

        private void tmrTrafficMonitoring_Tick(object sender, EventArgs e)
        {
            Thread thLeftRightVehicle = new Thread(new ThreadStart(DrawLeftRightVehicle));
            Thread thRightLeftVehicle = new Thread(new ThreadStart(DrawRightLeftVehicle));

            thLeftRightVehicle.Start();
            thRightLeftVehicle.Start();

            pbxRoadMap.Invalidate();
        }
    }
}
Terminating a Thread
As mentioned already, a thread is part of an application. This means that when an application closes, the operating system (OS) terminates all the related or associated threads. This also means that normally, the OS takes (and is equipped to take) care of threads. Still, in some cases (and only you will decide why), you will need to terminate a thread, even if its application is still running.
As one way to support the ability to terminate a thread, the Thread class is equipped with an overloaded method named Abort. Actually, the Thread.Abort() method neither suspends nor terminates a thread. It only lets the OS know that the thread should be terminated. The operating system is left with deciding what to do (including when and how).
One of the versions of the Thread.Abort() method takes no argument. Its syntax is:
public void Abort();
As you can see, this method is simply asked to terminate its thread (remember that this method doesn't really terminate a thread). In the same way, you can terminate as many threads as you want in your program.
The Thread.Abort() method hardly does any processing. In fact, this method relies on you (and on the operating system, OS) to take care of any problem. In reality, thread abortion (or termination) is neither guaranteed nor predictable. One way you can assist, or inform, the OS about the operation (of terminating your thread) is to provide some information about it. To let you provide such information, the Thread class provides another version of the Abort() method. Its syntax is:
public void Abort(object stateInfo);
This version takes an argument that can hold and provide more details about the operation.
![]() Practical Learning: Ending the Lesson
Practical Learning: Ending the Lesson
| Home | Copyright © 2016-2024, FunctionX | Monday 04 September 2016 | Next |