Topics on the Forms of an Application

Topics on the Forms of an Application
Fundamentals of a Form
Introduction
An application is a list of instructions a person gives to a computer asking it to perform some action(s). On a regular graphical application, the most fundamental object through which the instructions are given is called a form.
A form is a rectangular object that displays as application to the user. Here is an example of a simple form:
To support forms, the .NET Framework provides a class named Form. It is created in the System.Windows.Forms.dll library.
![]() Practical Learning: Starting a Project
Practical Learning: Starting a Project
Author NoteIf you want, using the form of the application you created, you can apply the descriptions in the following sections to experiment with, and get, the same results. |
Visually Creating a Form
There are various ways you can create a form in an application. If you create a Windows Forms App, Microsoft Visual Studio creates an application and adds a default first form to it. To visually create a form
While in the Add New Item dialog box, accept or change the name of the form and click Add.
Dynamically Creating a Form
To dynamically create a form, start a file. In the top section of the document, add using System.Windows.Forms;. Then, in the document, declare a variable of type Form and initialize it. You can declare the variable in the body of the class and initialize it. Here is an example:
using System.Windows.Forms;

class Exercise
{
    Form frmExercise;
}
If you are not planning to use the form inside a method, you can declare the variable in the body of a method and initialize it. Here is an example:
using System.Windows.Forms;

class Exercise
{
    private void Create()
    {
        Form frmExercise = new Form();
    }
}
If you declare a local variable like this, you can use it only inside the method. You can also declare the variable in the body of a class but initialize it in the body of a method. Here is an example:
using System.Windows.Forms;

class Exercise
{
    Form frmExercise;

    private void Create()
    {
        frmExercise = new Form();
    }
}
If you follow this technique, before using the form outside the method or outside the class, you must first call the method in which the form is initialized.
Deriving a Form
Another, usually better, way to start a form is to create a class and derive it from the Form class. This can be done as follows:
using System.Windows.Forms;

public class Exercise : Form
{

}
The advantage of deriving a class from Form is that not only can you add a constructor and methods to it, you can declare variables anywhere in the body of the class and such variables would be available to the methods and properties of the class.
Showing a Form
After creating a form, to let you display it to the user, the Form class is equipped with appropriate methods (see next lesson).
These two techniques of visual addition of objects and dynamic creation are the most used to add Windows controls to an application. The Windows controls are also called components.
Initializing the Components
Because there can be many controls used in a program, instead of using the constructor to initialize them, the Visual Studio standards recommend that you create a method called InitializeComponent to initialize the various objects used in your application. Then simply call that method from the constructor of your class. This can be done as follows:
using System.Windows.Forms;

public class Exercise : Form
{
    private Button btnSubmit;

    private void InitializeComponent()
    {
        btnSubmit = new Button();
        Controls.Add(btnSubmit);
    }

    public Exercise()
    {
        InitializeComponent();
    }
}
Components Tracking on an Application
As you add and remove components on an application, you need a way to count them to keep track of what components and how many of them your application is using. To assist you with this, the .NET Framework provides a class called Container. This class is defined in the ComponentModel namespace that is itself part of the System namespace. To use this class in your application, declare a variable of type Container. Because no other part of the application is interested in this variable, you should declare it private. This can be done as follows:
using System.Windows.Forms;

public partial class Exercise
{
    private Button btnSubmit;
    System.ComponentModel.Container components;
}
After this declaration, the compiler can keep track of the components that are part of the form.
Adding a Control to a Form
After creating a form, you can add Windows controls to it. You can add controls visually or dynamically.
After declaring the variable for a control and allocating memory for it, the control is available but doesn't have a host, which makes it invisible. A control must be positioned on a host like a form. To support the controls positioned on a form, the Form class is equipped with a property named Controls. This property holds a list of the objects that are placed on the form. To specify that a control you have instantiated must be positioned on a form, the class of the Controls property is equipped with a method named Add. Therefore, to make an object part of the form, pass its variable to the Add() method. Here is an example:
using System.Windows.Forms;

public class Exercise : Form
{
    private Button btnSubmit;

    public Exercise()
    {
        btnSubmit = new Button();
        Controls.Add(btnSubmit);
    }
}
Processing the Messages of an Application
An application is constantly generating messages through events. These events have to be processed. To help you process those messages, the .NET Framework provides a sealed class named Application
public sealed class Application
Probably the first operation to perform on an application is to launch it. To support this operation, the Application class is equipped with an overloaded method named Run. One of the versions of this method allows you to specify the (main) form of the application. That version uses the following syntax:
public static void Run (System.Windows.Forms.Form mainForm);
You should call the Application.Run() method from the entry point of your application, which is the Main() function. You can declare a variable of a class derived from Form and pass that variable to the Application.Run() method. Here is an example:
using System.Windows.Forms;

public class Exercise : Form
{
    public static void Main()
    {
        Exercise exo = new Exercise();

        Application.Run(exo);
    }
}
Remember that you need a variable only if you are planning to use the variable many times. Otherwise, you can pass the initialization of the class directly where it is needed. Here is an example:
using System.Windows.Forms;

public class Exercise : Form
{
    public static void Main()
    {
        Application.Run(new Exercise());
    }
}
To better manage your code, you can separate the class of the form and the other classes. Here is an example:
using System.Windows.Forms;

public class Exercise : Form
{
}

public class Program
{
    public static void Main()
    {
        Application.Run(new Exercise());
    }
}
Initializing a Form
By .NET Framework standards, to initialize a variable, it is suggested that, if you derive a class from Form, you should create a method named InitializeComponent in that class, then call that method in a default constructor of your class. Here is an example:
public class Exercise : Form
{
    private void InitializeComponent()
    {
    }

    public Exercise()
    {
        InitializeComponent();
    }
}

public class Program
{
    static int Main()
    {
        Application.Run(new Exercise());
        return 0;
    }
}
Form Management
The Properties of a Form
There are various ways you can manage a form: visually, with code, or using the Properties window. In the next sections and lessons, we will see how to visually manage Windows controls. Throughout our lessons, we will learn how to do things with code. We have already reviewed how to use the Properties window, and we will continue using the Properties window.
The Code of a Form
A form has two sides: the visual aspect and the associated form. There are various ways you can access the code of a form. Probably the most basic way is:
Renaming a Form
As you might have realized, a form is primarily created as a class. As such, it is subject to the techniques of class management. To rename a form and/or its associated class:
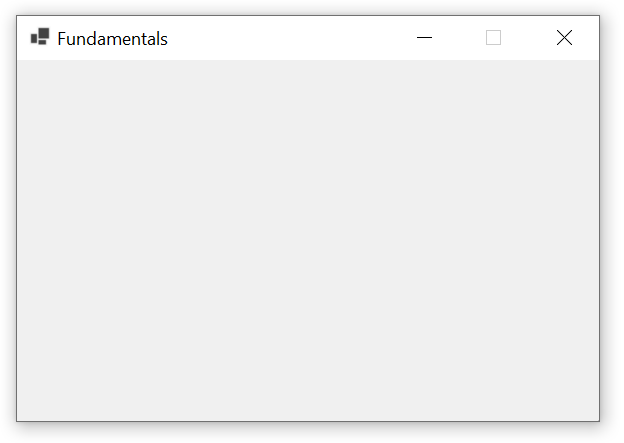
Anatomy of a Form: The Title Bar
The System Icon
A form is made of various sections that allow it to better manage the controls positioned on it. The top section of a form is made of a long portion called the title bar. On the left side of the title bar, the form displays a small picture called an icon or the system icon. To support icons, the Form class is equipped with a property named Icon:
public System.Drawing.Icon Icon { get; set; }
Microsoft Visual Studio provides a default icon for all forms. If you want to use a different icon, while the form is selected, in the Properties window, click the Icon field and then click its ellipsis button ![]() . This would launch the Open dialog box from where you can locate an icon and open it.
. This would launch the Open dialog box from where you can locate an icon and open it.
To change the icon programmatically, declare a variable of type Icon of the System.Drawing namespace and initialize it with the name of an icon file using the new operator. After initializing the icon, assign it to the form's Icon property. Here is an example:
private void InitializeComponent()
{
    System.Drawing.Icon customIcon =
			new System.Drawing.Icon(@"C:\Programs\RedBook.ico");
    Icon = customIcon;
}
Whether you had assigned an icon to the form or not, you can control if the form should display an icon. To support this, the Form class is equipped with a Boolean property named ShowIcon. If you set this property to false, the icon would not appear in the title bar of the form. If the Form.ShowIcon property is set to true, which is its default value, the form's title bar would display an icon.
The Caption of a Form
On the right side of the system icon, there is the title, also called the caption, of the form. The text on the title bar is also called the caption of the form. To let you manage the caption of a form, the Form class is equipped with a property named Text:
public override string Text { get; set; }
By default, if you create a Windows Forms application using Microsoft Visual Studio, it sets the name of the form as its caption. If you want to change the caption, while the form is selected, in the Properties window, click the Text field and type the desired text.
At design time, the caption is made of text you type "as is". At run time, you can change the caption to display a more complex text that could be a changing time, the result of a calculation, etc.
To find out the title of a form, get the value of its Text property.
The System Buttons
On the right side of the caption, there are three small buttons called the system buttons, made of the Minimize (![]() ), the Maximize (
), the Maximize (![]() ), and the Close (
), and the Close (![]() ) buttons. The presence or absence of these buttons is controlled by the Boolean ControlBox property:
) buttons. The presence or absence of these buttons is controlled by the Boolean ControlBox property:
public bool ControlBox { get; set; }
The default value of this property is True, which indicates that the form will be equipped with the system buttons. If you set it to False, no system button would be displayed.
In this case, the user would not be able to close the form using the system buttons. Therefore, if you create this type of form, make sure you provide the user with a way to close it.
The Minimize Button
The Minimize button (![]() ) is controlled by a Boolean property called MinimizeBox:
) is controlled by a Boolean property called MinimizeBox:
public bool MinimizeBox { get; set; }
By default, when you freshly create a form, this property is set to True and the form would display a Minimize button.
The Maximize Button
The Maximize button (![]() ) is controlled by the Boolean MaximizeBox property:
) is controlled by the Boolean MaximizeBox property:
public bool MaximizeBox { get; set; }
This property also is set to True by default.
Depending on what you are trying to achieve in your application, you can change the value of either one or both of these properties. The four combinations are as follows:
| MaximizeBox | MinimizeBox | Display | Result |
| True | True | The form can be minimized or maximized | |
| True | False | The form can be maximized but cannot be minimized | |
| False | True | The form can be minimized but cannot be maximized | |
| False | False | The form can be neither minimized nor maximized |
To change a system buttons programmatically, call the desired button's property and assign it a true or false value. Here is an example that makes sure the user cannot maximize the form:
private void InitializeComponent()
{
    Icon = new System.Drawing.Icon(@"C:\Programs\RedBook.ico");
    Text = "Windows Fundmentals - Programming";

    ControlBox = true;
    MinimizeBox = true;
    MaximizeBox = false;
}
This would produce:
The Form's Position
The Startup Position of a Form
When an application launches, you can control how and where you want the main form to appear. To assist you with this, the Form class is equipped wiih a property named StartPosition. This property is based on an enumeration named FormStartPosition:
public System.Windows.Forms.FormStartPosition StartPosition { get; set; }
You cam specify the starting position of a form visually or programmatically. To set it visually, you can access the Properties window of the form and get to the StartPosition field. The members of the FormStartPosition enumeration are:
| Value | Result |
| CenterParent | The form will be positioned in the center of its parent. If the application is made of only one form, this form would be positioned in the middle of the desktop |
| CenterScreen | The form will be positioned in the middle of the desktop even if this form is part of an application that is made of various forms. |
| Manual | The form will use the values of the X, Y, Left, and/or Top properties of the Location |
| WindowsDefaultLocation | The operating system will specify the form's position using a value known in Win32 as CW_USEDEFAULT |
Based on this, to set the default relative location of a form when it comes up, change the value of its StartPosition combo box in the Properties window. To specify this characteristic when programmatically creating a form or to change this property at run time, call the FormStartPosition enumeration to select the desired value and assign it to the StartPosition property of the form. Here is an example:
using System.Windows.Forms;

public class Exercise : Form
{
    public Exercise()
    {
        InitializeComponent();
    }

    private void InitializeComponent()
    {
        Icon = new System.Drawing.Icon(@"C:\Programs\RedBook.ico");
        Text = "Windows Fundmentals - Programming";

        StartPosition = FormStartPosition.WindowsDefaultLocation;
    }
}
The StartPosition property provides another value that is related to the size.
The Window State of a Form
When creating your application, you can configure its (main) form to be minimized or maximized when the application is launched. To let you set this feature, the Form class is equipped with a property named WindowState. This property is based on an enumeration namd FormWindowState:
public System.Windows.Forms.FormWindowState WindowState { get; set; }
The default value of this property is Normal which means the form would appear in the same dimensions it was designed. If you want the form to be minimized or maximized at startup, in the Properties window, change the desired value of the WindowState property to Maximized or Minimized.
To control the window's state programmatically, assign the Maximized or Minimized value, which are other members of the FormWindowState enumeration, to the WindowState property. Here is an example:
using System.Drawing;

public class Exercise : System.Windows.Forms.Form
{
    public Exercise()
    {
        InitializeComponent();
    }

    private void InitializeComponent()
    {
        Icon = new Icon(@"C:\Programs\RedBook.ico");
        Text = "Windows Fundmentals - Programming";

        WindowState = FormWindowState.Maximized;
    }
}
If you want to check the state of a window before taking action, simply use a conditional statement to compare its WindowState property to the Normal, the Maximized, or the Minimized values.
The Form's Taskbar Presence
When an application displays on the screen along with other applications, its form can be positioned on top of, or behind, forms of other applications. This is allowed by multitasking assignments. When a form is hidden, the taskbar allows you to access it because the form would be represented by a button. This aspect of forms is controlled by a Boolean property named ShowInTaskbar:
public bool ShowInTaskbar { get; set; }
Its default value is True, which indicates that the form would be represented on the taskbar by a button. Here is an example:
private void InitializeComponent()
{
        Icon = new Icon(@"C:\Programs\RedBook.ico");
        Text = "Windows Fundmentals - Programming";

        ShowInTaskbar = false;
}
| Unless you have a good reason (and it is hard to see what that reason could be), you should not set the ShowInTaksbar property of the first or main form of an application to false. |
The Size of a Form
The Width of a Form
The width of a form is the distance from its left to its right borders. To support the width of forms, the Form class is equipped with an integral property named Width that it inherits from the Control class:
public int Width { get; set; }
To visually specify the width of a form, click and empty area of the form to select it. In the Properties window, expand the Size field. under Size, click the Width field and type the desired value. To programmatically specify the width of a form, access the Width property of its variable and assign an integer to it. Here is an example:
using System.Windows.Forms;

class WaterDistribution
{
    static void Main()
    {
        // Form: Bill Preparation
        Form billPreparation = new Form();

        billPreparation.Text = "Water Distribution Company - Bill Preparation";
        billPreparation.Width = 425;
    }
}
To (programmatically) know the width of a form, access the Width property of its Form variable and get is value.
The Height of a Form
The height of a form is the distance from its top to its bottom borders. To support the height of forms, the Control class is equipped with a property named Height that its child classes, including Form, inherit. To visually specify the height of a form, select the form. In the Properties window, expand Size. Under Size, click Height and type the desired integer. You can programmatically set it as we saw for the width. Here is an example:
using System.Windows.Forms;

class WaterDistribution
{
    static void Main()
    {
        // Form: Bill Preparation
        Form billPreparation = new Form();

        billPreparation.Text = "Water Distribution Company - Bill Preparation";
        billPreparation.Width = 425;
        billPreparation.Height = 160;
    }
The Form's Size
A form's size is the amount of space it is occupying on the screen. As seen in the previous two sections, the size of a form can be expressed as its width and its height. This can be illustrated as follows:
When you create a form, it assumes a default size. To set or change the size of a form, at design time, first click it to select it. Then, position the mouse on its right, bottom, or bottom-right handles. This changes the mouse cursor in one of three shapes:
With the mouse positioned, drag in the desired direction.
If you don't want to be able to resize a form and you want to prevent this by accident, at design time, set the form's Locked property to True. If you do this:
| Because Locked is only a design characteristic, it is not an actual property of the Form class. Therefore, you cannot use it to lock a form at run time. In other words, you cannot use the Lock feature to prevent the user from resizing a form. |
Besides resizing the form by dragging one of its handles, to change the size of a form, select it and, in the Properties window, click the + button of the Size field. Then type the desired value for the Width and the desired value for the Height. The values must be natural numbers.
To programmatically change the size of a form, as seen in previous lessons, assign the desired values to either or both its Width and Height properties. Here is an example:
private void InitializeComponent()
{
    Icon = new Icon(@"C:\Programs\RedBook.ico");
    Text = "Windows Fundmentals - Programming";

    Width = 425;
    Height = 308;
}
Alternatively, to let you specify the size of a form, the Form class is equipped with a property named ClientSize that is of type Size:
public System.Drawing.Size ClientSize { get; set; }
Here is an example of using this property to specify the size of a form:
private void InitializeComponent()
{
    Icon = new Icon(@"C:\Programs\RedBook.ico");
    Text = "Windows Fundmentals - Programming";

    ClientSize = new Size(425, 308);
}
If you want the operating system to specify the size of the form, set its StartPosition property to WindowsDefaultBounds. In this case, a value called CW_USEDEFAULT would be assigned to both the Width and the Height properties.
The Form Borders
A form can be made to appear with a system icon and the system buttons. Depending on your goals, you can also make a form appear as a dockable window. The borders of a form are controlled by a property named FormBorderStyle:
public System.Windows.Forms.FormBorderStyle FormBorderStyle { get; set; }
If you set both the MinimizeBox and the MaximizeBox properties to False, we saw that the form would have only the system Close button, but the form can still be resized. If you want the form to display only the system Close button and to prevent the user from resizing it, set its FormBorderStyle property to Fixed3D. Here is an example:
private void InitializeComponent()
{
    Icon = new Icon(@"C:\Programs\RedBook.ico");
    Text = "Windows Fundmentals - Programming";

    FormBorderStyle = FormBorderStyle.Fixed3D;
}
This would produce:
A Tool Window
A tool window is a form equipped with a short title bar, no icon, and only a small system Close button. There are two types of tool windows.
You can also create a form with no borders by assigning None to the FormBorderStyle property. If you do this, make sure you provide the user with a way to close the form; otherwise... |
 |
The Client Area of a Form
Introduction
When a form has been created, you can add Windows controls to it. These controls can be positioned only in a specific area, the body of the form. The area that the form makes available to the controls added to it is called the client area:
To know the amount of space that a form is making available to its child control, you can access the form's ClientSize or the ClientRectangle properties.
The Background Color of a Form
The client area of a form is painted with a color specified by the operating system. To let you change the background color of a form, the Form class is equipped with a property named BackColor:
public override System.Drawing.Color BackColor { get; set; }
To visually set the background color of a form, access its BackColor field of the Properties window:
 |
 |
 |
To programmatically change its color, assign a color from the Color structure to the BackColor property. Here is an example:
public class Exercise : System.Windows.Forms.Form
{
    public Exercise()
    {
        InitializeComponent();
    }

    private void InitializeComponent()
    {
        Icon = new Icon(@"C:\Programs\RedBook.ico");
        Text = "Windows Fundmentals";

        BackColor = Color.BurlyWood;
    }
}
![]() Practical Learning: Ending the Lesson
Practical Learning: Ending the Lesson
|
|
|||
| Previous | Copyright © 2001-2024, FunctionX | Saturday 06 May 2023, 15:05 | Next |
|
|
|||