Introduction to the Properties of a Class

Introduction to the Properties of a Class
Properties Fundamentals
Introduction
When you create a class, if you add a field (a member variable) that should be accessible only by other members of the same class, that is, if you want to "hide" a field from the outside world, you make it private. This technique makes sure that the clients of the class cannot directly change the value of the field.
If you create a field as private but still want other classes to access or get the value of such a field, you must then provide a mechanism that those class would use, like a door through which the external objects must pass access the field.
A property is a member of a class that plays an intermediary role to a field of the class. A property is used to "filter" access to a field of a class. Therefore, you start by declaring a (private (if you don't make it private, you may be deceiving the purpose of creating a property)) field. Here is an example:
using System;

public class Square
{
    private double _side;
}

public class Exercise
{
    public static int Main()
    {
        return 0;
    }
}
Obviously this private field cannot be accessed by an outside class. To let the outside classes access this variable, you would/can create a property.
![]() Practical Learning: Introducing Properties
Practical Learning: Introducing Properties
namespace Geometry06
{
    public class Square
    {
        private double s;

        public Square(double side)
        {
            s = side;
        }
    }
}
Creating a Property
There is no single syntax to create a property but there is a general starting formula. The beginning of a property resembles a field but a property has a body like that of a class. Therefore, a property starts with the following formula:
access-level data-type property-name { }
Like a field, a property can be made to be accessed by only the members of the same class or by objects outside the class. This means that you must start a property with an access level of private, public, or internal. Most of the time, you will apply the public access level. Like a field, a property must have a name. The name of a property follows the rules and policies of names of classes. This means that the name should resemble that of an object and start with an uppercase letter. A property must have a body, which is delimited by curly brackets immediately after its name. Based on these descriptions, a property can start as follows:
public class Square
{
    // This is a new property
    public double Side { }
}
To make it easy to read, each curly bracket can be created on its own line. Here is an example:
public class Square
{
    public double Side
    {
    }
}
With regards to their roles, there are various types of properties.
Introduction to Property Readers
A property is referred to as read if its role is to make available the value of the member variable it represents. To create a read property, in the body of the property, type the get keyword and create a body for the keyword, using the traditional curly brackets that delimit a section of code. Here is an example:
public class Square
{
    public double Side
    {
        get {}
    }
}
Once again, to make your code easy to read, each curly bracket can be written on its own line. The section that contains get and its curcly bracket is referred to as the get section, or the get clause, or the getter.
The get section behaves like a method that returns a value. The returned value must be of the data type of the property. Therefore, in the body of the get clause, you must return a value using the return keyword. The simplest way consists of returning the field that corresponds to the property in the class. Here is an example:
public class Square
{
    private double _side;

    public double Side
    {
        get
        {
            return _side;
        }
    }
}
Otherwise, in the body of the get clause, you can implement any behavior that you want such as performing some operations before making the field's value available outside. Since the private field is a member of the class, you can also use the this object to access it. Here is an example:
public class Square
{
    private double _side;

    public double Side
    {
        get
        {
            return this._side;
        }
    }
}
Initializing a Property Reader
A read property is also referred to as read-only property because the clients of the class can only retrieve the value of the property but they cannot change it. Therefore, if you create a read property, you should provide the users with the ability to primarily specify the value of the field it represents. This would be a way to initialize the property readers.
To initialize a property reader, you can create an accessory method or a constructor for the class. If you want to create a property whose value is constant (the value can never change), in the body of the method or constructor, assign the desired value to the private field associated with the property. If you want the value to be provided externally, the method or constructor should (must)use a parameter that is the same type as the property and field. In the body of the method or constructor, assign the parameter to the field. This can be done as follows:
public class Square
{
    private double _side;

    public double Side
    {
        get
        {
            return this._side;
        }
    }

    public Square(double s)
    {
        this._side = s;
    }
}
Once a read property has been created, other classes can access it, for example they can read its value.
![]() Practical Learning: Creating Read-Only Properties
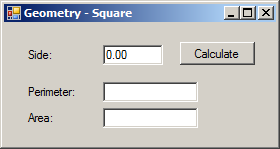
Practical Learning: Creating Read-Only Properties
namespace Geometry06
{
    public class Square
    {
        private double s;

        public Square(double side)
        {
            s = side;
        }

        public double Side
        {
            get { return s; }
        }
        public double Perimeter
        {
            get { return s * 4; }
        }

        public double Area
        {
            get { return s * s; }
        }
    }
}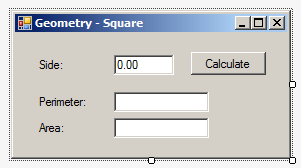
| Control | (Name) | Text |
| Label | Side: | |
| TextBox | txtSide | 0.00 |
| Button | btnCalculate | Calculate |
| Label | Perimeter: | |
| TextBox | txtPerimeter | |
| Label | Area: | |
| TextBox | txtArea |
using System;
using System.Windows.Forms;
namespace Geometry06
{
public partial class Form : Form
{
public Geometry()
{
InitializeComponent();
}
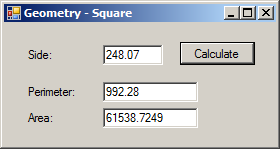
private void btnCalculate_Click(object sender, EventArgs e)
{
double side = double.Parse(txtSide.Text);
Square sqr = new Square(side);
txtPerimeter.Text = sqr.Perimeter.ToString();
txtArea.Text = sqr.Area.ToString();
}
}
}
An Expression-Bodied Property
We have learned to get a get clause of a property with a simple return value. Here is an example:
class Season
{
    int temp;

    public int MeanTemperature
    {
        get
        {
            return temp;
        }
    }
}
If you have a get clause that uses a simple return value, the C# language provides a simple way to implement such a clause. To do that, remove the curly brackets. Replace the return keyword with the => operator. Here is an example:
class Season
{
    int temp;

    public int MeanTemperature
    {
        get => temp;
    }
}
Using the Body of a Property Reader
The body of a get clause of a property can be as complicated as you want, instead of simply returning its associated field. For example, you can declare a variable in the clause. You can decide to use such a variable or not. For example, you can involve such a variable in an expression. Here is an example:
using System;

class Order
{
    static void Main()
    {
        Mattress mat = new Mattress(12);

        Console.WriteLine("Mattress Description");
        Console.WriteLine("--------------------");
        Console.Write("Thickness: ");
        Console.WriteLine(mat.Thickness);
        Console.WriteLine("====================");
    }
}

class Mattress
{
    int _thk;

    public Mattress(int thick)
    {
        _thk = thick;
    }

    public string Thickness
    {
        get
        {
            string pds = "pounds";

            return _thk + " " + pds;
        }
    }
}
Also, in the body of a get clause, you can create a local function. You can then call that funtion right there in the body of the get clause. Here is an example:
using System;
using System.Windows.Forms;

namespace Exercise01
{
    public partial class Form1 : Form
    {
        public Form1()
        {
            InitializeComponent();
        }

        private void btnProcess_Click(object sender, EventArgs e)
        {
            Mattress mat = new Mattress(12);

            txtThickness.Text = mat.Thickness;
        }
    }

    class Mattress
    {
        int _thk;

        public Mattress(int thick)
        {
            _thk = thick;
        }

        public string Thickness
        {
            get
            {
                void Show()
                {
                    MessageBox.Show("The thickness of our mattresses is expressed in pounds.", "Mattress Worldwide");
                }

                string pds = "pounds";

                Show();

                return _thk + " " + pds;
            }
        }
    }
}
Introduction to Property Writers
Instead of retrieving the value of a field of a class, you may want external classes to be able to change the value of that member. A property is referred to as write if it can change (or write) the value of its corresponding field.
To create a write property, in the body of the property, type the set keyword and create a curly-bracket delimited body for it. Here is an example:
public class TimeSheet
{
    public double Monday
    {
    	set
        {
        }
    }
}
A write property is used to pass a value from outside the class to a field of its class. Therefore, the least operation you can perform with a write property is to assign it a value that would be provided by the outside world. To support this, C# provides the value contextual keyword (contextual means the word is a keyword only in some cases, depending on how it is being used). Here is an example:
public class TimeSheet
{
    public double Monday
    {
    	set
        {
    	    mon = value;
        }
    }
}
In the same way, you can create as many write properties as you need.
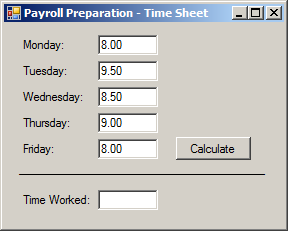
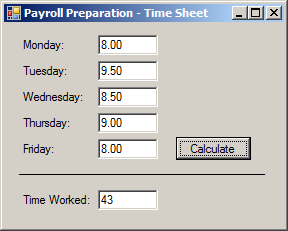
![]() Practical Learning: Creating Write-Only Properties
Practical Learning: Creating Write-Only Properties
namespace PayrollEvaluation2
{
    public class TimeSheet
    {
        private double mon;
        private double tue;
        private double wed;
        private double thu;
        private double fri;

        public double Monday { set { mon = value; } }
        public double Tuesday { set { tue = value; } }

        public double Wednesday
        {
            set { wed = value; }
        }
        public double Thursday { set { thu = value; } }
        public double Friday { set { fri = value; } }

        public double TimeWorked
        {
            get
            {

                return mon + tue + wed + thu + fri;
            }
        }
}
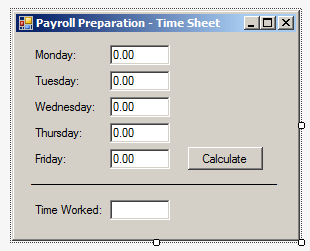
| Control | (Name) | Text |
| Label | Monday: | |
| TextBox | txtMonday | 0.00 |
| Label | Tuesday: | |
| TextBox | txtTuesday | 0.00 |
| Label | Wednesday: | |
| TextBox | txtWednesday | 0.00 |
| Label | Thursday: | |
| TextBox | txtThursday | 0.00 |
| Label | Friday: | |
| TextBox | txtFriday | 0.00 |
| Button | Calculate | btnCalculate |
| Label | Time Worked: | |
| TextBox | txtTimeWorked |
using System;
using System.Windows.Forms;

namespace PayrollEvaluation2
{
    public partial class Form : Form
    {
        public PayrollPreparation()
        {
            InitializeComponent();
        }

        private void btnCalculate_Click(object sender, EventArgs e)
        {
            TimeSheet ts = new TimeSheet();

            ts.Monday = double.Parse(txtMonday.Text);
            ts.Tuesday = double.Parse(txtTuesday.Text);
            ts.Wednesday = double.Parse(txtWednesday.Text);
            ts.Thursday = double.Parse(txtThursday.Text);
            ts.Friday = double.Parse(txtFriday.Text);

            double total = ts.TimeWorked;
            txtTimeWorked.Text = total.ToString();
        }
    }
}
Monday:    8.00
Tuesday:   9.50
Wednesday: 8.50
Thursday:  9.00
Friday:    8.00
An Expression-Bodied Property Writer
A property writer is usually the best place to validate, to accept, or to reject a value that a property must deal with. This means that sometimes you will use to set clause to process a value. Still, many times, that clause will include only a single-line expression. In that case, you can omit the body of the clause. After the set keyword, type => and the expression that assigns value to the private field of the property. Here is an example:
public class Employee
{
    private string code;

    public string ContractIdentifier
    {
        set => code = value;
    }
}
Introduction to Read/Write Properties
Overview
A property is referred to as read/write if it can both receive values from the outside world and it can provide values to the outside world. Actually, a property that has only a set section is referred to as write-only because the other classes can only assign a value (or write a value) to its corresponding field. A read/write property has both a get and a set sections.
To create a read/write property, create a get and a set clauses in the body of the property. If you are using Microsoft Visual Studio, right-click the section where you want to create the property and click Insert Snippet... Double-click Visual C#. In the list, double-click propfull:
Here is an example:
public class Square
{
    private double s;

    public double Side
    {
        get
        {
            return s;
        }

        set
        {
            s = value;
        }
    }
}
By tradition, the get section is created before the set section, but that is not a rule. You can as well create a set section before a get section.
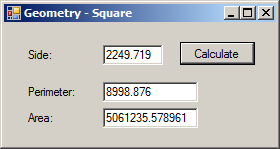
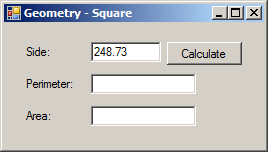
![]() Practical Learning: Creating Read-Write Properties
Practical Learning: Creating Read-Write Properties
namespace Geometry06
{
    public class Square
    {
        private double s;

        public Square()
        {
        }

        public double Side
        {
            get
            {
                return s;
            }

            set
            {
                s = value;
            }
        }
        public double Perimeter
        {
            get { return s * 4; }
        }

        public double Area
        {
            get { return s * s; }
        }
    }
}using System;
using System.Windows.Forms;
namespace Geometry06
{
public partial class Geometry : Form
{
public Geometry()
{
InitializeComponent();
}
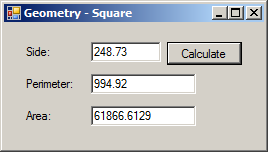
private void btnCalculate_Click(object sender, EventArgs e)
{
Square sqr = new Square();
double side = double.Parse(txtSide.Text);
sqr.Side = side;
txtPerimeter.Text = sqr.Perimeter.ToString();
txtArea.Text = sqr.Area.ToString();
}
}
}
Introduction to Initializing a Read-Write Property
There are various ways you make sure that a property would get its values. One way is to create a read/write property and stop there; then simply eventually let clients of the class assign a value to the property. Here is an example:
public class Exercise
{
    public static void Main()
    {
        Employee empl = new Employee();

        empl.ContractIdentifier = "HL-9480";
    }
}

public class Employee
{
    private string code;

    public string ContractIdentifier
    {
        get { return code;  }
        set { code = value; }
    }
}
An Expression-Bodied Property
Another technique is to create a method or a constructor that would use parameter that is the type of the property as we have already seen. In both cases, each clause of the property uses a single-line statement. If that's the case, you can omit the bodies of the clauses and use the => operator to simply them as we learned earlier. Here are examples:
public class Employee
{
    private string code;

    public string ContractIdentifier
    {
        get => code;

        set => code = value;
    }
}
Introduction to Automatic Properties
Overview
As you should be aware by now, a read-only property is one that only provides values to external objects that cannot write values to it. To help you easily create an automatic read-only property, the C# language provides a formula as follows:
access-level data-type property-name { get; }
Based on this, to create a read-only property, simply include get; in its curly brackets. Here is an example:
public class Book
{
    public string ISBN { get; }
}
By the way, in previous versions of C#, to create a read-only property, you had to add private set; in the curly brackets. Here is an example:
public class Book
{
    public string ISBN { get; private set; }
}
Initializing an Automatic Read-Only Property
If you want to initialize a read-only property, you can create a constructor. Then, in the body of a constructor, assign the desired value to the property. Here is an example:
using static System.Console;

namespace Exercises
{
    public class Exercise
    {
        public static void Main()
        {
            Employee staff = new Employee();

            Write("Employee: ");
            WriteLine(staff.FullName);
            WriteLine("=================================");
        }
    }

    public class Employee
    {
        public string FullName { get; }

        public Employee()
        {
            FullName = "Julius Nyerere";
        }
    }
}
If you want to initialize a read-only property with a value that would be provided by a client of the class, create a constructor that takes a parameter that is the same type as the property. In the body of a constructor, assign the argument to the property. Here is an example:
public class Depreciation
{
    public double Cost { get; }

    public Depreciation(double cost)
    {
        Cost = cost;
    }
}
You cannot use a function or a method other than a constructor to initialize a read-only property. As an alternative, to initialize a read-only property, instead of using a constructor, after the curly brackets of the property, assign the desired default value. Here is an example:
public class Depreciation
{
    public double Cost { get; } = 10000;
}
![]() Practical Learning: Creating Automatic Properties
Practical Learning: Creating Automatic Properties
namespace BusinessMathematics2
{
    public class Calculations
    {
        static public double Subtract(double a, double b)
        {
            return a - b;
        }

        public static double Divide(double a, double b)
        {
            return a / b;
        }
    }
}namespace BusinessMathematics2
{
public class Depreciation
{
public double Cost { get; }
public double SalvageValue { get; }
public int Life { get; }
public Depreciation(double cost, double value, int length)
{
Cost = cost;
SalvageValue = value;
Life = length;
}
public double Calculate()
{
double numerator = Calculations.Subtract(Cost, SalvageValue);
return Calculations.Divide(numerator, Life);
}
}
}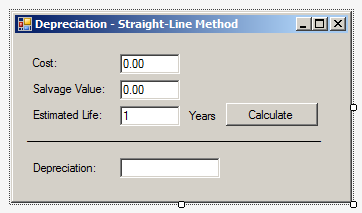
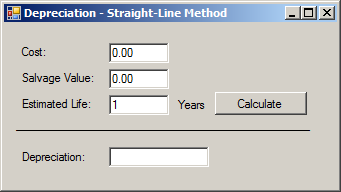
| Control | (Name) | Text |
| Label | Cost: | |
| TextBox | txtCost | 0.00 |
| Label | Salvage Value: | |
| TextBox | txtSalvageValue | 0.00 |
| Label | Estimated Life: | |
| TextBox | txtEstimatedLife | 1 |
| Label | Years | |
| Button | Calculate | btnCalculate |
| Label | Depreciation: | |
| TextBox | txtDepreciation |
using System;
using System.Windows.Forms;
namespace BusinessMathematics2
{
public partial class BusinessMathematics : Form
{
public BusinessMathematics()
{
InitializeComponent();
}
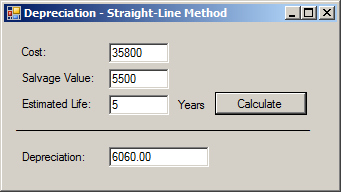
private void btnCalculate_Click(object sender, EventArgs e)
{
double cost = double.Parse(txtCost.Text);
double value = double.Parse(txtSalvageValue.Text);
int life = int.Parse(txtEstimatedLife.Text);
Depreciation deprec = new Depreciation(cost, value, life);
txtDepreciation.Text = deprec.Calculate().ToString("F");
}
}
}

namespace BusinessMathematics2
{
    public class Calculations
    {
        static public double Subtract(double a, double b) => a - b;
        public static double Divide(double a, double b) => a / b;
    }
}namespace BusinessMathematics2
{
public class Depreciation
{
public double Cost { get; }
public double SalvageValue { get; }
public int Life { get; }
public Depreciation(double cost, double value, int length)
{
Cost = cost;
SalvageValue = value;
Life = length;
}
public double Calculate() => Calculations.Divide(Calculations.Subtract(Cost, SalvageValue), Life);
}
}A Single-Expression Property
One more option to initialize a read-only property is to use the formula we saw for functions and methods that use a single line to return a value or an expression; that is, after the name of the property, type =>, and the return value or expression Here is an example:
public class Depreciation
{
    public double Cost => 10000;
}
Introduction to Read-Write Automatic Properties
An Automatic Property
If you want to create a simple read/write property that relays values between a class and the external objects, you don't have to create a local field for it. To help you easily create a property, the C# language provides a formula as follows:
access-level data-type property-name { get; set; }
To use this formula, declare what resembles a variable followed by { get; set; }. This is referred to as an automatic property. Here is an example of an automatic property:
class Rectangle
{
    public double Width { get; set; }
}
![]() Practical Learning: Introducing Automatic Properties
Practical Learning: Introducing Automatic Properties
namespace Chemistry03
{
    public class Element
    {
        public string Symbol { get; set; }
        public string ElementName { get; set; }
        public int AtomicNumber { get; set; }
        public double AtomicWeight { get; set; }
    }
}
Initializing an Automatic Property
To initialize an automatic property, you can create a constructor that uses a parameter for the property. In the body of the constructor, assign the argument to the property. Here is an example:
public class Element
{
    public int AtomicNumber { get; set; }

    public Element(int number)
    {
        AtomicNumber = number;
    }
}
In the same way, if you want the property to be initialized with any value of your choice, you don't have to include a corresponding value in the constructor. Instead, in the body of the constructor, you can assign any value you want. Here is an example:
public class Element
{
    public int AtomicNumber { get; set; }

    public Element(int number)
    {
        AtomicNumber = 12;
    }
}
![]() Practical Learning:
Initializing Automatic Properties
Practical Learning:
Initializing Automatic Properties
namespace Chemistry03
{
    public class Element
    {
        internal string Symbol { get; set; }
        internal string ElementName { get; set; }
        internal int AtomicNumber { get; set; }
        internal double AtomicWeight { get; set; }

        public Element()
        {
            Symbol = "Ne";
            AtomicNumber = 10;
            ElementName = "Neon";
            AtomicWeight = 20.180;
        }
    }
}
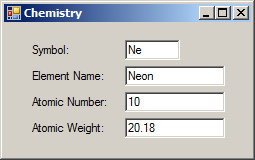
| Control | (Name) | Text |
| Label | Symbol: | |
| TextBox | txtSymbol | |
| Label | Element Name: | |
| TextBox | txtElementName | |
| Label | Atomic Number: | |
| TextBox | txtAtomicNumber | |
| Label | Atomic Weight: | |
| TextBox | txtAtomicWeight |
using System.Windows.Forms;

namespace Chemistry03
{
    public partial class Form1 : Form
    {
        public Chemistry()
        {
            InitializeComponent();

            Element elm = new Element();

            Present(elm);
        }

        void Present(Element obj)
        {
            txtElementName.Text  = obj.ElementName;
            txtSymbol.Text       = obj.Symbol;
            txtAtomicNumber.Text = obj.AtomicNumber.ToString();
            txtAtomicWeight.Text = obj.AtomicWeight.ToString();
        }
    }
}
Assigning a Default Value to an Automatic Property
Instead of initializing an automatic property in a constructor, you can assign the desired value after the curly brackets of the property. Here is an example:
public class Element
{
    public int AtomicNumber { get; set; } = 12;
}
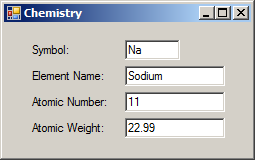
![]() Practical Learning:
Automatically Initializing Properties
Practical Learning:
Automatically Initializing Properties
namespace Chemistry03
{
    public class Element
    {
        internal string Symbol { get; set; } = "Na";
        internal string ElementName { get; set; } = "Sodium";
        internal int AtomicNumber { get; set; } = 11;
        internal double AtomicWeight { get; set; } = 22.990;
    }
}
Static Properties
A property can be made static. One option is to create the property in a normal class. The corresponding field must also be static.
![]() Practical Learning: Creating and Using Static Properties
Practical Learning: Creating and Using Static Properties
namespace Geometry06
{
    public class Square
    {
        private static double s;

        public Square()
        {
        }

        public static double Side
        {
            get { return s; }

            set { s = value; }
        }

        static public double Perimeter { get { return s * 4; } }

        public double Area             { get { return s * s; } }
    }
}using System;
using System.Windows.Forms;
namespace Geometry06
{
public partial class Geometry : Form
{
public Geometry()
{
InitializeComponent();
}
private void btnCalculate_Click(object sender, EventArgs e)
{
Square sqr = new Square();
double side = double.Parse(txtSide.Text);
Square.Side = side;
txtArea.Text = sqr.Area.ToString();
txtPerimeter.Text = Square.Perimeter.ToString();
}
}
}
A Property of a Class Type
Introduction
After creating a class, it becomes a data type in its own right. As a normal data type, it can be involved in any regular property issue. Of course, to involve a class in a property-related operation, you must first have a class. You can use one of the built-in classes or structures of the .NET Framework or you can create your own class. To start, we already know how to create a field of a class type. Here is an example:
class Camera
{
}

class TrafficTicket
{
    Camera cmr;
}
A Regular Class Type
Earlier, we saw that, to create a property reader, you can create a get clause that returns the field. Here is an example:
public class Camera
{
    public string Location { get; set; }
}

public class TrafficTicket
{
	Camera cmr;

    public Camera Recorder
    {
        get
        {
            return cmr;
        }
    }
}
In the body of the get clause, we will see that you can create some type of validation for the fiel (to accept or reject its value), but if you are creating a simple property that simply returns the field, you can make the property as an expression-body. Here is an example:
public class Camera
{
    public string Location { get; set; }
}

public class TrafficTicket
{
	Camera cmr;

    public Camera Recorder
    {
        get => cmr
    }
}
On the other hand, if you want to get a property-writer, create a set clause. In its body assign value to the field. Here is an example:
public class Camera
{
    public string Location { get; set; }
}

public class TrafficTicket
{
	Camera cmr;

    public Camera Recorder
    {
        set
        {
            cmr = value;
        }
    }
}
We will see that you can process the field value in the set clause. If you are planning to create a simple property that only assigns the property to the value contextual keyword, you can change the body of the set class into an expression-body. Here is an example:
public class Camera
{
    public string Location { get; set; }
}

public class TrafficTicket
{
    Camera cmr;

    public Camera Recorder
    {
        set => cmr = value;
    }
}
An Automatic Property of a Class Type
In some cases, you will want to process the members (properties and methods) of the property that is of a class (or structure) type. In some other cases, you will want a simple property that only represents a characteristic of an object based on the class. In this case, you can make the property automatic. You have various options.
If you want a simple property that only produces an object, you can create the property as an automatic one with only get. Here is an example:
public class Camera
{
    public string Location { get; set; }
}

public class TrafficTicket
{
    public Camera Recorder
    {
        get;
    }
}
If you want a property that only writes an object, create write-only automatic property.
If you want a simple property that the clients of the class can both read from and write to, you can create the property as an automatic one. Here is an example:
public class Camera
{
    public string Location { get; set; }
}

public class TrafficTicket
{
    public Camera Recorder
    {
        get;
        set;
    }
}
Using a Property of a Class Type
Introduction
If you create a property of a value (primitive type, you can immediately use it. Here is an example:
using static System.Console;

public class Employee
{
    public string FullName { get; set; }
}

public class Exercise
{
    public static int Main(string[] args)
    {
        Employee staff = new Employee();

        staff.FullName = "Ebalé Mesô Mê Mvuu";

        WriteLine("Employee Name: {0}", staff.FullName);

        return 100_000;
    }
}
This would produce:
Employee Name: Ebalé Mesô Mê Mvuu
Press any key to continue . . .
In this case, the (string) property was not initialized in the class where it was created, then that property was accessed and used where needed. If you use a property of a class type directly, you will receive an error. Here is an example:
using static System.Console;
public class Camera
{
    public string Location { get; set; }
}

public class TrafficTicket
{
    public Camera Recorder
    {
        get;
        set;
    }
}

public class Exercise
{
    public static int Main(string[] args)
    {
        TrafficTicket tt = new TrafficTicket();

        tt.Recorder.Location = "Freemont Drive and Winchester Road";

        WriteLine("Infraction Location: {0}", tt.Recorder.Location);

        return 100_000;
    }
}
This would produce:
Unhandled Exception: System.NullReferenceException: Object reference not set to
an instance of an object.
   at Exercise.Main(String[] args) in C:\Users\pkatts\Source\Repos\Exercise100\Ex
ercise100\Exercise.cs:line 22
Press any key to continue . . .
You must first initialize the property. You have many options.
Initializing a Property of a Class Type Before Use
Before using a property of a class, you can first initialize it from an object of the class. Here is an example:
using static System.Console;

public class Camera
{
    public string Location { get; set; }
}

public class TrafficTicket
{
    public Camera Recorder
    {
        get;
        set;
    }
}

public class Exercise
{
    public static int Main(string[] args)
    {
        TrafficTicket tt = new TrafficTicket();

        tt.Recorder = new Camera();

        tt.Recorder.Location = "Freemont Drive and Winchester Road";

        WriteLine("Infraction Location: {0}", tt.Recorder.Location);

        return 100_000;
    }
}
This would produce:
Infraction Location: Freemont Drive and Winchester Road
Press any key to continue . . .
Initializing a Property of a Class Type When Creating it
Notice that, in the above code, you must remember to initialize the property of class type before accessing the members of the property. For some reason, you may forget to initialize the property or you may do it wrongly. Probably the best way to get the property of class type ready is to initialize the property when creating it. To do this, after the closing curly bracket of the property, use the new operator to initialize the property using a constructor of the class type. Here is an example:
using static System.Console;
public class Camera
{
    public string Location { get; set; }
}

public class TrafficTicket
{
    public Camera Recorder
    {
        get;
        set;
    } = new Camera();
}

public class Exercise
{
    public static int Main(string[] args)
    {
        TrafficTicket tt = new TrafficTicket();

        tt.Recorder.Location = "Freemont Drive and Winchester Road";

        WriteLine("Infraction Location: {0}", tt.Recorder.Location);

        return 100_000;
    }
}
![]() Practical Learning: Ending the Lesson
Practical Learning: Ending the Lesson
|
|
||
| Previous | Copyright © 2001-2021, C# Key | Next |
|
|
||