 |
The Appearance of Windows Controls |
|
Fundamental Design Characteristics of a Windows Control
The Name of a Control on a Form or Report
If you add a text box  or another control from the Controls section of the Ribbon to the form or report, the control would receive a default name. If you drag an object from the Field List to a form or report, the control would use the name of the field set in the table. In both cases, you can change the name of the control.
To change the name of a control on a form or a report, first switch to Design View and access
the Property Sheet for the control. In the Property Sheet, click
the Other or the All tab:
- To change the name of a control, click Name and type the desired string
- To edit the name of a control, either click Name and press F2, or click
the name itself, use the Delete, the Backspace, and the arrow keys to edit
it
 Practical Learning: Naming Objects
- Start Microsoft Access
- Click Blank Desktop Database
- Set the file name to Chemistry1
- Close the default table without saving it
- On the Ribbon, click Create
- In the Forms section, click Form Design
- In the Controls section, right-click the Text Box
and click Drop Multiple Controls
- Click somewhere in the upper section of the form (no need for
precision)
- On the form, click below the first text box
- In the Controls section of the Ribbon, click the Select button

- On the form, double-click the first Unbound text box
(on the right side of Text0)
- In the Property Sheet, click the Other tab and click Name
- Type txtElementNumber
- On the form, click the other Unbound text box
(on the right side of Text2)
- In the Name field of the Property Sheet, type txtSymbol
- To save and close the form, click its Close button

- When asked whether you want to save, click Yes
- Set the name to Elements and click OK
Record and Control Source
If you create a form or a report based on a table, its
Windows controls would be linked to the original table where they would get
their data from. Otherwise, to link a control to a field of a table, first switch the
form or report to Design View and make sure you had set the form or report's Record Source
property to the table that holds the field. Double-click the control to access
its Property Sheet. In the Property Sheet, click either the Data
or the All tab. Click the Control Source field and select an item from
its combo box.
Practical Learning: Setting Control Sources of Objects
- On the Ribbon, click Create
- In the Tables section, click Table Design
- Under Field Name, type AtomicNumber, press Tab, and type n (for Number)
- On the Ribbon, click the Primary Key button

- Click the cell below AtomicNumber and type Symbol
- In the left section of the title bar of Microsoft Access, click the Save
button

- Set the name to Elements and press Enter
- Close the Elements table
- In the Navigation Pane, right-click the Elements form and
click Design View
- If the Property Sheet is not displaying, double-click the button at the intersection of the rulers
 .
.
In the Property Sheet, click the Data tab, click Record Source and type e
(make sure Elements has been selected)
- On the form, click the
first Unbound text box (on the right side of Text0)
- In the Data tab of the Property Sheet, click Control Source
- Click the arrow of the Control Source combo box and select AtomicNumber
- On the form, click the next Unbound text box
- In the Data tab of the Property Sheet, click Control Source.
Click the arrow of the Control Source combo box and select Symbol
The Caption of a Windows Control
A caption is the word or group of words
that displays on a control. If you drag a control from the Field List to a form
or report, the control would use the caption set in the table for the field.
Remember that if no caption was set for the field, the name is used as the
caption. At any time, you can change the caption to your liking..
The controls that have a caption have a property named Caption in the Property Sheet.
Practical Learning: Setting Objects Captions
- On the form, click the first label (probably
Text0)
- In the Property Sheet, click Format and click Caption
- Type Element #:
- On the form, click the other label (probably Text2)
- In the Property Sheet, click All and Caption
- Type Symbol:
- Close the form
- When asked whether you want to save, click Yes
- In the Navigation Pane, right-click the Elements table and click Design View
- Click the empty cell under Symbol
- Type ElementName and press the down arrow key
- In the cell under ElementName, type AtomicMass and press F6
- Click Caption and type Mass
- In the same way, set the Caption of AtomicNumber as Atomic #
- Close the table
- When asked whether you want to save, click Yes
- In the Navigation Pane, double-click the Elements form to open it
- Right-click its tab and click Design View
- In the Tools section of the Design tab of the Ribbon, click Add
Existing Fields
- From the Field List, drag ElementName and drop it on the form
- Notice that the accompanying label has a caption that is the same as the field name
- From the Field List, drag AtomicMass and drop it on the form
- Notice that it has its own caption
- On the form, click the left ElementName
- Click the left ElementName again to put it into edit mode
- Click between t and N, and press the Space bar
- Click an unoccupied area of the form to dismiss the selection
- Press Ctrl + A to select all controls
- On the Ribbon, click Arrange
- In the Table section, click Stacked
- Close the form
- When asked whether you want to save, click Yes
- On the Ribbon, click File and click Open
- In the list of files, click Ceil Inn1 from the
previous
lesson
- On the Ribbon, click Create
- In the Forms section, click Form Design
- Double-click the button at the intersection of the rulers.
In the Property Sheet, click the Data tab.
Click Record Source and type m (make sure MaritalsStatus has been selected)
- In the Design tab of the Ribbon, in the Tools section, click Add Existing Fields
- In the Field List, double-click MaritalStatusID
- On the form, click inside the left MaritalStatusID (the label) and edit it to display Marital Status ID
- In the Field List, double-click MaritalStatus
- On the form, click inside the left MaritalStatus (the label) and edit it to display Marital Status
- Close the form
- When asked whether you want to save the form, click Yes
- Set the form name as MaritalsStatus and press Enter
Data Entry on a Form
Introduction
Data entry on a form is performed using Windows controls. If the control is
a text box, click it and type the value. As you may know already, most controls are accompanied
by a label. You can click that label to give focus to the control. If a control is a list, you
will be asked to make a selection.
After entering or changing data on a control, to move from
one field to the next, the surest way is to press Tab. In some cases, the
user can also press Enter.
Practical Learning: Form Data Entry
- On the Ribbon, click File and click Open
- In the list of files, click Cruise1 (otherwise, open the Cruise1 database)
- In the Navigation Pane, under Carriers, double-click the Carriers form
- On the form, click the text box on the right side of Ship Code
- Type ELR-086
- Press Tab
- In the Ship Name text box, type Ocean Bayonne
- Click Port of Registry and type Miami, FL
- To close the form, click its close button
- On the Ribbon, click File and click Open
- In the list of files, click Chemistry1
- In the Navigation Pane, double-click the Elements form to open it
- Create a few records as follows:
| Element # |
Symbol |
Element Name |
Mass |
| 1 |
H |
Hydrogen |
1.00794 |
| 2 |
He |
Helyum |
4.002602 |
| 3 |
Li |
Lithium |
6.941 |
| 4 |
Zi |
Xylophate |
9.50242 |
| 5 |
B |
Boron |
10.811 |
| 6 |
C |
Carbon |
12.0107 |
- On the Ribbon, click File and click Open
- In the list of files, click StatesStatistics1 from the
previous lesson
- In the Navigation Pane, right-click the States form and click
Design View
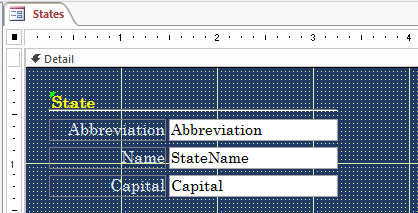
- Double-click the left StateName (the label) to access its properties
- In the Property Sheet of the label, click Format if necessary.
Click the text in the Caption field and remove State to have
Name
Controlling Data Entry on a Form
One of the most important roles of a form is to provide a friendly means of
performing data entry. Probably the most fundamental aspect of a form is to prevent an asthetic
display of records to the user. As such, a form is not necessary made for data entry. In fact,
you can prevent the user from creating records using a form. This is controlled by a Boolean
property named Allow Additions. Therefore, to prevent the user from creating new records
using a form, open the form in Design View and access its Property Sheet. In the Data or the All
tab, set the Allow Additions field to No.
Practical Learning: Controlling Data Entry on a Form
- On the Ribbon, click File and click Open
- In the list of files, click Ceil Inn1 used earlier
- In the Navigation Pane, double-click the MaritalsStatus form to open it
- In the bottom section of the form, click the New (Blank) Record
- In the new record, click Marital Status
- Type Widow and press Tab
- Right-click the title bar of the form and click Design View
- Double-click the button at the intersection of the rulers
- In the Property Sheet, click Data if necessary.
Double-click Allow Additions to set its value to No
- Right-click the title bar of the form and click Form View
- In the bottom section of the form, Notice that the New (Blank) Record button is disabled.
Still in the bottom section of the form, click the Last Record button
- Press Tab to try to get to a new record
- On the Ribbon, click File and click Open
- In the list of files, click Cruise1 (from the previous lesson)
- When asked whether you want to save the changes to the form, click Yes
- In the Navigation Pane, right-click the CruiseShips form and click Open
- After viewing the form, right-click its body and click Design View
- Double-click the button at the intersection of the rulers.
In the Property Sheet, click Data and click Record Source
- Click the arrow of Record Source and select CruiseShips
- On the Ribbon, click Design if necessary.
In the Tools section of the Ribbon, click Add Existing Fields
- In the Field List, click ShipCode
- Press and hold Shift
- Click Decks
- Release Shift
- Drag the selected fields to the form and release the mouse
- Move the selection to the top-left of the form so it aligns with
2 measures from left according to the horizontal ruler and 2
measures from top according to the vertical ruler
- Click an unoccupied area of the form to dismiss the selection
- On the form, double-click Ship Code to open its Property Sheet
- In the Property Sheet, click the Format tab.
Click Width and type 1.20
- On the form, click ShipCode
- In the Width field of the Property Sheet, type 1.25
- Inside the horizontal ruler, click above Ship Code to select the labels
- On the Ribbon, click Arrange
- In the Size & Ordering section, click Size/Space and click To Widest
- Inside the horizontal ruler, click above ShipCode to select the text boxes
- Right-click one of the selected controls, position the mouse on Size and click To Widest
- On the Ribbon, click Design
- In the Tools section of the Ribbon, click Add Existing Fields
- In the Field List, click PortOfRegistry
- Press and hold Shift
- Click Capacity
- Release Shift
- Drag the selected fields to the right side of the form and release the mouse
- Move the selection to the right side of the other controls on the form to align the
selection with the 3 mark + 2 measures of the horizontal ruler and 2 measures from the top inside the vertical ruler
- Click an unoccupied area of the form to dismiss the selection
- On the form, double-click Port of Registry (on the left side of PortOfRegistry) to access its properties
- In the Property Sheet, click the Format tab.
Click Width and type 1.35
- Click Left and type 3
- On the form, click PortOfRegistry
- In the Width field of the Property Sheet, type 1.35
- Inside the horizontal ruler, click above Port of Registry to select the right-side labels
- On the Ribbon, click Arrange
- In the Size & Ordering section, click Align and click Left
- Still in the Size & Ordering section, click Size/Space and click To Widest
- Inside the horizontal ruler, click above PortOfRegistry to select the text boxes
- Right-click one of the selected controls, position the mouse on Size and click To Widest
- To preview, right-click the title bar of the form and click Form View
- After viewing, right-click the title bar of the form and click Design View
The Font Applied to a Windows Control
Introduction
The font is the design used to paint text of the control on
a form or a report. The appearance of a control of a form or a report can be
improved with an appropriate font. To change the font of a control, first
display its form or report in Design View:
- On the Ribbon, click either Home or Format. In the Text Formatting section
of the Home tab or in the Font section of the Format tab, click the
Font combo box and select the name of the desired font
- Access the Property Sheet for the control. In either the Format or the
All tab, click Font Name, click the arrow of the combo box and select the
desired font
The font you apply to any control on a form or a report
doesn't have any influence on the columns of the base table.
Practical Learning: Specifying the Font of a Control
- The CruiseShips form should still be opened in Design View.
To select all controls on the form, press Ctrl + A
- On the Ribbon, click Home
- In the Text Formatting section, click the arrow of
the Font combo box and select Comic Sans MS (if you don't have that font, select Tahoma)
The Font Size of a Control
To change or set the size of the font used to display the characters of a
control on a form or a report:
- After clicking the control or selecting the group of controls, on the
Ribbon, click either Home or Format. In the Text Formatting section of the
Home tab or in the Font section of the Format tab, click the arrow of the Font Size combo box and select the
desired tab
- Access the Property Sheet for the control or the group of controls. In
either the Format or the All tab, click the arrow of the Font Size combo box
and select the desired size
Practical Learning: Setting the Font Sizes of Controls
- All controls should still be selected on the form (otherwise, press Ctrl +A to select them).
On the Ribbon, click Format
- In the Font section, click the arrow of the Font Size combo box and
select 12
The Text Style of a Control
To change the font style of a control, switch the form or report to Design View.
Select the control or the group of controls. On the Ribbon, click either Home or
Format. In the Text Formatting section of the Home tab or in the Font
section of the Format tab, click the button that represents the desired style:
Bold  ,
Italic
,
Italic  ,
or Underline
,
or Underline  .
.
Instead of the buttons on the Ribbon, you can apply a style or a combination of
styles using the Property Sheet. In the Property Sheet, click either the Format or the All tab:
- To set a bold style, use the Font Weight combo box. Its values are: Extra Light, Light, Normal,
Medium, Semi Bold, Bold, Extra Bold, and Heavy
- The italic aspect it controlled by the Font Italic Boolean
property whose default value is No
- The underline feature is controlled by the
Font Underline Boolean property and its default value is No
Practical Learning: Setting the Font Style of a Control
- The CruiseShips form should still be opened in Design View.
Inside the horizontal ruler, click above Ship Code to select the left-side labels
- On the Ribbon, click Home
- In the Text Formatting section, click the Bold button
- Inside the horizontal ruler, click above Port of Registry to select the right-side labels
- In the Property Sheet, click Format if necessary and click Font Weight
- Click the arrow of the combo box and select Bold
The Text Alignment of a Control
The text alignement specifies on what side the value of a field
would be displayed, to the left, to the center, or to the right within the area
allocated to the control. To specify the text alignment of a control:
- On the Ribbon, click either Home or Format. In the Text
Formatting section, click the Align Left button
 (this is the default button of the section), the Center button
  or the Align Right button
- In the Property Sheet of the control, click either Format or All.
In the Text Align field, select the desired option: General
(the default), Left, Center, Right or Distribute
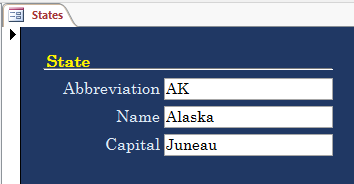
Practical Learning: Aligning Fields Text
- On the Ribbon, click File and click Open
- In the list of files, click StatesStatistics1
- When asked whether you want to save the changes on the form, click Yes
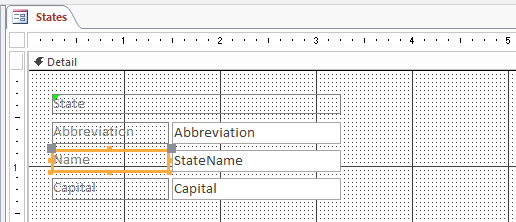
- In the Navigation Pane, right-click the States form and click Design View
- On the form, click the left Abbreviation (the label)
- Press and hold Shift
- Click Name
- Click the left Capital
- Release Shift
- On the Ribbon, click Format
- In the Font section of the Ribbon, click the Align Right button

- On the Ribbon, click File and click Open
- In the list of files, click Cruise1
- When asked whether you want to save the changes on the form, click Yes
Introduction to Colors and Windows Controls
Text Color
The color applied to the text of a control specifies the perception
of red-green-blue that the control will show. To specify or change the color of text of
a control:
- Click the control:
- On the Ribbon, click either Home or Format. In the Font (Home tab) or the Text
Formatting (Format tab) section of the Ribbon, click the down-pointing arrow button of
the Font Color button. Either select or compose a color
- In the Property Sheet for the control, click either Format or All. In the
Fore Color field, select or create a color
- On the form or report, right-click the control. Position the mouse on Font/Fore
Color. Either select or create the desired color
Practical Learning: Setting Text Font on Fields
- In the Navigation Pane, right-click the CruiseShips form and click Design View
- To select all controls on the form, press Ctrl + A
- On the Ribbon, click Home
- In the Text Formatting section, click the arrow of the Font Color button and select
Dark Blue, Text 2, Lighter 80% (Theme Colors: 4th column - 2nd row)
- Click inside the horizontal ruler above ShipCode to seleft the left-side text boxes
- On the Ribbon, click Format
- In the Font section, click the arrow of the Font Color button and select
Blue (Standard Colors: 8th column - 7th row)
- Click inside the horizontal ruler above PortOfRegistry to select the right-side text boxes
- In the Property Sheet, click All
- Click Fore Color and click browse button
- In the window that appears, select Blue (Standard Colors: 8th column - 7th row)
- To preview, right-click the title bar of the form and click Form View
- On the Ribbon, click File
- In the list of files, click StatesStatistics1
- When asked whether you want to save, click Yes
- In the Navigation Pane, right-click the States form and click Design View
The Background Color of a Control
The background color specifies the color used behind the text, or on the
body, of a control. To specify or change the background color of a control, if the color
you want to use is one of the Microsoft Access-defined colors, on the form or the report,
right-click a control or one of the selected control, position the mouse on
Fill/Back Color, and click the desired color. Otherwise:
- Click the control on the form or report. On the Ribbon, click either Home or Format.
In the Text Formatting (Home tab) or the Font (Format) section, click the arrow of
the Background Color button. Select the desired color or create one
- In the Property Sheet of the control, click either Format or All. Click
Back Color and either select from the combo box or create a color using the browse button
- On the form or report, right-click the control and position the mouse on Fill/Back Color.
Practical Learning: Setting the Background Color
- Click the body of the form to select the Detail section
- On the Ribbon, click Format
- In the Font section, click the down-pointing arrow of the Background Color
and select Blue, Accent 5, Darker 50% (Theme Colors: 9th column, 6th row)
- On the Ribbon, click Format and, in the Selection section, click Select
All
- Still in the Format tab of the Ribbon, in the Font section, click the
arrow of the Font combo box and select Century (if you don't have that font,
select Times New Roman)
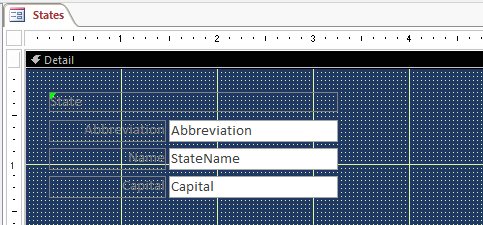
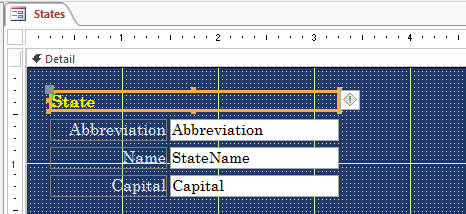
- Inside the horizontal ruler, click above State to select (only) the labels
- In the Font section of the Ribbon, click the arrow of the Font Size
combo box and select 12
- While the labels are still selected, in the Font section of the Ribbon,
click the arrow of the Font Color button and select Blue, Accent 1, Lighter
80% (Theme Colors: 5th column, 2nd row)
- On the form, click the right Abbreviation (the text box)
- Press and hold Shift
- Click StateName
- Click the right Capital
- Release Shift
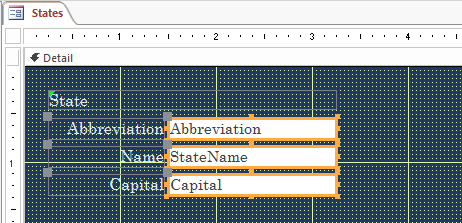
- In the Font section of the Ribbon, click the arrow of the Font Color
button and select Black, Text 1 (Theme Colors: 2nd column, first row)
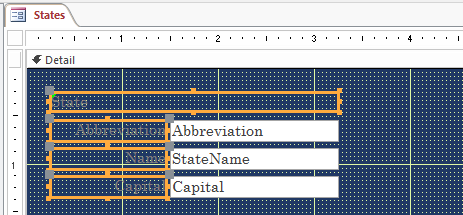
- On the form, click State
- In the Font section of the Ribbon, click the Bold button
- While the sections titles are still selected, in the Font section of the Ribbon, click the arrow of the Font Color button and select Yellow (Standard Colors: 4th column, 7th row)
- On the Ribbon, click File and click Open
- In the list of files, click Ceil Inn1
- When asked whether you want to save, click Yes
- In the Navigation Pane, right-click the Occupancies form and click open
- After viewing the form, right-click the title bar of the form and click
Design View
- Double-click the button at the intersection of the rulers
- In the Property Sheet, click Data and click Record Source
- Click the arrow of Record Source and select Occupancies
- On the Ribbon, click Design if necessary.
In the Tools section, click Add Existing Fields
- From the Field List, drag OccupancyNumber and drop it on the form under the Detail bar (no precision needed)
- Double-click the button at the intersection of the rulers
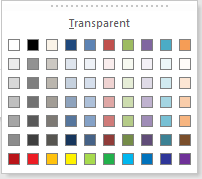
A Transparent Control
If you don't want a control to be painted with a particular color,
you can make it transparent. To do this, right-click the control on the form or report.
Position the mouse on Fill/Back Color, and click Transparent:
 .
.
Alternatively, in the Property Sheet, click the Back Style field, then click
the arrow of its combo box and select
Transparent.
Practical Learning: Setting the Transparency of a Control
- On the form, click OccupancyNum to select the text box
- In the Property Sheet, click Format and click Back Style
- Click the arrow of Back Style and select Transparent
- On the Ribbon, click File and click Open
- In the list of files, click StatesStatistics1
- When asked whether you want to save, click Yes
- In the Navigation Pane, right-click the States form and click Design View
The Borders of a Windows Control
The Thickness of a Border
To indicate its limits, a control is surrounded by a border. By default, the
border appears as a solid line. To specify or change the thickness of the borders of a control
or a group of controls, first select it or select them. Then:
- On the Ribbon, click Format. In the Control Formatting section, click
Shape Outline, position the mouse on
Line Thickness and click the desired width from the list
- In the Format or the All tab of the Property Sheet, click Border Width,
then click the arrow of its combo box and select from the list
The Line Type of a Border
Besides the thickness, you can control the border of an
object with a style. To do this, first select the control or a group of
controls. Then:
- On the Ribbon, click Format. In the Control Formatting section, click
Shape Outline, position the mouse on Line
Type, and select from the list
- In the Format or the All tabs of the Property Sheet, click Border Style
and click the arrow of the combo box to select from the list
The available options are:
The Border Style characteristic can be used in combination with
the Special Effect property. Some of these effects depend on the Special Effect
value and may not appear as expected.
The Border Color property can be used to control the color used to draw the border of a label or a field. It is used as we described for the Fore Color property.
The Border Width property is used as the Line/Border Width button of the Formatting toolbar.
The Border Color of a Control
To paint the borders of a control with a color of your choice. First select a control or a group of
controls. Then:
- On the Ribbon, click Format. In the Control Formatting section, click the
Shape Outline button. In the window that would come up, click a color of your
choice
- In the Format or the All tabs of the Property Sheet, click Border
Color. If you click the arrow of its combo box, you can select one of the
pre-defined colors. Alternatively, you can click its ellipsis button
 to
display the color window
to
display the color window
Special Effects
The special effect is a small feature that makes it possible to
display a section of a form/report or a control flat, sunk, or raised.
To apply the special effects to a control, first select the control or a group of controls.
Then:
- On the form or report, right-click a control or one of the controls of a
selected group, position the mouse on Special Effect, and click one of the
options
- In the Property Sheet, click
Special Effect button, then click the arrow of its combo box and select
one of the options
The available options are:
 Practical Learning: Using Special Effects
- On the form, click State
- In the Property Sheet, click Format and click Special Effect
- Click the arrow of the Special Effect combo box and select Chiseled
- To preview the form, right-click its tab and click Form View
- Save and close the form
- On the Ribbon, click File and click Open
- In the list of files, click Ceil Inn1
- In the Navigation Pane, right-click the Occupancies form and click Design View
- On the Ribbon, click File and click Open
- In the list of files, click Chemistry1
- In the Navigation Pane, right-click the Elements form and click Design
View
- Complete the design of the form as follows:
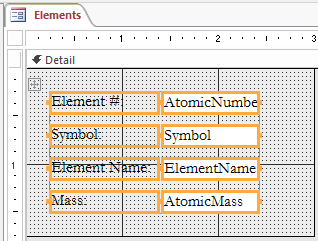
- Save and close the form
Using a Pre-Design
Copying a Design
Microsoft Access makes it possible to copy a design from one control to another.
To do this, in the Design View of a form or report, click the control that has the desired design.
On the Ribbon, click Home. In the Clipboard section, click the Format Painter button. On the form
or report, click the control on whic you want to apply the design.
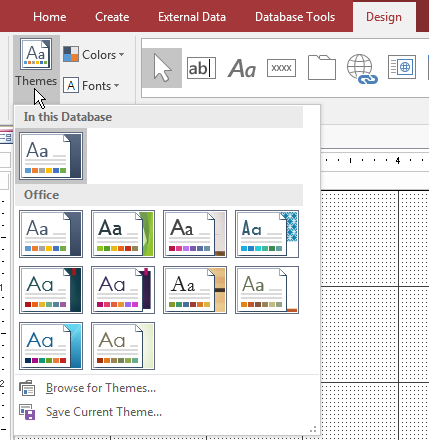
Using a Design Template
Microsoft Access provides sets of fonts and colors you can apply to the controls
on a form or report. To apply them, the form or report must be displayed in Design View. The options
are available in the Themes section of the Design tab of the Ribbon.
To a apply a common font to all controls on the form or
report, in the Themes section of the Ribbon, click Fonts and click the desired
font. The colors are provided as a set for different sections and controls:
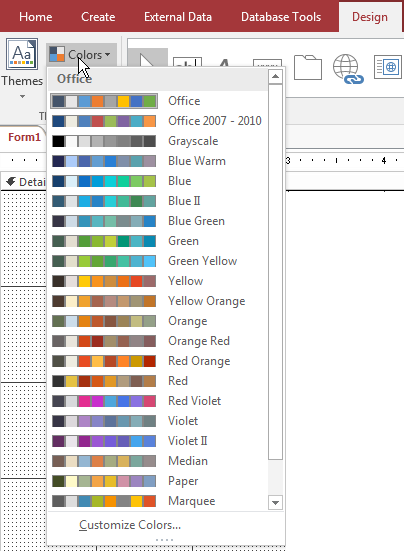
A theme is a combitation of a font and colors. To apply a theme, in the Themes
section of the Ribbon, click Themes and select the desired option:
Interface Characteristics of Windows Controls
The Visibility of a Windows Control
By default, when you add a control to the form or report,
that control would appear to the user. For various reasons, you may not want the
user to see a certain control. In this case, you can hide that control.
The visibility or disappearance of a Windows control can be
controlled independently from its corresponding column on a table. To let you
control the visibility of a control, the Property Sheet is equipped with the
Visible Boolean property. If you set the Visible property to
No (the default is Yes, the control would be hidden.
The Status Bar of a Form
As mentioned for a table, when a control receives focus on a
form, you can display some helpful text on the status bar. You can take care of
this aspect on the table as we saw already. When the corresponding Windows
control on the form receives focus, the same text would display on the status
bar of the form.
In this case, you must create the Description feature
of the field on the table before adding the corresponding control to the form.
If you did not create the status bar text in the table, or you created that status
bar text after adding the corresponding control to the form, you can still
create the text to display on the status bar of the form.
To create a status bar text for a field on a form, while
in Design View, access the Property Sheet for the control. In the Other or the
All tab, enter a sentence in the Status Bar Text property.
The Availability of a Control
A control is said to be enabled if the user can interact with it. For example,
by default, the user can change the text of a text box or make a selection from another
type on control. If a control is disabled, the user cannot
change its text or change its selection
To let you control the availability of an object, the Property Sheet is equipped
with a Boolean field named Enabled.
Practical Learning: Disabling a Control
- On the Ribbon, click File and click Open
- In the list of files, click Ceil Inn1
- In the Navigation Pane, right-click the Occupancies form and click
Design View
- On the form, click OccupancyNum to select the text box
- In the Property Sheet, click Data if necessary.
Click Enabled, then click its arrow and select No
Locking a Control
A control is said to be locked if the user cannot change the value of the control
in Form View. To lock a control, after selecting it in Design View, access its Boolean Locked
property in the Property Sheet and set it to Yes (the default value is No).
Practical Learning: Locking a Control
- The OccupancyNumber control should still be selected on the form (otherwise, select it).
In the Data tab of the Property Sheet, double-click Locked to set its value to Yes
- In the Property Sheet, click Format
- Click Special Effect and set its value to Chiseled
- Close the form
- When asked whether you want to save, click Yes
- On the Ribbon, click File and click Open
- In the list of files, click Road System1 from
the previous lesson
- In the Navigation Pane, right-click the Roads form and click Design View
- Click one of the controls on the form and click the cross cursor on their left to select all controls
- On the Ribbon, click Arrange
- In the Table section, click Remove Layout

- On the Ribbon, click Design
- In the Tools section, click Add Existing Fields
- From the Field List, drag Location and drop it on the form
- Complete the design of the form based on your tastes. Here is an example:
- Close the form
- When asked whether you want to save, click Yes
- On the Ribbon, click File and click Open
- In the list of files, click FunDS1 (from Lesson 5)
- On the Ribbon, click Create
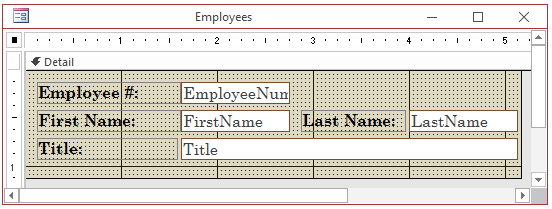
- In the Forms section, click Form Design
- Double-click the button at the intersection of the rulers
- In the Propert Sheet, click Data and, in the Record Source, select Employees
- Save the form as Employees
- In the Design tab of the Ribbon, in the Tools section, click Add Existing Fields
- In the Field List, double-click EmployeeNumber
- In the Field List, double-click FirstName
- In the Field List, double-click LastName
- In the Field List, double-click Title
- Design the form as you like (for our form, the Back Color of the Form Header section is set
to #C1B995, the Back Color of the Detail section is set to #DDD9C3, the Back
Color of the Form Footer section is set to #663300)
- To perform data entry, right-click the title bar of the form and click
Form View
- Create the following records:
| Employee # |
First Name |
Last Name |
Title |
| 402446 |
Catherine |
Watts |
Owner - General Manager |
| 275594 |
Claire |
Roberts |
Sales Associate |
| 702048 |
Jennifer |
Harrison |
Sales Manager |
| 927486 |
Amanda |
Aronson |
Sales Associate |
- Save and close the form
- In the Navigation Pane, double-click the ShoppingSessions table
- Create the following records:
| Receipt # |
Employee # |
| 100001 |
402446 |
| 100002 |
402446 |
| 100003 |
702048 |
| 100004 |
275594 |
| 100005 |
927486 |
| 100006 |
702048 |
- Close Microsoft Access