Lists-Based Controls

Lists-Based Controls
Simple Lists-Based Controls
Introduction
A list-based ontrol is an object that holds a list of values, such as a list of strings, a list of numbers, etc. In fact, in some cases, a control can hold a list of lists, in which case each item in the list contains its own list of things.
List Boxes
A list box is a control that holds a verical list of items. The list starts with an item and each subsequent item is added below the previous one. To start, the control presents a list. To select an item from the list, the user can click the desired item. To make another selection, the user can click a different item. Depending on how the control is configured, the user can be restricked to select only one item at a time or the user can allowed to select many items at the same time.
To make sure you can create a list box, the Toolbox is equipped with a ListBox button. You can click it and click a form or a controls container of your application. To let you manage the characteristics of a list box, the .NET Framework provides a class named ListBox.
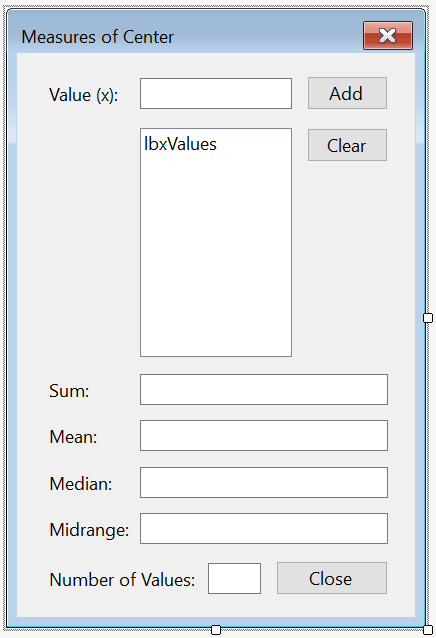
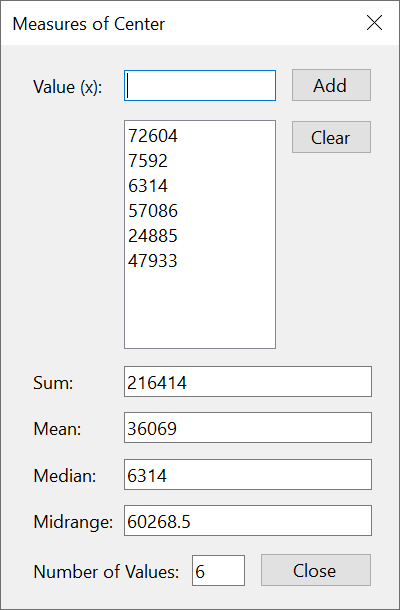
![]() Practical Learning: Introducing Windows Controls
Practical Learning: Introducing Windows Controls
| Control | Name | Text | |
| Label | Value (x): | ||
| TextBox | txtValue | ||
| Button | btnAdd | Add | |
| ListBox | lbxValues | ||
| Label | Sum: | ||
| TextBox | txtSum | ||
| Label | Number of Values: | ||
| TextBox | txtMode | ||
| Label | Mean: | ||
| TextBox | txtMean | ||
| Label | Median: | ||
| TextBox | txtMedian | ||
| Label | Midrange: | ||
| TextBox | txtMidrange | ||
| Label | Number of Values: | ||
| TextBox | txtCount | ||
| Button | btnClose | Close | |
namespace MeasuresOfCenter1
{
public partial class MeasuresOfCenter : Form
{
public MeasuresOfCenter()
{
InitializeComponent();
}
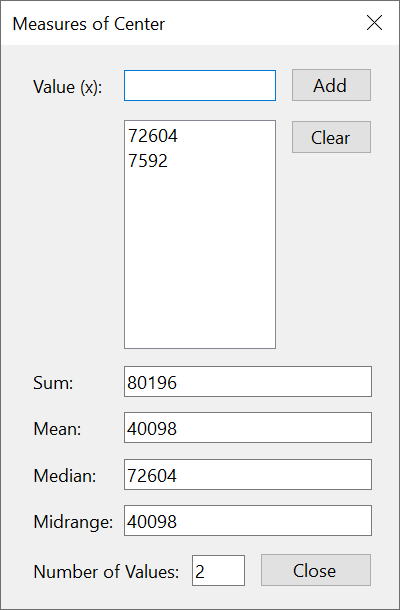
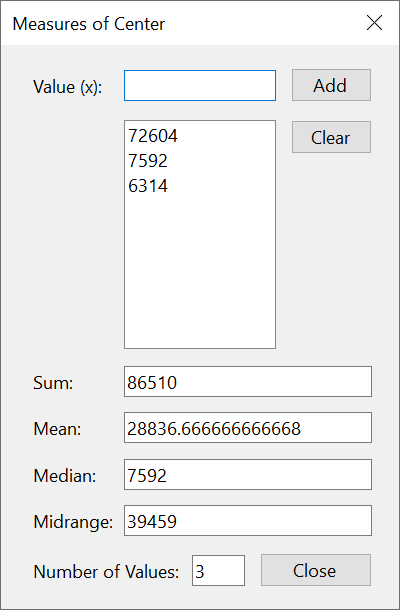
private void btnAdd_Click(object sender, EventArgs e)
{
// This is the value that will be added to the text box
double value, sum = 0.00;
double mean, median, midrange;
// Check that the user entered a value in the text box
if (string.IsNullOrEmpty(txtValue.Text))
{
MessageBox.Show("You must enter a value in the top text box.",
"Measures of Center",
MessageBoxButtons.OK, MessageBoxIcon.Information);
return;
}
try
{
// Get the value the user entered
value = double.Parse(txtValue.Text);
// Add it to the list box
lbxValues.Items.Add(value);
txtValue.Text = "";
txtValue.Focus();
}
catch (FormatException)
{
MessageBox.Show("The value you entered is invalid.",
"Probability Distribution",
MessageBoxButtons.OK, MessageBoxIcon.Information);
}
// Calculate the total
for (int i = 0; i < lbxValues.Items.Count; i++)
sum += double.Parse(lbxValues.Items[i].ToString()!);
// Calculate the mean
mean = sum / lbxValues.Items.Count;
// Find out if the list is odd
if ((lbxValues.Items.Count % 2) == 0)
{
double midIndex = lbxValues.Items.Count / 2;
int ind = (int)(midIndex - 0.5);
double aValue = double.Parse(lbxValues.Items[ind].ToString()!);
median = (aValue + aValue) / 2;
}
else
median = double.Parse(lbxValues.Items[lbxValues.Items.Count / 2].ToString()!);
// Calculate the midrange as the mean between the minimum and maximum
midrange = midrange = (double.Parse(lbxValues.Items[0].ToString()!) +
double.Parse(lbxValues.Items[lbxValues.Items.Count - 1].ToString()!)) / 2;
// Display the values
txtCount.Text = lbxValues.Items.Count.ToString();
txtSum.Text = sum.ToString();
txtMean.Text = mean.ToString();
txtMedian.Text = median.ToString();
txtMidrange.Text = midrange.ToString();
}
private void btnClear_Click(object sender, EventArgs e)
{
txtValue.Text = string.Empty;
lbxValues.Items.Clear();
txtSum.Text = string.Empty;
txtCount.Text = string.Empty;
txtMean.Text = string.Empty;
txtMedian.Text = string.Empty;
txtMidrange.Text = string.Empty;
}
private void btnClose_Click(object sender, EventArgs e)
{
Close();
}
}
}
|
 |
 |
 |
Combo Boxes
A combo box is version of a list box in a reduced size. Like a list box, a combo box holds a list of values. Instead of displaying a whole list like a list box does, a combo displays only one item. The control is maded of a text box and a button that has a down-pointing arrow. To make a selection, the user can click the arrow button to open the list and click the desired item.
To let you create combo boxes, the Toolbox is equipped with a button labeled ComboBox. You can click that button and click an area in your form. To help you manage the behavior of your combo box, the .NET Framework is equipped with a class named ComboBox. You can use the Properties window to visually mange those characteristics.
![]() Practical Learning: Introducing Combo Boxes
Practical Learning: Introducing Combo Boxes
namespace AutoPartsInventory2.Models
{
    internal readonly struct AutoPart
    {
        public long    PartNumber { get; init; }
        public int     Year       { get; init; }
        public string? Make       { get; init; }
        public string? Model      { get; init; }
        public string? Category   { get; init; }
        public string? PartName   { get; init; }
        public double  UnitPrice  { get; init; }
        public string? ImageFile  { get; init; }
    }
}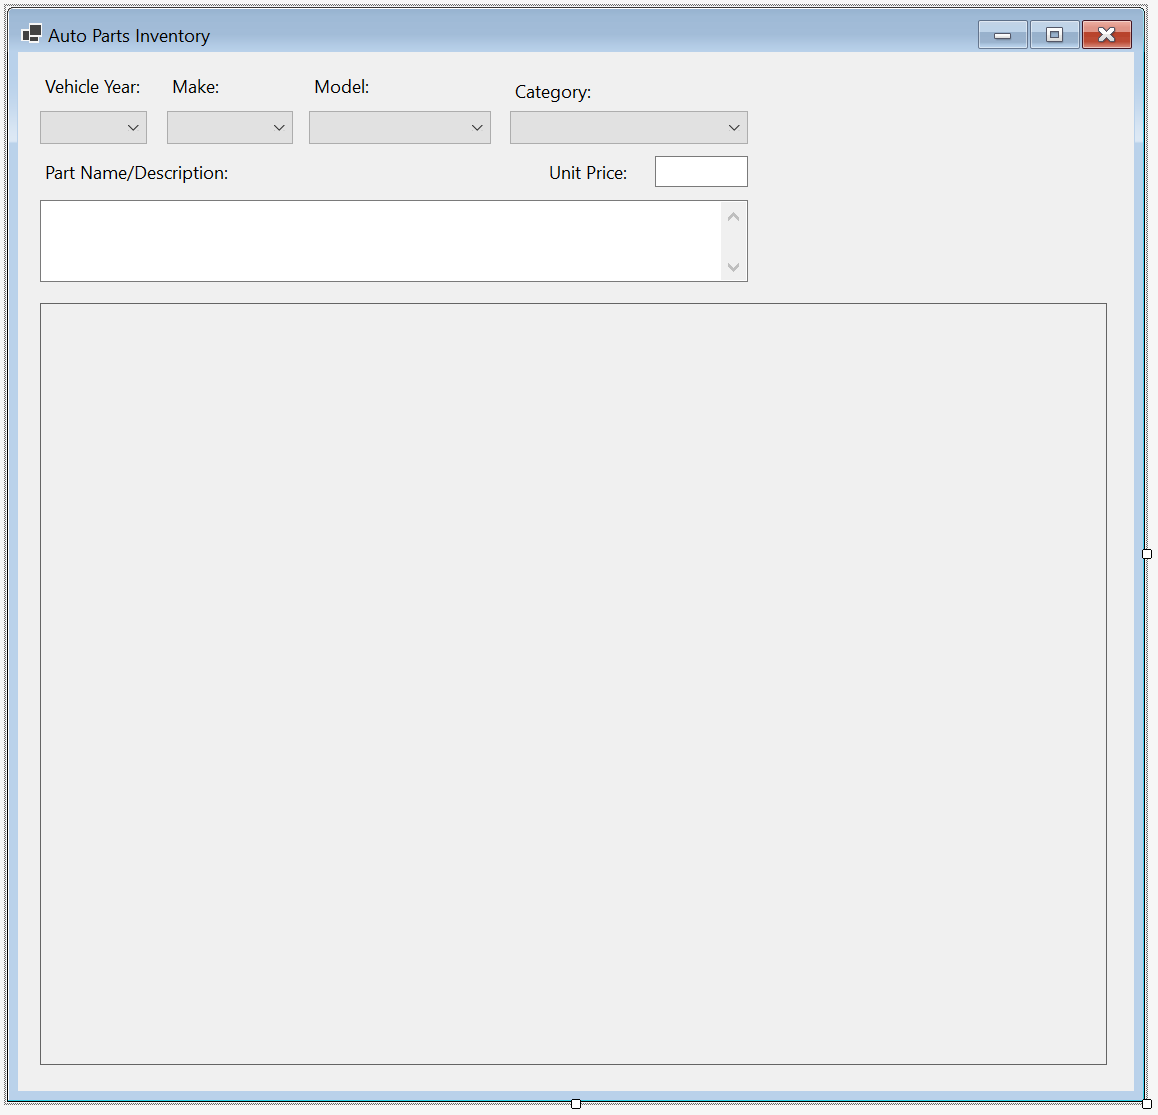
| Control | (Name) | Text | Other Properties | |
| Label | Vehicle Year: | |||
| Label | Make: | |||
| Label | Model: | |||
| Label | Category: | |||
| ComboBox | cbxYears | DropDownList | ||
| ComboBox | cbxMakes | DropDownStyle: DropDownList | ||
| ComboBox | cbxModels | DropDownStyle: DropDownList | ||
| ComboBox | cbxCategories | DropDownStyle: DropDownList | ||
| Label | Part Name/Description: | |||
| TextBox | txtPartName | |||
| Label | Unit Price: | |||
| TextBox | txtUnitPrice | TextAlign: Right | ||
| PictureBox | pbxAutoPart | BorderStyle: FixedSingle SizeMode: AutoSize |
||
using AutoPartsInventory2.Models;
namespace AutoPartsInventory2
{
public partial class AutoPartsInventory : Form
{
internal AutoPart[] AutoParts { get; set; } = new AutoPart[30];
public AutoPartsInventory()
{
InitializeComponent();
}
private void AutoPartsInventory_Load(object sender, EventArgs e)
{
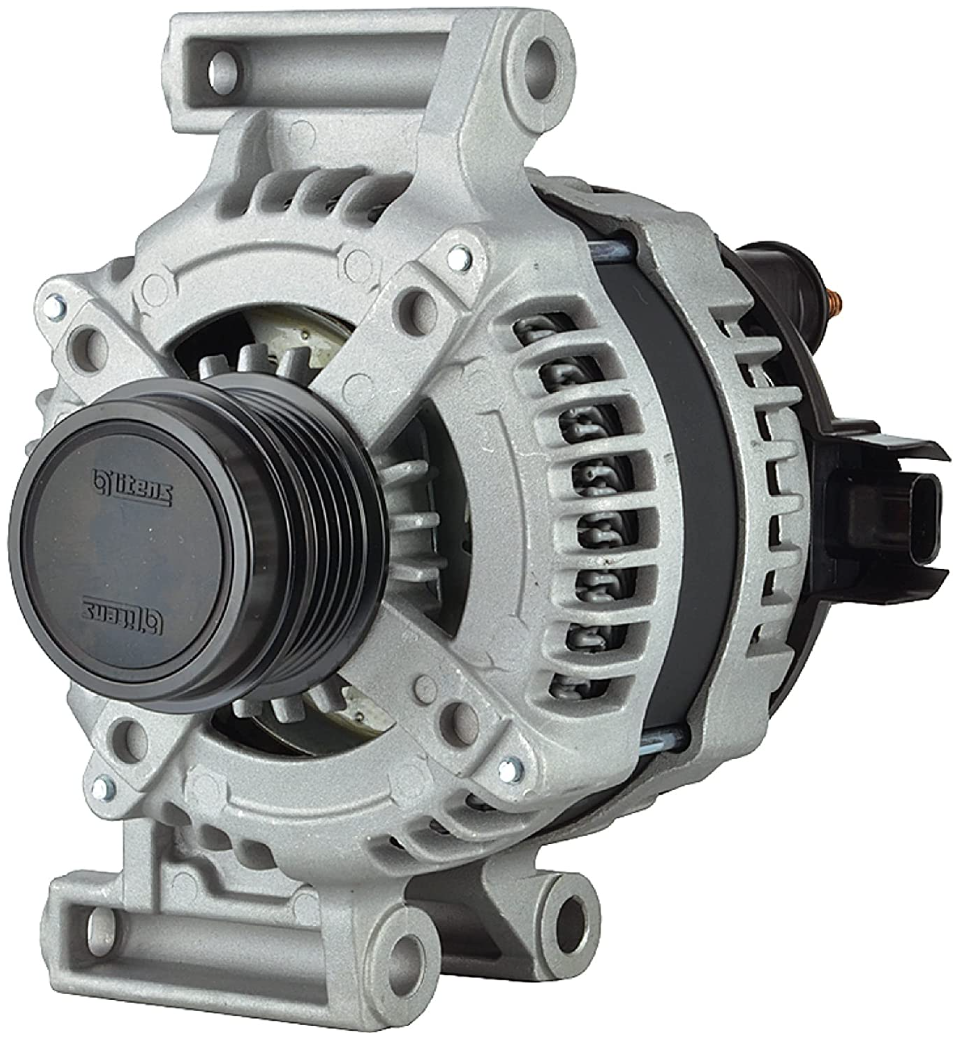
AutoParts[0] = new AutoPart() { PartNumber = 393795, Year = 2015, Make = "Buick", Model = "Regal", Category = "Alternators & Generators", PartName = "DB Electrical Alternator", UnitPrice = 218.74, ImageFile = "928037.png" };
AutoParts[1] = new AutoPart() { PartNumber = 928374, Year = 2018, Make = "Chevrolet", Model = "Express 3500", Category = "Shocks, Struts & Suspension", PartName = "Suspension Kit (Front; with 3 Groove Pitman Arm)", UnitPrice = 142.44, ImageFile = "304031.png" };
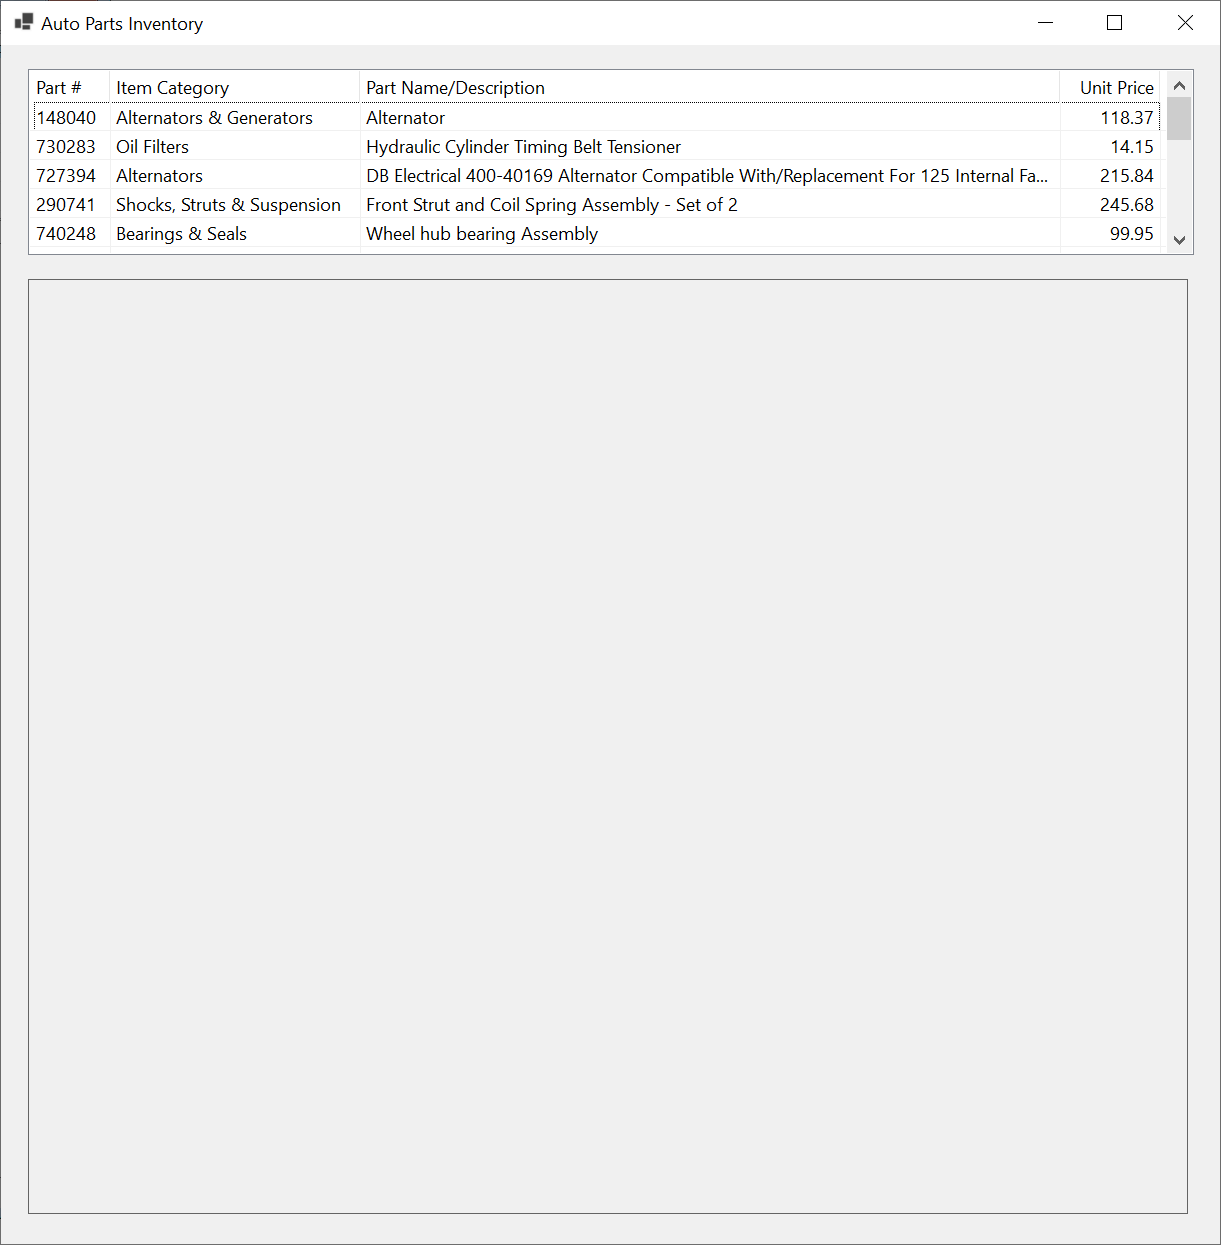
AutoParts[2] = new AutoPart() { PartNumber = 148040, Year = 2010, Make = "Chrysler", Model = "Town & Country 3.8L", Category = "Alternators & Generators", PartName = "Alternator", UnitPrice = 118.37, ImageFile = "148040.png" };
AutoParts[3] = new AutoPart() { PartNumber = 730283, Year = 2020, Make = "Jeep", Model = "Wrangler Unlimited Sahara", Category = "Oil Filters", PartName = "Hydraulic Cylinder Timing Belt Tensioner", UnitPrice = 14.15, ImageFile = "730283.png" };
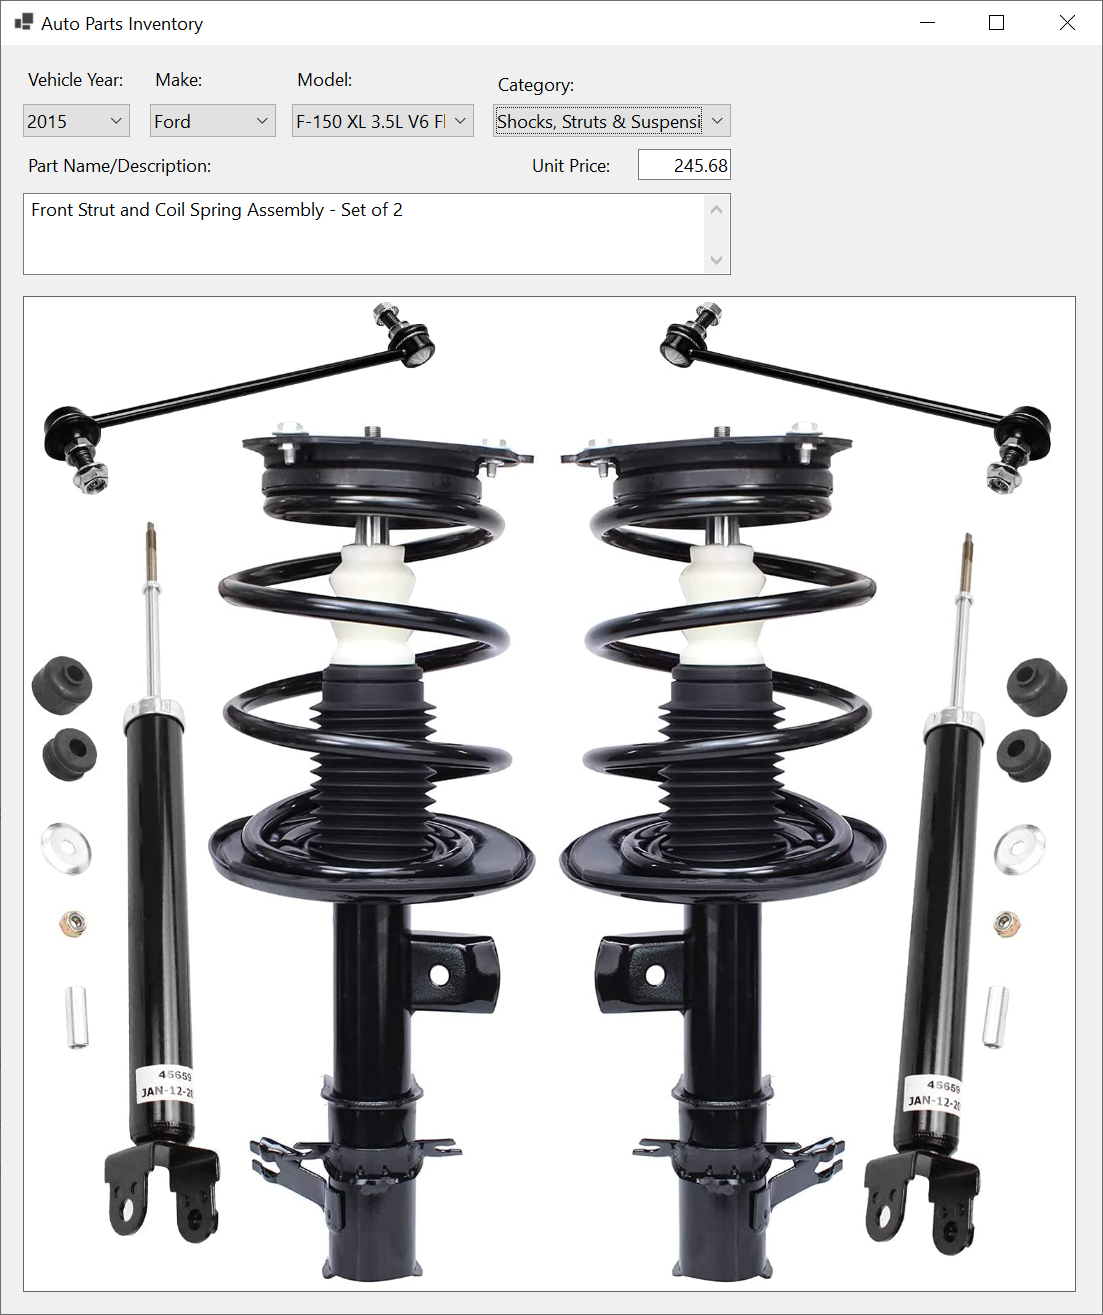
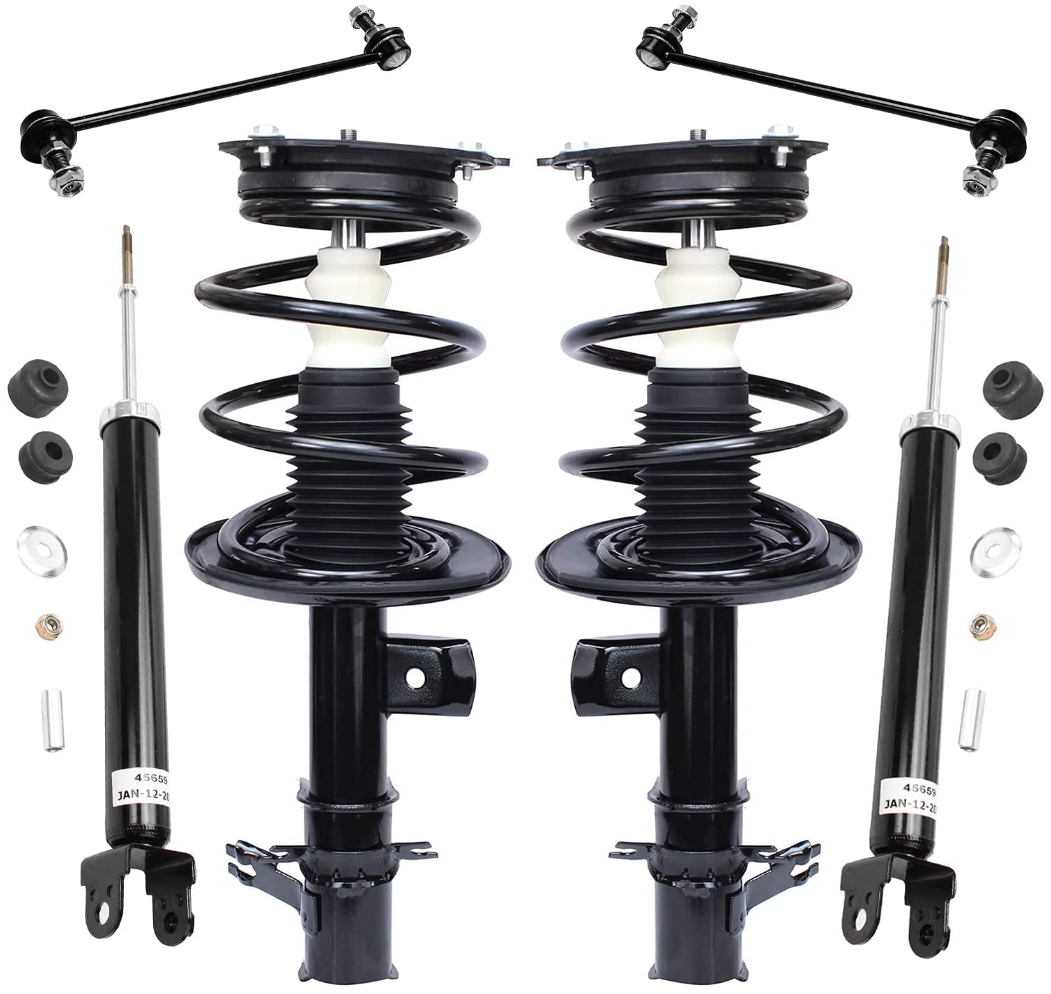
AutoParts[4] = new AutoPart() { PartNumber = 290741, Year = 2015, Make = "Ford", Model = "F-150 XL 3.5L V6 Flex Regular Cab 2 Full-Size Doors", Category = "Shocks, Struts & Suspension", PartName = "Front Strut and Coil Spring Assembly - Set of 2", UnitPrice = 245.68, ImageFile = "290741.png" };
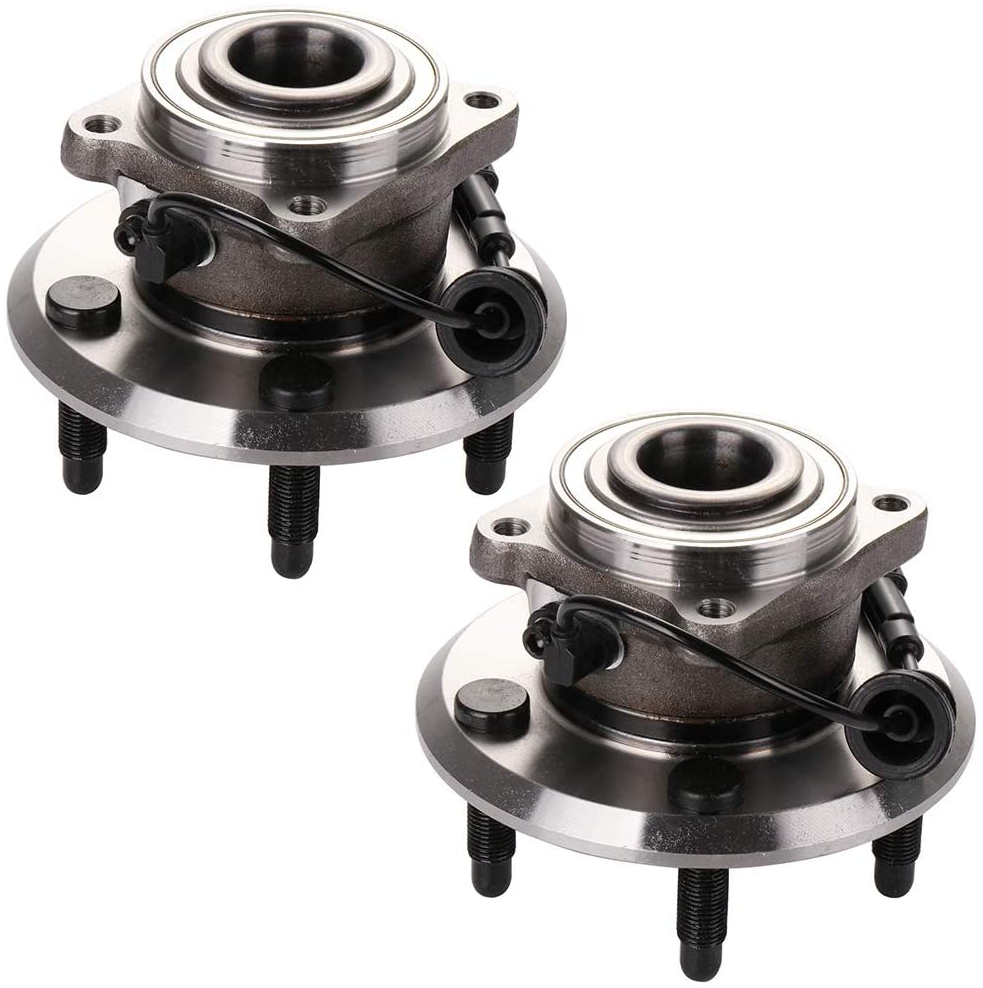
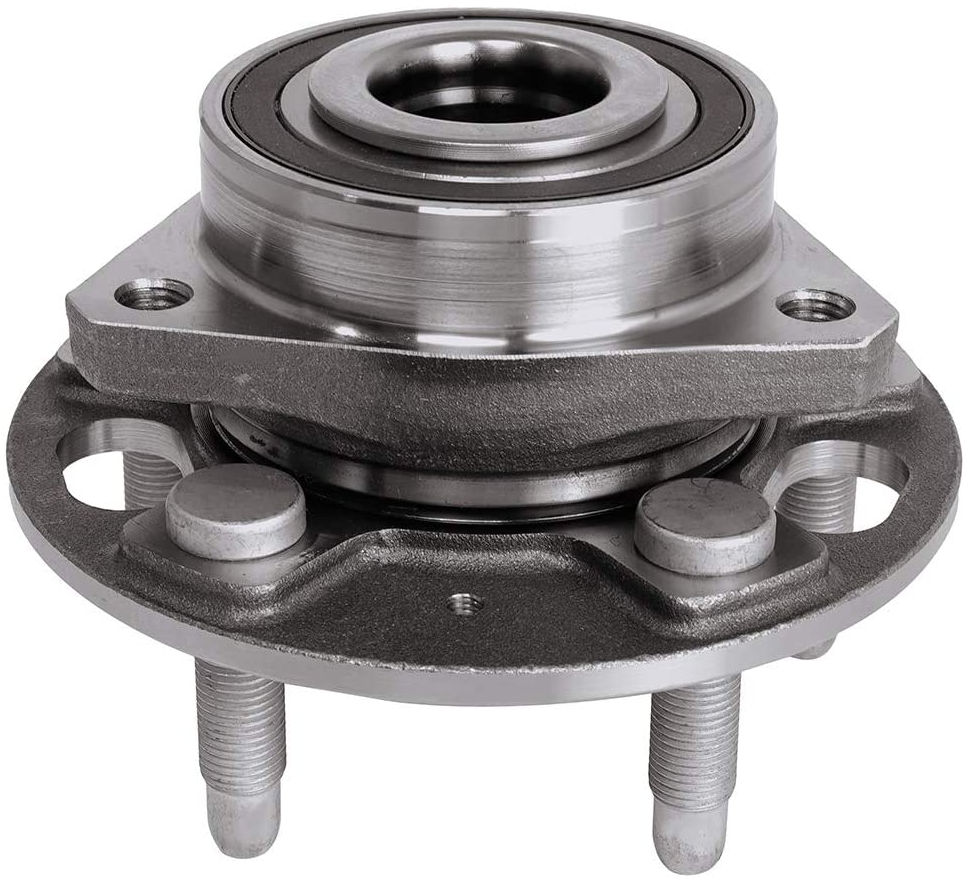
AutoParts[5] = new AutoPart() { PartNumber = 740248, Year = 2013, Make = "Chevrolet", Model = "Equinox", Category = "Bearings & Seals", PartName = "Wheel hub bearing Assembly", UnitPrice = 99.95, ImageFile = "740248.png" };
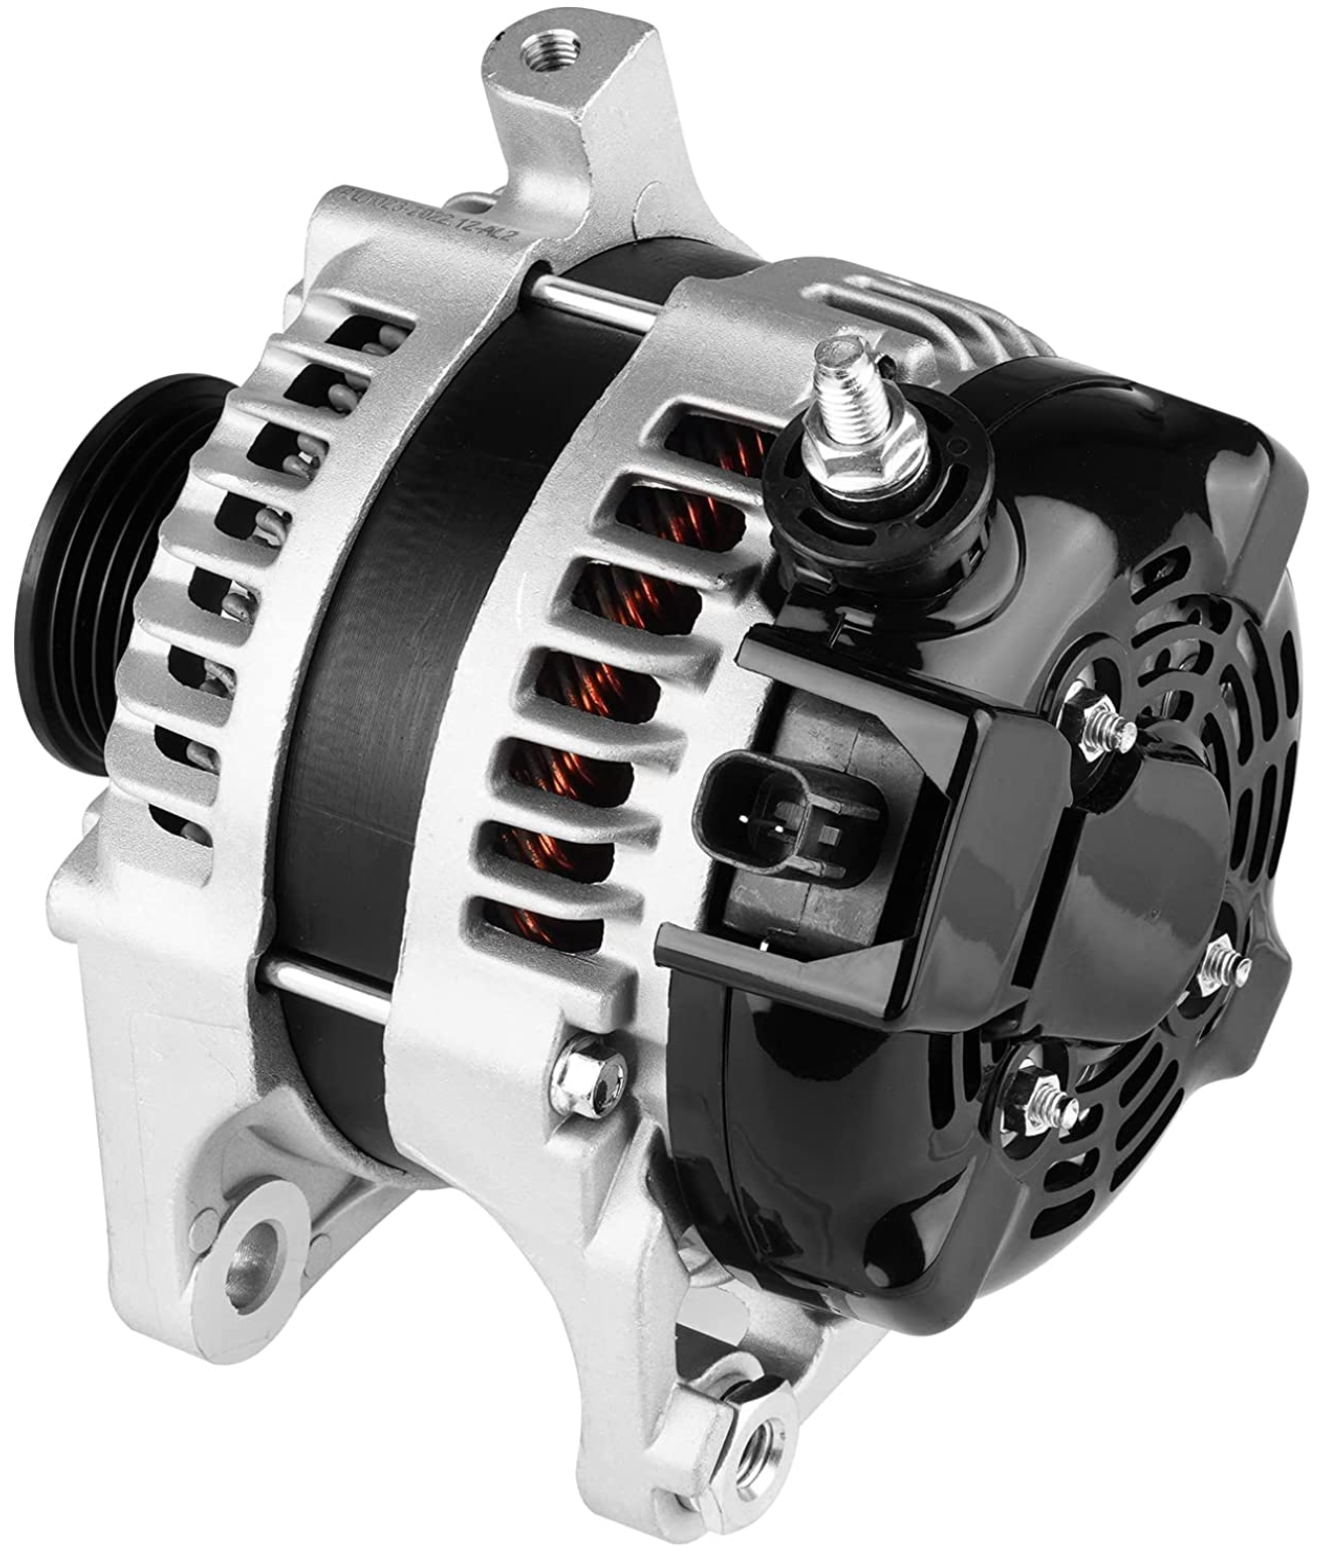
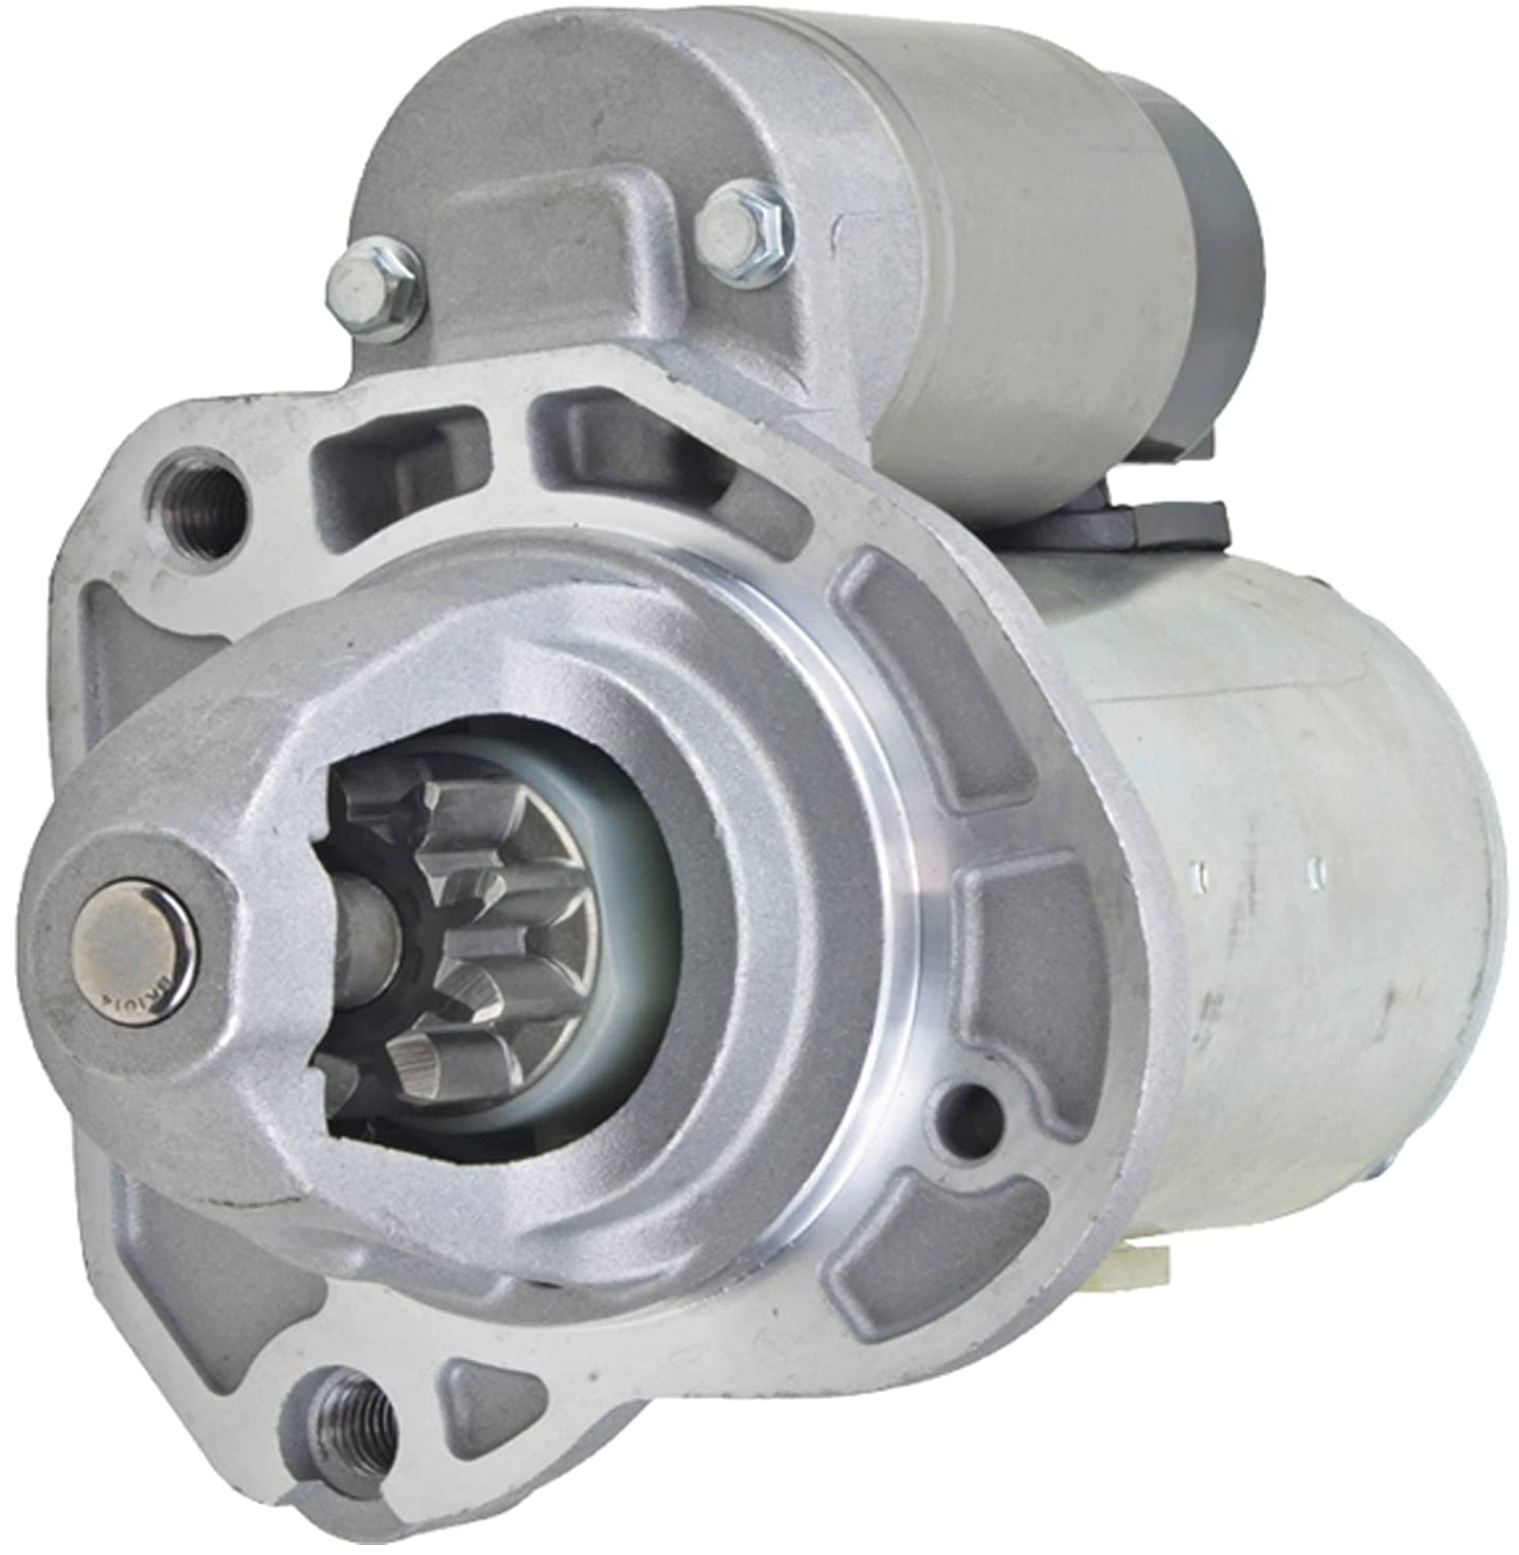
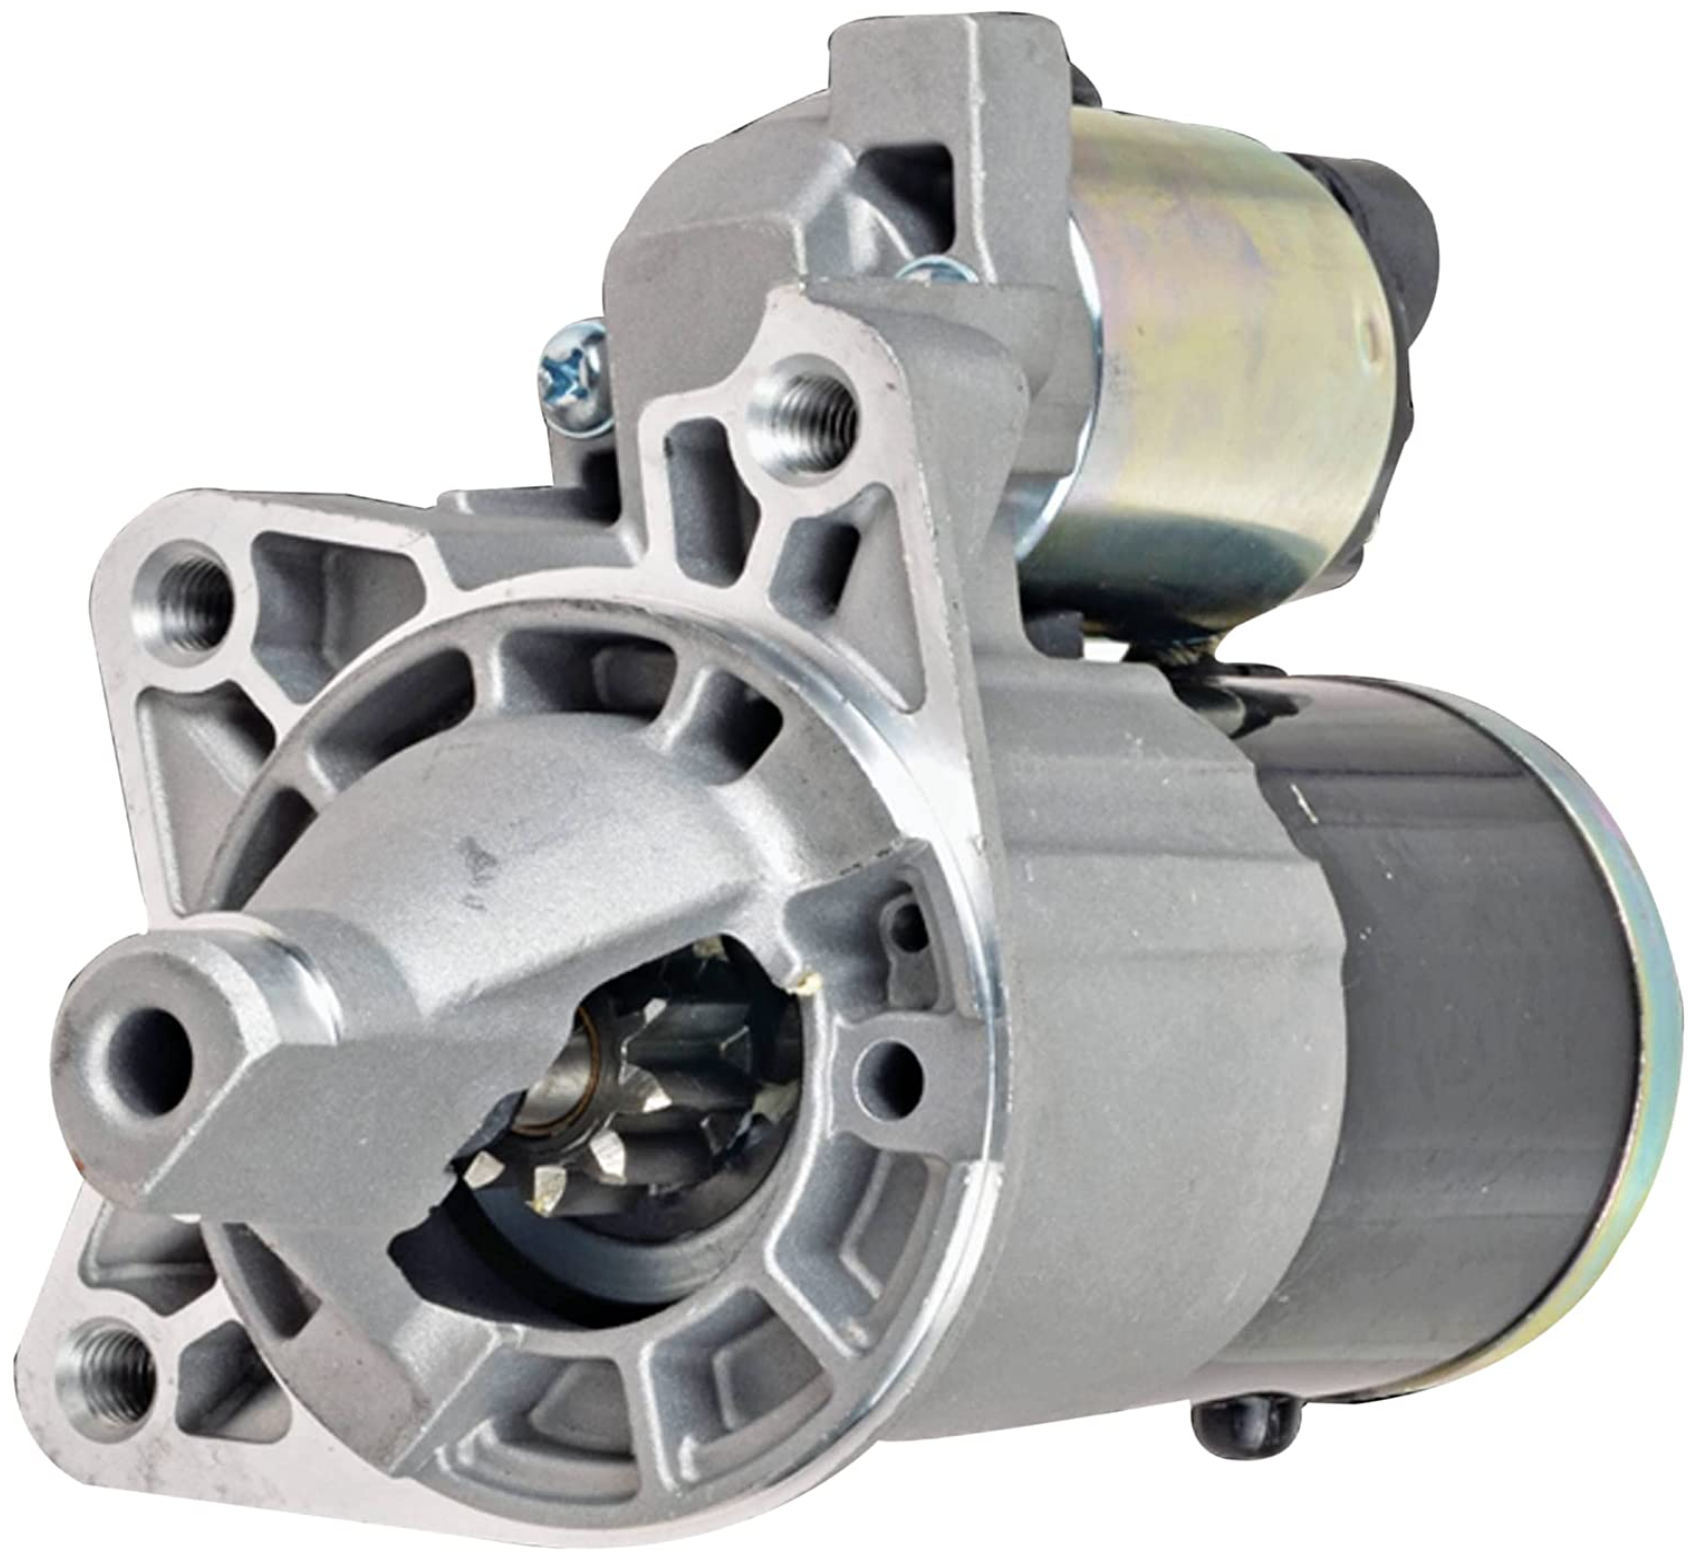
AutoParts[6] = new AutoPart() { PartNumber = 283759, Year = 2012, Make = "Dodge", Model = "Charger 3.6L", Category = "Starters", PartName = "DB Electrical SND0787 Starter", UnitPrice = 212.58, ImageFile = "283759.png" };
AutoParts[7] = new AutoPart() { PartNumber = 503502, Year = 2008, Make = "Jeep", Model = "Wrangler", Category = "Alternators", PartName = "Alternator", UnitPrice = 114.46, ImageFile = "503502.png" };
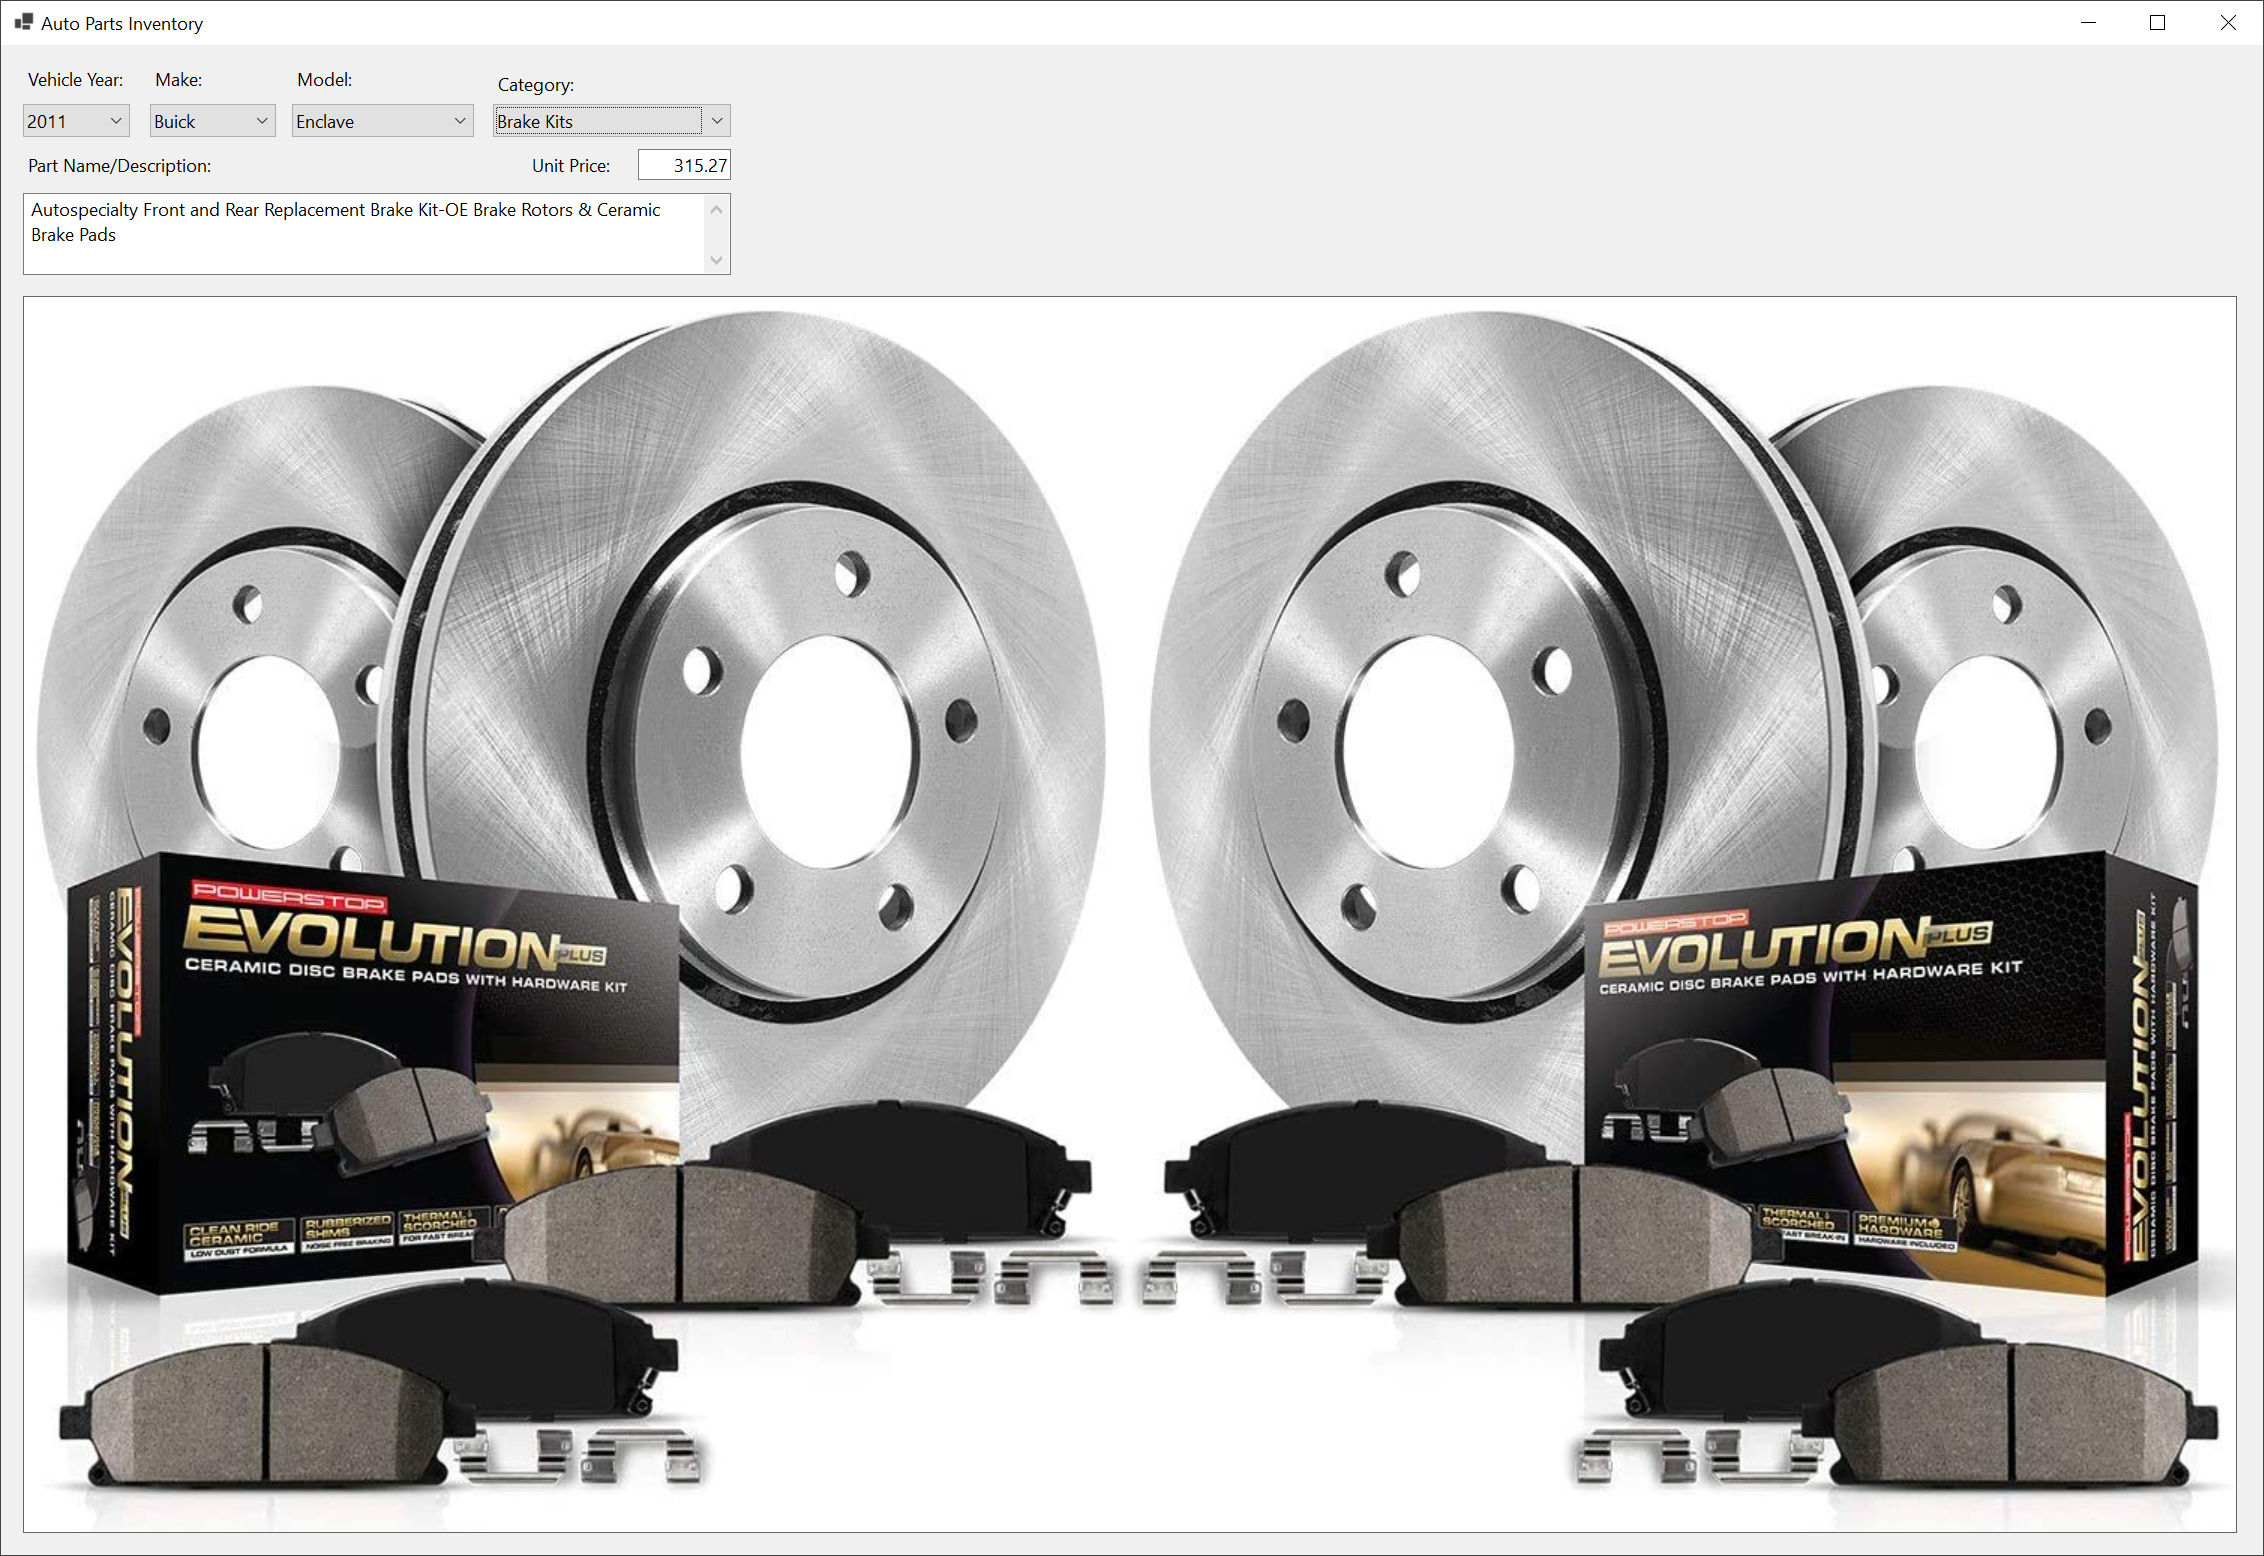
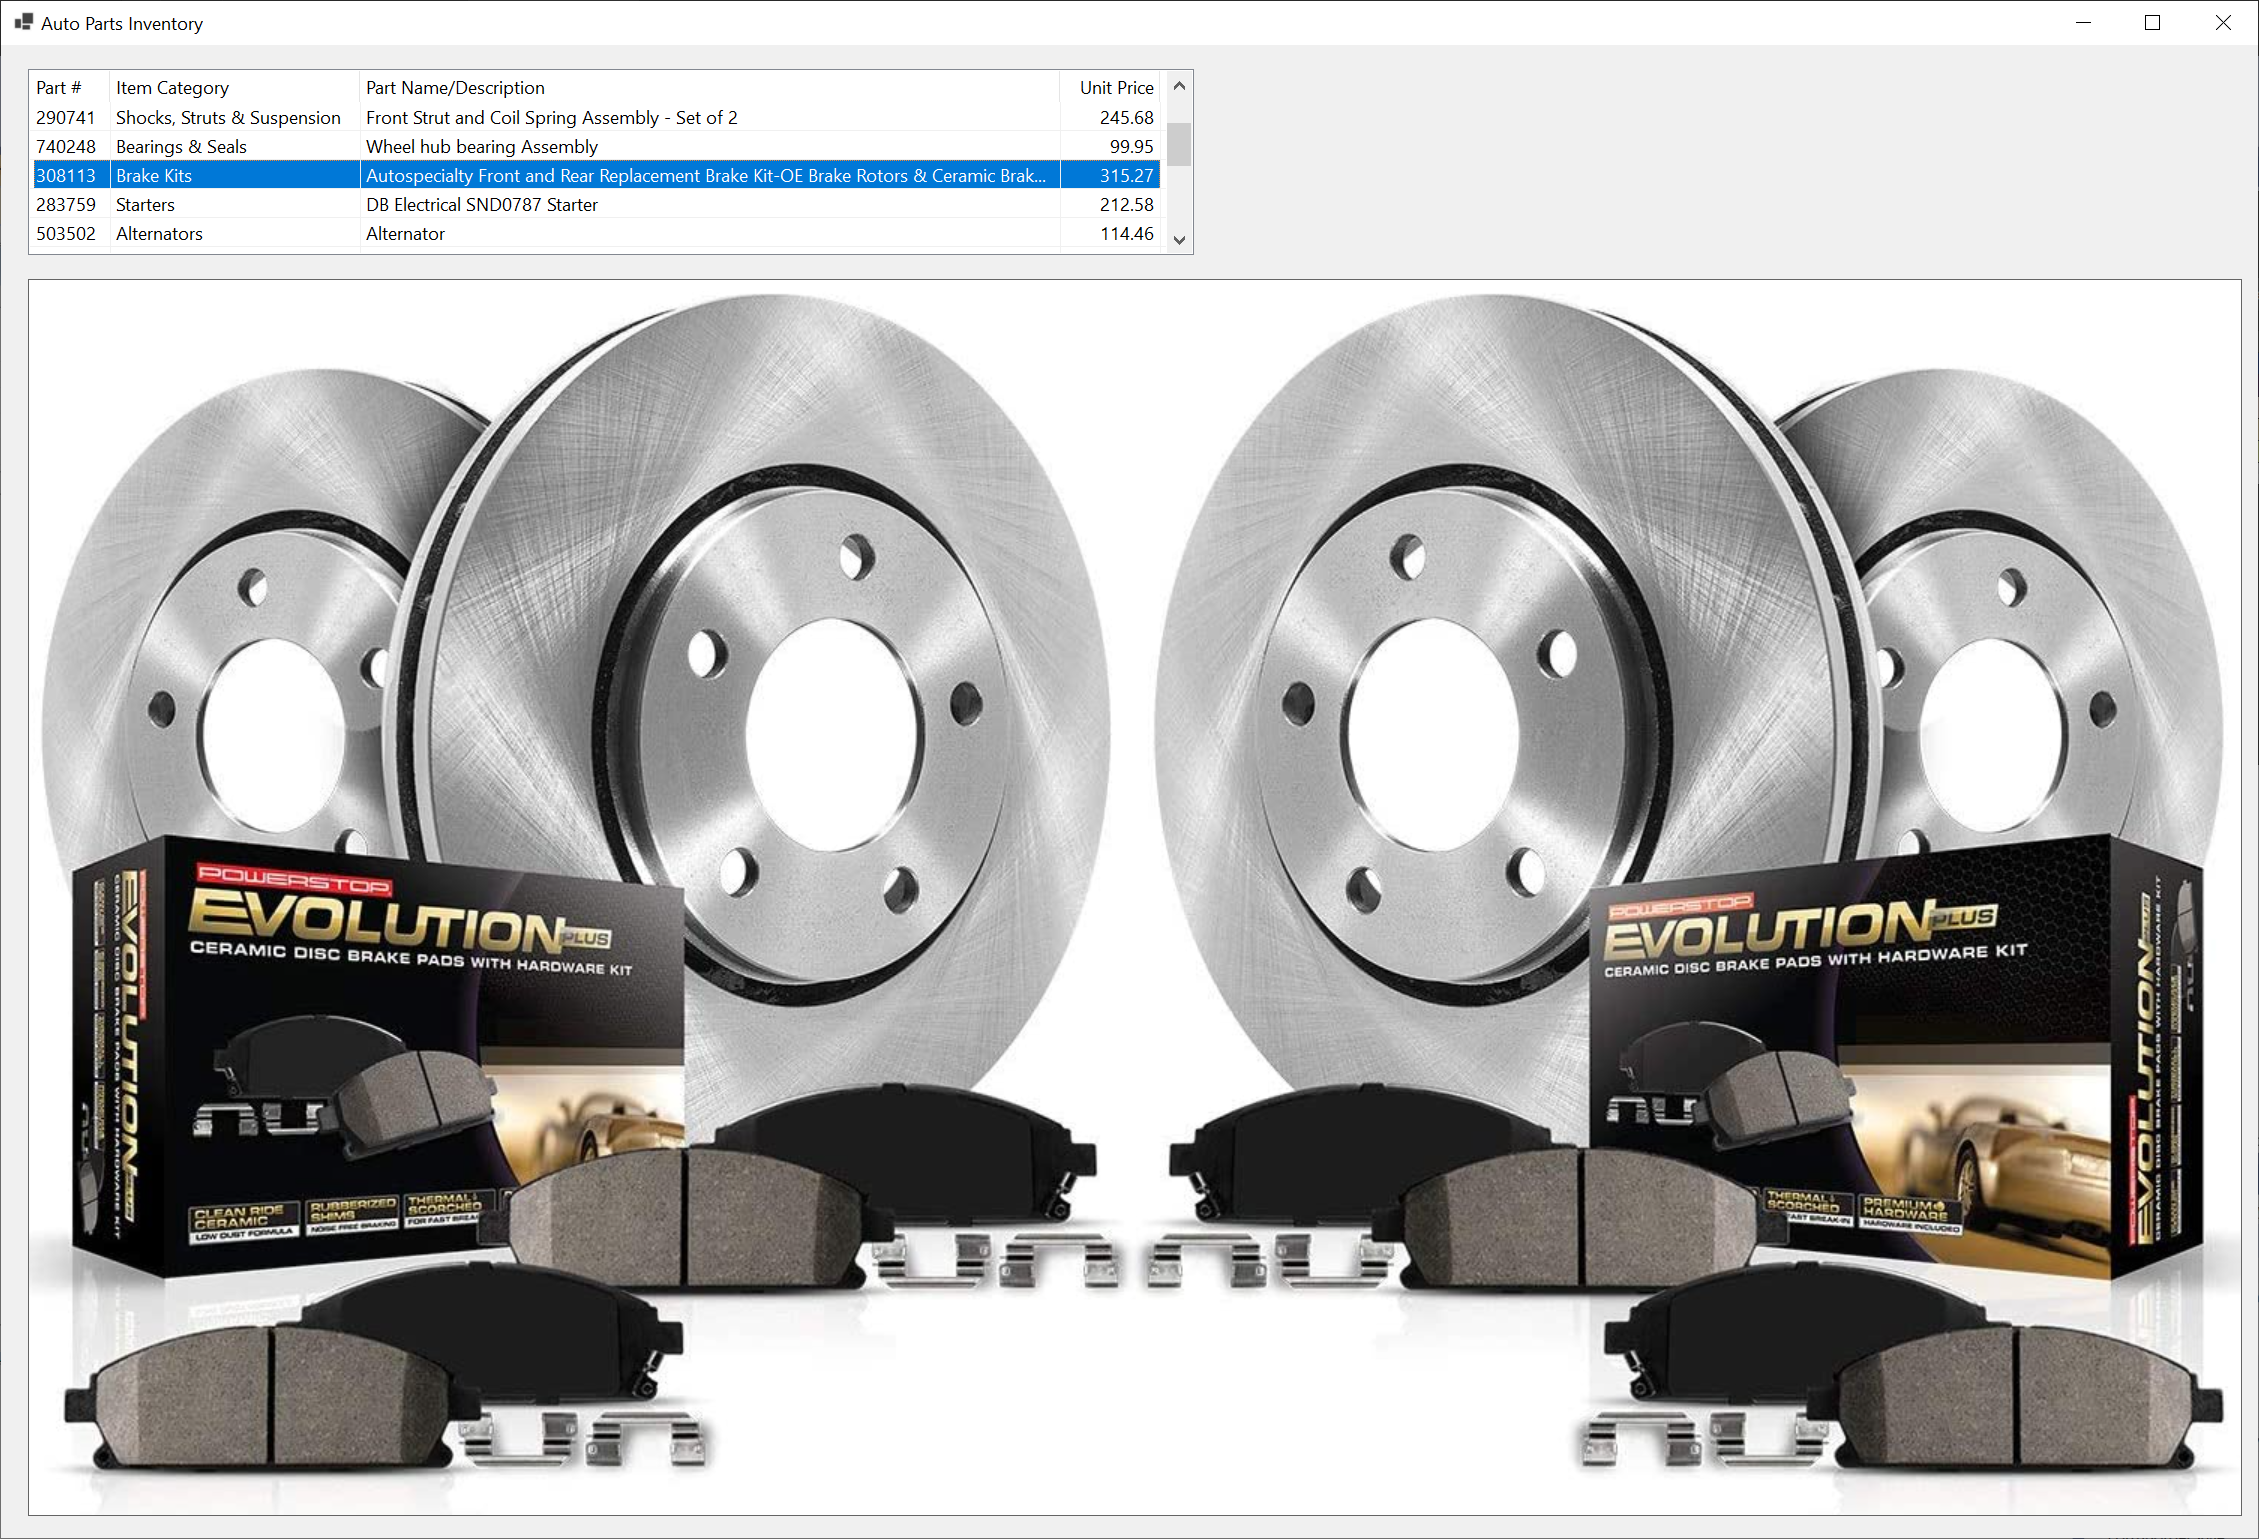
AutoParts[8] = new AutoPart() { PartNumber = 130338, Year = 2011, Make = "Buick", Model = "Enclave", Category = "Brake Kits", PartName = "Autospecialty Front and Rear Replacement Brake Kit-OE Brake Rotors & Ceramic Brake Pads", UnitPrice = 315.27, ImageFile = "308113.png" };
AutoParts[9] = new AutoPart() { PartNumber = 799428, Year = 2012, Make = "Cadillac", Model = "XTS", Category = "Bearings & Seals", PartName = "Front/Rear Wheel Hub Bearing Assembly 5 Lugs w/ABS", UnitPrice = 79.97, ImageFile = "799428.png" };
AutoParts[10] = new AutoPart() { PartNumber = 648203, Year = 2018, Make = "Honda", Model = "CRV", Category = "Alternator", PartName = "Alternator", UnitPrice = 202.47, ImageFile = "593804.png" };
AutoParts[11] = new AutoPart() { PartNumber = 148073, Year = 2011, Make = "Chrysler", Model = "s200", Category = "Starters", PartName = "DB Electrical SND0775 Starter", UnitPrice = 94.48, ImageFile = "148073.png" };
AutoParts[12] = new AutoPart() { PartNumber = 308113, Year = 2017, Make = "Buick", Model = "Enclave", Category = "Brake Kits", PartName = "Autospecialty Front and Rear Replacement Brake Kit-OE Brake Rotors & Ceramic Brake Pads", UnitPrice = 315.27, ImageFile = "308113.png" };
AutoParts[13] = new AutoPart() { PartNumber = 938475, Year = 2010, Make = "Chrysler", Model = "Sebring", Category = "Starters", PartName = "DB Electrical SMT0343 Starter", UnitPrice = 82.66, ImageFile = "938475.png" };
AutoParts[14] = new AutoPart() { PartNumber = 502853, Year = 2014, Make = "GMC", Model = "Terrain", Category = "Bearings & Seals", PartName = "Wheel Hub Bearing Assembly", UnitPrice = 48.85, ImageFile = "927944.png" };
AutoParts[15] = new AutoPart() { PartNumber = 520384, Year = 2020, Make = "Jeep", Model = "Wrangler Unlimited Sahara", Category = "Drum Brake", PartName = "Rear Dynamic Friction Company True-Arc Brake Shoes", UnitPrice = 42.22, ImageFile = "928037.png" };
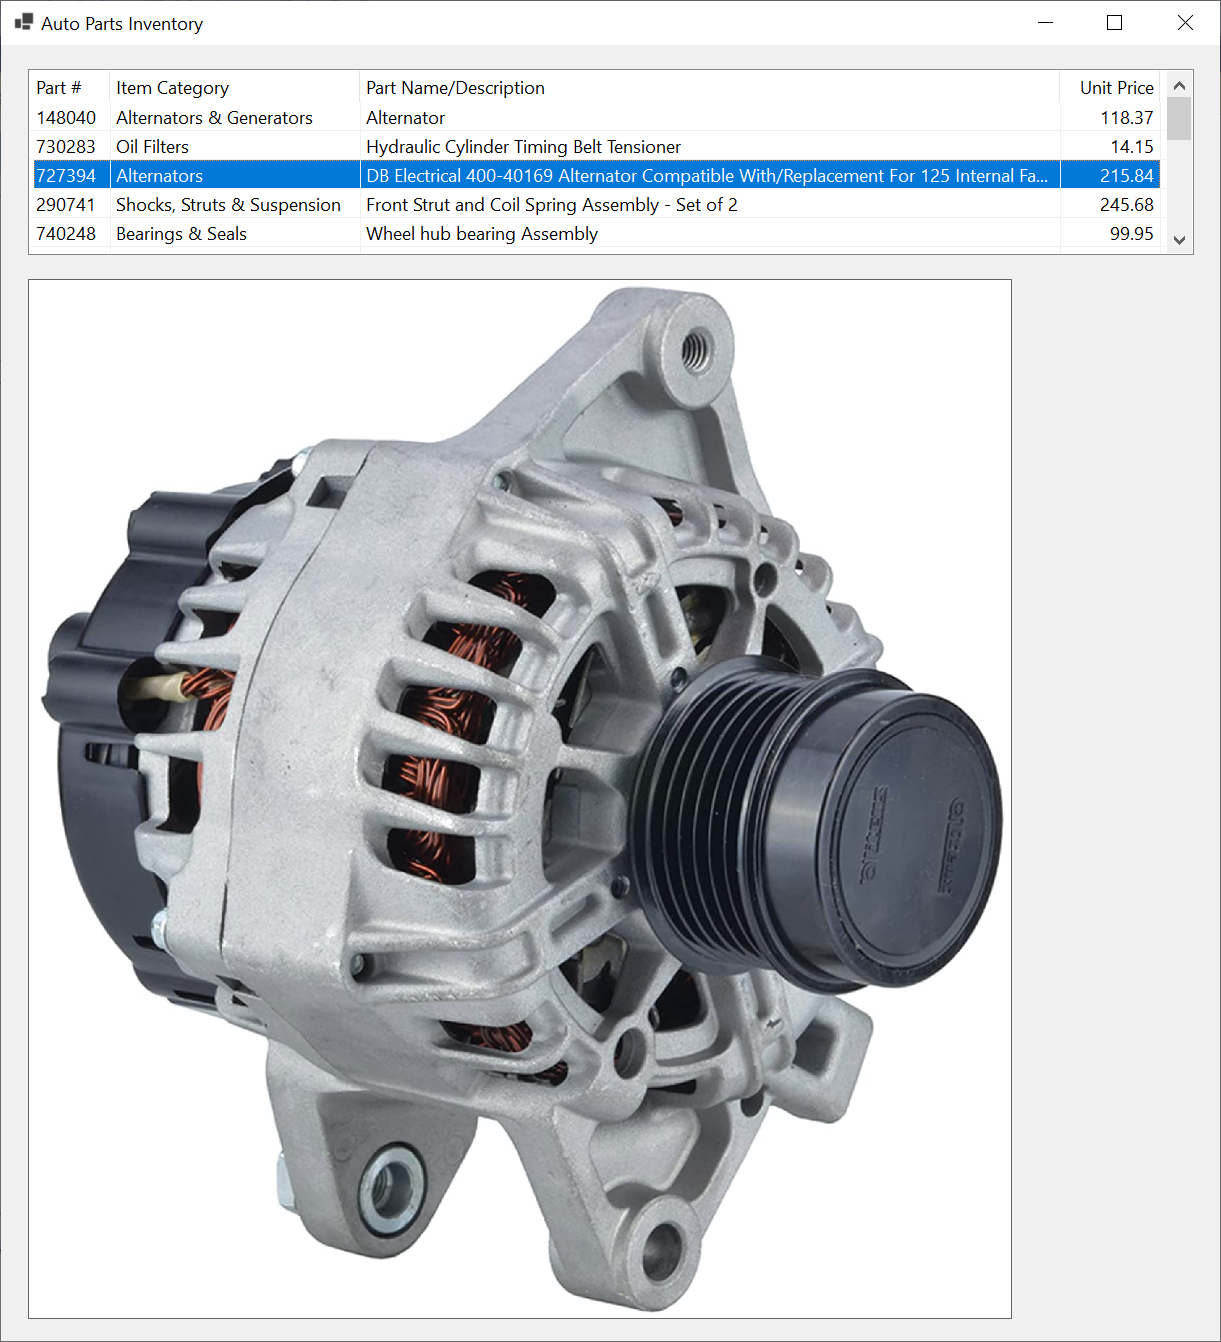
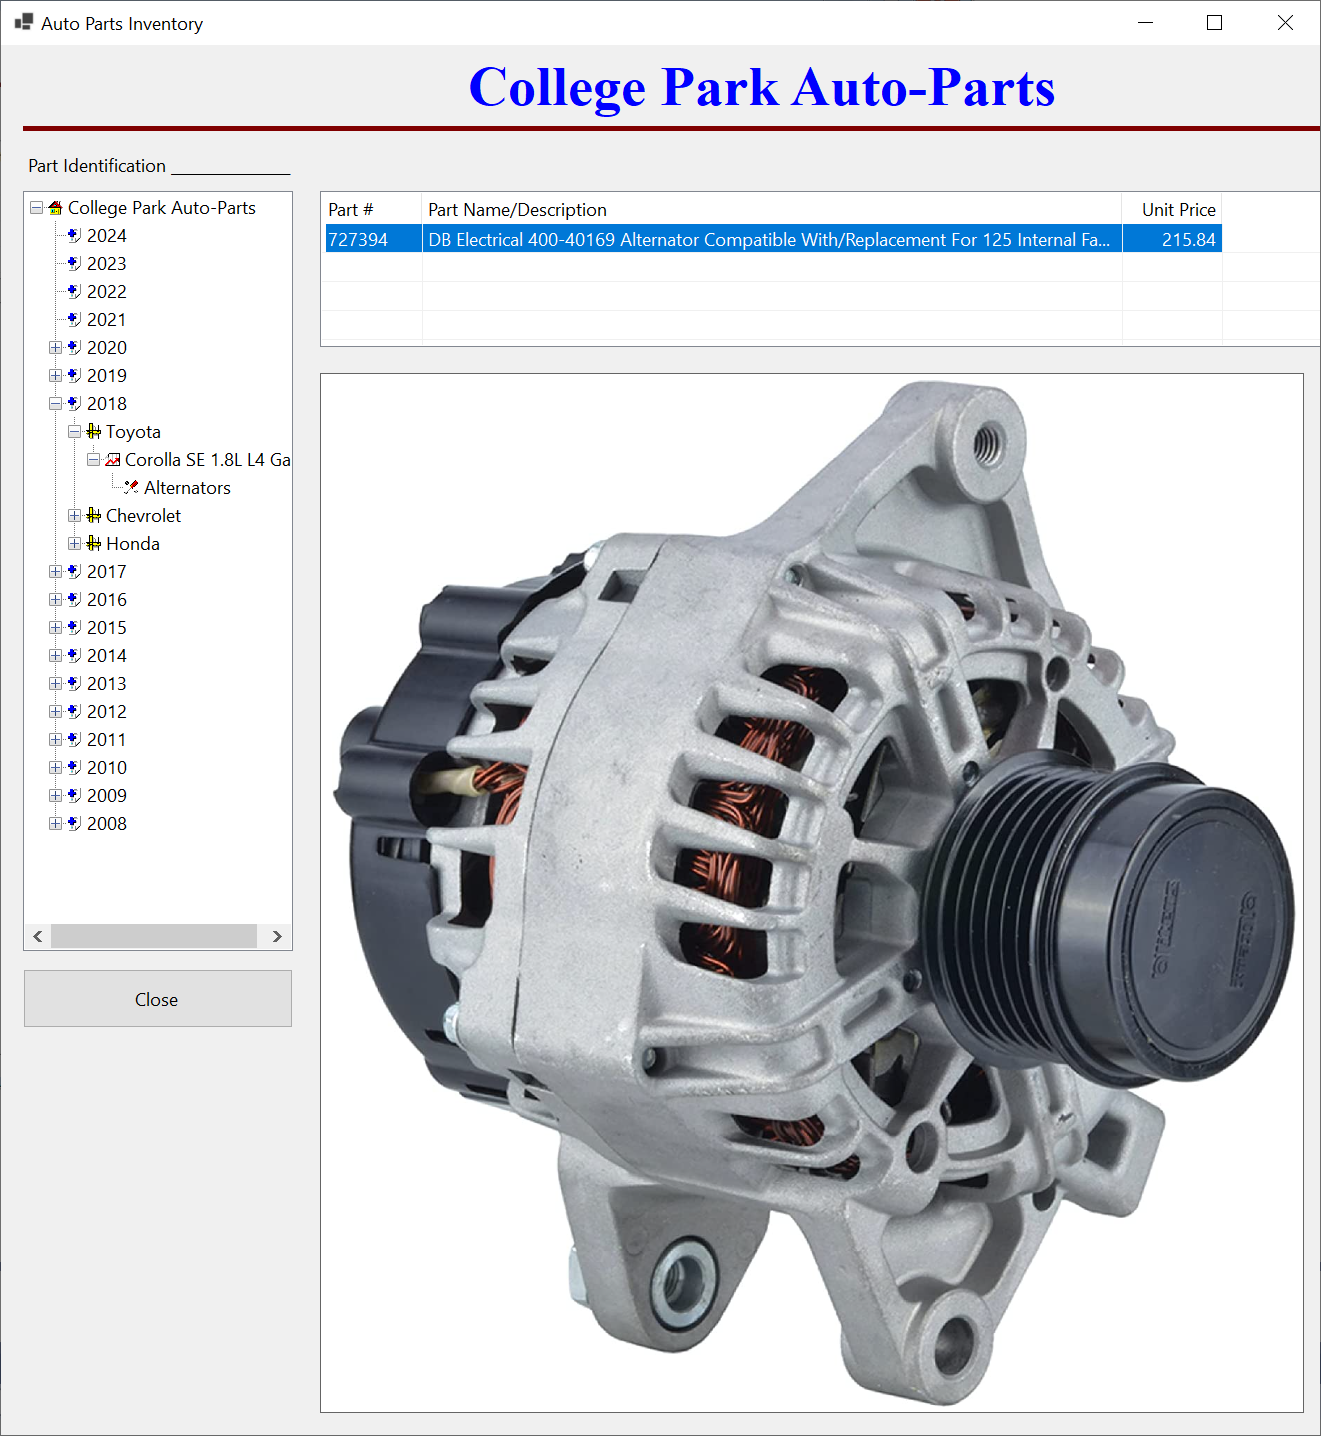
AutoParts[16] = new AutoPart() { PartNumber = 727394, Year = 2018, Make = "Toyota", Model = "Corolla SE 1.8L L4 Gas", Category = "Alternators", PartName = "DB Electrical 400-40169 Alternator Compatible With/Replacement For 125 Internal Fan Type Decoupler Pulley Type Internal Regulator CW Rotation", UnitPrice = 215.84, ImageFile = "727394.png" };
AutoParts[17] = new AutoPart() { PartNumber = 483804, Year = 2011, Make = "Chrysler", Model = "Town & Country 3.3L", Category = "Alternators & Generators", PartName = "", UnitPrice = 118.37, ImageFile = "148040.png" };
AutoParts[18] = new AutoPart() { PartNumber = 927944, Year = 2017, Make = "Chevrolet", Model = "Equinox", Category = "Bearings & Seals", PartName = "Wheel Hub Bearing Assembly", UnitPrice = 48.85, ImageFile = "927944.png" };
AutoParts[19] = new AutoPart() { PartNumber = 208497, Year = 2009, Make = "Dodge", Model = "Grand Caravan", Category = "Alternators", PartName = "Alternator", UnitPrice = 114.46, ImageFile = "503502.png" };
AutoParts[20] = new AutoPart() { PartNumber = 749471, Year = 2019, Make = "Toyota", Model = "Prius", Category = "Shocks, Struts & Suspension", PartName = "2-Piece Suspension Strut and Coil Spring Kit (593024)", UnitPrice = 299.97, ImageFile = "593024.png" };
AutoParts[21] = new AutoPart() { PartNumber = 957724, Year = 2016, Make = "Chrysler", Model = "s200", Category = "Starters", PartName = "DB Electrical SND0775 Starter", UnitPrice = 94.48, ImageFile = "148073.png" };
AutoParts[22] = new AutoPart() { PartNumber = 397930, Year = 2008, Make = "Buick", Model = "Enclave", Category = "Brake Kits", PartName = "Autospecialty Front and Rear Replacement Brake Kit-OE Brake Rotors & Ceramic Brake Pads", UnitPrice = 315.27, ImageFile = "308113.png" };
AutoParts[23] = new AutoPart() { PartNumber = 927307, Year = 2014, Make = "Buick", Model = "Regal", Category = "Alternators & Generators", PartName = "DB Electrical Alternator", UnitPrice = 218.74, ImageFile = "928037.png" };
AutoParts[24] = new AutoPart() { PartNumber = 304031, Year = 2017, Make = "Chevrolet", Model = "Express 2500", Category = "Shocks, Struts & Suspension", PartName = "Suspension Kit (Front; with 3 Groove Pitman Arm)", UnitPrice = 142.44, ImageFile = "304031.png" };
AutoParts[25] = new AutoPart() { PartNumber = 497249, Year = 2013, Make = "GMC", Model = "Sierra 1500", Category = "Drum Brake", PartName = "ACDelco Gold 17960BF1 Bonded Rear Drum Brake Shoe Set", UnitPrice = 58.92, ImageFile = "497249.png" };
AutoParts[26] = new AutoPart() { PartNumber = 973947, Year = 2012, Make = "Honda", Model = "Accord", Category = "Brake Kits", PartName = "R1 Concepts Front Rear Brakes and Rotors Kit |Front Rear Brake Pads| Brake Rotors and Pads| Ceramic Brake Pads and Rotors", UnitPrice = 292.84, ImageFile = "973947.png" };
AutoParts[27] = new AutoPart() { PartNumber = 868050, Year = 2010, Make = "Dodge", Model = "Avenger", Category = "Starters", PartName = "DB Electrical SMT0343 Starter", UnitPrice = 82.66, ImageFile = "938475.png" };
AutoParts[28] = new AutoPart() { PartNumber = 182694, Year = 2016, Make = "Chevrolet", Model = "Impala", Category = "Bearings & Seals", PartName = "Wheel Hub Bearing Assembly", UnitPrice = 48.85, ImageFile = "927944.png" };
AutoParts[29] = new AutoPart() { PartNumber = 209246, Year = 2013, Make = "Chevrolet", Model = "Silverado 1500", Category = "Drum Brake", PartName = "ACDelco Gold 17960BF1 Bonded Rear Drum Brake Shoe Set", UnitPrice = 58.92, ImageFile = "497249.png" };
cbxYears.Items.Add(2023.ToString());
cbxYears.Items.Add(2022.ToString());
cbxYears.Items.Add(2021.ToString());
cbxYears.Items.Add(2020.ToString());
cbxYears.Items.Add(2019.ToString());
cbxYears.Items.Add(2018.ToString());
cbxYears.Items.Add(2017.ToString());
cbxYears.Items.Add(2016.ToString());
cbxYears.Items.Add(2015.ToString());
cbxYears.Items.Add(2014.ToString());
cbxYears.Items.Add(2013.ToString());
cbxYears.Items.Add(2012.ToString());
cbxYears.Items.Add(2011.ToString());
cbxYears.Items.Add(2010.ToString());
cbxYears.Items.Add(2009.ToString());
cbxYears.Items.Add(2008.ToString());
}
private void cbxYears_SelectedIndexChanged(object sender, EventArgs e)
{
cbxMakes.Items.Clear();
cbxModels.Items.Clear();
cbxCategories.Items.Clear();
txtPartName.Text = string.Empty;
txtUnitPrice.Text = string.Empty;
foreach (AutoPart part in AutoParts)
{
if (!(cbxMakes.Items.Contains(part.Make)))
{
cbxMakes.Items.Add(part.Make);
}
}
}
private void cbxMakes_SelectedIndexChanged(object sender, EventArgs e)
{
cbxModels.Items.Clear();
cbxCategories.Items.Clear();
txtPartName.Text = string.Empty;
txtUnitPrice.Text = string.Empty;
foreach (AutoPart part in AutoParts)
{
if( (part.Year.ToString().Equals(cbxYears.Text)) &&
(part.Make!.Equals(cbxMakes.Text)) )
{
if (!(cbxModels.Items.Contains(part.Model)))
{
cbxModels.Items.Add(part.Model);
}
}
}
}
private void cbxModels_SelectedIndexChanged(object sender, EventArgs e)
{
cbxCategories.Items.Clear();
txtPartName.Text = string.Empty;
txtUnitPrice.Text = string.Empty;
foreach (AutoPart part in AutoParts)
{
if( (part.Year.ToString().Equals(cbxYears.Text)) &&
(part.Make!.Equals(cbxMakes.Text)) &&
(part.Model!.Equals(cbxModels.Text)) )
{
if (!(cbxCategories.Items.Contains(part.Category)))
{
cbxCategories.Items.Add(part.Category);
}
}
}
}
private void cbxCategories_SelectedIndexChanged(object sender, EventArgs e)
{
foreach (AutoPart part in AutoParts)
{
if( (part.Year.ToString().Equals(cbxYears.Text)) &&
(part.Make!.Equals(cbxMakes.Text)) &&
(part.Model!.Equals(cbxModels.Text)) &&
(part.Category!.Equals(cbxCategories.Text)))
{
txtPartName.Text = part.PartName;
txtUnitPrice.Text = part.UnitPrice.ToString("F");
pbxAutoPart.Image = Image.FromFile(@"E:\College Park Auto-Parts\" + part.ImageFile);
Width = pbxAutoPart.Left + pbxAutoPart.Image.Width + 50;
Height = pbxAutoPart.Top + pbxAutoPart.Image.Height + 80;
}
}
}
}
}
Composite Lists-Based Controls
An Image List
An image list is a list of image that are put together to be use by an application in a particular manner. The images are put together as an array where each picture occupies a specific index and can therefore be located with that index.
To support image lists, the .NET Framework provides a class named ImageList. You can use it to programmatically create an image list. To visually create an image list, click the ImageList button in the Toolbox and click a form on the application. An image list is not a visual control. Therefore, when you visually add an ImageList to a form, the icon of that object is positioned below the form.
If you had programmatically created an ImageList, you can configure it with code. After visually adding an image list to a form, you can configure it using the Properties window. Either way, the most important action to take is to add images to the object. To support this, the ImageList class is equipped with a property named Images .
List Views
We saw that a list box holds a vertical series of items, one item at a time. A list view is an enhanced version of a list box. While each item in a list box contain one value, in a list view, each item is one or more values. To organise a list view, its items are divided in columns. As a programmer, you have many options to define how the list box should display its items.
To help you with list views, the Toolbox has a button marked ListView. To create a list view, click that button and click a form or other container in your application. The characteristics of a list view are specified in a class named ListView. All the characteristics are available in the Properties window.
![]() Practical Learning: Returning a Tuple
Practical Learning: Returning a Tuple
| (Name) | Text | TextAlign | Width |
| colPartNumber | Part # | 80 | |
| colCategory | Item Category | 250 | |
| colPartName | Part Name/Description | 700 | |
| colUnitPrice | Unit Price | Right | 100 |
| Control | (Name) | Other Properties | |
| ListView | lvwAutoParts | FullRowSelect: True GridLines: True View: Details |
|
| PictureBox | pbxAutoPart | BorderStyle: FixedSingle SizeMode: AutoSize |
|
namespace AutoPartsInventory3
{
    public partial class AutoPartsInventory : Form
    {
        public AutoPartsInventory()
        {
            InitializeComponent();
        }

        private void AutoPartsInventory_Load(object sender, EventArgs e)
        {
            ListViewItem lviAutoPart = new ListViewItem(148040.ToString());

            lviAutoPart.SubItems.Add("Alternators & Generators");
            lviAutoPart.SubItems.Add("Alternator");
            lviAutoPart.SubItems.Add(118.37.ToString("F"));
            lvwAutoParts.Items.Add(lviAutoPart);

            lviAutoPart = new ListViewItem(730283.ToString());

            lviAutoPart.SubItems.Add("Oil Filters");
            lviAutoPart.SubItems.Add("Hydraulic Cylinder Timing Belt Tensioner");
            lviAutoPart.SubItems.Add(14.15.ToString("F"));
            lvwAutoParts.Items.Add(lviAutoPart);

            lviAutoPart = new ListViewItem(727394.ToString());

            lviAutoPart.SubItems.Add("Alternators");
            lviAutoPart.SubItems.Add("DB Electrical 400-40169 Alternator Compatible With/Replacement For 125 Internal Fan Type Decoupler Pulley Type Internal Regulator CW Rotation");
            lviAutoPart.SubItems.Add(215.84.ToString("F"));
            lvwAutoParts.Items.Add(lviAutoPart);

            lviAutoPart = new ListViewItem(290741.ToString());

            lviAutoPart.SubItems.Add("Shocks, Struts & Suspension");
            lviAutoPart.SubItems.Add("Front Strut and Coil Spring Assembly - Set of 2");
            lviAutoPart.SubItems.Add(245.68.ToString("F"));
            lvwAutoParts.Items.Add(lviAutoPart);

            lviAutoPart = new ListViewItem(740248.ToString());

            lviAutoPart.SubItems.Add("Bearings & Seals");
            lviAutoPart.SubItems.Add("Wheel hub bearing Assembly");
            lviAutoPart.SubItems.Add(99.95.ToString("F"));
            lvwAutoParts.Items.Add(lviAutoPart);

            lviAutoPart = new ListViewItem(308113.ToString());

            lviAutoPart.SubItems.Add("Brake Kits");
            lviAutoPart.SubItems.Add("Autospecialty Front and Rear Replacement Brake Kit-OE Brake Rotors & Ceramic Brake Pads");
            lviAutoPart.SubItems.Add(315.27.ToString("F"));
            lvwAutoParts.Items.Add(lviAutoPart);

            lviAutoPart = new ListViewItem(283759.ToString());

            lviAutoPart.SubItems.Add("Starters");
            lviAutoPart.SubItems.Add("DB Electrical SND0787 Starter");
            lviAutoPart.SubItems.Add(212.58.ToString("F"));
            lvwAutoParts.Items.Add(lviAutoPart);

            lviAutoPart = new ListViewItem(503502.ToString());

            lviAutoPart.SubItems.Add("Alternators");
            lviAutoPart.SubItems.Add("Alternator");
            lviAutoPart.SubItems.Add(114.46.ToString("F"));
            lvwAutoParts.Items.Add(lviAutoPart);

            lviAutoPart = new ListViewItem(799428.ToString());

            lviAutoPart.SubItems.Add("Bearings & Seals");
            lviAutoPart.SubItems.Add("Front/Rear Wheel Hub Bearing Assembly 5 Lugs w/ABS");
            lviAutoPart.SubItems.Add(79.97.ToString("F"));
            lvwAutoParts.Items.Add(lviAutoPart);

            lviAutoPart = new ListViewItem(148073.ToString());

            lviAutoPart.SubItems.Add("Starters");
            lviAutoPart.SubItems.Add("DB Electrical SND0775 Starter");
            lviAutoPart.SubItems.Add(94.48.ToString("F"));
            lvwAutoParts.Items.Add(lviAutoPart);

            lviAutoPart = new ListViewItem(938475.ToString());

            lviAutoPart.SubItems.Add("Starters");
            lviAutoPart.SubItems.Add("DB Electrical SMT0343 Starter");
            lviAutoPart.SubItems.Add(82.66.ToString("F"));
            lvwAutoParts.Items.Add(lviAutoPart);

            lviAutoPart = new ListViewItem(520384.ToString());

            lviAutoPart.SubItems.Add("Drum Brake");
            lviAutoPart.SubItems.Add("Rear Dynamic Friction Company True-Arc Brake Shoes");
            lviAutoPart.SubItems.Add(42.22.ToString("F"));
            lvwAutoParts.Items.Add(lviAutoPart);

            lviAutoPart = new ListViewItem(927944.ToString());

            lviAutoPart.SubItems.Add("Bearings & Seals");
            lviAutoPart.SubItems.Add("Wheel Hub Bearing Assembly");
            lviAutoPart.SubItems.Add(48.85.ToString("F"));
            lvwAutoParts.Items.Add(lviAutoPart);

            lviAutoPart = new ListViewItem(304031.ToString());

            lviAutoPart.SubItems.Add("Shocks, Struts & Suspension");
            lviAutoPart.SubItems.Add("Suspension Kit (Front; with 3 Groove Pitman Arm)");
            lviAutoPart.SubItems.Add(142.44.ToString("F"));
            lvwAutoParts.Items.Add(lviAutoPart);

            lviAutoPart = new ListViewItem(497249.ToString());

            lviAutoPart.SubItems.Add("Drum Brake");
            lviAutoPart.SubItems.Add("ACDelco Gold 17960BF1 Bonded Rear Drum Brake Shoe Set");
            lviAutoPart.SubItems.Add(58.92.ToString("F"));
            lvwAutoParts.Items.Add(lviAutoPart);
        }

        private void lvwAutoParts_ItemSelectionChanged(object sender, ListViewItemSelectionChangedEventArgs e)
        {
            pbxAutoPart.Image = Image.FromFile(@"C:\College Park Auto-Parts\" + e.Item!.Text + ".png");

            Width = pbxAutoPart.Left + pbxAutoPart.Image.Width + 40;
            Height = pbxAutoPart.Top + pbxAutoPart.Image.Height + 80;
        }
    }
}
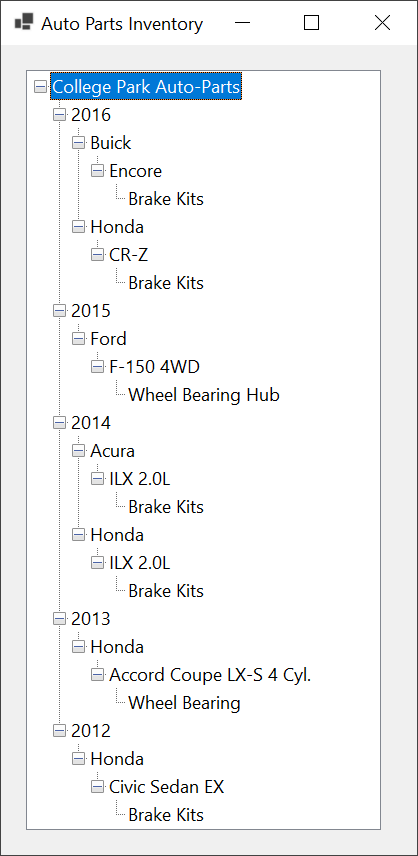
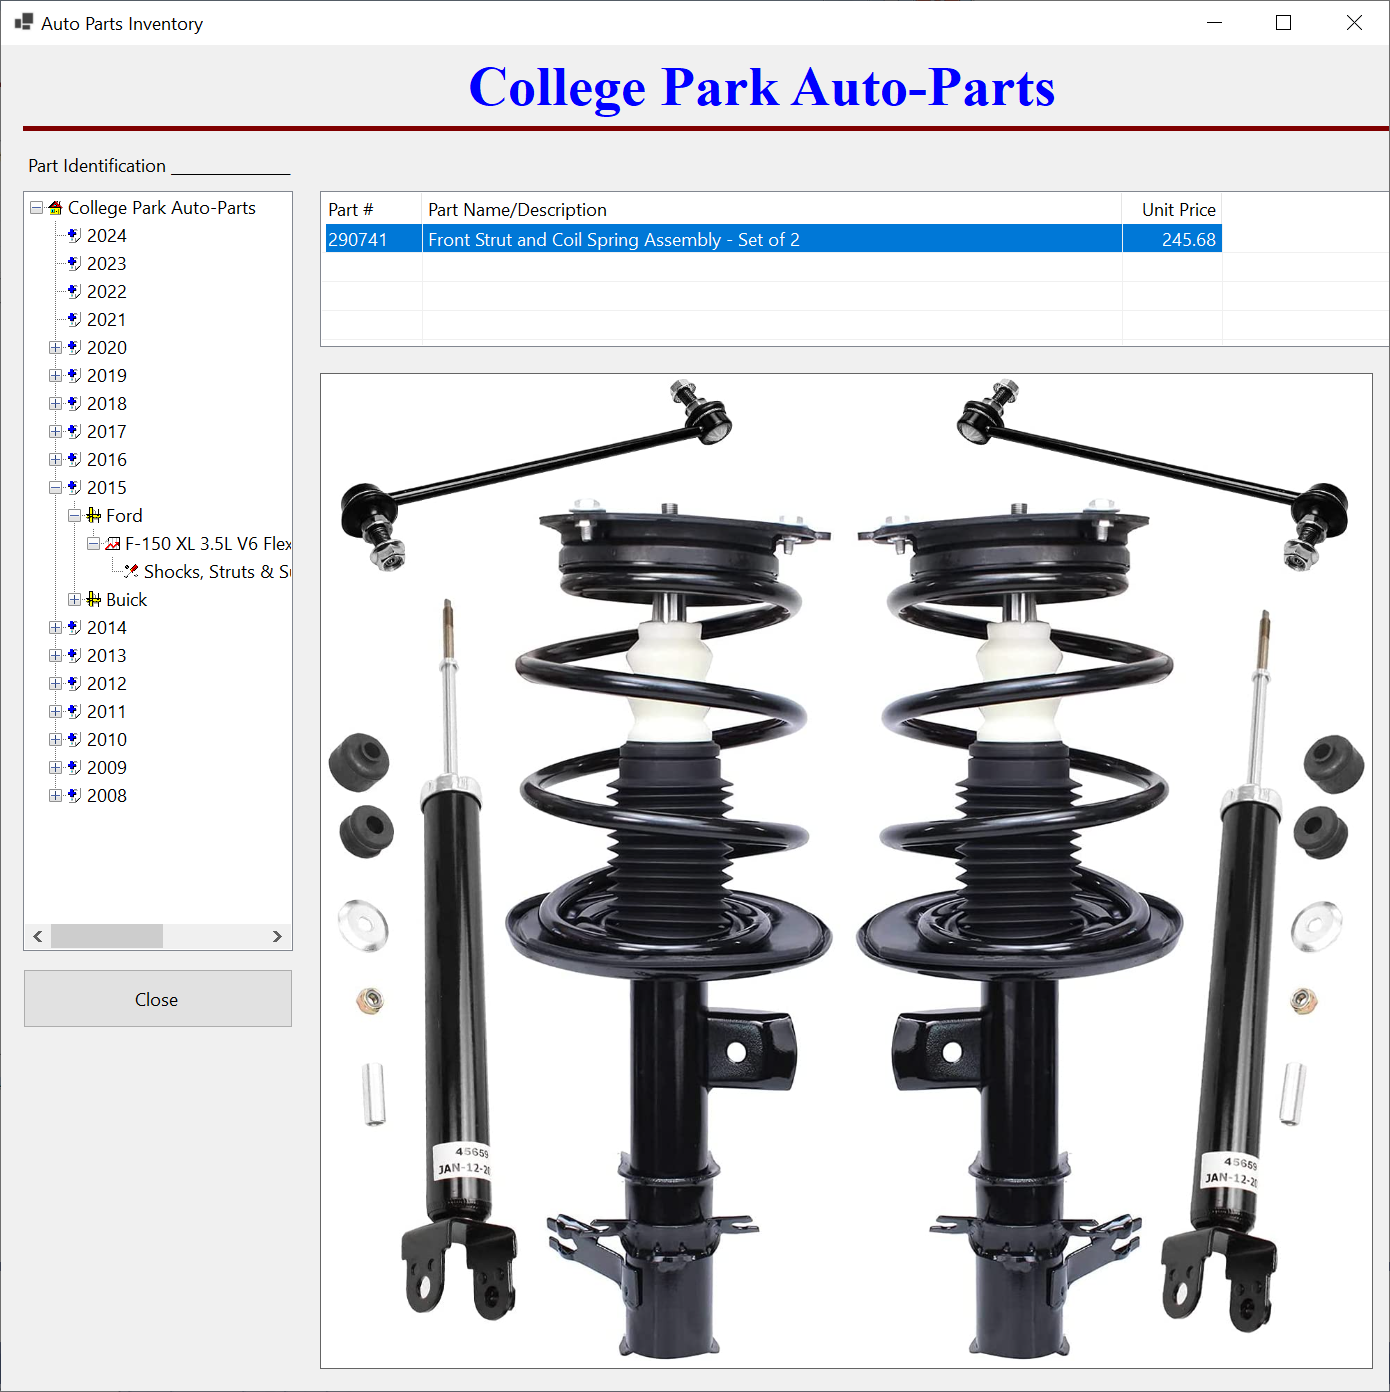
Tree Views
A tree view is a control that holds a list that resembles a tree. It has a beginning, also called a root. That root has one or more dependencies as branches and leaves. These are referred to as nodes. The root and nodes have buttons that allow a user to expand or collapse a section.
To allow you to create a tree view, the .NET Framework provides a class named TreeView. To allow you to graphically add a tree view to your application, the Toolbox is equipped with a button titled TreeView. You can click that button and click a form or your application.
After adding a tree view to a form, you can configure its behavior. For example, you use the Properties window to add and configure the columns. In the same way, you can visually or programmatically create the tree nodes. Here are examples:
namespace AutoPartsInventory4
{
    public partial class AutoPartsInventory : Form
    {
        public AutoPartsInventory()
        {
            InitializeComponent();
        }

        private void AutoPartsInventory_Load(object sender, EventArgs e)
        {
            TreeNode nodRoot = tvwAutoParts.Nodes.Add("College Park Auto-Parts", "College Park Auto-Parts", 0, 1);

            TreeNode nodChild = nodRoot.Nodes.Add("2016", "2016", 2, 3);
            TreeNode nodGrandChild = nodChild.Nodes.Add("Buick", "Buick", 4, 5);
            TreeNode nodGrandGrandChild = nodGrandChild.Nodes.Add("Encore", "Encore", 6, 7);
            nodGrandGrandChild.Nodes.Add("Brake Kits", "Brake Kits", 8, 9);

            nodGrandChild = nodChild.Nodes.Add("Honda", "Honda", 4, 5);
            nodGrandGrandChild = nodGrandChild.Nodes.Add("CR-Z", "CR-Z", 6, 7);
            nodGrandGrandChild.Nodes.Add("Brake Kits", "Brake Kits", 8, 9);

            nodChild = nodRoot.Nodes.Add("2015", "2015", 2, 3);
            nodGrandChild = nodChild.Nodes.Add("Ford", "Ford", 4, 5);
            nodGrandGrandChild = nodGrandChild.Nodes.Add("F-150 4WD", "F-150 4WD", 6, 7);
            nodGrandGrandChild.Nodes.Add("Wheel Bearing Hub", "Wheel Bearing Hub", 8, 9);

            nodChild = nodRoot.Nodes.Add("2014", "2014", 2, 3);
            nodGrandChild = nodChild.Nodes.Add("Acura", "Acura", 4, 5);
            nodGrandGrandChild = nodGrandChild.Nodes.Add("ILX 2.0L", "ILX 2.0L", 6, 7);
            nodGrandGrandChild.Nodes.Add("Brake Kits", "Brake Kits", 8, 9);

            nodGrandChild = nodChild.Nodes.Add("Honda", "Honda", 4, 5);
            nodGrandGrandChild = nodGrandChild.Nodes.Add("ILX 2.0L", "ILX 2.0L", 6, 7);
            nodGrandGrandChild.Nodes.Add("Brake Kits", "Brake Kits", 8, 9);

            nodChild = nodRoot.Nodes.Add("2013", "2013", 2, 3);

            nodGrandChild = nodChild.Nodes.Add("Honda", "Honda", 4, 5);
            nodGrandGrandChild = nodGrandChild.Nodes.Add("Accord Coupe LX-S 4 Cyl.", "Accord Coupe LX-S 4 Cyl.", 6, 7);
            nodGrandGrandChild.Nodes.Add("Wheel Bearing", "Wheel Bearing", 8, 9);

            nodChild = nodRoot.Nodes.Add("2012", "2012", 2, 3);
            nodGrandChild = nodChild.Nodes.Add("Honda", "Honda", 4, 5);
            nodGrandGrandChild = nodGrandChild.Nodes.Add("Civic Sedan EX", "Civic Sedan EX", 6, 7);
            nodGrandGrandChild.Nodes.Add("Brake Kits", "Brake Kits", 8, 9);

            tvwAutoParts.SelectedNode = nodRoot;

            // Expand the root node
            tvwAutoParts.ExpandAll();
        }
    }
}
This would produce:
![]() Practical Learning: Introducing Else Conditions
Practical Learning: Introducing Else Conditions
namespace AutoPartsInventory4.Models
{
    internal record struct AutoPart
    {
        public long    PartNumber { get; init; }
        public int     Year       { get; init; }
        public string? Make       { get; init; }
        public string? Model      { get; init; }
        public string? Category   { get; init; }
        public string? PartName   { get; init; }
        public double UnitPrice   { get; init; }
        public string? ImageFile  { get; init; }
    }
}| (Name) | Text | TextAlign | Width |
| colPartNumber | Part # | 100 | |
| colPartName | Part Name/Description | 700 | |
| colUnitPrice | Unit Price | Right | 100 |
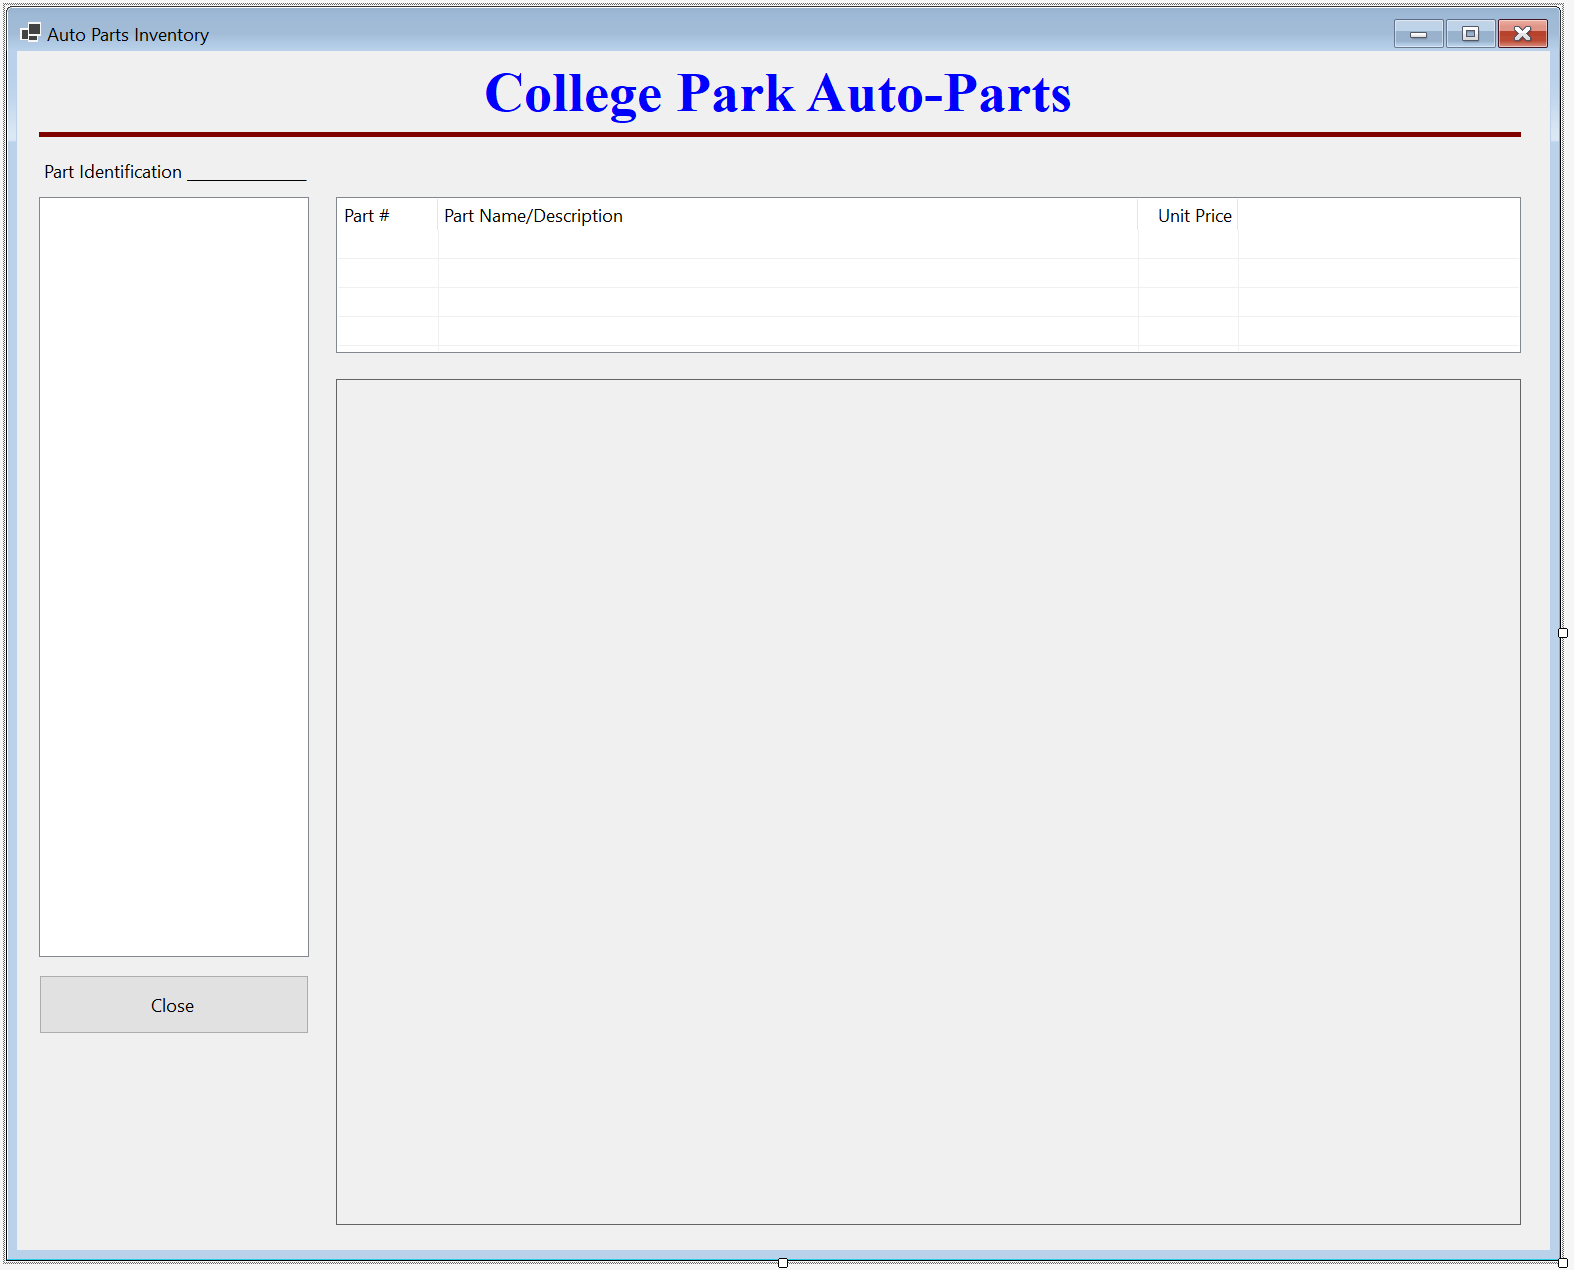
| Control | (Name) | Text | Other Properties | |
| Label | College Park Auto-Parts | Font: Times New Roman, 36pt, style=Bold ForeColo: Blue |
||
| Label | BackColor: Maroon AutoSize: False |
|||
| Label | Part Identification _______ | |||
| TreeView | tvwAutoParts | ImageList: imgAutoParts | ||
| Button | btnClose | Close | Font: Times New Roman, 48pt, style=Bold | |
| ListView | lvwAutoParts | FullRowSelect: True GridLines: True View: Details |
||
| PictureBox | pbxAutoPart | BorderStyle: FixedSingle SizeMode: AutoSize |
||
using AutoPartsInventory4.Models;

namespace AutoPartsInventory4
{
    public partial class AutoPartsInventory : Form
    {
        internal AutoPart[] AutoParts { get; set; } = new AutoPart[32];

        public AutoPartsInventory()
        {
            InitializeComponent();
        }

        private void AutoPartsInventory_Load(object sender, EventArgs e)
        {
            TreeNode nodRoot = tvwAutoParts.Nodes.Add("College Park Auto-Parts", "College Park Auto-Parts", 0, 1);

            AutoParts[0]  = new AutoPart() { PartNumber = 393795, Year = 2015, Make = "Buick",     Model = "Regal", Category = "Alternators & Generators", PartName = "DB Electrical Alternator", UnitPrice = 218.74, ImageFile = "928037.png" };
            AutoParts[1]  = new AutoPart() { PartNumber = 928374, Year = 2018, Make = "Chevrolet", Model = "Express 3500", Category = "Shocks, Struts & Suspension", PartName = "Suspension Kit (Front; with 3 Groove Pitman Arm)", UnitPrice = 142.44, ImageFile = "304031.png" };
            AutoParts[2]  = new AutoPart() { PartNumber = 148040, Year = 2010, Make = "Chrysler",  Model = "Town & Country 3.8L", Category = "Alternators & Generators", PartName = "Alternator", UnitPrice = 118.37, ImageFile = "148040.png" };
            AutoParts[3]  = new AutoPart() { PartNumber = 730283, Year = 2020, Make = "Jeep",      Model = "Wrangler Unlimited Sahara", Category = "Oil Filters", PartName = "Hydraulic Cylinder Timing Belt Tensioner", UnitPrice = 14.15, ImageFile = "730283.png" };
            AutoParts[4]  = new AutoPart() { PartNumber = 290741, Year = 2015, Make = "Ford",      Model = "F-150 XL 3.5L V6 Flex Regular Cab 2 Full-Size Doors", Category = "Shocks, Struts & Suspension", PartName = "Front Strut and Coil Spring Assembly - Set of 2", UnitPrice = 245.68, ImageFile = "290741.png" };
            AutoParts[5]  = new AutoPart() { PartNumber = 740248, Year = 2013, Make = "Chevrolet", Model = "Equinox", Category = "Bearings & Seals", PartName = "Wheel hub bearing Assembly", UnitPrice = 99.95, ImageFile = "740248.png" };
            AutoParts[6]  = new AutoPart() { PartNumber = 283759, Year = 2012, Make = "Dodge",     Model = "Charger 3.6L", Category = "Starters", PartName = "DB Electrical SND0787 Starter", UnitPrice = 212.58, ImageFile = "283759.png" };
            AutoParts[7]  = new AutoPart() { PartNumber = 503502, Year = 2008, Make = "Jeep",      Model = "Wrangler", Category = "Alternators", PartName = "Alternator", UnitPrice = 114.46, ImageFile = "503502.png" };
            AutoParts[8]  = new AutoPart() { PartNumber = 130338, Year = 2011, Make = "Buick",     Model = "Enclave", Category = "Brake Kits", PartName = "Autospecialty Front and Rear Replacement Brake Kit-OE Brake Rotors & Ceramic Brake Pads", UnitPrice = 315.27, ImageFile = "308113.png" };
            AutoParts[9]  = new AutoPart() { PartNumber = 799428, Year = 2012, Make = "Cadillac",  Model = "XTS", Category = "Bearings & Seals", PartName = "Front/Rear Wheel Hub Bearing Assembly 5 Lugs w/ABS", UnitPrice = 79.97, ImageFile = "799428.png" };
            AutoParts[10] = new AutoPart() { PartNumber = 648203, Year = 2018, Make = "Honda",     Model = "CRV", Category = "Alternator", PartName = "Alternator", UnitPrice = 202.47, ImageFile = "593804.png" };
            AutoParts[11] = new AutoPart() { PartNumber = 148073, Year = 2011, Make = "Chrysler",  Model = "s200", Category = "Starters", PartName = "DB Electrical SND0775 Starter", UnitPrice = 94.48, ImageFile = "148073.png" };
            AutoParts[12] = new AutoPart() { PartNumber = 308113, Year = 2017, Make = "Buick",     Model = "Enclave", Category = "Brake Kits", PartName = "Autospecialty Front and Rear Replacement Brake Kit-OE Brake Rotors & Ceramic Brake Pads", UnitPrice = 315.27, ImageFile = "308113.png" };
            AutoParts[13] = new AutoPart() { PartNumber = 938475, Year = 2010, Make = "Chrysler",  Model = "Sebring", Category = "Starters", PartName = "DB Electrical SMT0343 Starter", UnitPrice = 82.66, ImageFile = "938475.png" };
            AutoParts[14] = new AutoPart() { PartNumber = 502853, Year = 2014, Make = "GMC",       Model = "Terrain", Category = "Bearings & Seals", PartName = "Wheel Hub Bearing Assembly", UnitPrice = 48.85, ImageFile = "927944.png" };
            AutoParts[15] = new AutoPart() { PartNumber = 520384, Year = 2020, Make = "Jeep",      Model = "Wrangler Unlimited Sahara", Category = "Drum Brake", PartName = "Rear Dynamic Friction Company True-Arc Brake Shoes", UnitPrice = 42.22, ImageFile = "520384.png" };
            AutoParts[16] = new AutoPart() { PartNumber = 727394, Year = 2018, Make = "Toyota",    Model = "Corolla SE 1.8L L4 Gas", Category = "Alternators", PartName = "DB Electrical 400-40169 Alternator Compatible With/Replacement For 125 Internal Fan Type Decoupler Pulley Type Internal Regulator CW Rotation", UnitPrice = 215.84, ImageFile = "727394.png" };
            AutoParts[17] = new AutoPart() { PartNumber = 483804, Year = 2011, Make = "Chrysler",  Model = "Town & Country 3.3L", Category = "Alternators & Generators", PartName = "Electrical Alternator", UnitPrice = 118.37, ImageFile = "148040.png" };
            AutoParts[18] = new AutoPart() { PartNumber = 927944, Year = 2017, Make = "Chevrolet", Model = "Equinox", Category = "Bearings & Seals", PartName = "Wheel Hub Bearing Assembly", UnitPrice = 48.85, ImageFile = "927944.png" };
            AutoParts[19] = new AutoPart() { PartNumber = 208497, Year = 2009, Make = "Dodge",     Model = "Grand Caravan", Category = "Alternators", PartName = "Alternator", UnitPrice = 114.46, ImageFile = "503502.png" };
            AutoParts[20] = new AutoPart() { PartNumber = 749471, Year = 2019, Make = "Toyota",    Model = "Prius", Category = "Shocks, Struts & Suspension", PartName = "2-Piece Suspension Strut and Coil Spring Kit (593024)", UnitPrice = 299.97, ImageFile = "593024.png" };
            AutoParts[21] = new AutoPart() { PartNumber = 957724, Year = 2016, Make = "Chrysler",  Model = "s200", Category = "Starters", PartName = "DB Electrical SND0775 Starter", UnitPrice = 94.48, ImageFile = "148073.png" };
            AutoParts[22] = new AutoPart() { PartNumber = 397930, Year = 2008, Make = "Buick",     Model = "Enclave", Category = "Brake Kits", PartName = "Autospecialty Front and Rear Replacement Brake Kit-OE Brake Rotors & Ceramic Brake Pads", UnitPrice = 315.27, ImageFile = "308113.png" };
            AutoParts[23] = new AutoPart() { PartNumber = 927307, Year = 2014, Make = "Buick",     Model = "Regal", Category = "Alternators & Generators", PartName = "DB Electrical Alternator", UnitPrice = 218.74, ImageFile = "928037.png" };
            AutoParts[24] = new AutoPart() { PartNumber = 304031, Year = 2017, Make = "Chevrolet", Model = "Express 2500",   Category = "Shocks, Struts & Suspension", PartName = "Suspension Kit (Front; with 3 Groove Pitman Arm)", UnitPrice = 142.44, ImageFile = "304031.png" };
            AutoParts[25] = new AutoPart() { PartNumber = 497249, Year = 2013, Make = "GMC",       Model = "Sierra 1500",    Category = "Drum Brake", PartName = "ACDelco Gold 17960BF1 Bonded Rear Drum Brake Shoe Set", UnitPrice = 58.92, ImageFile = "497249.png" };
            AutoParts[26] = new AutoPart() { PartNumber = 973947, Year = 2012, Make = "Honda",     Model = "Accord",         Category = "Brake Kits", PartName = "R1 Concepts Front Rear Brakes and Rotors Kit |Front Rear Brake Pads| Brake Rotors and Pads| Ceramic Brake Pads and Rotors", UnitPrice = 292.84, ImageFile = "973947.png" };
            AutoParts[27] = new AutoPart() { PartNumber = 868050, Year = 2010, Make = "Dodge",     Model = "Avenger",        Category = "Starters", PartName = "DB Electrical SMT0343 Starter", UnitPrice = 82.66, ImageFile = "938475.png" };
            AutoParts[28] = new AutoPart() { PartNumber = 182694, Year = 2016, Make = "Chevrolet", Model = "Impala",         Category = "Bearings & Seals", PartName = "Wheel Hub Bearing Assembly", UnitPrice = 48.85, ImageFile = "927944.png" };
            AutoParts[29] = new AutoPart() { PartNumber = 209246, Year = 2013, Make = "Chevrolet", Model = "Silverado 1500", Category = "Drum Brake", PartName = "ACDelco Gold 17960BF1 Bonded Rear Drum Brake Shoe Set", UnitPrice = 58.92, ImageFile = "497249.png" };
            AutoParts[30] = new AutoPart() { PartNumber = 928037, Year = 2017, Make = "Buick",     Model = "Regal",          Category = "Alternators & Generators", PartName = "DB Electrical Alternator", UnitPrice = 218.74, ImageFile = "928037.png" };
            AutoParts[31] = new AutoPart() { PartNumber = 297149, Year = 2020, Make = "Jeep",      Model = "Wrangler",       Category = "Air Filters", PartName = "ACDelco Gold A3408C Air Filter", UnitPrice = 22.83, ImageFile = "297149.png" };

            nodRoot.Nodes.Add("2024", "2024", 2, 3);
            nodRoot.Nodes.Add("2023", "2023", 2, 3);
            nodRoot.Nodes.Add("2022", "2022", 2, 3);
            nodRoot.Nodes.Add("2021", "2021", 2, 3);

            tvwAutoParts.ExpandAll();

            TreeNode nodChild = nodRoot.Nodes.Add("2020", "2020", 2, 3);

            TreeNode nodGrandChild = nodChild.Nodes.Add(AutoParts[31].Make, AutoParts[31].Make, 4, 5);
            TreeNode nodGrandGrandChild = nodGrandChild.Nodes.Add(AutoParts[31].Model, AutoParts[31].Model, 6, 7);
            nodGrandGrandChild.Nodes.Add(AutoParts[31].Category, AutoParts[31].Category, 8, 9);

            nodGrandGrandChild = nodGrandChild.Nodes.Add(AutoParts[15].Model, AutoParts[15].Model, 6, 7);
            nodGrandGrandChild.Nodes.Add(AutoParts[15].Category, AutoParts[15].Category, 8, 9);

            nodGrandGrandChild.Nodes.Add(AutoParts[3].Category, AutoParts[3].Category, 8, 9);

            nodChild = nodRoot.Nodes.Add("2019", "2019", 2, 3);

            nodGrandChild = nodChild.Nodes.Add(AutoParts[20].Make, AutoParts[20].Make, 4, 5);
            nodGrandGrandChild = nodGrandChild.Nodes.Add(AutoParts[20].Model, AutoParts[20].Model, 6, 7);
            nodGrandGrandChild.Nodes.Add(AutoParts[20].Category, AutoParts[20].Category, 8, 9);

            nodChild = nodRoot.Nodes.Add("2018", "2018", 2, 3);

            nodGrandChild = nodChild.Nodes.Add(AutoParts[16].Make, AutoParts[16].Make, 4, 5);
            nodGrandGrandChild = nodGrandChild.Nodes.Add(AutoParts[16].Model, AutoParts[16].Model, 6, 7);
            nodGrandGrandChild.Nodes.Add(AutoParts[16].Category, AutoParts[16].Category, 8, 9);

            nodGrandChild = nodChild.Nodes.Add(AutoParts[1].Make, AutoParts[1].Make, 4, 5);
            nodGrandGrandChild = nodGrandChild.Nodes.Add(AutoParts[1].Model, AutoParts[1].Model, 6, 7);
            nodGrandGrandChild.Nodes.Add(AutoParts[1].Category, AutoParts[1].Category, 8, 9);

            nodGrandChild = nodChild.Nodes.Add(AutoParts[10].Make, AutoParts[10].Make, 4, 5);
            nodGrandGrandChild = nodGrandChild.Nodes.Add(AutoParts[10].Model, AutoParts[10].Model, 6, 7);
            nodGrandGrandChild.Nodes.Add(AutoParts[10].Category, AutoParts[10].Category, 8, 9);

            nodChild = nodRoot.Nodes.Add("2017", "2017", 2, 3);

            nodGrandChild = nodChild.Nodes.Add(AutoParts[24].Make, AutoParts[24].Make, 4, 5);
            nodGrandGrandChild = nodGrandChild.Nodes.Add(AutoParts[24].Model, AutoParts[24].Model, 6, 7);
            nodGrandGrandChild.Nodes.Add(AutoParts[24].Category, AutoParts[24].Category, 8, 9);

            nodGrandGrandChild = nodGrandChild.Nodes.Add(AutoParts[18].Model, AutoParts[18].Model, 6, 7);
            nodGrandGrandChild.Nodes.Add(AutoParts[18].Category, AutoParts[18].Category, 8, 9);

            nodGrandChild = nodChild.Nodes.Add(AutoParts[12].Make, AutoParts[12].Make, 4, 5);
            nodGrandGrandChild = nodGrandChild.Nodes.Add(AutoParts[12].Model, AutoParts[12].Model, 6, 7);
            nodGrandGrandChild.Nodes.Add(AutoParts[12].Category, AutoParts[12].Category, 8, 9);

            nodGrandGrandChild = nodGrandChild.Nodes.Add(AutoParts[30].Model, AutoParts[30].Model, 6, 7);
            nodGrandGrandChild.Nodes.Add(AutoParts[30].Category, AutoParts[30].Category, 8, 9);

            nodChild = nodRoot.Nodes.Add("2016", "2016", 2, 3);

            nodGrandChild = nodChild.Nodes.Add(AutoParts[21].Make, AutoParts[21].Make, 4, 5);
            nodGrandGrandChild = nodGrandChild.Nodes.Add(AutoParts[21].Model, AutoParts[21].Model, 6, 7);
            nodGrandGrandChild.Nodes.Add(AutoParts[21].Category, AutoParts[21].Category, 8, 9);

            nodGrandChild = nodChild.Nodes.Add(AutoParts[28].Make, AutoParts[28].Make, 4, 5);
            nodGrandGrandChild = nodGrandChild.Nodes.Add(AutoParts[28].Model, AutoParts[28].Model, 6, 7);
            nodGrandGrandChild.Nodes.Add(AutoParts[28].Category, AutoParts[28].Category, 8, 9);

            nodChild = nodRoot.Nodes.Add("2015", "2015", 2, 3);

            nodGrandChild = nodChild.Nodes.Add(AutoParts[4].Make, AutoParts[4].Make, 4, 5);
            nodGrandGrandChild = nodGrandChild.Nodes.Add(AutoParts[4].Model, AutoParts[4].Model, 6, 7);
            nodGrandGrandChild.Nodes.Add(AutoParts[4].Category, AutoParts[4].Category, 8, 9);

            nodGrandChild = nodChild.Nodes.Add(AutoParts[0].Make, AutoParts[0].Make, 4, 5);
            nodGrandGrandChild = nodGrandChild.Nodes.Add(AutoParts[0].Model, AutoParts[0].Model, 6, 7);
            nodGrandGrandChild.Nodes.Add(AutoParts[0].Category, AutoParts[0].Category, 8, 9);

            nodChild = nodRoot.Nodes.Add("2014", "2014", 2, 3);

            nodGrandChild = nodChild.Nodes.Add(AutoParts[23].Make, AutoParts[23].Make, 4, 5);
            nodGrandGrandChild = nodGrandChild.Nodes.Add(AutoParts[23].Model, AutoParts[23].Model, 6, 7);
            nodGrandGrandChild.Nodes.Add(AutoParts[23].Category, AutoParts[23].Category, 8, 9);

            nodGrandChild = nodChild.Nodes.Add(AutoParts[14].Make, AutoParts[14].Make, 4, 5);
            nodGrandGrandChild = nodGrandChild.Nodes.Add(AutoParts[14].Model, AutoParts[14].Model, 6, 7);
            nodGrandGrandChild.Nodes.Add(AutoParts[14].Category, AutoParts[14].Category, 8, 9);

            nodChild = nodRoot.Nodes.Add("2013", "2013", 2, 3);

            nodGrandChild = nodChild.Nodes.Add(AutoParts[25].Make, AutoParts[25].Make, 4, 5);
            nodGrandGrandChild = nodGrandChild.Nodes.Add(AutoParts[25].Model, AutoParts[25].Model, 6, 7);
            nodGrandGrandChild.Nodes.Add(AutoParts[25].Category, AutoParts[25].Category, 8, 9);

            nodGrandChild = nodChild.Nodes.Add(AutoParts[5].Make, AutoParts[5].Make, 4, 5);
            nodGrandGrandChild = nodGrandChild.Nodes.Add(AutoParts[5].Model, AutoParts[5].Model, 6, 7);
            nodGrandGrandChild.Nodes.Add(AutoParts[5].Category, AutoParts[5].Category, 8, 9);

            nodGrandGrandChild = nodGrandChild.Nodes.Add(AutoParts[29].Model, AutoParts[29].Model, 6, 7);
            nodGrandGrandChild.Nodes.Add(AutoParts[29].Category, AutoParts[29].Category, 8, 9);

            nodChild = nodRoot.Nodes.Add("2012", "2012", 2, 3);

            nodGrandChild = nodChild.Nodes.Add(AutoParts[9].Make, AutoParts[9].Make, 4, 5);
            nodGrandGrandChild = nodGrandChild.Nodes.Add(AutoParts[9].Model, AutoParts[9].Model, 6, 7);
            nodGrandGrandChild.Nodes.Add(AutoParts[9].Category, AutoParts[9].Category, 8, 9);

            nodGrandChild = nodChild.Nodes.Add(AutoParts[6].Make, AutoParts[6].Make, 4, 5);
            nodGrandGrandChild = nodGrandChild.Nodes.Add(AutoParts[6].Model, AutoParts[6].Model, 6, 7);
            nodGrandGrandChild.Nodes.Add(AutoParts[6].Category, AutoParts[6].Category, 8, 9);

            nodGrandChild = nodChild.Nodes.Add(AutoParts[26].Make, AutoParts[26].Make, 4, 5);
            nodGrandGrandChild = nodGrandChild.Nodes.Add(AutoParts[26].Model, AutoParts[26].Model, 6, 7);
            nodGrandGrandChild.Nodes.Add(AutoParts[26].Category, AutoParts[26].Category, 8, 9);

            nodChild = nodRoot.Nodes.Add("2011", "2011", 2, 3);

            nodGrandChild = nodChild.Nodes.Add(AutoParts[8].Make, AutoParts[8].Make, 4, 5);
            nodGrandGrandChild = nodGrandChild.Nodes.Add(AutoParts[8].Model, AutoParts[8].Model, 6, 7);
            nodGrandGrandChild.Nodes.Add(AutoParts[8].Category, AutoParts[8].Category, 8, 9);

            nodGrandChild = nodChild.Nodes.Add(AutoParts[11].Make, AutoParts[11].Make, 4, 5);
            nodGrandGrandChild = nodGrandChild.Nodes.Add(AutoParts[11].Model, AutoParts[11].Model, 6, 7);
            nodGrandGrandChild.Nodes.Add(AutoParts[11].Category, AutoParts[11].Category, 8, 9);

            nodGrandGrandChild = nodGrandChild.Nodes.Add(AutoParts[17].Model, AutoParts[17].Model, 6, 7);
            nodGrandGrandChild.Nodes.Add(AutoParts[17].Category, AutoParts[17].Category, 8, 9);

            nodChild = nodRoot.Nodes.Add("2010", "2010", 2, 3);

            nodGrandChild = nodChild.Nodes.Add(AutoParts[27].Make, AutoParts[27].Make, 4, 5);
            nodGrandGrandChild = nodGrandChild.Nodes.Add(AutoParts[27].Model, AutoParts[27].Model, 6, 7);
            nodGrandGrandChild.Nodes.Add(AutoParts[27].Category, AutoParts[27].Category, 8, 9);

            nodGrandChild = nodChild.Nodes.Add(AutoParts[13].Make, AutoParts[13].Make, 4, 5);
            nodGrandGrandChild = nodGrandChild.Nodes.Add(AutoParts[13].Model, AutoParts[13].Model, 6, 7);
            nodGrandGrandChild.Nodes.Add(AutoParts[13].Category, AutoParts[13].Category, 8, 9);

            nodGrandGrandChild = nodGrandChild.Nodes.Add(AutoParts[2].Model, AutoParts[2].Model, 6, 7);
            nodGrandGrandChild.Nodes.Add(AutoParts[2].Category, AutoParts[2].Category, 8, 9);

            nodChild = nodRoot.Nodes.Add("2009", "2009", 2, 3);

            nodGrandChild = nodChild.Nodes.Add(AutoParts[19].Make, AutoParts[19].Make, 4, 5);
            nodGrandGrandChild = nodGrandChild.Nodes.Add(AutoParts[19].Model, AutoParts[19].Model, 6, 7);
            nodGrandGrandChild.Nodes.Add(AutoParts[19].Category, AutoParts[19].Category, 8, 9);

            nodChild = nodRoot.Nodes.Add("2008", "2008", 2, 3);

            nodGrandChild = nodChild.Nodes.Add(AutoParts[7].Make, AutoParts[7].Make, 4, 5);
            nodGrandGrandChild = nodGrandChild.Nodes.Add(AutoParts[7].Model, AutoParts[7].Model, 6, 7);
            nodGrandGrandChild.Nodes.Add(AutoParts[7].Category, AutoParts[7].Category, 8, 9);

            nodGrandChild = nodChild.Nodes.Add(AutoParts[22].Make, AutoParts[22].Make, 4, 5);
            nodGrandGrandChild = nodGrandChild.Nodes.Add(AutoParts[22].Model, AutoParts[22].Model, 6, 7);
            nodGrandGrandChild.Nodes.Add(AutoParts[22].Category, AutoParts[22].Category, 8, 9);

            tvwAutoParts.SelectedNode = nodRoot;
        }

        private void tvwAutoParts_NodeMouseClick(object sender, TreeNodeMouseClickEventArgs e)
        {
            TreeNode nodClicked = e.Node;

            if (nodClicked.Level == 4)
                lvwAutoParts.Items.Clear();

            try
            {
                foreach (AutoPart part in AutoParts)
                {
                    if ((part.Category == nodClicked.Text) &&
                        (part.Model == nodClicked.Parent.Text) &&
                        (part.Make == nodClicked.Parent.Parent.Text) &&
                        (part.Year.ToString() == nodClicked.Parent.Parent.Parent.Text))
                    {
                        ListViewItem lviAutoPart = new ListViewItem(part.PartNumber.ToString());

                        lviAutoPart.SubItems.Add(part.PartName);
                        lviAutoPart.SubItems.Add(part.UnitPrice.ToString("F"));
                        lvwAutoParts.Items.Add(lviAutoPart);
                    }
                }
            }
            catch (NullReferenceException)
            {
            }
        }

        private void lvwAutoParts_ItemSelectionChanged(object sender, ListViewItemSelectionChangedEventArgs e)
        {
            foreach (AutoPart part in AutoParts)
            {
                if (part.PartNumber == long.Parse(e.Item!.Text))
                {
                    pbxAutoPart.Image = Image.FromFile(@"E:\College Park Auto-Parts\" + part.ImageFile);

                    Width = pbxAutoPart.Left + pbxAutoPart.Image.Width + 40;
                    Height = pbxAutoPart.Top + pbxAutoPart.Image.Height + 80;
                }
            }
        }

        private void btnClose_Click(object sender, EventArgs e)
        {
            Close();
        }
    }
}
|
|
|||
| Previous | Copyright © 2001-2025, FunctionX | Sunday 07 May 2023, 14:00 | Next |
|
|
|||