|
Strings |
|
Introduction to Strings
Text on a Table
A string is text made of a readable letter, a symbol, a
word or a group of words.Microsoft Access supports two broad types of text
actually based on their length. A short text is one that has a maximum size
of 255 characters. To support this, Microsoft Access provides a data type
named Short Text. To specify that a column or field will use a short
text:
- In the Datasheet View of a table
- Click Click to Add and select Short Text
- Click a cell in the design column, in the Add & Delete section, click
the Short Text button

- In the Design View, after setting a field name, specify its Data Type as Short Text:

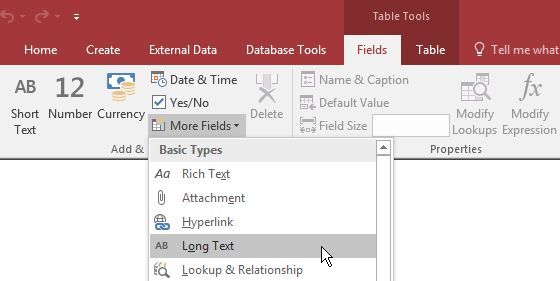
To assist you with common text fields, Microsoft Access
provides many options in the Datasheet View. To use one of them, on the Ribbon,
click Fields, in the Add & Delete section, click More Fields. In the Quick Start
section, click the desired option.
If some columns exist already, to insert a text-based field
between two columns, click the column header, or a cell under the column, that
will precede it. On the Ribbon, click Fields. If a column has been created already and it is using a data type other than
Short Text, to change it, click its column header or a cell
under its column. On the Ribbon, click Fields. In the Formatting section, click the arrow of the Data Type combo box and select
Short Text.
 Practical Learning: Introducing Strings Practical Learning: Introducing Strings
- Start Microsoft Access
- In the list of files, click Altair Realtors1 from
Lesson 17
- In the Navigation Pane, double-click the Properties table to open it
- On the table, click any cell under Property Type
- On the Ribbon, click Fields
- In the Add & Delete section of the Ribbon, click More Fields and
click Address
- On the table, right-click Country Region and click Delete Field
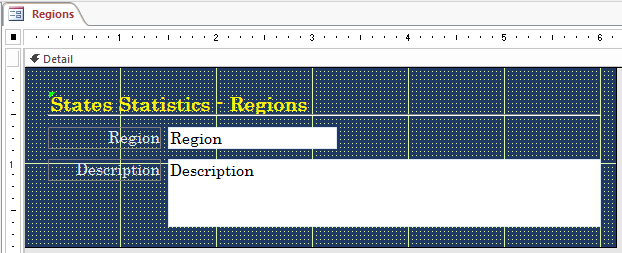
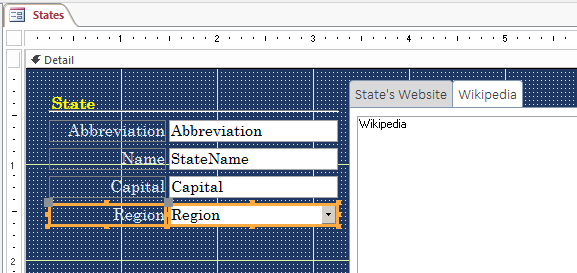
Text on a Form
As we have seen in previous lessons, after creating
text-based field, you can add it to a form or report, in which case it would be
used as a text box. A text-based column can also be used in a form or report as
a combo box or any text-based control.
To access the string stored in a text box or any text-based
control, use only the name of the control (don't add .Text)
Practical Learning:
Using Text on Windows Controls
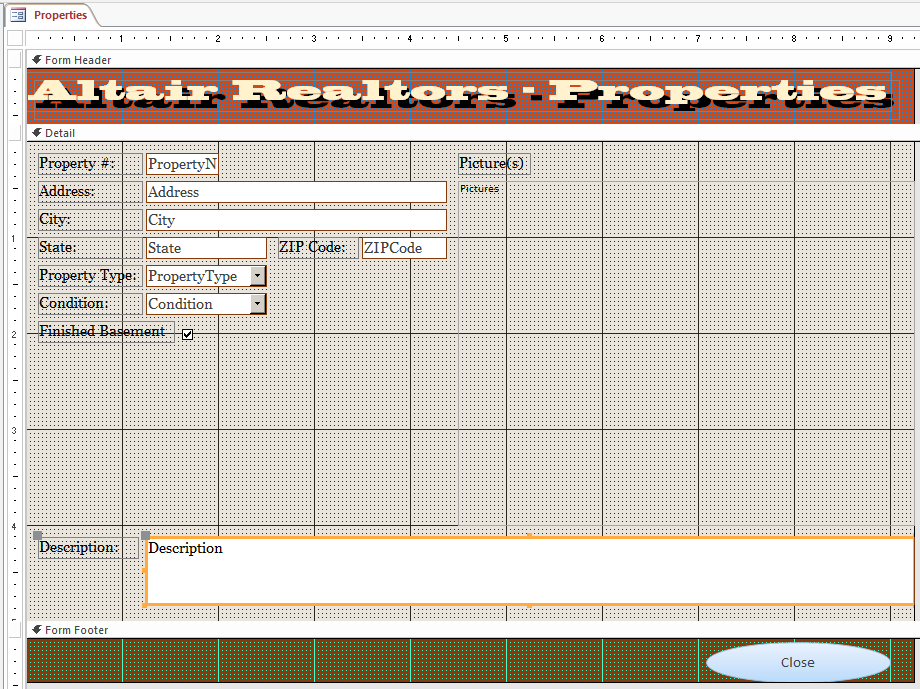
- In the Navigation Pane, right-click the Properties form and click Design
View
- In the Property Sheet, click Data and change the Control Source of each
control as follows:
| Control Name |
Control Source |
| Address |
Address |
| City |
City |
| State |
State |
| ZIPCode |
ZIPCode |
- Close the form
- When asked whether you want to save, click Yes
Text as a Value
To indicate or specify the value of a string, put it between
double-quotes.
Introduction to Strings and Expressions
As mentioned in the previous lesson, you can create an
expression-based column on a table. The expression can include only constant
values, only constant strings, only columns names, or a combination of those.
Practical Learning:
Creating and Using Text-Based Expressions
- On the Ribbon, click File and click Open
- In the list of files, click FunDS1
- In the Navigation Pane, double-click the Employees table to open it in
the Datasheet View
- On the form, click the empty cell under Last Name
- On the Ribbon, click Fields
- In the Add & Delete section, click More Fields, position the mouse on
Calculated Field, and click Text
- In the middle list of the Expression Builder dialog box, double-click
FirstName
- Type & " " &
- In the middle list, double-click LastName
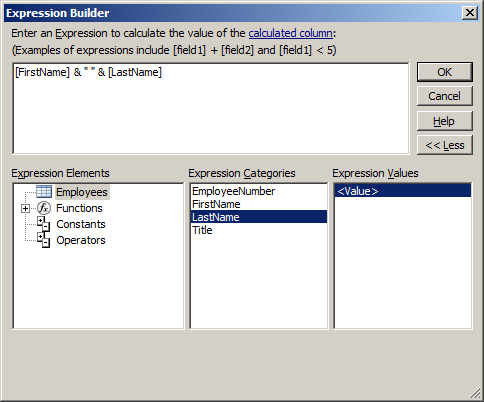
- Click OK
- Type EmployeeName in place of Field1
- Click any cell under EmployeeName
- In the Properties section of the Ribbon, click Name & Caption
- Set the Caption as Employee Name and click OK
- Close the table
- In the Navigation Pane, right-click the Employees form and click Design
View
- In the Tools section of the Ribbon, click Add Existing Fields
- From the Field List, drag EmployeeName and drop it on the form
- Format its design to be like the other text boxes
- Close the form
- When asked whether you want to save, click Yes
- In the Navigation Pane, right-click the ShoppingSessions form and click Design View
- In the Controls section of the Ribbon, click the Combo Box control
 and click in the Detail section form and click in the Detail section form
- In the first page of the wizard, make sure the top radio button is selected and click Next
- In the second page of the wizard, make sure Table: Employees is selected and click Next
- In the Available Fields of the third page of the wizard, double-click EmployeeName and click Next
- Don't change anything in the fourth page of the wizard and click Next
- Don't change anything in the fifth page of the wizard and click Next
- In the sixth page of the wizard, click the arrow of the combo box and select EmployeeNumber
- Click Next
- In the seventh page of the wizard, set the label as Processed By:
- Click Finish
- Close the form
- When asked whether you want to save, click Yes
- On the Ribbon, click File and click Open
- In the list of files, click Ceil Inn1 from the
previous lesson
- In the Navigation Pane, double-click the Employees table to open it in
the Datasheet View
- On the form, click the empty cell under Last Name
- On the Ribbon, click Fields
- In the Add & Delete section, click More Fields, position the mouse on
Calculated Field, and click Text
- In the middle list of the Expression Builder dialog box, double-click
FirstName
- Type & " " &
- In the middle list, double-click LastName
- Click OK
- Type EmployeeName in place of Field1
- Close the table
- In the Navigation Pane, right-click the Employees form and click Design
View
- In the Tools section of the Ribbon, click Add Existing Fields
- From the Field List, drag EmployeeName and drop it on the form
- Format its design to be like the other text boxes
- Close the form
- When asked whether you want to save, click Yes
Primary Charactistics of Strings
The Size of a String
The size of a string is the number of characters it contains or may hold.
By default, when you have just created a Short Text-based field, whether in the Datasheet View or
Design View, its default
size is automatically set to 255 characters. In some circumstances, you may want
the field to deal with a different size. You
can therefore decrease or increase this size for any number between 1 and
255:
To specify the allowable number of characters of a Short Text-based field:
- In the Datasheet View, click a cell in the target column. On the Ribbon, click
Fields. In the Properties section, click Field Size and change the value:

- In
the Design View, in the top section, click the name, data type, or
description of the column. In the lower section of the table,
click Field Size and type the desired number.
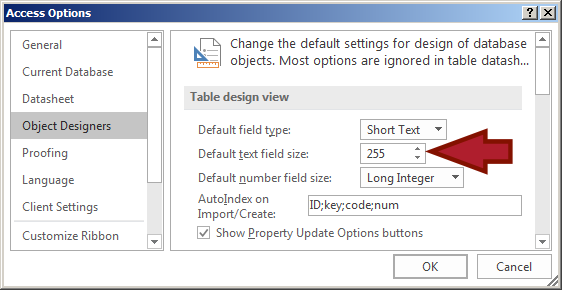
As mentioned already, the default size of a Short Text-based
field is set to 255. This value is set in the Access Options. To change it, open
the dialog box (on the Ribbon, click File and click Options). In the Default
Text Field Size spin button, enter the desired value:
After setting the Field Size property, the
database would make sure that the user can only type so many characters.
Practical Learning: Setting Field Sizes
- In the Navitation Pane, double-click the Properties table to open it in
Datasheet View
- On the table, click any cell under Address
- On the Ribbon, click Fields
- In the Properties section of the Ribbon, in the Field Size, click the
value, type 100 and press Enter
- Read the message box and click Yes
- Right-click the tab of the table and click Design View
- In the top section of the window, change StateProvince to State
- In the top section of the window, change ZIPPostal to ZIPCode
- Complete the fields as follows:
| Field Name |
Field Zide |
Caption |
| PropertyNumber |
|
Property # |
| Address |
100 |
|
| City |
40 |
|
| State |
|
|
| ZIPCode |
|
ZIP Code |
| PropertyType |
|
|
| Condition |
|
|
| FinishedBasement |
|
|
| Pictures |
|
|
- Close the table
- When asked whether you want to save, click Yes
The Length of a String
To get the size of a string, you can call a function named
Len. Its
syntax is:
Len(String) As Number
When calling this function, pass a string etween
double-quotes or the name of a control. The function then produces the
number of characters in it.
Practical
Learning: Setting the Maximum Size of a Short Text Field
- On the Ribbon, click File and click Open
- In the
list of files, click College Park Auto Repair1 from
Lesson 16
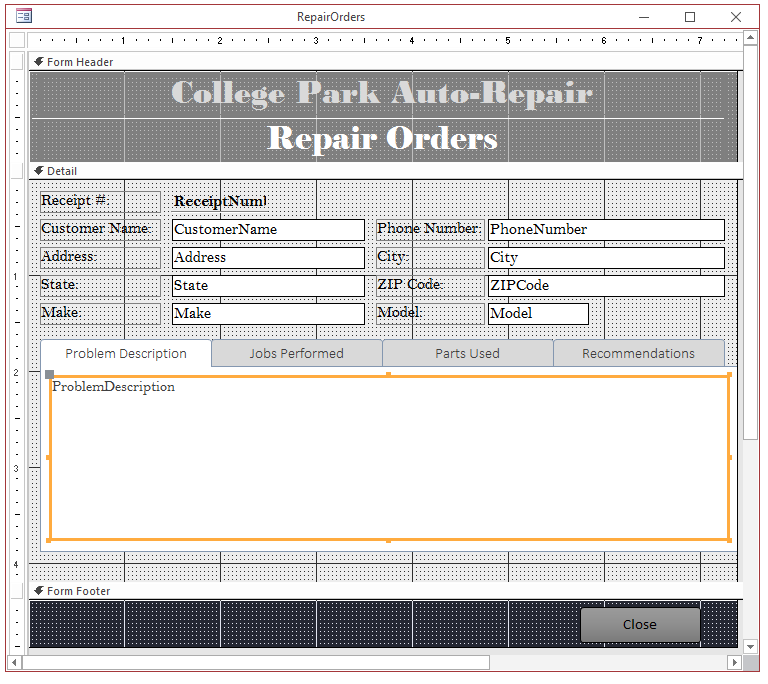
- In the Navigation Pane, right-click the JobsPerformed table and click Design View
- In the top portion of the window, click JobName
- In the bottom part, change the following characteristics:
Field Size: 100
Caption: Job Name
- Save and close the table
- In the Navigation Pane, right-click the PartsUsed table and click Design
View
- In the top portion of the window, click PartName
- In the bottom part, change the following characteristics:
ield Size: 80
Caption: Part Name
- Save and close the table
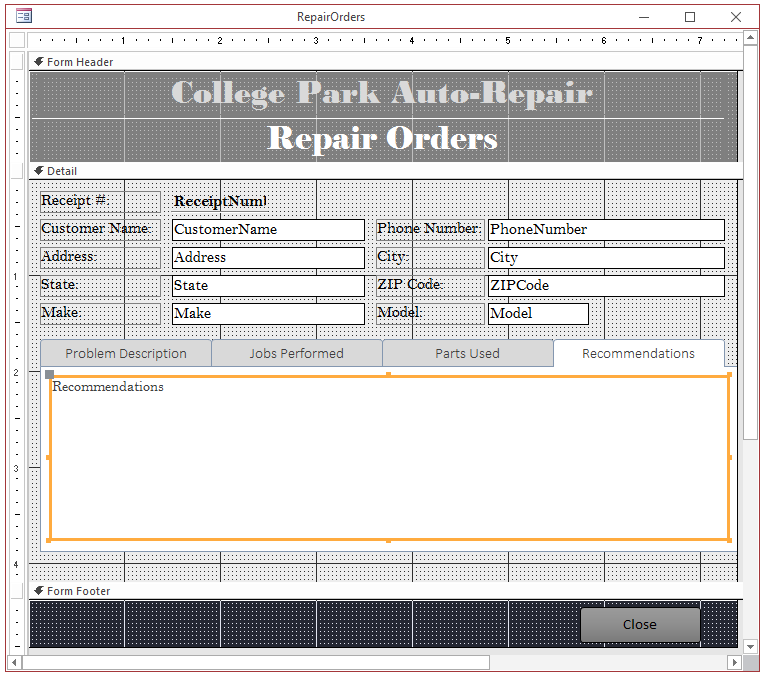
- In the Navigation Pane, right-click the RepairOrders table and click
Design View
- Specify the fields sizes as follows:
| Field Name |
Field Size |
| CustomerName |
50 |
| PhoneNumber |
20 |
| Address |
60 |
| City |
40 |
| State |
40 |
| ZIPCode |
20 |
| Make |
40 |
| Model |
40 |
- Save and close the table
Input Masks
A mask is a technique of creating sections, also called placeholders, in a field. A
section can be configured to accept only a letter, only a digit, a character
or a digit, any symbol, nothing, or a particular character that the user
cannot change. Microsoft Access supports two primary categories of masks:
implicit and explicit. An implicit mask is one that is comtrolled by a data
type. This means that, if you set a certain data type to a field, Microsoft
Access can make sure that only valid values can be entered into the field.
An explicit mask is a field that is made to
control what value is entered into it. When creating the mask, you will use some
predefined characters and create a combination of your choice. A mask, or the
type of mask, depends on the data type of the field.
You can create the mast for a field of a table or for a text
box in a form. If you create the mask for a field in a table, when that field is
added to a form, the mask will apply. If you change the mask of an existing
field of a table after that field has been added to a form, the text box of that
field will not be update on the form. You can either delete the text box on the
form and re-add it to the form, or you can create the mask on the form.
To create a(n explicit) mask on a field:
- Display the table in Design View. In the top section
of the window, click the field that needs the mask and specify its type. In the
lower section of the window, click Input Mask
- Display the form in Design View. On the form, click the text box that
needs the mask. In the Data tab of the Property Sheet, click Input Mask
In both cases, the field will be equipped with a browse
button:  . .
Before creating a mask for a field, Microsoft Access comes
with various pre-defind masks you can apply to a field. Masks
are available for dates, times, US Social Security Number, currency values, etc. To
help you apply one
of these masks, Microsoft Access is equipped with the Input Mask Wizard. To
open it, click the Browse button.
The first page of the wizard displays the most regularly used masks, including
those for US/Canada telephone number, US Social Security #, US ZIP code, date,
time, etc:

If you see a mask that suits you, you can check it by
clicking the Try It text box. This would show the placeholders for the sections
of characters that could be entered during data entry. If you see a mask you want to use, you can click it
and click Next. If none of the masks suits your need, you can create a new one and add it to the list. To do this,
click the Edit List button. This would open the Customize Input Mask Wizard dialog box:
By default, the Customize Input Mask Wizard offers
four already created masks, including US/Canada phone number, US Social
Security Number, US ZIP Code, and telephone extension number. You can
check them by click the Next Record button  in the bottom section of the dialog box.
To create a new mask, click the New (Blank)
Record button
in the bottom section of the dialog box.
To create a new mask, click the New (Blank)
Record button  .
After creating a new mask, you can click Close. .
After creating a new mask, you can click Close.
To complete the mask, continue with the wizard.
If none of the masks provided by the wizard suits you, you can create your
own. To do that, click the Input Mask property for the desired fields and
uses the following characters to create the mask:
|
Character |
Used to enter or accept |
| 0 |
A single digit |
| 9 |
A single digit or space |
| # |
A digit, space, + or - |
| L |
An alphabetical character |
| ? |
A letter |
| A |
A letter or a digit |
| a |
A letter, a digit, or nothing |
| & |
A character or space |
| C |
A character, space, or nothing |
| . |
A decimal place holder; for US English, this would be the period |
| , |
Thousand separator; for US English, this would be a comma |
| :;-/ |
Date and time separator, as specified in the Regional Settings of Control Panel |
| < |
A letter; the letter will be converted to lowercase |
| > |
A letter; the letter will be converted to uppercase |
| ! |
Anything; the mask is filled from right to left for this position |
| | |
Anything; the character that follows this one will be displayed itself. For example, if you type |L, the letter L would be displayed instead of being used a mask |
If you want to include a word or sentence as part of the mask, type it in any section as desired.
Practical Learning: Using Input Masks
- Re-open the Altair Realtors1 database
- Display the Properties table in Design View
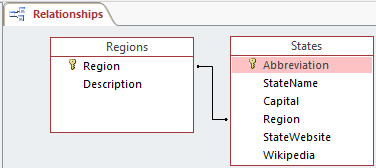
- In the top section of the window, click State
- In the lower section, click Input Mask, type >LL and press Enter
- In the upper section of the window, click ZIPCode
- In the lower section, click the
Input Mask field and click its ellipsis button
- When asked whether you want to save the table, click Yes
- In the first page of the wizard, click ZIP Code
- Click the Try It text box:

- Click Next
- Click Next
- Click the first radio button
- Click Next
- Click Finish
- Right-click the tab of the table and click Datasheet View
- When asked whether you want to save the table, click Yes
- Update the following records:
| Property # |
Address |
City |
State |
ZIP Code |
| 524880 |
1640 Lombardo Ave |
Silver Spring |
md |
20904-1649 |
| 688364 |
10315 North Hacht Rd |
Alexandria |
va |
22231 |
| 611464 |
6366 Lolita Drive |
Laurel |
md |
20707-1807 |
| 749562 |
495 Parker House Terrace |
Gettysburg |
wv |
26901-1101 |
| 427115 |
10232 Truesome Drv |
York |
pa |
17401 |
| 200417 |
4140 Holisto Crt |
Germantown |
md |
|
| 927474 |
9522 Lockwood Rd |
Arlington |
va |
22203-8212 |
| 682630 |
6114 Costinha Avenue |
Martinsburg |
wv |
25401-4240 |
| 288540 |
10340 Helmes Street #408 |
Silver Spring |
md |
20906-8006 |
- Close the table
SQL and Strings
The SQL supports strings in two data types: CHAR, TEXT, and VARCHAR.
They are the same as Microsoft Access's Short Text data type. Here
are examples of using them:
CREATE TABLE Contractors
(
    FirstName CHAR,
    LastName TEXT,
    Gender CARCHAR
);
The char or the text data types are used for
columns whose fields would receive (or present) text of 1 to 255
characters. If you want the field to hold a maximum of less than 255 characters,
you must add parentheses to the data type and enter the maximum number in the
parentheses. Here are examples:
CREATE TABLE Persons
(
    FirstName     CHAR(20),
    MiddleInitial Char(1),
    LastName      TEXT(20),
    Title         text(50),
    Gender        VARCHAR(20),
    Address       varchar(200)
);
|