Introduction to the Tables of a Database

Introduction to the Tables of a Database
Fundamentals of Databases Tables
Introduction
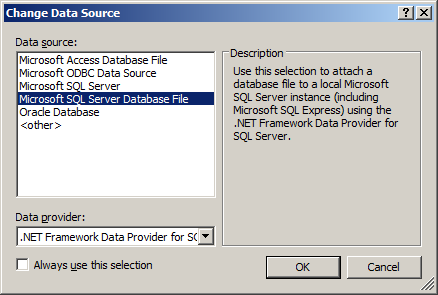
As we saw when studying data sets, a table is a list of items. One way to create a table is by writing SQL code. After creating a database, to get a window in which you can write code to create a table, in Microsoft SQL Server Management Studio, in the Object Explorer, right-click-click the name of the database and click New Query.
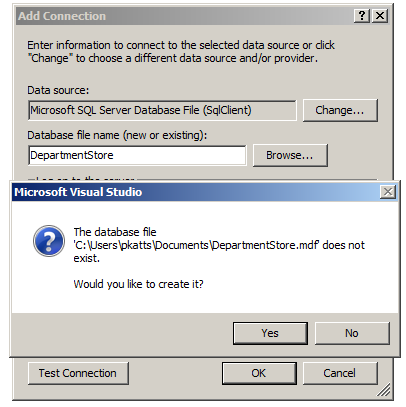
![]() Practical Learning: Introducing Databases
Practical Learning: Introducing Databases
<?xml version="1.0" encoding="utf-8"?>
<!--
  For more information on how to configure your ASP.NET application, please visit
  https://go.microsoft.com/fwlink/?LinkId=169433
  -->
<configuration>
  <connectionStrings>
    <add name="csDepartmentStore"
         connectionString="Data Source=(LocalDb)\MSSQLLocalDB;AttachDbFilename=|DataDirectory|\DepartmentStore.mdf;Initial Catalog=DepartmentStore;Integrated Security=True"
         providerName="System.Data.SqlClient" />
  </connectionStrings>
  <system.web>
    . . . No Change
</configuration>
Creating a Table
To create a table with SQL code, the DDL formula to start is as follows:
CREATE TABLE table-name( );
The CREATE TABLE expression is required.
The Name of a Table
The table-name of our formula specifies the name of the new table. The SQL is very flexible and the name of a table can be almost anything. That is, it can include special characters and spaces.
In our databases, to name a table, we will follow the rules we have applied for the names of classes. Also, we will use names in plural. In Transact-SQL, you can include the name of the table between [ and ].
Fundamentals of the Columns of a Table
Introduction
To organize its kist of items, its data, a table is devided in vertical sections, which are categories of data. They are named columns. In fact, a table must have at least one column. The column are created in the parentheses that follow the name of the table.
If a table will use just one column, create it in the parentheses of the table. This would be done as follows:
CREATE TABLE table-name(column-definition)If a table will need more than one column, separate them with commas. This can be done as follows:
CREATE TABLE table-name(column_1, column_2, column_n)
You can include all columns on the same line as done above. To make your statement easier to read, you should create each column on its own line as follows:
CREATE TABLE table-name
(
	column_1,
	column_2,
	column_n
);
The primary formula to create a column is:
column-name data-type options
The Name of a Column
Each column must have a name. The name of a column:
As an alternative, you can include the name of the column between [ and ].
The Data Type of a Column
A column is used to hold a category of value stored in a table. For this reason, a column is also called a field. The most fundamental type of value that a column can hold is text. To let you indicate that a column will use text-based values, the SQL provides a data type named VARCHAR. Therefore, you can start a column as follows:
CREATE TABLE Employees
(
	EmployeeNumber VARCHAR
)
In the same way, you can create as many columns as you want. Here are examples:
CREATE TABLE Employees
(
	EmployeeNumber VARCHAR,
    FullName VARCHAR,
    Address VARCHAR,
    State VARCHAR,
    ZIPCode VARCHAR
)
We will review what options are available and when they should be used.
The Maximum Size of a Column
The size of a column is the amount of memory that every one of its values will use in the computer method. When it comes to a text-based column, the size of the maximum number of characters that each value can use.
To specify the maximum number of character of a text-based column, add some parentheses to the VARCHAR type. In the parentheses, enther the desired number. Here are examples:
CREATE TABLE Employees
(
	EmployeeNumber VARCHAR(10),
    FullName VARCHAR(42),
    Address VARCHAR(127),
    State VARCHAR(2),
    ZIPCode VARCHAR(11)
)
Remember that you can end a statement with a semicolon. If you want, after the semicolon, you can add GO on the next line. After writing the DDL code to create a table, you must execute it. To do this, on the toolbar of a Query window, click the Execute button ![]() .
.
![]() Practical Learning: Creating a Table
Practical Learning: Creating a Table
CREATE TABLE SaleItems
(
	Manufacturer VARCHAR(40),
	Category VARCHAR(28),
	SubCategory VARCHAR(25),
	ItemName VARCHAR(120),
	Size VARCHAR(20)
);
GOusing System.Web.Mvc;
using System.Data.SqlClient;
namespace DepartmentStore2.Controllers
{
public class HomeController : Controller
{
public ActionResult Index()
{
return View();
}
public ActionResult About()
{
ViewBag.Message = "Your application description page.";
return View();
}
public ActionResult Contact()
{
ViewBag.Message = "Your contact page.";
return View();
}
public ActionResult ManageDatabase()
{
using (SqlConnection scRentManagement = new SqlConnection(System.Configuration.ConfigurationManager.ConnectionStrings["csDepartmentStore"].ConnectionString))
{
SqlCommand cmdApartments = new SqlCommand("CREATE TABLE Employees" +
"(" +
" EmployeeNumber VARCHAR(10)," +
" FirstName varchar(25), " +
" LastName VarChar(25), " +
" EmploymentTitle VarcHAR(50)" +
");",
scRentManagement);
scRentManagement.Open();
cmdApartments.ExecuteNonQuery();
}
return View();
}
}
}Records Fundamentals
Introduction
To perform data entry using SQL, use the INSERT combined with the VALUES keywords. The primary formula to follow is:
INSERT table-name VALUES(for-column1, for-column2, for-column_n);
The table-name must be a valid name of an existing table in the database you are using. If the name is wrong, the SQL interpreter would simply consider that the table you are referring to doesn't exist. Consequently, you would receive an error.
The VALUES keyword indicates that you are ready to list the values of the columns. The values of the columns must be included in parentheses.
If a column is made for text (a character or a string, VARCHAR) include the value in single quotes.
![]() Practical Learning: Creating Records
Practical Learning: Creating Records
public ActionResult ManageDatabase()
{
    using (SqlConnection scRentManagement = new SqlConnection(System.Configuration.ConfigurationManager.ConnectionStrings["csDepartmentStore"].ConnectionString))
    {
        SqlCommand cmdApartments = new SqlCommand("INSERT SaleItems " +
                                                  "VALUES('Ralph Lauren', 'Girls', 'Shirts', 'Girls 2-6X Short-Sleeved Mesh Polo Shirt', '3T'); ",
                                                  scRentManagement);

        scRentManagement.Open();
        cmdApartments.ExecuteNonQuery();
    }

    return View();
}Introduction to Primary Keys
One of the most valuable features of a table is that each record should be unique. This means that if a table contains one column, each value in that column must be unique. Here is an example:
Table: Customers
| AccountNumber |
| G928374 |
| K827306 |
| Q396847 |
| G937084 |
| Q264863 |
When a table contains many columns and a user is performing data entry manually, there is a risk that the user may provide a record that exists already. You can ask the SQL interpreter to check the records automatically when the user has created a record and is trying to save it. If the record exists already, the interpreter would throw an error.
To let you ask the SQL interpreter to make sure that the records of a column are unique, the SQL provides an option named PRIMARY KEY. To use it, type it after the name of the desired column. Here is an example:
CREATE TABLE Employees
(
    EmployeeNumber VARCHAR(10) PRIMARY KEY,
    FullName VARCHAR(42),
    Address VARCHAR(127),
    State VARCHAR(2),
    ZIPCode VARCHAR(11)
);
GO
In this case, each value under EmployeeNumber must be unique. If the user tries entering an employee number that exists already, the SQL interpreter would present an error when the user tries to save the record.
![]() Practical Learning: Introducing Primary Keys
Practical Learning: Introducing Primary Keys
public ActionResult ManageDatabase()
{
    using (SqlConnection scRentManagement = new SqlConnection(System.Configuration.ConfigurationManager.ConnectionStrings["csDepartmentStore"].ConnectionString))
    {
        SqlCommand cmdApartments = new SqlCommand("CREATE TABLE StoreItems " +
                                                  "(" +
                                                  "      ItemNumber VARCHAR(8) PRIMARY KEY, " +
                                                  "      Manufacturer VARCHAR(40), " +
                                                  "      Category VARCHAR(28), " +
                                                  "      SubCategory VARCHAR(25), " +
                                                  "      ItemName VARCHAR(120), " +
                                                  "      Size VARCHAR(20) " +
                                                  "); " +
                                                  "INSERT StoreItems " +
                                                  "VALUES('927059', 'Ralph Lauren', 'Girls', 'Shirts', 'Girls 2-6X Short-Sleeved Mesh Polo Shirt', '3T');",
                                                  scRentManagement);

        scRentManagement.Open();
        cmdApartments.ExecuteNonQuery();
    }

    return View();
}Introduction to SQL Variables
Overview
As seen in C#, a variable is a technique to store a value in the computer memory. Like C#, the SQL supports variables.
Declaring a Variable
To declare a variable, use the DECLARE keyword in the following formula:
DECLARE options
The DECLARE keyword is followed by a name for the variable. In Transact-SQL, the name of a variable starts with the @ sign. Transact-SQL is extremely flexible with names. There are rules and suggestions you will use for the names:
To declare a variable, use the following formula:
DECLARE @variable-name data-type;
Here is an example:
DECLARE @FirstName VARCHAR(20);
GO
After declaring a variable, to initialize it, in the necessary section, type the SELECT or the SET keyword followed by the name of the variable, followed by the assignment operator "=", followed by an appropriate value. The formula used is:
SELECT @variable-name = desired-value
or
SET @variable-name = desired-value
Here is an example:
DECLARE @FirstName VARCHAR(20);

SET @FirstName = 'Eric';
GO
Once a variable has been initialized, you can use its value.
Declaring Many Variables
You can declare more than one variable. You can declare each on its own line. Here is an example:
DECLARE @FirstName VARCHAR(20);
DECLARE @LastName VARCHAR(20);

SET @FirstName = 'Eric';
SELECT @LastName = 'Chinje';
GO
You can also declare many variables with one DECLARE keyword. To do that, separate them with a comma. The formula would be:
DECLARE @variable_1 data-type_1, @variable_2 data-type_2, @variable_n data-type_n;
The name of each variable must be followed by its own data type. Here is an example:
DECLARE @FirstName VARCHAR(20), @MiddleName VARCHAR(20), @LastName VARCHAR(20);

SET @FirstName = 'Francis';
SET @MiddleName = 'Emmanuel';
SELECT @LastName = 'Sitouok';
GO
You can also put each variable on its line. Here is an example:
DECLARE @FirstName VARCHAR(20),
	    @MiddleName VARCHAR(20),
	    @SecondName VARCHAR(20),
		@LastName VARCHAR(20);

SET @FirstName = 'Geoge';
SET @MiddleName = 'Herbert';
SELECT @SecondName = 'Walker';
SELECT @LastName = 'Bush';
GO
Functions Fundamentals
Introduction
A function is a section that performs an action, like a method of a class in C#, except that a function does not belong to a class. In Transact-SQL, a function is considered an object. Based on this, you must create a function and execute it before using it. The function then becomes an object of a database.
In Transact-SQL, the primary formula to create a function is:
CREATE FUNCTION function-name()
In SQL, a function is created as an object. It must have a name. Once again, the SQL is very flexible when it comes when it comes of objects. For our databases, we will apply the rules of names of the methods of a class.
Returning a Value From a Function
Like a method in C#, a function can return or produce a result. When creating a function, you must specify the type of value it must return. To provide this information, after the name of the function, type the RETURNS keyword followed by a definition for a data type, such as. Here is a simple example:
CREATE FUNCTION Combine()
RETURNS VARCHAR(58)
After specifying the type of value the function would return, you can create a body for the function. While in C# the body of a function starts with {, in SQL, the body starts with the BEGIN keyword. The body of a function closes with the END keyword, equivalent to } in C#. Here is an example:
CREATE FUNCTION Combine()
RETURNS VARCHAR(58)
BEGIN

END
Optionally, you can type the AS keyword before the BEGIN keyword:
CREATE FUNCTION Combine()
RETURNS VARCHAR(58)
AS
BEGIN

END
Between the BEGIN and the END keywords, you can define the job of the function. For example, you can declare one or more variables in the body of the function to help in carrying the assignment. A variable declared in the body of a function is referred to as a local variable. Once such a variable has been declared, it can be used like any other variable.
Just before the END keyword, you must specify the value that the function returns. This is done by typing the RETURN keyword followed by an expression. A sample formula is:
CREATE FUNCTION Combine()
RETURNS VARCHAR(58)
AS
BEGIN
    RETURN expression
END
Here is an example
CREATE FUNCTION GetFullName()
RETURNS VARCHAR(100)
AS
BEGIN
	RETURN 'Ottou Marcellin'
END
Calling a Function
After a function has been created, you can use the value it returns. As seen for methods of classes in C#, using a function is referred to as calling it. To call a function, you must qualify its name. To do this, type the name of the database in which it was created, followed by the period operator, followed by dbo, followed by the period operator, followed by the name of the function, and its parentheses. The formula to use is:
database-name.dbo.function-name()
Because a function returns a value, you can use that value as you see fit. For example, you can call it as the value of a column during data entry. Here is an example:
INSERT Employees
VALUES('394857', Census.dbo.GetFullName());
GO
The Arguments of a Function
Introduction
Like a method in C# class, a function can use one or more parameters. When such a function is called, it can be passed arguments as external values.
If a function must use a parameter, when creating the function, you must specify a name and the type of value of the parameter(s). The name of a parameter is created with the @sign, like a variable. Here is an example:
CREATE FUNCTION Combine(@username VARCHAR(52))
When a function takes a parameter, in the body of the function, you can use the parameter as if you know its value, as long as you respect the type of that value. Here is an example:
CREATE FUNCTION CreateEmailAddress(@username VARCHAR(25))
RETURNS VARCHAR(50)
AS
BEGIN
	RETURN @username + '@mailcity.com';
END
When you call a function that takes one parameter, you must supply a value for that argument. To do this, type the value of the parameter in the parentheses of the function.
A Function With Various Parameters
You can create a function that uses more than one parameter. In this case, separate the parameters in the parentheses of the function with a comma. Here is an example:
CREATE FUNCTION CreateClerkName(@firstName VARCHAR(20), @lastName VARCHAR(20))
Once again, in the body of the function, you can use the parameters as if you already know their values. Here is an example:
CREATE FUNCTION CreateClerkName(@firstName VARCHAR(20), @lastName VARCHAR(20))
RETURNS VARCHAR(100)
AS
BEGIN
	RETURN @lastName + ', ' + @firstName
END;
GO
You can also declare local variables and involve them with parameters as you see fit. When calling a function that takes more than one parameter, in the parentheses of the function, provide a value for each parameter, in the exact order they appear in the parentheses of the function.
Function Maintenance
Renaming a Function
Because a function in Transact-SQL is an object, it can be renamed, modified, or deleted.
To rename a function, in the Object Explorer in Microsoft SQL Server, right-click it and click Rename. Type the desired new name and press Enter.
Deleting a Function
If you create a function and decide that you don't need it any more, you can delete it. To programmatically delete a function, type DROP FUNCTION followed by the name of the function and execute the statement. Here is an example:
DROP FUNCTION GetFullName;
GO
Modifying a Function
As mentioned already, in the body of the function, you define what the function is supposed to take care of. Here is an example:
CREATE FUNCTION Combine()
RETURNS VARHCAR(3)
BEGIN
    RETURN 'Yes'
END
After creating a function, you can change it. For example, you can declare new variables, call other functions, etc.
Microsoft SQL Server Namespaces and Schemas
A Namespace
As you should know from your study of the C# language, a namespace is a group of items that each has a unique name. When you use namespaces, you can create objects that use the same name as long as each of those objects is created in a different namespace. In reality, to manage many other aspects of your database projects, you use namespaces and you put objects, other than databases, within those namespaces. Therefore, a namespace and its content can be illustrated as follows:
Notice that there are various types of objects within a namespace.
Introduction to Schemas
Within a namespace, you can create objects as you wish. To further control and manage the objects inside of a namespace, you can put them in sub-groups called schemas. A schema is a group of objects within a namespace. This also means that, within a namespace, you can have as many schemas as you want. This can be illustrated as follows:
To manage the schemas in a namespace, you need a way to identify each schema. Each schema must have a name. In our illustration, one schema is named Schema1. Another schema is named Schema2. Yet another schema is named Schema_n.
The Database Owner
There are two types of schemas you can use, those built-in and those you create. When Microsoft SQL Server is installed, it also creates a few schemas. One of the schemas is named sys. The sys schema contains a list of some of the objects that exist in the Microsoft SQL Server system of databases. One of these objects is named databases (actually, it's a view). When you create a database, its name is entered in the databases object using the same name you gave it.
We saw that, before using a database, you must establish a connection with the server. You do this using a user account that can use the server. Once the connection exists, you can create a database. In Microsoft SQL Server, the user who creates a database is referred to as the database owner. To identify this user, when Microsoft SQL Server is installed, it also creates a special user account named dbo. This account is automatically granted various permissions on the databases of the server.
Because the dbo account has default access to all databases, to refer to an object of a database, you can qualify it by typing dbo, followed by the period operator, followed by the name of the object.
Creating a Schema
To manage the distribution of objects and some aspects of the security of your database, you can create one or more aspects. To programmatically create a schema, the formula to follow is:
CREATE SCHEMA schema_name_clause [ <schema_element> [ ...n ] ]

<schema_name_clause> ::=
    {
    schema_name
    | AUTHORIZATION owner_name
    | schema_name AUTHORIZATION owner_name
    }

<schema_element> ::=
    {
        table_definition | view_definition | grant_statement |
        revoke_statement | deny_statement
    }
The most important part is:
CREATE SCHEMA schema_name_clause [ <schema_element> [ ...n ] ]
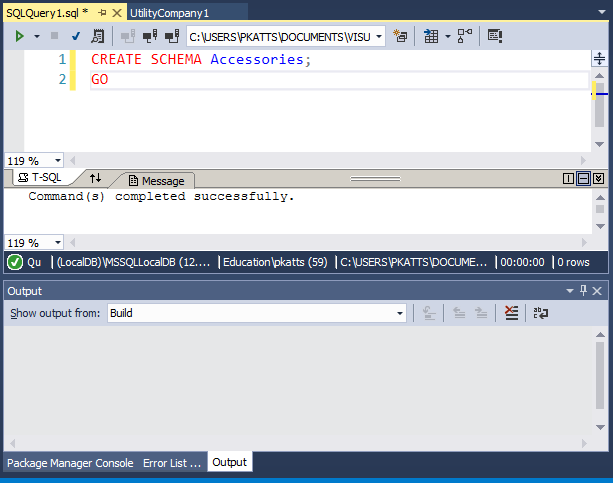
In this case, start with the CREATE SCHEMA expression and add a name to it. Here is an example:
CREATE SCHEMA Accessories;
GO
As an option, you can start the name with [ and end it with ], as in:
CREATE SCHEMA [Accessories];
GO
Accessing an Object From a Schema
Inside of a schema, two objects cannot have the same name, but an object in one schema can have the same name as an object in another schema. Based on this, if you are accessing an object within its schema, you can simply use its name, since that name would be unique. On the other hand, because of the implied possibility of dealing with objects with similar names in your server, when accessing an object outside of its schema, you must qualify it. To do this, type the name of the schema that contains the object you want to use, followed by the period operator, followed by the name of the object you want to use. From our illustration, to access the Something1 object that belongs to Schema1, you would type:
Schema1.Something1
As an option, you can include the name of a schema in [], as in:
[Accessories].WaterMeters
As mentioned already, when Microsoft SQL Server is installed, it creates a schema named dbo. This is probably the most common schema you will use. In fact, if you don't create a schema in a database, the dbo schema is the default and you can apply it to any object in your database.
![]() Practical Learning: Ending the Lesson
Practical Learning: Ending the Lesson
|
|
||
| Previous | Copyright © 2001-2021, FunctionX | Next |
|
|
||