Topics on Creating and Using Controllers

Topics on Creating and Using Controllers
Crating an MVC Project from a Template
Starting an Empty MVC Project
You can create a complete MVC website from scratch. If you do, the amount of work to set up the project can be overming. Otherwise, or to assist you in starting a project, Microsoft Visual Studio provides two basic templates.
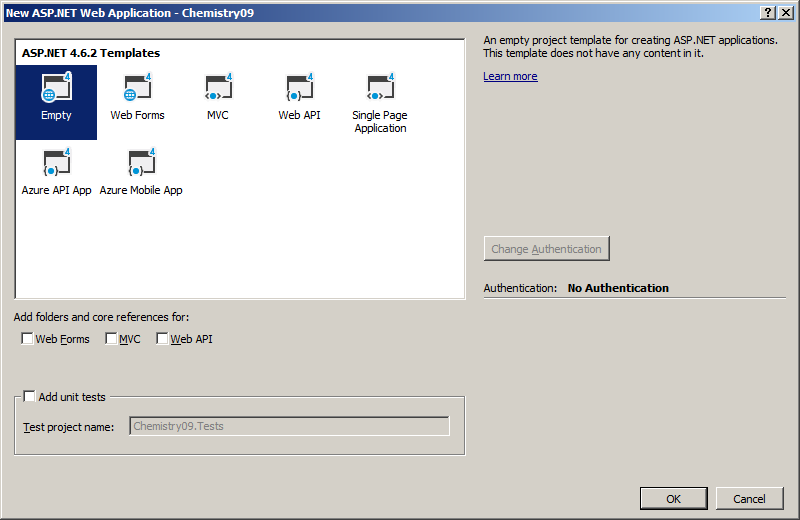
To get a basic project starting project, you can ask Microsoft Visual Studio to create all starting folders for your website. To do this, start an ASP.NET Web Application. In the New ASP.NET Application dialog box, select the Empty option and click the MVC check box. After you have clicked OK, Microsoft Visual Studio would create all the primary folders of an MVC website and a Web.config file:

Once the semi-empty project has been created, normally, one of the things you should do sooner or a later is to create at least one controller. After getting a controller, you can create and associate the desired view(s) to it. Besides the controller(s), you can add the classes and files you judge necessary to complement the project. Of course, you should create those classes and files in the appropriate folders.
![]() Practical Learning: Starting a Semi-Empty Project
Practical Learning: Starting a Semi-Empty Project
using System;
using System.Collections.Generic;
using System.Linq;
using System.Web;
using System.Web.Mvc;

namespace Chemistry1.Controllers
{
    public class HomeController : Controller
    {
        // GET: Home
        public ActionResult Index()
        {
            return View();
        }

        // GET: ElementSearch
        public ActionResult ElementSearch()
        {
            return View();
        }

        // GET: Compounds
        public ActionResult Compounds()
        {
            return View();
        }

        // GET: PeriodicTable
        public ActionResult PeriodicTable()
        {
            return View();
        }
    }
}. . . No Change
<h2>Chemical Compounds</h2>@{
ViewBag.Title = "Periodic Table";
}
<h2>Periodic Table</h2><!DOCTYPE html>
<html>
<head>
. . . No Change
</head>
<body>
<div class="navbar navbar-inverse navbar-fixed-top">
<div class="container">
<div class="navbar-header">
<button type="button" class="navbar-toggle" data-toggle="collapse" data-target=".navbar-collapse">
<span class="icon-bar"></span>
<span class="icon-bar"></span>
<span class="icon-bar"></span>
</button>
@Html.ActionLink("Home", "Index", "Home", new { area = "" }, new { @class = "navbar-brand" })
</div>
<div class="navbar-collapse collapse">
<ul class="nav navbar-nav">
<li>@Html.ActionLink("Element Search", "ElementSearch", "Home")</li>
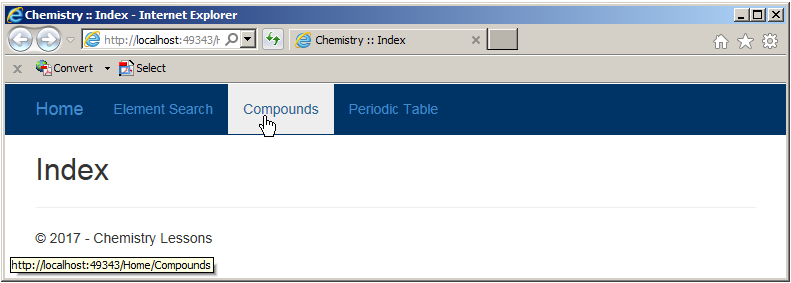
<li>@Html.ActionLink("Compounds", "Compounds", "Home")</li>
<li>@Html.ActionLink("Periodic Table", "PeriodicTable", "Home")</li>
</ul>
</div>
</div>
</div>
<div class="container body-content">
@RenderBody()
<hr />
<footer>
<p>© @DateTime.Now.Year - Chemistry Lessons</p>
</footer>
</div>
<script src="~/Scripts/jquery-1.10.2.min.js"></script>
<script src="~/Scripts/bootstrap.min.js"></script>
</body>
</html>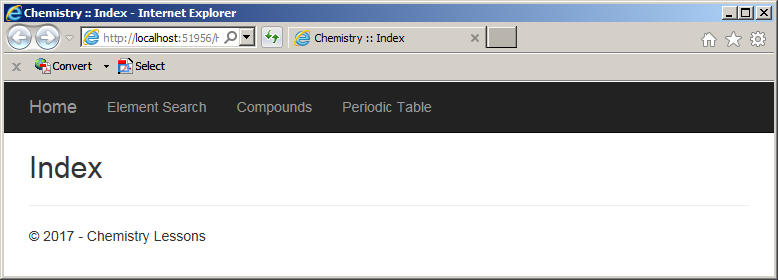
A Semi-Complete Project
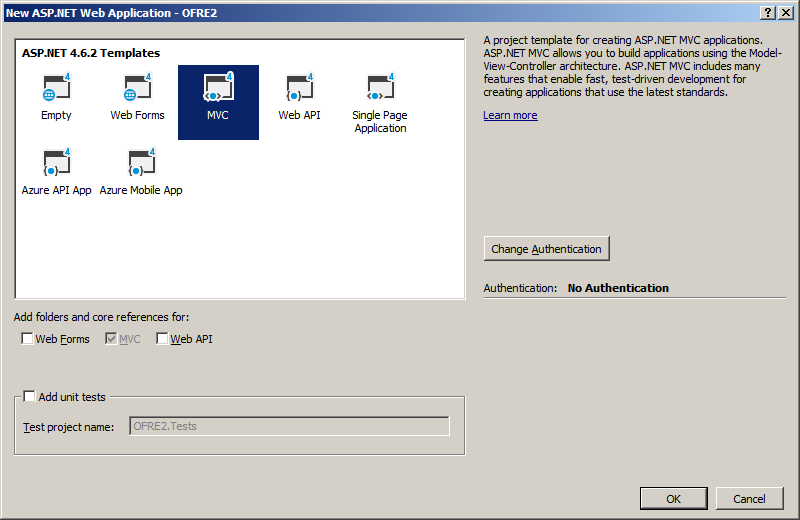
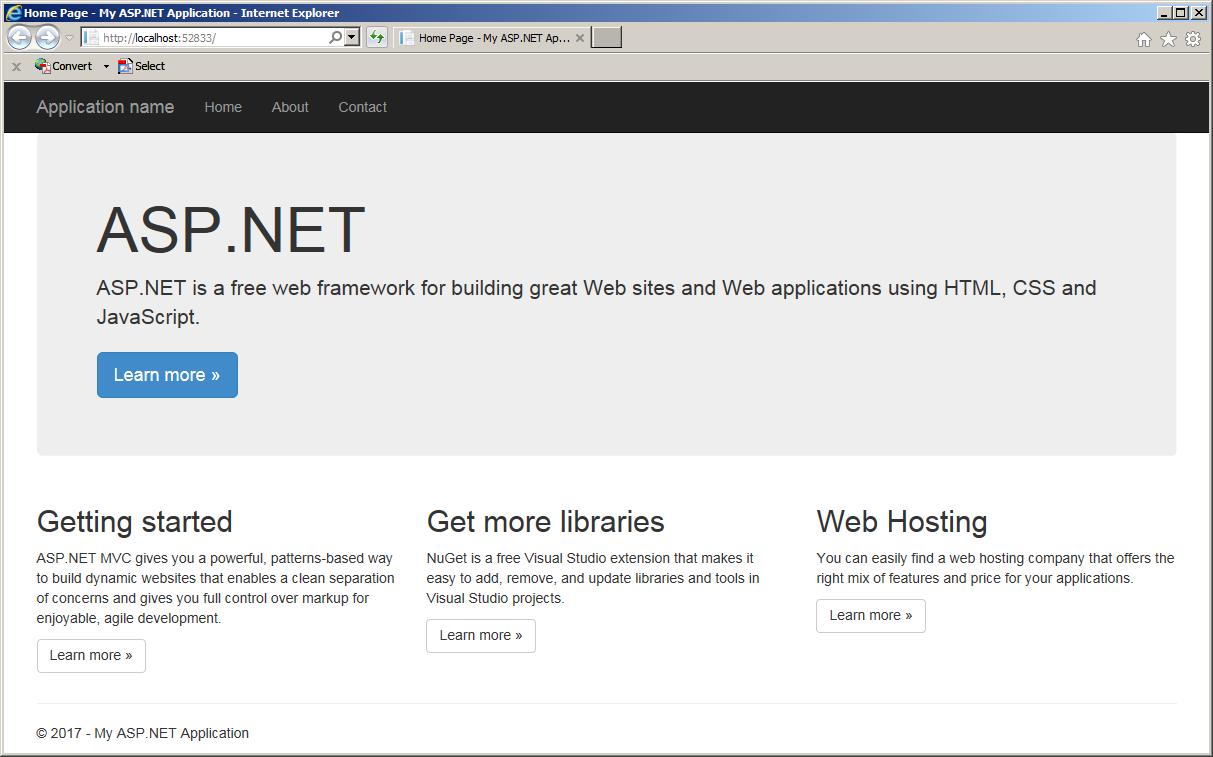
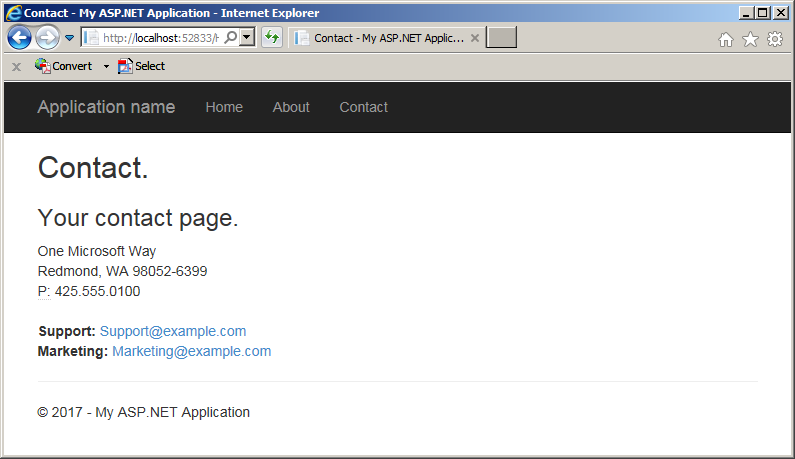
Microsoft Visual Studio provides a semi-complete ASP.NET MVC project from which you can start a website. To get it, after starting an ASP.NET Web Application, in the New ASP.NET Web Application, click the MVC icon. If necessary, you can click the buttons and other check boxes for more options. When you are ready, click OK.
![]() Practical Learning: Creating a Semi-Complete Project
Practical Learning: Creating a Semi-Complete Project
Customizing a Project from a Microsoft Visual Studio Template
Introduction
An ASP.NET website you create from a template is primarily a project like any other. If necessary, you can add any new folder(s) or file(s) you judge necessary.
![]() Practical Learning: Adding Folders and Files to a Project
Practical Learning: Adding Folders and Files to a Project
using System;
using System.Collections.Generic;
using System.Linq;
using System.Web;

namespace Chemistr08.App_Code
{
    public enum Phase
    {
        Gas,
        Liquid,
        Solid,
        Unknown
    }

    public class Element
    {
        public string Symbol { get; set; } = "H";
        public string ElementName { get; set; } = "Hydrogen";
        public int AtomicNumber { get; set; } = 1;
        public decimal AtomicWeight { get; set; } = 1.008M;
        public Phase Phase { get; set; } = Phase.Gas;

        public Element()
        {
        }

        public Element(int number)
        {
            AtomicNumber = number;
        }

        public Element(string symbol)
        {
            Symbol = symbol;
        }

        public Element(int number, string symbol, string name, decimal mass)
        {
            Symbol = symbol;
            ElementName = name;
            AtomicWeight = mass;
            AtomicNumber = number;
        }
    }
}
Customizing the Design of a Microsoft Visual Studio ASP.NET Project
If you create an Empty ASP.NET Web Application and select the MVC check box in the New ASP.NET Application dialog box, when you create your first controller, Microsoft Visual Studio would add a layout file and three starting CSS files to your project. If you create an MVC project by selecting the MVC icon in the New ASP.NET Application dialog box, Microsoft Visual Studio would add all the necessary start folders and files. In both cases, you can change various aspects of the template as you see fit.
One of the aspects you may want to customize for a project created from a template is the design. The design of a typical ASP.NET website involves the layout document, the CSS file(s), and the webpages. In all these categories of files, you have three options:
![]() Practical Learning: Customizing the Design of an MS Visual Studio Project
Practical Learning: Customizing the Design of an MS Visual Studio Project
.top-banner {
    background-color: #003366;
}

#main-title {
    font-weight: 800;
    margin-top: 6px;
    font-size: 2.52em;
    text-align: center;
    color: blue;
    border-bottom: 1px solid blue;
    font-family: Garamond, 'Times New Roman', Georgia, serif;
}

.elm-presentation {
    width: 350px;
    margin: auto;
    padding-top: 20px;
}

.small-text { width:       40px;  }
.emphasize  { font-weight: bold;  }
.left-col { width: 120px; }<!DOCTYPE html>
<html>
<head>
. . . No Change
</head>
<body>
<div class="navbar top-banner navbar-fixed-top">
<div class="container">
. . . No Change
</div>
</div>
<div class="container body-content">
@RenderBody()
<hr />
<footer>
<p>© @DateTime.Now.Year - Chemistry Lessons</p>
</footer>
</div>
<script src="~/Scripts/jquery-1.10.2.min.js"></script>
<script src="~/Scripts/bootstrap.min.js"></script>
</body>
</html>. . . No Change
@{
Chemistr08.App_Code.Element h = new Chemistr08.App_Code.Element(1, "H", "Hydrogen", 1.008M) { Phase = Chemistr08.App_Code.Phase.Gas };
Chemistr08.App_Code.Element he = new Chemistr08.App_Code.Element(2, "He", "Helium", 4.002602M) { Phase = Chemistr08.App_Code.Phase.Gas };
Chemistr08.App_Code.Element li = new Chemistr08.App_Code.Element(3, "Li", "Lithium", 6.94M) { Phase = Chemistr08.App_Code.Phase.Solid };
Chemistr08.App_Code.Element be = new Chemistr08.App_Code.Element(4, "Be", "Beryllium", 9.0121831M) { Phase = Chemistr08.App_Code.Phase.Solid };
Chemistr08.App_Code.Element b = new Chemistr08.App_Code.Element(5, "B", "Boron", 10.81M) { Phase = Chemistr08.App_Code.Phase.Solid };
Chemistr08.App_Code.Element c = new Chemistr08.App_Code.Element(name: "Carbon", mass: 12.011M, symbol: "C", number: 6) { Phase = Chemistr08.App_Code.Phase.Solid };
Chemistr08.App_Code.Element n = new Chemistr08.App_Code.Element(7);
n.Symbol = "N";
n.AtomicWeight = 14.007M;
n.ElementName = "Nitrogen";
n.Phase = Chemistr08.App_Code.Phase.Gas;
Chemistr08.App_Code.Element o = new Chemistr08.App_Code.Element("O")
{
AtomicNumber = 8,
ElementName = "Oxygen",
AtomicWeight = 15.999M,
Phase = Chemistr08.App_Code.Phase.Gas
};
Chemistr08.App_Code.Element f = new Chemistr08.App_Code.Element("F")
{
AtomicNumber = 9,
ElementName = "Fluorine",
AtomicWeight = 15.999M,
Phase = Chemistr08.App_Code.Phase.Gas
};
Chemistr08.App_Code.Element ne = new Chemistr08.App_Code.Element("Ne")
{
AtomicNumber = 10,
ElementName = "Neon",
AtomicWeight = 20.1797M,
Phase = Chemistr08.App_Code.Phase.Gas
};
Chemistr08.App_Code.Element na = new Chemistr08.App_Code.Element(11, "Na", "Sodium", 22.98976928M) { Phase = Chemistr08.App_Code.Phase.Solid };
Chemistr08.App_Code.Element mg = new Chemistr08.App_Code.Element(12, "Mg", "Magnesium", 24.305M) { Phase = Chemistr08.App_Code.Phase.Solid };
Chemistr08.App_Code.Element al = new Chemistr08.App_Code.Element(13, "Al", "Aluminium", 26.9815385M) { Phase = Chemistr08.App_Code.Phase.Solid };
Chemistr08.App_Code.Element si = new Chemistr08.App_Code.Element() { ElementName = "Silicon", AtomicWeight = 28.085M, Symbol = "Si", AtomicNumber = 14, Phase = Chemistr08.App_Code.Phase.Solid };
Chemistr08.App_Code.Element p = new Chemistr08.App_Code.Element() { ElementName = "Phosphorus", AtomicWeight = 30.973761998M, Symbol = "P", AtomicNumber = 15, Phase = Chemistr08.App_Code.Phase.Solid };
Chemistr08.App_Code.Element s = new Chemistr08.App_Code.Element(16, "S", "Sulfur", 32.06M) { Phase = Chemistr08.App_Code.Phase.Solid };
Chemistr08.App_Code.Element cl = new Chemistr08.App_Code.Element(17, "Cl", "Chlorine", 35.45M) { Phase = Chemistr08.App_Code.Phase.Gas };
int atomicNumber = 0;
if (IsPost)
{
atomicNumber = Request["txtNumberEntered"].AsInt();
switch (atomicNumber)
{
default:
selected = h;
break;
case 2:
selected = he;
break;
case 3:
selected = li;
break;
case 4:
selected = be;
break;
case 5:
selected = b;
break;
case 6:
selected = c;
break;
case 7:
selected = n;
break;
case 8:
selected = o;
break;
case 9:
selected = f;
break;
case 10:
selected = ne;
break;
case 11:
selected = na;
break;
case 12:
selected = mg;
break;
case 13:
selected = al;
break;
case 14:
selected = si;
break;
case 15:
selected = p;
break;
case 16:
selected = s;
break;
case 17:
selected = cl;
break;
}
}
}
<p id="main-title">:: Chemistry ::</p>
<div class="elm-presentation">
<form name="frmChemistry" method="post">
<table>
<tr>
<td class="left-col emphasize">Enter Atomic #:</td>
<td>
<input type="text" name="txtNumberEntered" class="small-text" value="@atomicNumber" />
<input type="submit" name="btnFind" value="Find" style="width: 70px;" />
</td>
</tr>
<tr>
<td class="emphasize">Symbol:</td>
<td><input type="text" name="txtSymbol" value=@selected.Symbol /></td>
</tr>
<tr>
<td class="emphasize">Element Name:</td>
<td><input type="text" name="txtElementName" value=@selected.ElementName /></td>
</tr>
<tr>
<td class="emphasize">Atomic Weight:</td>
<td><input type="text" name="txtAtomicWeight" value=@selected.AtomicWeight /></td>
</tr>
<tr>
<td class="emphasize">Phase:</td>
<td><input type="text" name="txtAtomicWeight" value=@selected.Phase /></td>
</tr>
</table>
</form>
</div>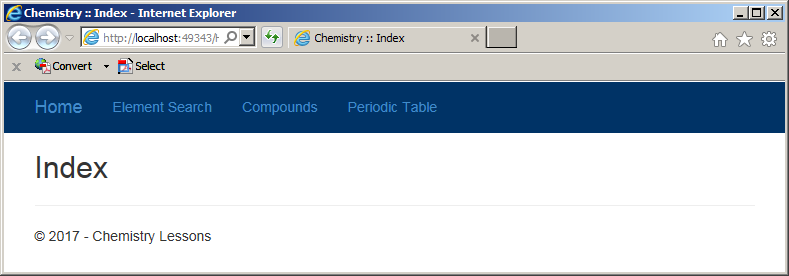
 |
 |
 |
|
using System;
using System.Collections.Generic;
using System.Linq;
using System.Web;
using System.Web.Mvc;

namespace OFRE2.Controllers
{
    public class CampaignsController : Controller
    {
        // GET: TwoWay
        public ActionResult TwoWay()
        {
            return View();
        }

        // GET: ThreeWay
        public ActionResult ThreeWay()
        {
            return View();
        }
    }
}#glued-part {
top: 0;
width: 100%;
height: 75px;
position: fixed;
background-color: white;
}
#heading1 {
color: maroon;
font-weight: 800;
font-size: 2.52em;
text-align: center;
line-height: 2.05em;
font-family: Cambria, Cochin, Georgia, Times, Times New Roman, serif;
}
.navbar-fixed-top {
top: 75px;
}
.navbar-inverse {
background-color: #581405;
border-top: 3px solid black;
border-bottom: 3px solid black;
}
.jumbotron {
padding-top: 80px;
margin-bottom: 0px;
background-color: white;
border: 1px solid burlywood
}@media screen and (min-width: 768px) {
.jumbotron {
padding-top: 48px;
padding-bottom: 48px;
}
.container .jumbotron {
padding-right: 60px;
padding-left: 60px;
}
.jumbotron h1 {
font-size: 63px;
}
}<!DOCTYPE html>
<html>
<head>
. . . No Change
</head>
<body>
<div id="glued-part">
<p id="heading1">Organization for Fundraising Events</p>
</div>
<div class="navbar navbar-inverse navbar-fixed-top">
<div class="container">
<div class="navbar-header">
<button type="button" class="navbar-toggle" data-toggle="collapse" data-target=".navbar-collapse">
<span class="icon-bar"></span>
<span class="icon-bar"></span>
<span class="icon-bar"></span>
</button>
@Html.ActionLink("OFRE", "Index", "Home", new { area = "" }, new { @class = "navbar-brand" })
</div>
<div class="navbar-collapse collapse">
<ul class="nav navbar-nav">
<li>@Html.ActionLink("Home", "Index", "Home")</li>
<li>@Html.ActionLink("About OFRE", "About", "Home")</li>
<li>@Html.ActionLink("Contact Us", "Contact", "Home")</li>
</ul>
</div>
</div>
</div>
<div class="container body-content">
@RenderBody()
<hr />
<footer>
<h4 class="text-center">© @DateTime.Now.Year :: Organization for Fundraising Events</h4>
</footer>
</div>
@Scripts.Render("~/bundles/jquery")
@Scripts.Render("~/bundles/bootstrap")
@RenderSection("scripts", required: false)
</body>
</html>. . . No Change
<div class="jumbotron">
<h1>OFRE</h1>
<p class="lead">
The Organization for Fundraising Events, or OFRE, is a group of people who assist organizations,
communities, associations, schools, causes, religious institutions, etc, to plan, conduct, promote,
and run campaigns to raise money for any goal (cause, health issues, communities, school, politics,
ceremony, religion, catastrophe, business startup, etc). The Organization can provide a complete
service, including promoting the event, collecting, and delivering the funds. OFRE is a private,
independent, and a not-for-profit organization.
</p>
</div>
<div class="row">
<div class="col-md-4">
<p class="pic-holder"><img src="~/Images/Campaign.png" alt="Plan With Us" width="248" height="137" /></p>
<h2>Plan With Us</h2>
<p>Are you ready for a memorable experience in fundraising? You reaached the right place.
Do you lack experience in fundraising? Don't take a chance. Don't worry about
a thing. Let us run your next campaign. Give us the opportunity to put our vast
experience at your disposal. You will enjoy the whole adventure.</p>
</div>
<div class="col-md-4">
<p class="pic-holder"><img src="~/Images/TwoWay.png" alt="Two-Way Campaign" width="248" height="136" /></p>
<h2>Two-Way Campaign</h2>
<p>This is an already completely created program to run a campaign to raise funds for two
organizations or causes. This program consists of starting a compaign, collecting funds,
appropriately distributing them, and delivering a complete legal/business/financial
report of the campaign.</p>
@Html.ActionLink("Two-Way Campaign", "TwoWay", "Campaigns", new { DontTryToFindOutWhatThisIs = "" }, new { @class = "btn btn-default" })
</div>
<div class="col-md-4">
<p class="pic-holder"><img src="~/Images/ThreeWay.png" alt="Three-Way Distribution" width="248" height="136" /></p>
<h2>Three-Way Distribution</h2>
<p>In this program, the Organization runs a campaign to raise funds for three different
organizations or causes. The ratios of distribution are stated any way a group wants.
An effective computer application is intuitively ready to process all types of requests.</p>
@Html.ActionLink("Three-Way Campaign Distribution", "ThreeWay", "Campaigns", new { ThisIsJustAPlaceHolder = "" }, new { @class = "btn btn-default" })
</div>
</div>
The Objects of a Controller/View System
Getting the HTTP Responses of a Web Page
To give you access to the HTTP response of a webpage, the WebPageRenderingBase class provides a property named Response whis is of type HttpResponseBase. Actually, the HttpResponseBase class is an adaptation of the HttpResponse class, which is an object of the Microsoft Internet Information Server (IIS).
Getting the Server of a Web Site
To give you access to the server and server-related operations of a website, the WebPageRenderingBase class provides a property named Server. This property is of type HttpServerUtilityBase, which is an adaptation of the Server class of IIS.
To display its content in a browser, a view gathers colors and fonts. It identifies the patths of the pictures. It creates a list of the necessary HTML tags and their styles to figure out the formatting of text, the alignment of the paragraphs, and the positions of the pictures or webcontrols. The view must then draw text and download the pictures. If there is code such as JavaScript or else involved with the HTML code, the view must interpret that code and act appropriately. All these details and others (such as security, etc) are groupped in what is called the context of a view.
To support the context of a view, the .NET Framework provides a class named ViewContext. The ViewContext class is derived from a class named ControllerContext that has no parent (except the object class from which all classes of a C# project are derived). Both the ViewContext and the ControllerContext classes are defined in the System.Web.Mvc namespace of the System.Web.Mvc.dll library. Since ViewContext is a normal class, you can declare a variable of it. Here is an example:
<!DOCTYPE html>
<html>
<head>
<title>Exercise</title>
</head>
<body>

@{
    System.Web.Mvc.ViewContext vc = new System.Web.Mvc.ViewContext();
}

</body>
</html>
On the other hand, you can create a method that produces a ViewContext object. Here is an example:
using System.Web.Mvc;

public class ResearchAndDevelopment
{
    public ViewContext Create()
    {
        ViewContext context = new ViewContext();

        return context;
    }
}
You can also create a parameter of its type. Here is an example:
using System.Web.Mvc;

public class ResearchAndDevelopment
{
    public void Draw(ViewContext context)
    {

    }
}
Operations on a View Page
Writting to a View
To let you write values to a view, the HttpResponseBase class is equipped with an overloaded method named Write . You can pass it a string because one of its versions used the following syntax:
public virtual void Write(string s)
Here is an example:
using System;
using System.Collections.Generic;
using System.Linq;
using System.Web;
using System.Web.Mvc;

namespace Exercise.Controllers
{
    public class HomeController : Controller
    {
        public ActionResult Index()
        {
            Response.Write("Welcome to our website.");

            return View();
        }
    }
}
One of the characteristics of the HttpResponseBase.Write() method is that its string can include HTML tags. Here is an example:
using System;
using System.Collections.Generic;
using System.Linq;
using System.Web;
using System.Web.Mvc;

namespace Exercise.Controllers
{
    public class HomeController : Controller
    {
        public ActionResult Index()
        {
            Response.Write("<h1>Chemistry Lessons</h1>");

            return View();
        }
    }
}
The HTML tag(s) in the argument can also contain attributes and/or styles. In these case, the value(s) of the attribute(s) should be included in single quotes. Here is an example:
using System.Web.Mvc;

namespace Exercise.Controllers
{
    public class CampaignsController : Controller
    {
        public ActionResult Index()
        {
            Response.Write("<h1>Organization for Fundraising Events</h1>" +
                           "<p style='font-size: 12px; color: #0000FF;'>OFRE is in the business " +
                           "of helping organizations and causes that want/need to raise money.</p>");

            return View();
        }
    }
}
Redirecting to a Web Page
.Redirecting to a webpage consists of automatically moving the browser's focus from one webpage to another. There are various ways you can take casre of this.
To support webpage redirection, the HttpResponseBase class is equipped with an overloaded method named Redirtect. One of the versions takes a string as argument. Its syntax is:
public virtual void Redirect(string url)
![]() Practical Learning:
Ending the Lesson
Practical Learning:
Ending the Lesson
|
|
||
| Previous | Copyright © 2017-2021, FunctionX | Next |
|
|
||