Introduction to the Controllers of a Web Site

Introduction to the Controllers of a Web Site
Controlling Access to a View
Introduction to Controllers
A view is the result that displays to the visitor of your webpage. Before presenting some information to your visitor, you may want to first check some values, perform some calculations, validate some details, etc. Obviously, you shouldn't take such actions on the visitor's computer, which is referred to as the client computer, which is where the view appears. Some operations should be performed on the webserver. When the results are ready, you (actually the server) can then send those results to the view that displays on the browser.
A controller is an object that receives some information (data) from a view, processes that information, decides what to do, and may send the result to a view. A controller is a class. You can create it yourself or Microsoft Visual Studio can create it for you. The primary class that manages controllers is named Controller. The Controller class is defined in the System.Web.Mvc namespace of the System.Web.Mvc.dll library.
![]() Practical Learning: Introducing Controllers
Practical Learning: Introducing Controllers
Creating a Controller
To get a controller, create a class derived from the Controller class. The name of your class must end with Controller, as in class-nameController
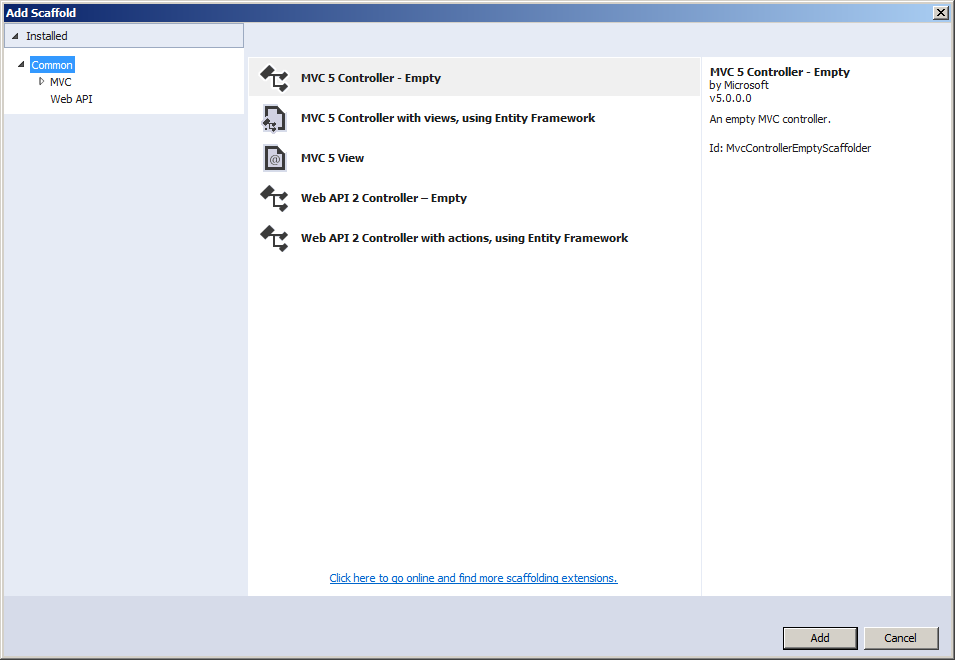
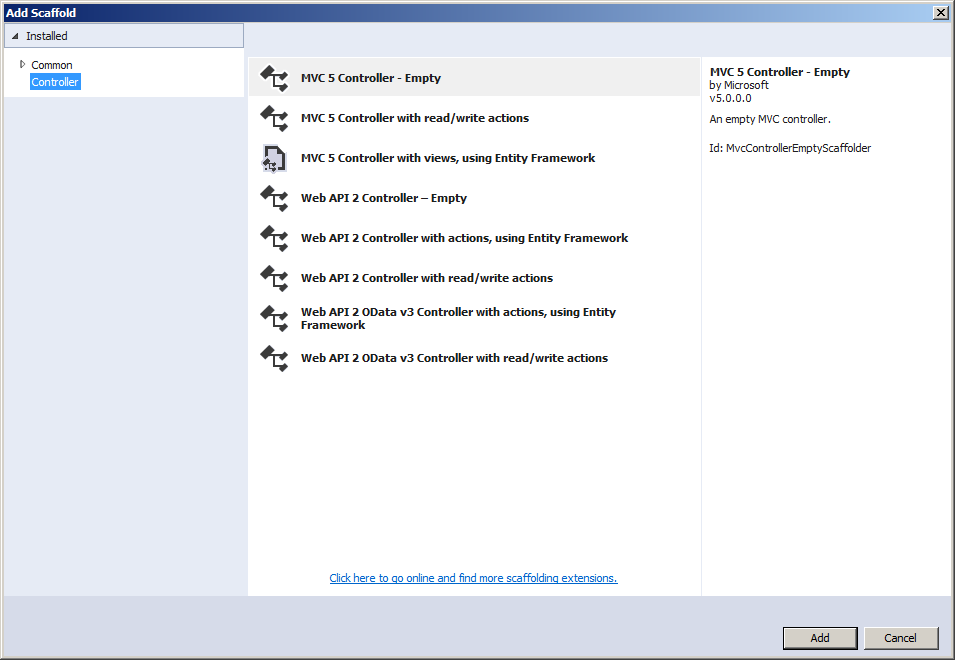
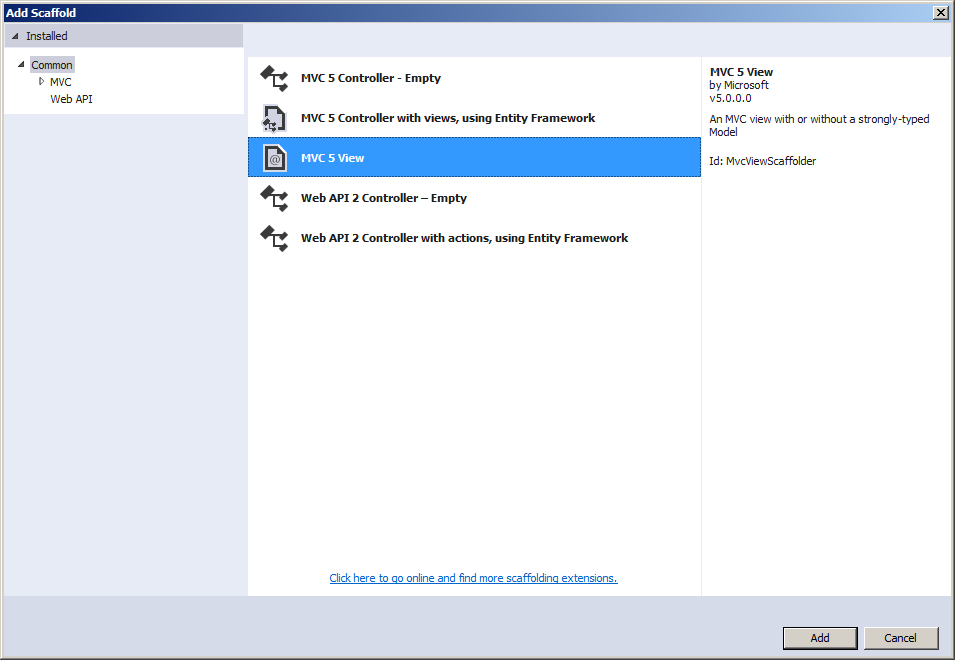
Your class should be created in a folder named Controllers. If you are creating everything manually, you should create that folder. Otherwise, in most cases, Microsoft Visual Studio will create that folder for you. To manually create a controller:
After selecting one of the MVC 5 Controller options, click Add. In the Add Controller dialog box, accept the suggested name or change it. Make sure the name ends with Controller. When you are ready, click Add.
![]() Practical Learning: Creating Controllers
Practical Learning: Creating Controllers
The Actions of a Controller
An operation that a controller performs is referred to as an action. An action is an object created from a class. Most actions are created from a class named ActionResult or one of its derived classes.
The primary action of a Controller object is named View. It is provided as an overloaded method with various versions for different reasons. All of them produce an object of type ViewResult, which is derived from ActionResult.
If you create a controller in Microsoft Visual Studio, the studio creates a class and adds at least one method named Index. That method is marked to return an ActionResult object. Here is an example:
using System;
using System.Collections.Generic;
using System.Linq;
using System.Web;
using System.Web.Mvc;

namespace Exercise.Controllers
{
    public class HomeController : Controller
    {
        // GET: Home
        public ActionResult Index()
        {
            return View();
        }
    }
}
![]() Practical Learning: Adding Actions to Controllers
Practical Learning: Adding Actions to Controllers
using System;
using System.Collections.Generic;
using System.Linq;
using System.Web;
using System.Web.Mvc;

namespace Geometry1.Controllers
{
    public class HomeController : Controller
    {
        // GET: Home
        public ActionResult Index()
        {
            return View();
        }

        // GET: Links
        public ActionResult Links()
        {
            return View();
        }

        // GET: AboutUs
        public ActionResult AboutUs()
        {
            return View();
        }
    }
}using System;
using System.Collections.Generic;
using System.Linq;
using System.Web;
using System.Web.Mvc;
namespace Geometry1.Controllers
{
public class ShapeController : Controller
{
// GET: Shape
public ActionResult Index()
{
return View();
}
// GET: Triangle
public ActionResult Triangle()
{
return View();
}
// GET: Square
public ActionResult Square()
{
return View();
}
}
}An Action in a Controller for a View
The results of the processing performed by a controller must be sent to a view so the user can see them. To make this happen, you must create a link from a controller to a view. There are various ways to do this. In most cases, you will make selections in one or more dialog boxes and Microsoft Visual Studio would take care of the necessary configurations for you.
When you create a controller, Microsoft Visual Studio creates, among other things, a folder named Views in the project. Inside the Views folder, Microsoft Visual Studio creates a sub-folder that uses the same name as the name you gave to a controller without the word Controller.
If you examine the controller class that is generated for you, it contains one ore more methods, also called action methods, depending on the selection you would have made when creating the controller. When you decide to create a view, you should (must) give it the same name as an action method that the controller will use to perform the actions related to that view. Normally, if the webpages associated with a controller class will have a common central webpage as an entry-point, the controller class should have at least one method named Index.
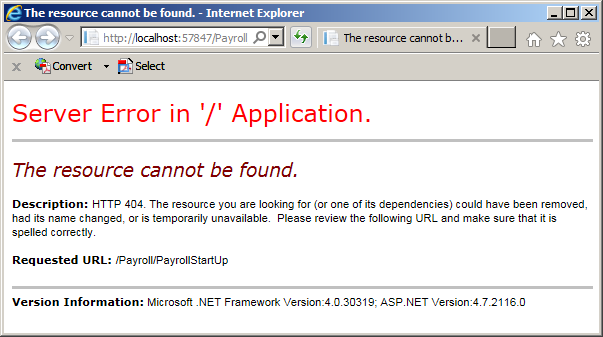
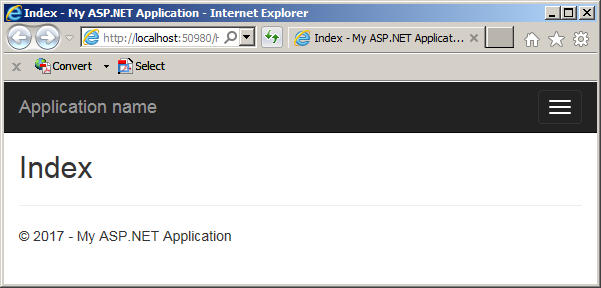
You can create a view before or after creating its associated action method in a controller class. The rule is that, at the time the view displays in a browser, the action method must have been created or must be found. If the compiler cannot find the action method, it would produce an error as "The resource cannot be found. ":
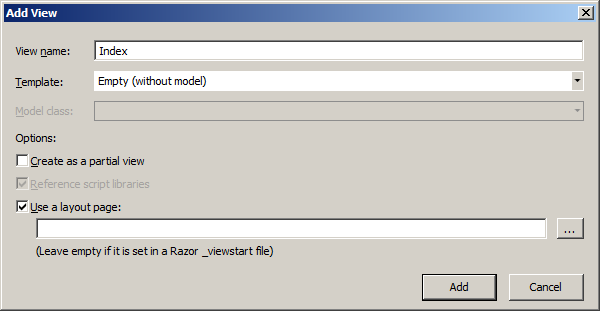
To create a view associated to an action method of a controller:
Remember that, when you create a view, it becomes an object based on the WebViewPage class that itself is derived from WebPageBase. One of the properties of the WebViewPage is named Html and it is of type HtmlHelper.
If you create a view that is tied to a controller, the view benefits from some method extensions that are not available to the types of views we were creating in the previous lessons. As a matter of fact, the Html property provides more functionality in this case.
![]() Practical Learning: Associating a View to a Controller
Practical Learning: Associating a View to a Controller
<!DOCTYPE html>
. . . No Change
<body>
. . . No Change
<div class="container body-content">
@RenderBody()
<hr />
<footer>
<p>© @DateTime.Now.Year - Geometry Tutorials</p>
</footer>
</div>
@Scripts.Render("~/bundles/jquery")
@Scripts.Render("~/bundles/bootstrap")
@RenderSection("scripts", required: false)
</body>
</html>Linking the Views
Linking with HTML
ASP.NET MVC fully supports HTML, including the abilty to create links that allow a visitor to move from one webpage to another. From your knowledge of HTML, remember that a link is created using the a tag.
To create a link to a view, as the value of the href attribute, start with ~/, following by the name of the controller, followed /, and followed by the name of the action. Don't add the .cshtml file extension. Here are examples:
<!DOCTYPE html>
. . . No Change
<body>
<div class="navbar navbar-inverse navbar-fixed-top">
<div class="container">
<div class="navbar-header">
<button type="button" class="navbar-toggle" data-toggle="collapse" data-target=".navbar-collapse">
<span class="icon-bar"></span>
<span class="icon-bar"></span>
<span class="icon-bar"></span>
</button>
<a href="~/Home/Index" class = "navbar-brand">Home</a>
</div>
<div class="navbar-collapse collapse">
<ul class="nav navbar-nav">
<li><a href="~/Polygons/Triangle">Triangle</a></li>
<li><a href="~/Polygons/Square">Square</a></li>
<li><a href="~/Home/Links">Resources</a></li>
</ul>
</div>
</div>
</div>
<div class="container body-content">
@RenderBody()
<hr />
<footer>
<p>© @DateTime.Now.Year - Geometry Tutorials</p>
</footer>
</div>
@Scripts.Render("~/bundles/jquery")
@Scripts.Render("~/bundles/bootstrap")
@RenderSection("scripts", required: false)
</body>
</html>
Introduction to Linking to an Action
When it comes to MVC, the HtmlHelper was extended with an overloaded method named ActionLink. The simplest version of this method uses the following syntax:
public static MvcHtmlString ActionLink(this HtmlHelper htmlHelper,
				       string linkText,
				       string actionName)
The first argument is the text to display for the link. It can be a constant string such as Home, Time Sheet, or Customers Accounts Details. If you wa«nt to use a number, you can put it in double-quotes or convert it to a string. The argument can also be the name of a variable that would produce a string. The second argument is the name of the mehod that represents the desired action defined in a controller.
![]() Practical Learning: Introducing Action Linking
Practical Learning: Introducing Action Linking
<!DOCTYPE html>

. . . No Change

<body>
    <div class="navbar navbar-inverse navbar-fixed-top">
        <div class="container">

            . . . No Change

            </div>
            <div class="navbar-collapse collapse">
                <ul class="nav navbar-nav">
                    <li>@Html.ActionLink("Resources", "Links")</li>
                </ul>
            </div>
        </div>
    </div>

. . . No Change

</body>
</html>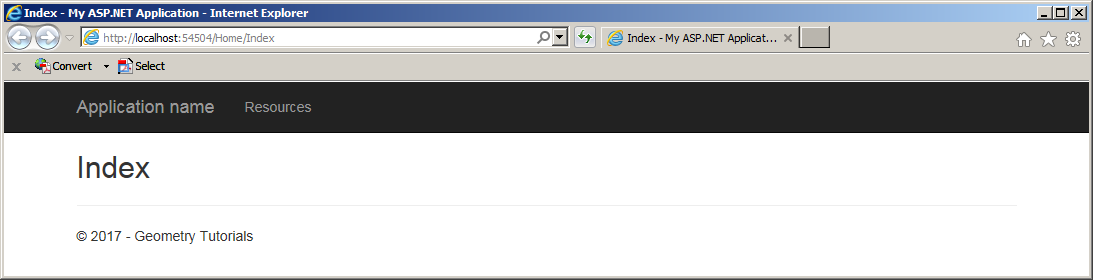
Linking to an Action of a Controller
The above version works well if you are trying to link to an action in the same controller. To let you indicate a controller, the following version of the method is available:
public static MvcHtmlString ActionLink(this HtmlHelper htmlHelper,
				       string linkText,
				       string actionName,
				       string controllerName)
In this case, pass the name of the controller as the third argument. The method is available in many other versions. One of them takes two object values as the fourth and fifth arguments.
![]() Practical Learning: Specifying the Controller of a Linking Action
Practical Learning: Specifying the Controller of a Linking Action
<!DOCTYPE html>
. . . No Change
<body>
<div class="navbar navbar-inverse navbar-fixed-top">
<div class="container">
<div class="navbar-header">
<button type="button" class="navbar-toggle" data-toggle="collapse" data-target=".navbar-collapse">
<span class="icon-bar"></span>
<span class="icon-bar"></span>
<span class="icon-bar"></span>
</button>
@Html.ActionLink("Application name", "Index", "Home", new { area = "" }, new { @class = "navbar-brand" })
</div>
<div class="navbar-collapse collapse">
<ul class="nav navbar-nav">
<li>@Html.ActionLink("Equilateral Triangle", "Triangle", "Polygons")</li>
<li>@Html.ActionLink("Square", "Square", "Polygons")</li>
<li>@Html.ActionLink("Resources", "Links")</li>
</ul>
</div>
</div>
</div>
<div class="container body-content">
@RenderBody()
<hr />
<footer>
<p>© @DateTime.Now.Year - Geometry Tutorials</p>
</footer>
</div>
@Scripts.Render("~/bundles/jquery")
@Scripts.Render("~/bundles/bootstrap")
@RenderSection("scripts", required: false)
</body>
</html>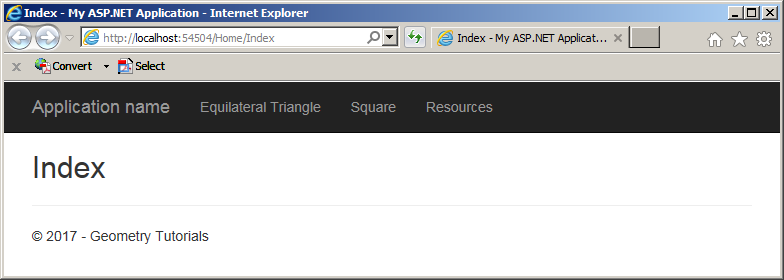
Other Techniques of Linking to an Action of a Controller
The ActionLink() method is available in many other versions. One of them takes two object values as the fourth and fifth arguments.
![]() Practical Learning: Adding Options When Linking to an Action
Practical Learning: Adding Options When Linking to an Action
<!DOCTYPE html>
<html>

. . . No Change

<body>
    <div class="navbar navbar-inverse navbar-fixed-top">
        <div class="container">
            <div class="navbar-header">

                . . . No Change

                @Html.ActionLink("Geometry", "Index", "Home", new { area = "" }, new { @class = "navbar-brand" })
            </div>
            <div class="navbar-collapse collapse">

                . . . No Change

            </div>
        </div>
    </div>

. . . No Change

</body>
</html>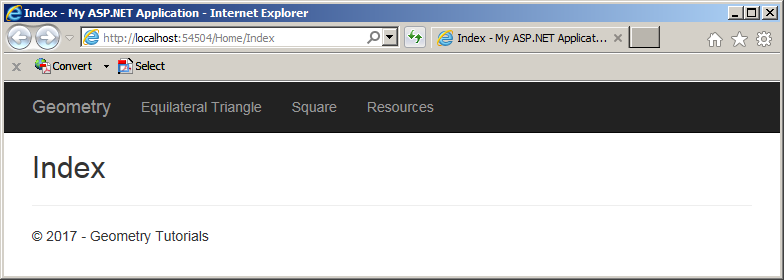

using System;
using System.Collections.Generic;
using System.Linq;
using System.Text;
using System.Threading.Tasks;

namespace Geometry1
{
    public interface IPolygon
    {
        int    Edges         { get;      }
        double Side          { get; set; }
        int    InternalAngle { get;      }
        double Perimeter     { get;      }
        double Area          { get;      }

        double CalculateInscribedRadius();
        double CalculateCircumscribedRradius();
    }
}using System;
using System.Collections.Generic;
using System.Linq;
using System.Web;
namespace Geometry1.App_Code
{
public class EquilateralTriangle : IPolygon
{
public int Edges
{
get
{
return 3;
}
}
public double Side { get; set; }
public int InternalAngle
{
get { return 60; }
}
public double Height => Side * Math.Sqrt(3.00) / 2.00;
public double Perimeter => Side * Edges;
public double Area => Side * Side * Math.Sqrt(3.00) / 4.00;
public double CalculateInscribedRadius() => Side * Math.Sqrt(3.00) / 6.00;
public double CalculateCircumscribedRradius() => Side * Math.Sqrt(3.00);
}
}using System;
using System.Collections.Generic;
using System.Linq;
using System.Web;
namespace Geometry1.App_Code
{
public class Square : IPolygon
{
public int Edges => 4;
public double Side { get; set; }
public int InternalAngle => 90;
public double Height => Side;
public double Perimeter => Side * Edges;
public double Area => Side * Side;
public double CalculateInscribedRadius() => Side / 2.00;
public double CalculateCircumscribedRradius() => Side * Math.Sqrt(2.00) / 2.00;
}
}Beginning a Form
One of the features provided by a view tied to a controller is its own ability to hold a form. To make this possible, the HtmlHelper class is extended with an overloaded method named BeginForm. This is equivalent to creating a form in HTML. To start a form using this method, use the following formula:
@using (Html.BeginForm(...)) {
}
The simplest version of the BeginForm() method takes no argument. Its syntax is:
public static MvcForm BeginForm(this HtmlHelper htmlHelper)
This is equivalent to creating a formn in HTML without specifying its name and using the default METHOD as POST. The BeginForm() method is available in many other versions for different goals.
Adding HTML Web Controls to a Form
A view supports controls created from traditional HTML elements. Each control is naturally created inside the square brackets of the using statement.
![]() Practical Learning: Using HTML Web Controls
Practical Learning: Using HTML Web Controls
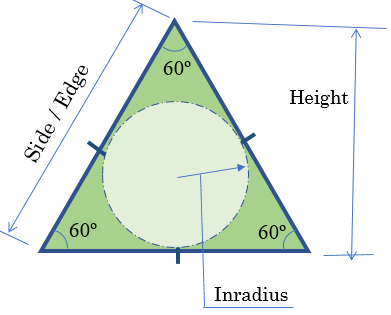
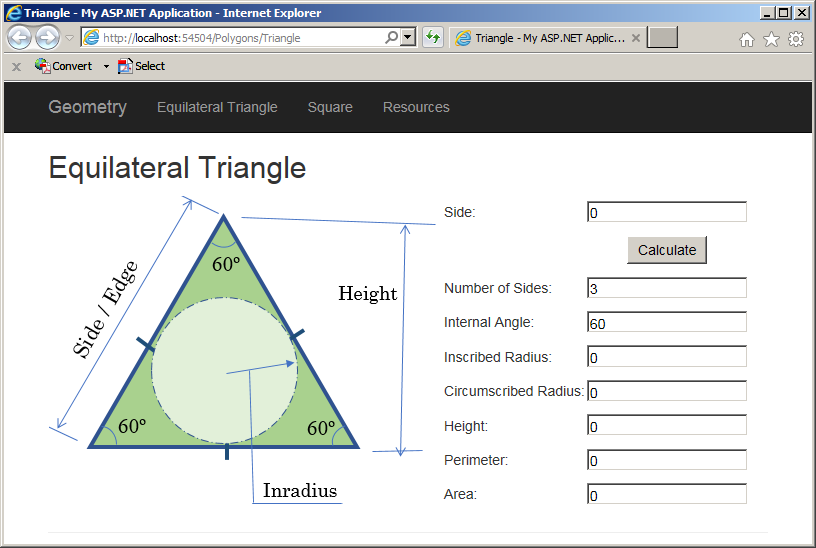
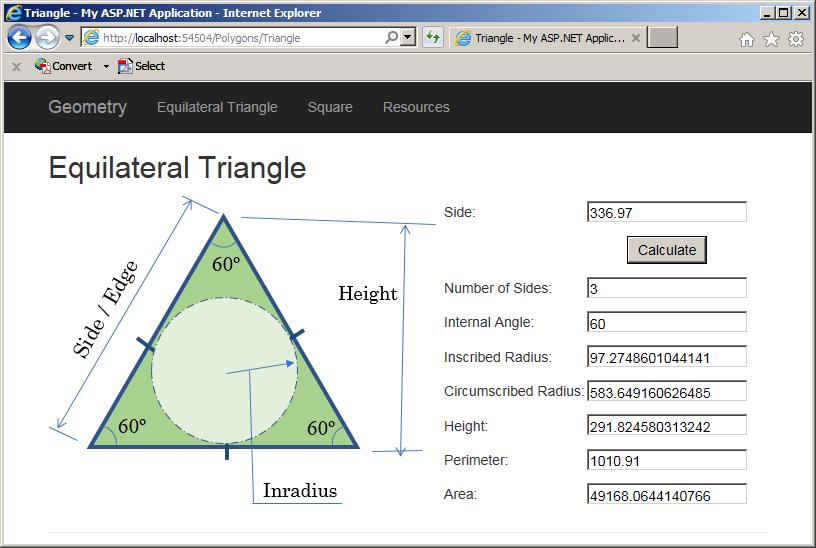
. . . No Change <h2>Equilateral Triangle</h2> @{ double side = 0.00; Geometry1.App_Code.EquilateralTriangle et = new Geometry1.App_Code.EquilateralTriangle(); if (IsPost) { side = Convert.ToDouble(Request["txtSide"]); et.Side = side; } } @using (Html.BeginForm()) { <table> <tr> <td style="width: 395px" rowspan="9"> <img src="~/Images/triangle2.png" width="391" height="315" alt="Geometry - Equilateral Triangle"> </td> <td class="caption">Side:</td> <td><input type="text" name="txtSide" value="@side" /></td> </tr> <tr> <td> </td> <td style="text-align: center"><input type="submit" name="btnSubmit" value="Calculate" /></td> </tr> <tr> <td>Number of Sides:</td> <td><input type="text" name="txtSides" value="@et.Edges" /></td> </tr> <tr> <td>Internal Angle:</td> <td><input type="text" name="txtInternalAngle" value="@et.InternalAngle" /></td> </tr> <tr> <td>Inscribed Radius:</td> <td><input type="text" name="txtInscribedRadius" value="@et.CalculateInscribedRadius()" /></td> </tr> <tr> <td>Circumscribed Radius:</td> <td><input type="text" name="txtCircumscribedRadius" value="@et.CalculateCircumscribedRradius()" /></td> </tr> <tr> <td>Height:</td> <td><input type="text" name="txtInternalAngle" value="@et.Height" /></td> </tr> <tr> <td>Perimeter:</td> <td><input type="text" name="txtPerimeter" value="@et.Perimeter" /></td> </tr> <tr> <td>Area:</td> <td><input type="text" name="txtArea" value="@et.Area" /></td> </tr> </table> }

Adding Web Controls to a Form
A view supports controls created from both HTML or the extended methods of the HtmlHelper class. Each control is created inside the square brackets of the using statement.
![]() Practical Learning: Using HTML Web Controls
Practical Learning: Using HTML Web Controls
. . . No Change
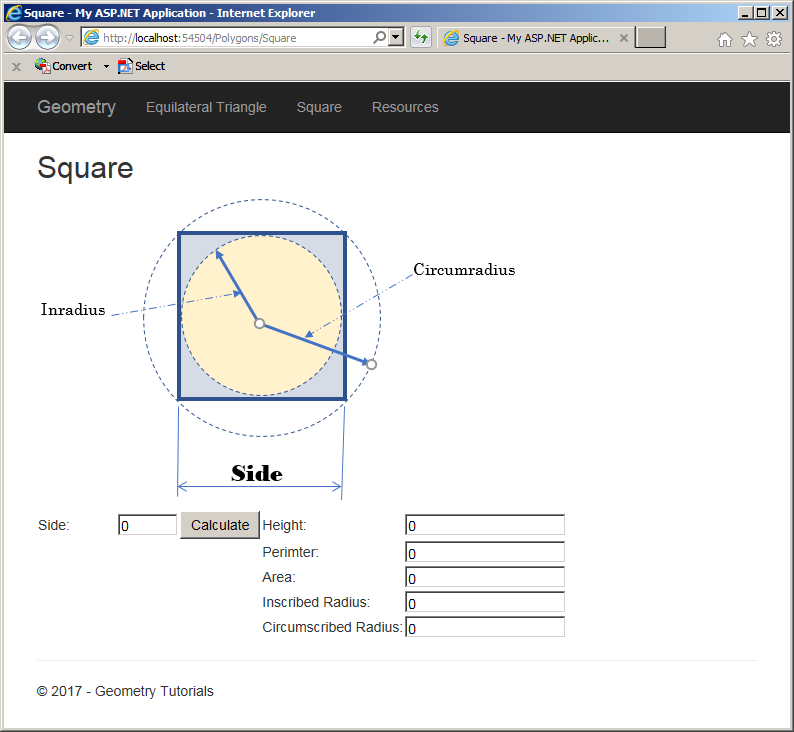
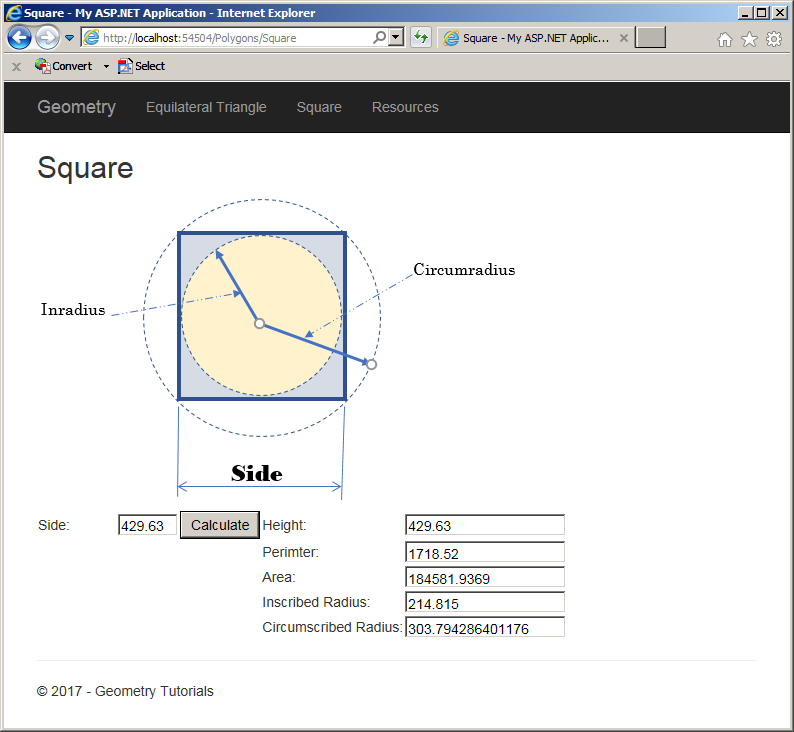
<h2>Square</h2>
<p><img src="~/Images/Square.png" alt="Geometry - Square" width="483" height="305" /></p>
@{
double side = 0.00;
Geometry1.App_Code.Square sqr = new Geometry1.App_Code.Square();
if (IsPost)
{
side = Convert.ToDouble(Request["txtSide"]);
sqr.Side = side;
}
}
@using (Html.BeginForm())
{
<table>
<tr>
<td style="width: 80px">Side:</td>
<td>@Html.TextBox("txtSide", @side, new { style = "width: 60px" })</td>
<td><input type="submit" name="btnCalculate" value="Calculate" /></td>
<td>Height:</td>
<td>@Html.TextBox("txtHeight", @sqr.Height)</td>
</tr>
<tr>
<td> </td>
<td> </td>
<td> </td>
<td>Perimter:</td>
<td>@Html.TextBox("txtPerimter", @sqr.Perimeter)</td>
</tr>
<tr>
<td> </td>
<td> </td>
<td> </td>
<td>Area:</td>
<td>@Html.TextBox("txtArea", @sqr.Area)</td>
</tr>
<tr>
<td> </td>
<td> </td>
<td> </td>
<td>Inscribed Radius:</td>
<td>@Html.TextBox("txtInscribedRadius", @sqr.CalculateInscribedRadius())</td>
</tr>
<tr>
<td> </td>
<td> </td>
<td> </td>
<td>Circumscribed Radius:</td>
<td>@Html.TextBox("txtCircumscribedRadius", @sqr.CalculateCircumscribedRradius())</td>
</tr>
</table>
}

|
|
||
| Previous | Copyright © 2017-2021, FunctionX | Next |
|
|
||