A Webpage Introduction The webpage is the most fundamental object of a website. It is the main object that presents the site. To support webpages, ASP.NET provides a class named Page. Creating a Page As you should know already, a webpage is created in HTML using HTML tags. Once this is done, the webpage becomes an object based on the Page class. Characteristics of a Webpage Loading a Webpage When the browser opens a webpage, the page fires an event named Load. To use this event, create a procedure named Page_Load for that event. That event is a good place to do anything that is necessary as soon as the page displays. Here is an example: <%@ Page Language="VB" %> <!DOCTYPE html> <html> <head> <script runat="server"> Sub Page_Load(ByVal sender As Object, ByVal e As EventArgs) Response.Write("The page has been opened and is now available...") End Sub </script> <title>Exercise</title> </head> <body> </body> </html> Posting Back After using a webpage, a visitor can click a button or do something based on how you configure your webpage. When the visitor clicks a button or performs a similar action, the content of the webpage is sent to the webserver. This is referred to as posting the values to the server (like the post office that sends mail to somebody). The server would deal with, referred to as processing, the values that were sent (from the form). Then the server would send the results back to a webpage. This is referred to as posting back the results. As we will see in a later section, you can decide what to do, whether to send the results to the same page or to a different page. The Previous Page If the visitors got to a webpage from another page, the browser has in memory a webpage referred to as the previous page. To allow you to access that previous page, the Page class is equipped with a member named PreviousPage. It is based on the Page class. Web Controls: The Button Introduction A button is an object a visitor can click to initiate an action. The class that supports the button is named Button. It can be used to add a button to a webpage. Posting to a Webpage As mentioned earlier, after using a form, the visitor can click a button and the values on the form would be sent to the server. When the server sends the results back,, you must decide what to do, or you must specify what document or webpage will deal with the results. One way is to send those results to another page. To support this, the Button class and consequently its control has a member named PostBackUrl. Assign the address of the webpage to the PostBackUrl attribute. Here is an example: <%@ Page Language="VB" %>
<!DOCTYPE html>
<html>
<head runat="server">
<script runat="server">
</script>
<title>Exercise</title>
</head>
<body>
<form id="frmExercise" runat="server">
<asp:Button id="btnOpenAnotherPage" runat="server"
PostBackUrl="exercise2.aspx" Text="Open Another Page" />
</form>
</body>
</html>
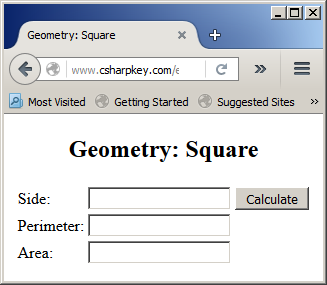
Processing From a Client You can deal with the values of a form locally on the webpage or send them to the webserver, which is the traditional weay. To let you process the values locally, the TextBox class has a member named OnClientClick which is also used as an attribute on the control. Before using this attribute, you should create a JavaScript function. To use this attribute, assign the name of the JavaScript function, with its parentheses, to this attribute. Clicking a Button When the user clicks a button, if you want to use the action, first create a procedure for the event. The name of the procedure usually ends with Click. To support the clicking event, the Button class is equipped with a member named Click. To support this event, the <asp:Button> control has an attribute named OnClick. To deal with the event, assign the procedure to this attribute. Here is an example: <%@ Page Language="VB" %> <!DOCTYPE html> <head runat="server"> <title>Exercise</title> <script runat="server"> Sub btnCalculateClick(ByVal sender As Object, ByVal e As EventArgs) End Sub </script> </head> <body> <form id="frmCalculation" runat="server"> <asp:Button runat="server" id="btnCalculate" Text="Calculate" OnClick="btnCalculateClick"></asp:Button> </form> </body> </html> Web Controls: The Label Introduction AS label is a webcontrol that displays static text to the visitor. The user cannot directly change that text but you can programmatically change it. ASP.NET supports the label through a class and a control both named TextBox. The Control Associated to a Label One of the goals of a label is to indicate what an accompanying control is used for. To let you specify that other control, the Label class is equipped with a member named AssociatedControlID to which you can assign the identification of a control. Web Controls: The Text Box Introduction A text box is a control that receives a value from a webpage visitor or displays a value to the visitor. The class that handles the text box is named TextBox and it is represented by the asp:TextBox control. Characteristics of a Text Box: The Text The primary characteristic of a text box is its text, which can be text displayed to the visitor or text that is requested from the user. To support this characteristics, the TextBox class is equipped with a member named Text. The control corresponding to that class has an attribute named after that member. In the came way, the classes of the controls that display or request text have a member named Text. That member is represented in HTML by an attribute of the same name. To indicate the text of a control, you can assign the desired value to this attribute. Here are examples: <%@ Page Language="VB" %>
<!DOCTYPE html>
<html>
<head runat="server">
<title>Geometry: Square</title>
</head>
<body>
<div align="center">
<h2>Geometry: Square</h2>
<form id="frmSquare" method="get" runat="server">
<table>
<tr>
<td><asp:Label id="lblSide" Text="Side:" runat="server"></asp:Label></td>
<td>
<asp:TextBox Runat="server" id="txtSide"></asp:TextBox>
<asp:Button Runat="server" id="btnCalculate"
Text="Calculate"></asp:Button></td>
</tr>
<tr>
<td><asp:Label id="lblPerimeter" Text="Perimeter:"
runat="server"></asp:Label></td>
<td><asp:TextBox Runat="server"
id="txtPerimeter"></asp:TextBox></td>
</tr>
<tr>
<td><asp:Label id="lblArea" Text="Area:" runat="server"></asp:Label></td>
<td><asp:TextBox Runat="server"
id="txtArea"></asp:TextBox></td>
</tr>
</table>
</form>
</div>
</body>
</html>
This would produce:
On the other hand, to access the text of a control, type the identifier of the control, followed by .Text. Such a string can be used like a normal string variable. For example, you can assign it to a variable. Here is an example: Dim firstName As String firstName = txtFirstName.Text Remember that the value held by a control is primarily considered as text. Therefore, if you need to use that value as a number, you must first convert it, and we have already reviewed the available functions. Here is an example: <%@ Page Language="VB" %>
<!DOCTYPE html>
<html>
<head runat="server">
<script Language="VB" runat="server">
Sub Examplify()
Dim side As Double
side = CDbl(txtSide.Text)
End Sub
</script>
<title>Geometry: Square</title>
</head>
<body>
<div align="center">
<h2>Geometry: Square</h2>
<form id="frmSquare" method="get"
runat="server">
<table>
<tr>
<td><asp:Label id="lblSide" Text="Side:" runat="server"></asp:Label></td>
<td>
<asp:TextBox Runat="server"
id="txtSide" Text="0.00"></asp:TextBox>
<asp:Button Runat="server" id="btnCalculate"
Text="Calculate"></asp:Button></td>
</tr>
<tr>
<td><asp:Label id="lblPerimeter" Text="Perimeter:"
runat="server"></asp:Label></td>
<td><asp:TextBox Runat="server"
id="txtPerimeter" Text="0.00"></asp:TextBox></td>
</tr>
<tr>
<td><asp:Label id="lblArea" Text="Area:" runat="server"></asp:Label></td>
<td><asp:TextBox Runat="server"
id="txtArea" Text="0.00"></asp:TextBox></td>
</tr>
</table>
</form>
</div>
</body>
</html>
Remember that you can apply a style to a control. Here are examples: <%@ Page Language="VB" %>
<!DOCTYPE html>
<html>
<head runat="server">
<title>Geometry: Square</title>
</head>
<body>
<div align="center">
<h2>Geometry: Square</h2>
<form id="frmSquare" method="get" runat="server">
<table>
<tr>
<td><asp:Label id="lblSide"
style="color: #0000FF"
Text="Side:" runat="server"></asp:Label></td>
<td>
<asp:TextBox Runat="server" id="txtSide"></asp:TextBox>
<asp:Button Runat="server" id="btnCalculate"
Text="Calculate"></asp:Button></td>
</tr>
<tr>
<td><asp:Label style="font-weight: bold; color: #FF0000;"
id="lblPerimeter"
Text="Perimeter:" runat="server"></asp:Label></td>
<td><asp:TextBox Runat="server" id="txtPerimeter">
</asp:TextBox></td>
</tr>
<tr>
<td><asp:Label id="lblArea"
style="font-weight: bold; color: #FF0000;"
Text="Area:" runat="server"></asp:Label></td>
<td><asp:TextBox Runat="server" id="txtArea">
</asp:TextBox></td>
</tr>
</table>
</form>
</div>
</body>
</html>
This would produce:
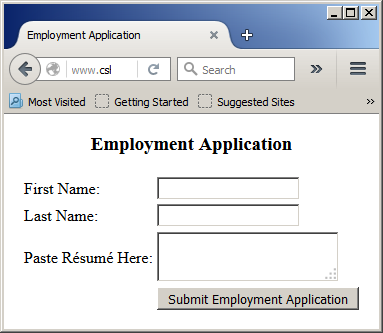
This can be referred to as inline formatting because it affects only the tag in which the style is created. The second technique consists of creating the necessary styles in the <head> tag of the HTML file. The third technique used to integrate CSS in your web page consists of creating a separate CSS file and referencing it in your (HTML, ASP, or ASP.NET) web page. The Multi-Line Text Box Introduction You can create a text box that can display on many lines. The control is also based on the TextBox class and the TextBox control. Creating a Multi-Line Text Box To let you specify some aspect of how the text box would be used, the TextBox class is equipped with a member named TextMode, which is based on an enumeration named TextBoxMode. To make a text box be able to handle many lines, one of the members of this enumeration is named MultiLine. Here is an example of specifying it: <%@ Page Language="VB" %>
<!DOCTYPE html
<head>
<title>Employment Application</title>
</head>
<body>
<div align="center">
<h3>Employment Application</h3>
<form id="frmEmploymentApplication" runat="server">
<table>
<tr>
<td>First Name:</td>
<td>
<asp:TextBox id="txtFirstName" runat="server" /></td>
</tr>
<tr>
<td>Last Name:</td>
<td>
<asp:TextBox id="txtLastName" runat="server" /></td>
</tr>
<tr>
<td>Paste R�sum� Here:</td>
<td>
<asp:TextBox id="txtResume" TextMode="MultiLine"
runat="server" /></td>
</tr>
<tr>
<td> </td>
<td><asp:Button id="btnSubmit" text="Submit Employment Application"
runat="server"></asp:Button></td>
</tr>
</table>
</form>
</div>
</body>
</html>
This would produce:
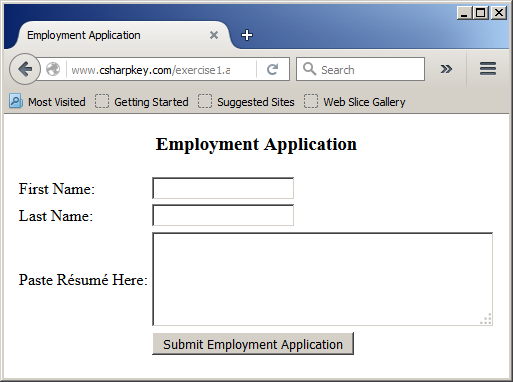
To let you control the size of the multi-line text box, its class is equipped with two members named Columns and Rows. The TextBox control use the same names for the attributes that apply their behaviors. The Columns and the Rows attributes work exactly like their counterparts of the input type="text" control of HTML. Here is an example of using these attributes: <%@ Page Language="VB" %>
<!DOCTYPE html
<head>
<title>Employment Application</title>
</head>
<body>
<div align="center">
<h3>Employment Application</h3>
<form id="frmEmploymentApplication" runat="server">
<table>
<tr>
<td>First Name:</td>
<td>
<asp:TextBox id="txtFirstName" runat="server" /></td>
</tr>
<tr>
<td>Last Name:</td>
<td>
<asp:TextBox id="txtLastName" runat="server" /></td>
</tr>
<tr>
<td>Paste R�sum� Here:</td>
<td>
<asp:TextBox id="txtResume" TextMode="MultiLine"
Columns="10" Rows="5"
runat="server" /></td>
</tr>
<tr>
<td> </td>
<td><asp:Button id="btnSubmit" text="Submit Employment Application"
runat="server"></asp:Button></td>
</tr>
</table>
</form>
</div>
</body>
</html>
This would produce:
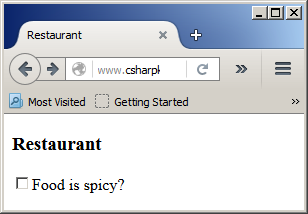
A Check Box Introduction ASP.NET provides many webcontrols to support conditional statements. One of them, a check box, is used to specify that a condition is true or it is false. The class that supports the check box is named CheckBox. Here is an example of creating a check box: <%@ Page Language="VB" %> <!DOCTYPE html> <html> <head runat="server"> <title>Restaurant</title> </head> <body> <form id="frmRestaurant" runat="server"> <h3>Restaurant</h3> <asp:CheckBox id="chkSpicy" Text="Food is spicy?" runat="server"></asp:CheckBox> </form> </body> </html> This would produce:
Check Box List A check box list is a group of check boxes created as one unit. The class that supports this concept is named CheckBoxList. Web Controls: Radio Buttons Introduction A radio button is a control with a small round box. To support radio buttons, ASP.NET provides the RadioButton class. Radio buttons usually come as a group. To make it easy to create a group of radio buttons, ASP.NET provides a class named RadioButtonList. Therefore, you can start a group of radio buttons as follows: <%@ Page Language="VB" %>
<!DOCTYPE html>
<html>
<head>
<title>Payroll Evaluation</title>
</head>
<body>
<h3>Payroll Evaluation</h3>
<form id="frmPayroll" runat="server">
<p><b>Payroll Frequency</b></p>
<asp:RadioButtonList id="rblPayrollPeriod" runat="server">
</asp:RadioButtonList>
</form>
</body>
</html>
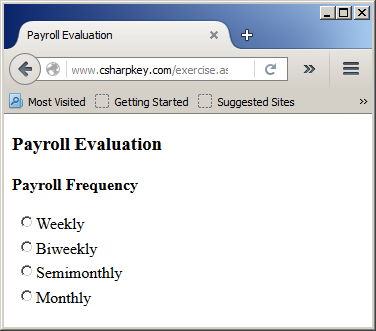
Each radio button in the list is created from a class named ListItem. It is used as an HTML element created in an asp:RadioButtonList element. Each list item is primarily represented by its caption, which is specified as the value of the asp:ListItem element. Here are examples: <%@ Page Language="VB" %>
<!DOCTYPE html>
<html>
<head>
<title>Payroll Evaluation</title>
</head>
<body>
<h3>Payroll Evaluation</h3>
<form id="frmPayroll" runat="server">
<p><b>Payroll Frequency</b></p>
<asp:RadioButtonList id="RblPayrollPeriod" runat="server">
<asp:ListItem>Weekly</asp:ListItem>
<asp:ListItem>Biweekly</asp:ListItem>
<asp:ListItem>Semimonthly</asp:ListItem>
<asp:ListItem>Monthly</asp:ListItem>
</asp:RadioButtonList>
</form>
</body>
</html>
This would produce:
Characteristics of Radio Buttons To use a radio button, a webpage visitor must click it. To be able to refer to a selected radio button, the radio button is represented by a member named SelectedItem that is in fact based on a class named ListControl. One of the characteristics of the ListControl class is the text its item is holding. This is represented by a member named Text. The radio buttons of a list are stored in a list where each item occupies a specific position. To identify the positions of the radio buttons, the RadioButtonList class is equipped with a member named SelectedIndex, which is of type Integer. The first radio button has an index of 0. The second has an index of 1. The third has an index of 2, and so on. A Drop Down List Introduction to the Combo Box A drop down list, also called a combo box, is a control that holds a list of items but presents only one item at a time. A combo box is made possible by a control and class named DropDownList. Therefore, a combo box can be started as follows: <form id="frmPayroll" runat="server">
<asp:DropDownList id="ddlMaritalStatus" runat="server">
</asp:DropDownList>
</form>
Each item of a drop down list is based on a class named ListItem. To add an item to a combo box, create a ListItem element with the desired string between the start and the end tags, and nest the element in the drop down list. Here are examples: <form id="frmPayroll" runat="server"> <p><b>Marital Status</b></p> <asp:DropDownList id="sdlMaritalStatus" runat="server"> <asp:ListItem>Single</asp:ListItem> <asp:ListItem>Married</asp:ListItem> </asp:DropDownList> </form> Characteristics of a Combo Box Each item of a drop-down list is based on a member named SelectedItem that is based on a class named ListControl. One of characteristics of this class is named Text, which is the string of a list item. A List Box Introduction A list box is a version of a combo box but that has a flat list. The list box is handled by a class named ListBox. Therefore, to start a list box, create an element of that class. Here is an example: <%@ Page Language="VB" %>
<!DOCTYPE html>
<html>
<head runat="server">
<title>Music Store</title>
</head>
<body>
<form id="frmInstruments" runat="server">
<asp:ListBox id="LbxInstruments" runat="server"></asp:ListBox>
</form>
</body>
</html>
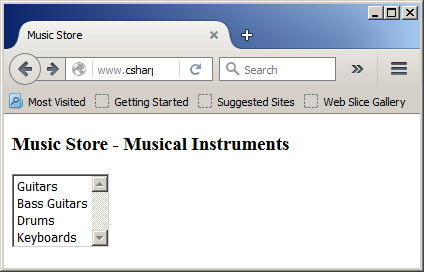
Each item of the list box is based on the ListItem class. To add an item to a list box, create a ListItem element and set its value as desired. Here is an example: <%@ Page Language="VB" %>
<!DOCTYPE html>
<html>
<head>
<title>Music Store</title>
</head>
<body>
<h3>Music Store - Musical Instruments</h3>
<form id="frmInstruments" runat="server">
<p><b>Categories</b></p>
<asp:ListBox id="LbxInstruments" runat="server">
<asp:ListItem>Guitars</asp:ListItem>
<asp:ListItem>Bass Guitars</asp:ListItem>
<asp:ListItem>Drums</asp:ListItem>
<asp:ListItem>Keyboards</asp:ListItem>
</asp:ListBox>
</form>
</body>
</html>
This would produce:
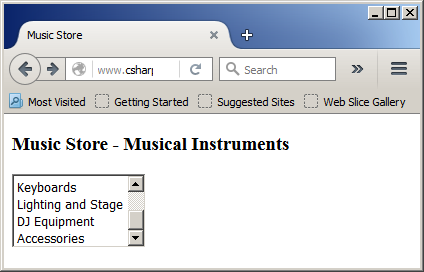
Characteristics of a List Box If a list box has more items than its size can display, the browser would equip it with scroll bars. Here is an example: <%@ Page Language="VB" %>
<!DOCTYPE html>
<html>
<head>
<title>Music Store</title>
</head>
<body>
<h3>Music Store - Musical Instruments</h3>
<form id="frmInstruments" runat="server">
<asp:ListBox id="LbxInstruments" runat="server">
<asp:ListItem>Guitars</asp:ListItem>
<asp:ListItem>Bass Guitars</asp:ListItem>
<asp:ListItem>Drums</asp:ListItem>
<asp:ListItem>Keyboards</asp:ListItem>
<asp:ListItem>Lighting and Stage</asp:ListItem>
<asp:ListItem>DJ Equipment</asp:ListItem>
<asp:ListItem>Accessories</asp:ListItem>
</asp:ListBox>
</form>
</body>
</html>
This would produce:
As is available to all webcontrols, you can set the size of a list box by specifying its width and height styles. To let you find out what item is selected in a list box, the ListBox class is equipped with members named SelectedIndex and SelectedItem. | ||||