
Introduction to Microsoft Access and VBA
|
|
Introduction to Microsoft Access and VBA |
Introduction to Microsoft Access
Overview
A database is a list of values stored somewhere. A computer database is a list or a group of lists stored in a computer disc such as a hard drive. Microsoft Access is an application used to create and manage computer databases.
 Practical Learning: Starting Microsoft Access
Starting a Project
Microsoft Access is is equipped with all the tools you will need to start a project, to end it, and to distribute it. As is the case for every application, to use Microsoft Access, you must launch it, which is done from the menu on the Start button of Microsoft Windows. When it starts, Microsoft Access displays two sections:
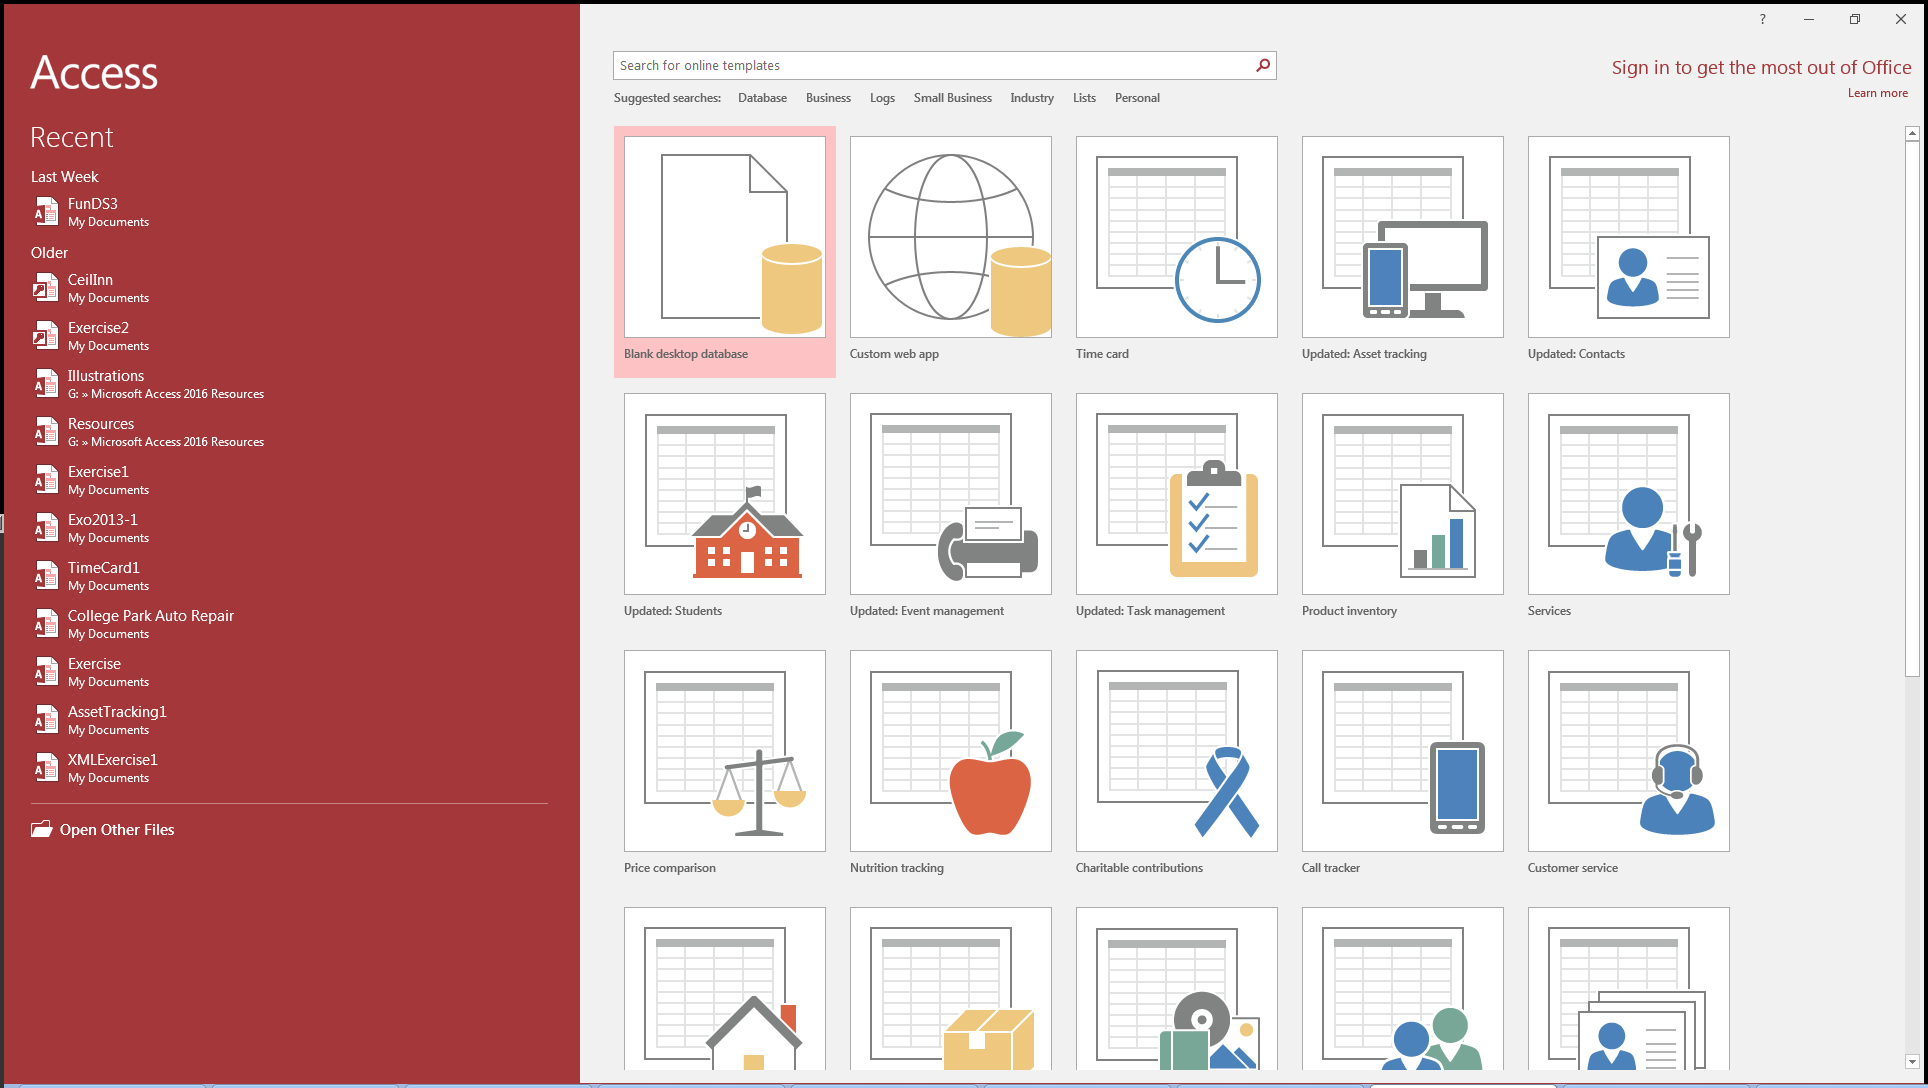
The left side displays a list of previously used files. The right side displays a list of example databases. To start with a project from scratch, you can click Blank Desktop Database. This would bring up a dialog box:
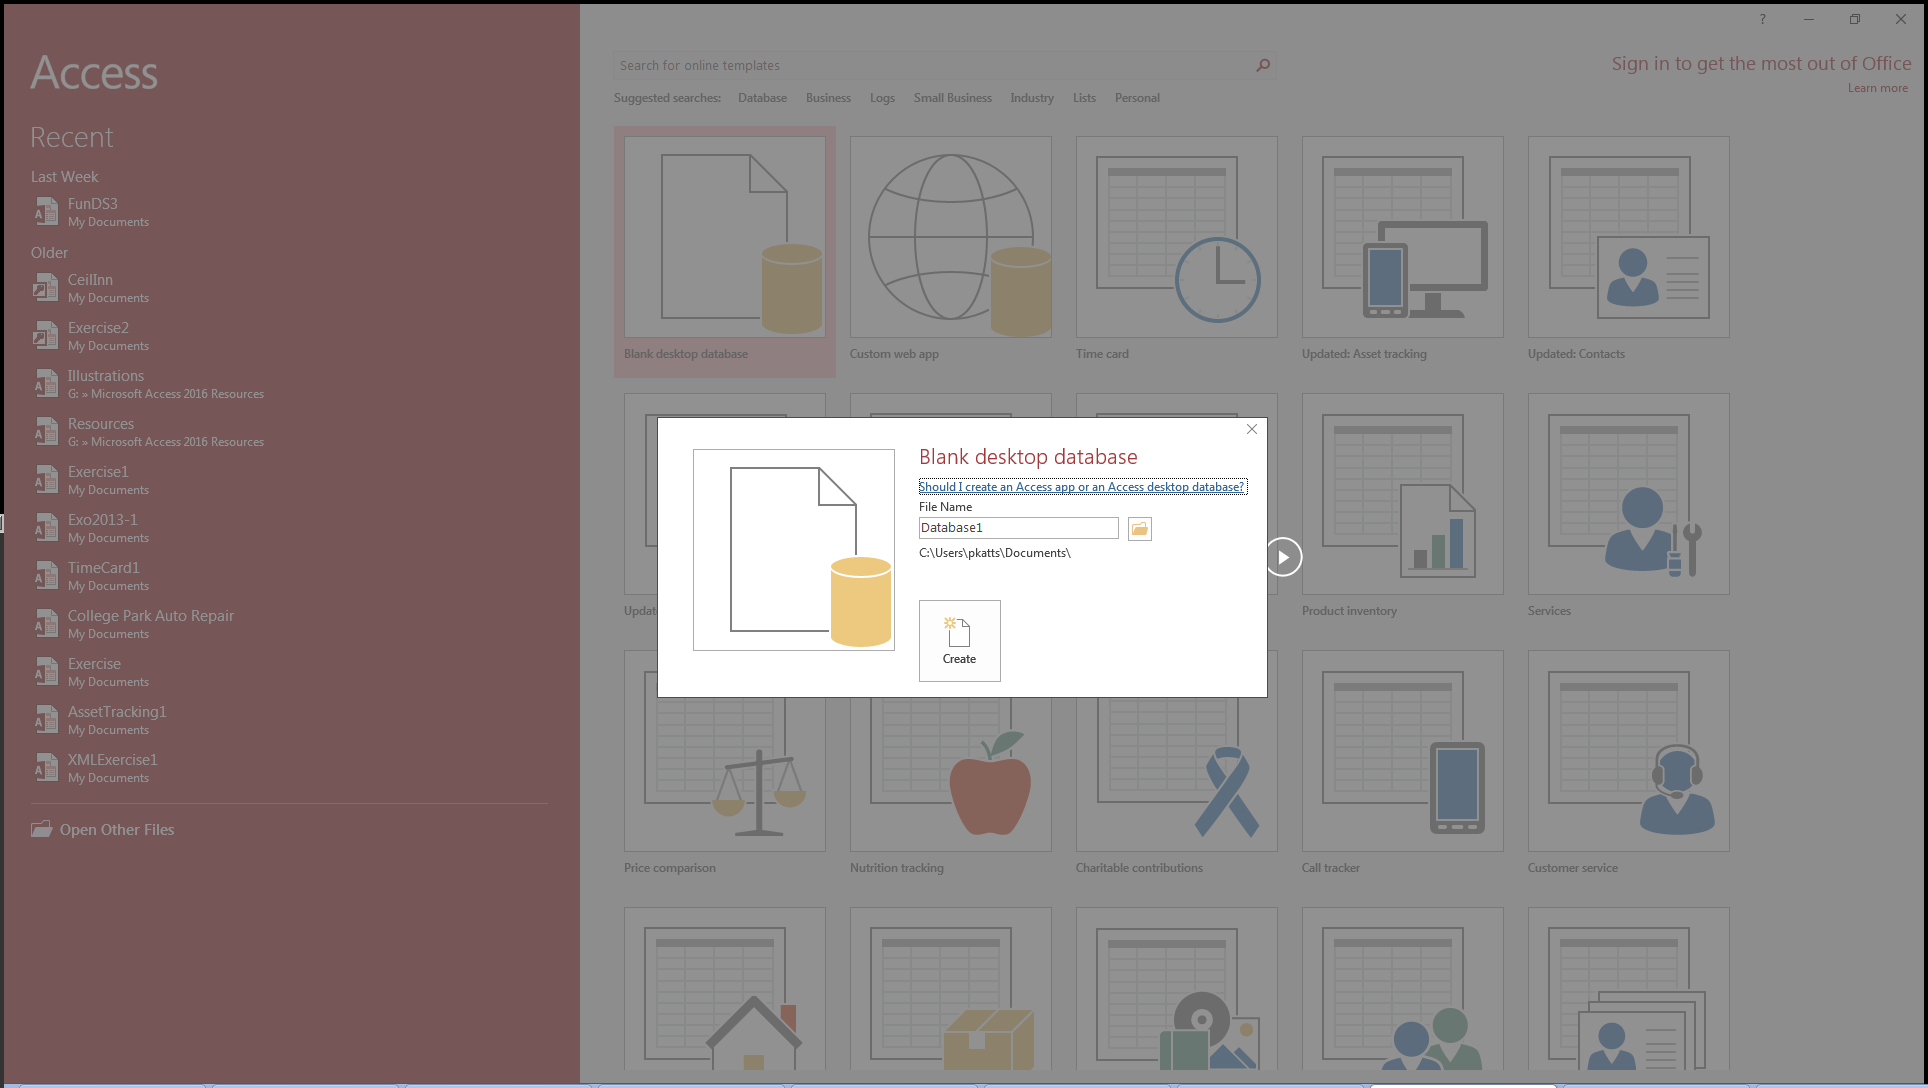
In the dialog box, specify the desired name of the file and click Create.
![]() Practical Learning: Creating a Database
Practical Learning: Creating a Database
The Microsoft Access Interface
The Quick Access Toolbar
The left side of the title bar displays the Quick Access Toolbar
 . The Quick Access toolbar containss
other useful buttons.
. The Quick Access toolbar containss
other useful buttons.
The Work Area
To assist you with necessary operations, Microsoft Access is equipped with the Ribbon. By clicking File, you can access menu items to save or open one:
To return to the previous window, you can click
the Back button ![]() .
.
Under the title bar, Microsoft Access displays a long bar called the Ribbon (or ribbon), whose contents and sections depend on what is currently going on in Microsoft Access:

The Structured Query Language (SQL)
Introduction
The primary language to perform the operations on a database is called the structured query language, or SQL.
| SQL can be pronounced Sequel or S. Q. L. In our lessons, we will consider the Sequel pronunciation. For this reason, the abbreviation will always be considered as a word, which would result in "A SQL statement" instead of "An SQL statement". Also, in these lessons, we will regularly write, "The SQL" instead of "The SQL language", as the L already represents Language. |
As it is common with other computer languages, the SQL has with its syntax, vocabulary, and rules. The SQL is equipped with keywords that tell it what to do and how to do it. Microsoft Access supports many ways of using, interpreting, or applying the SQL.
A SQL Statement
Code based on SQL is referred to as a SQL statement. In Microsoft Access, to open a window you can use to create or use a SQL statement, on the Ribbon, click Create. In the Queries section, click Query Design. This would display the Show Table dialog box. Click Close.
To open the window that allows you to write code:
This would display a window with a default line of code. This is referred to as the Query window� In it, you can either edit its existing code or delete the default code and replace it with your own code.
When writing a SQL statement, the SQL is not case-sensitive. This means that the words Case, case, and CASE represent the same thing. This applies to keywords of the SQL or words that you will add in your statements.
After writing your SQL statement, you can execute it to see the result. To do this:
After viewing the result, to return to the Query window:
The most fundamental operator used in the SQL is called SELECT. This operator is primarily used to display a value to the user. In this simple case, it uses the following formula:
SELECT Value;
The value on the right side of SELECT must be appropriate. It can be a number. Herei is an example:
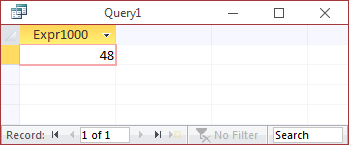
SELECT 48;
When you write a SQL statement, the semicolon is optional. This means that you can omit it.
When you execute a SQL statement in the Query window, its results are displayed in a spreadsheet. To be able to recognize a value, the top section of a column of the spreadsheet displays a label, called a caption. For example, the above would produce:
If you create a simple SELECT Value; Microsoft Access assigns a default caption to the column. The SQL allows you to specify a caption that would be used for the value. This is done using the following basic formula:
SELECT Value As Caption;
The words SELECT and AS are required. As mentioned already, SELECT would be used to specify a value and AS in this case allows you to specify a caption of your choice.
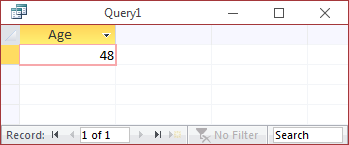
The caption can be made of a word but the word cannot be one of the SQL's keywords. Here is an example:
SELECT 48 AS Age;
This would produce:
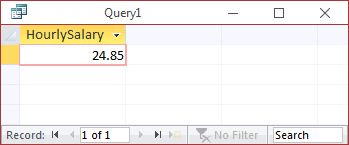
You can also use non-literal characters or digits in the caption. If the caption is made of a combination of words, you can concatenate them to create one word. Here is an example:
SELECT 24.85 AS HourlySalary;
This would produce:
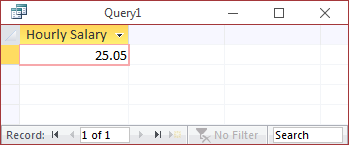
If you want the caption to display different words, you can include them between an opening square bracket "[" and a closing bracket "]". Here is an example:
SELECT 25.05 AS [Hourly Salary];
This would produce:
Instead of displaying one column, you may want to display more. To do this, separate them with commas. Here is an example:
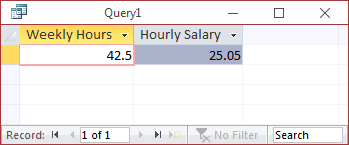
SELECT 42.50 AS [Weekly Hours], 25.05 AS [Hourly Salary];
This would produce:
Besides a number, the value of a SELECT expression can be a string. If it is, you can include it between single-quotes. Here is an example:
SELECT 'Martens, Laurent' AS [Employee Name];
In the same way, you can mix number-based and string-based columns.
SQL as Data Definition Language
The structured query language comes in two broad parts. The data definition language (DDL) is the SQL part used to create the objects of a database.
Introduction to Forms and Reports
Forms Fundamentals
A form is a rectangular object that hosts other objects and allows a database user, also called a user, to interact with the application. There are various ways you can create a form. If you want to immediately use the form, on the Ribbon, click Create. In the Forms section, click Form View.
If you want to prepare the form to receive other objects, this is referred to as design. To open a form for design, on the Ribbon, click Create. In the Forms section, click Form Design. When a form is in design, you can add objects to it.
![]() Practical Learning: Creating a Form
Practical Learning: Creating a Form
The Form View is the view used for regular operations on a form. To open a form in Form View:
The design of a form is done by displaying the object in Design View. To present a form in Design View:
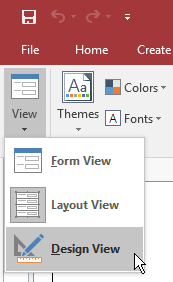
The Form View
If the form is currently displaying in Design View and you want to switch it to Form View:
![]() Practical Learning: Displaying a Form for Design
Practical Learning: Displaying a Form for Design
Reports Fundamentals
A report is a rectangular object that allows a user to print some values, that is, to sent a designed object to the printing device. Like a form, a report hosts the objects that present the values to be printed. There are various ways to create a report. To start a simple report, on the Ribbon, click Create. In the Reports section, click Report View.
To start a report that will host some objects, which referred to as design, on the Ribbon, click Create. In the Reports section, click Report Design. If the report is currently closed or it displays in another view, you can switch the view using the same techniques applied to a form.
![]() Practical Learning: Creating a
Report
Practical Learning: Creating a
Report
The Sections of a Form or Report
The Detail Section
The Detail section is the primary host of the controls on a form or report. The section is primarily characterized by its height. To visually change the height of the Detail section, click and drag the lower border of the Detail section:
The Form Header and the Form Footer
A form can be equipped with a Form Header and a Form Footer sections. To add these sections, right-click the middle of the form and click Form Header/Footer:
A report can be equipped with a Report Header and a Report Footer sections. To add these sections, right-click the body of the report and click Report Header/Footer:
You can heighten or reduce, sometimes completely, a section to your liking. This allows you to keep one section and hide the other.
![]() Practical Learning: Creating the Sections of a Form
Practical Learning: Creating the Sections of a Form
The Size of a Form or Report
The Width of a Form or Report
The width of a form or that of a report is the distance from its left border to its right border. All sections use the same width. To widen or narrow a form or report, click and drag the right border:
The Height of a Form or Report
The height of a form or report is controlled by its sections.
The Width and Height of a Form or Report
To change both the width and the height of a form or report at the same time, position the mouse on the lower-right corner:
Then click and drag left, right, up, down, or diagonally.
Automatically Sizing the Form to Fit Its Content
If you want to resize a form enough to show its whole content, on the Ribbon, click Home. In the Window section, click Size To Fit Form.
Controls Fundamentals
Introduction
A Windows control, or simply called a control, is an object positioned in the body of a form to allow a database user to interract with the database.
Microsoft Access supports various types of controls.
Adding a Control to a Form or Report
To manually add a control to a form or report, the form or report must be opened in Design View. When that happens, the Ribbon displays various objects in its Controls section. To add a control to a form or report, click it in the Controls section of the Ribbon, and click the desired section of the form or report. You can then move and position the control as you see fit.
![]() Practical
Learning: Adding a Control to a Form
Practical
Learning: Adding a Control to a Form
Microsoft Visual Basic Fundamentals
Introduction
You can create a completely functional database using only Microsoft Access. In some cases, to get a more complex database, you have to write code. To support this, Microsoft Access ships with, and installs, a programming environment named Microsoft Visual Basic. This is a (smaller) variant of the popular Microsoft Visual Basic language and environment but has everything necessary to create and manage a complex database.
Practical
Learning: Starting Microsoft Access
Opening Microsoft Visual Basic
In order to access Microsoft Visual Basic, you must first create or open a database in Microsoft Access. Then, you can open Microsoft Visual Basic from Microsot Access. You have various options. To launch Microsoft Visual Basic:
Any of these actions would open Microsoft Visual Basic:
Practical Learning: Opening Microsoft Visual Basic
Primary Accessories for Programming and Code Writing
Introduction
When using a database, you are in fact using two applications to create a final product. Microsoft Access is used to design the necessary objects for your product. This means that Microsoft Access is used for its visual display of objects. On the other hand, Microsoft Visual Basic is used to handle code that enhances the functionality of your application.
The code you will write is made of small instructions written in plain English, in a version referred to as the Visual Basic language. The instructions you write must be translated in a language the computer can understand. This is done by a program called a compiler. That program works behind the scenes so you will almost never be concerned with it (but you should know that it exists.
A comment is a piece of text in a code section that the database engine would not consider when reading your code. As such, a comment can be written any way you want.
In Visual Basic, the line that contains a comment can start with a single quote. Here is an example:
Private Sub Form_Load()
    ' This line will not be considered as part of the code
End Sub
Alternatively, you can start a comment with the Rem keyword. Anything on the right side of rem, Rem, or REM would not be read. Here is an example:
Private Sub Form_Load()
    ' This line will not be considered as part of the code
    Rem I can write anything I want on this line
End Sub
Comments are very useful and it is strongly suggested that you use them regularly. They can never hurt your code and they don't increase the size of your database. Comments can help you and other people who read your code to figure out what a particular section of code is used for, which can be helpful when you re-visit your code after months or years of not seeing it.
Introduction
A module is a file that holds programming code or pieces of code in a Visual Basic application. There are three types of modules you will use.
A Module from a Form or Report
From Microsoft Access, if you use a form or a report to open its code, Microsoft Visual Basic automatically creates a new module for the form or report and displays it:

![]() Practical
Learning: Creating a Form-Based Module
Practical
Learning: Creating a Form-Based Module
A Module from Scratch
As another category, you can create a module that is independent of any form or report. You can then write any code you want in that file. To create a module:
The names of modules are cumulative. This means that the first module would be named Module1; the second would be Module2, etc. It is a good idea to have names that are explicit especially if your application ends up with various modules. To give a custom name to a module, you must save it. This would prompt you to name the module. You can accept the suggested name or type your own and press Enter.
![]() Practical
Learning: Creating an Independent Module
Practical
Learning: Creating an Independent Module
Introduction to the Events of a Control
An event is an action that occurs on a control. Examples of actions include clicking a button, or typing text, or moving the mouse. Except for the label (or for static controls), every control supports some events. When an action occurs, the control is said to fire the event.
A default event is the event the control is more likely to fire. For example, a button is more likely to be clicked; so the default event of a button is the click event.
There are various ways you can launch an event for a control. As one option, in Microsoft Access, right-click the control on a form or report and click Build Event... In the Event Builder dialog box, click Code Builder and click OK. If you are already working in Microsoft Visual Basic, in the Object combo box, select the control. In the Procedure combo box, select the control.
![]() Practical
Learning: Introducing Controls Events
Practical
Learning: Introducing Controls Events
Microsoft Visual Basic Child Windows
Introduction
The Microsoft Visual Basic application is equipped with various windows you can use to create and manage the necessary objects. The windows are dockable. This means that they can be moved on the screen to other locations.
The Project Window
|
The Project window displays the coding segments for the objects of your project. If the Project Explorer is not displaying and you need it, on the main menu, click View -> Project Explorer. The Project window is usually positioned on the left of the window. To move it, click its title bar under the Standard toolbar, hold your mouse down and drag it to the desired location. To position it back to its previous location, double-click its title bar. To expand or collapse the folders tree, click the Toggle Folders button. |
 |
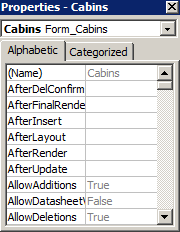
Introduction to the Properties Window
In the Microsoft Visual Basic Environment, the Properties window is used to specify or change some characteristics:
The Code Editor
The Code Editor is the area where you will write code. It is the largest section of the Microsoft Visual Basic programming environment. It is mainly made of three sections:
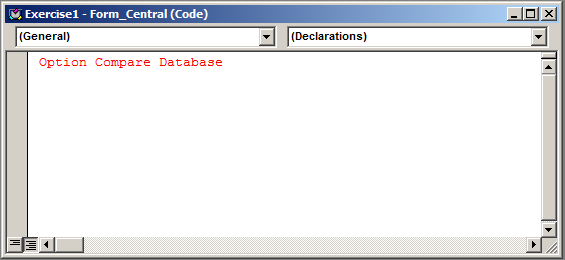
On top, there are two combo boxes. To know the name of a combo box, you can position the mouse on it and a tool tip would come up:

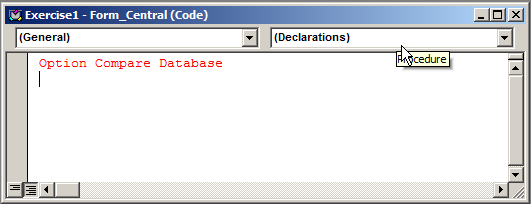
The Object combo box allows you to select a particular object and access its actions. The Procedure combo box allows you to select an action, related to the object in the Object combo box.
The Code Editor is equipped with a vertical and a horizontal scroll bars.
There are two small buttons on the left side of the horizontal scroll bar. The Full Module View button is used to display the code with an object. The Procedure View button will display the procedures associated with the database.
The Options Dialog Box
The Code Editor uses default colors to show the code. To customize these colors, you can use the Editor Format property page of the Options dialog box. To access it, on the main menu, click Tools and click Options...:

The Immediate Window
 |
The Immediate window is used to test code when necessary. To display it, on the main menu of Microsoft Visual Basic, lick View -> Immediate Window |
Practical
Learning: Using Microsoft Visual Basic Windows
Microsoft Access Databases
Introduction
There are various types of databases you can use in Microsoft Access. You can create a database from scratch. You can use some objects that ship with Microsoft Access to create a database. You can open either a database you previously created or one made by someone else.
Visually Creating a Microsoft Access Database
There are various ways you can create a database. To visually start a database from scratch, after launching Microsoft Access, click Blank Desktop Database. In the right section, accept or change the name of the database. If you want to create a contemporary database, either omit or add the .accdb extension. If you want to create a database that is compatible with earlier versions of Microsoft Access, you must add the extension .mdb.
After specifying the name, to specify a folder of your choice, under File Name and on
the right side of the name of the database, click the Browse button ![]() .
This would open the File New Database dialog box. You can click the arrow of the
Save In combo box to select a drive such as (A:), (C:), etc. After selecting the
drive, you can either select an existing folder or create a new folder by
clicking the Create New Folder button on the right side of the Save In combo
box. You can also use a directory on the network as the
repository of the new database.
.
This would open the File New Database dialog box. You can click the arrow of the
Save In combo box to select a drive such as (A:), (C:), etc. After selecting the
drive, you can either select an existing folder or create a new folder by
clicking the Create New Folder button on the right side of the Save In combo
box. You can also use a directory on the network as the
repository of the new database.
Creating a Database Using a Template
Microsoft Access ships with a few sample databases you can use and customize. To create a database from a template, after launching Microsoft Access, in the middle section, locate and click the desired sample.
If you have a database you don't need anymore, you can delete it. To delete a database, in My Documents, in Windows Explorer or another file management application:
A warning message would be presented to you to confirm what you want to do.
Closing a Database
You can close a database without closing Microsoft Access. To do this, on the Ribbon, click File and click Close.
Closing Microsoft Access and Visual Basic
The version of Microsoft Visual Basic used in Microsoft Access is "For Applications". It is related to Microsoft Access. When you are in the Code Editor of Microsoft Visual Basic, you can get back to Microsoft Access either from the View Microsoft Access button on the Standard toolbar or by clicking the Microsoft Access button on the Taskbar. The shortcut to get back to Microsoft Access is Alt + F11.
You can close Microsoft Visual Basic any time and keep Microsoft Access running. To do this, on the Standard toolbar of Microsoft Visual Basic, click the View Microsoft Access button to get back to the database. On the other hand, if you close Microsoft Access, Microsoft Visual Basic will be closed also.
Since Microsoft Access shares the same functionality you are probably familiar with from using other applications, you can close it easily.
Practical Learning: Ending the Lesson