The available functions range in various types. There are so many built-in functions and procedures that we can only introduce some of them here. You can find out about the others in the Help files because they are fairly documented. When studying variables, we introduced and also reviewed the conversion functions. We saw that each had a corresponding function used to convert a string value or an expression to that type. As a reminder, the general syntax of the conversion functions is: ReturnType = FunctionName(Expression) The Expression could be of any kind. For example, it could be a string or expression that would produce a value such as the result of a calculation. The conversion function would take such a value, string, or expression and attempt to convert it. If the conversion is successful, the function would return a new value that is of the type specified by the ReturnType in our syntax. The conversion functions are as follows:
These functions allow you to convert a known value to a another type.
In Lesson 3, we saw that different data types are used to store different values. To do that, each data type requires a different amount of space in the computer memory. To know the amount of space that a data type or a variable needs, you can call the Len() function. Its syntax is: Public Function Len( _
ByVal Expression As { Boolean | Byte | Double |
Integer | Long | Object | Single | String | Date | Variant } _
) As Integer
To call this function, you can declare a variable with a data type of your choice and optionally initialize with the appropriate value, then pass that variable to the function. Here is an example: Public Sub Exercise()
Dim Value As Integer
Value = 774554
Len(Value)
End Sub
If you want, you can make the computer produce a beeping a sound in response to something, anything. To support this, the Visual Basic language provides a function called Beep. Its syntax is: Public Sub Beep() Here is an example of calling it: Private Sub cmdBeep_Click()
Beep
End Sub
If this function is called when a program is running, the computer emits a brief sound.
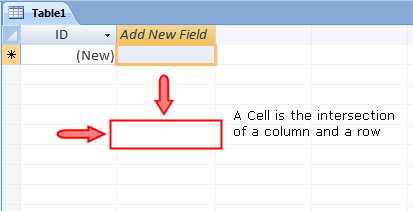
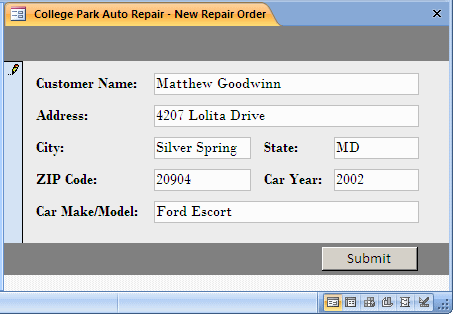
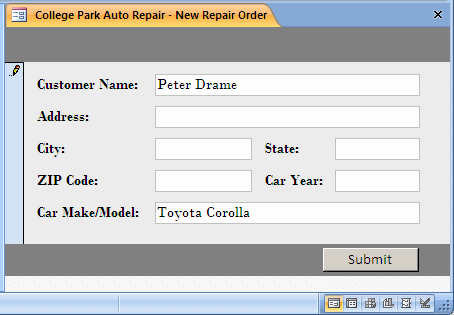
After creating a table and its column(s), you can populate the database with data. You and the user can use either the table or the form but as mentioned previously, the form is sometimes the appropriate object to do this. Data entry consists of filling a database with the necessary values. A series of values that corresponds to same levels of columns is called a row or a record. To enter data in a table, after displaying it in the Datasheet View, the user can click a box under a column and type the necessary value. After entering data in a box, the user can press Tab or Enter to move to the next box on the right. Whenever the user enters a value and moves to the next box, Microsoft Access automatically saves that value and it becomes part of the record. When either all horizontal boxes have been covered or the user simply decides to move to another horizontal range of boxes, he or she is said to have created a record. In summary, a record is a series of the same horizontal boxes. A record is actually represented as a row. The intersection of a column and a row is called a cell:
This means that data is actually entered into cells.
The form is the friendliest object of a database and meant for data entry. To perform data entry on a text field of a form, the user can click the control or the label that accompanies it, and type the desired value. Any of the forms we have created so far was good for data entry. After creating such a form, it is equipped with navigation buttons that allow a user to move from one record from another. If you want, you can create a special form used only for data entry. That is, you would not move from one record to another. To create a form for direct data entry, you have many alternatives. One of the techniques you can use to create a data entry-only form is as follows:
When the user is ready to perform data entry, you can open the form specifically for data entry. That is, you can programmatically navigate the form to a new record. To do this, you can call the GoToRecord() method of the DoCmd object. The syntax of this method is: GoToRecord(ObjectType, ObjectName, Record, Offset) The first argument to this method must be a constant value. In this case, it would be acDataForm. If you are calling it to act on the current form, you can set this argument to acActiveDataObject. In this case, you can omit this argument. The second argument is the name of the form to which the new record will be added. If the record is being added to the same form that is making the call, you can omit this argument. The third argument specifies the action that would be performed. This argument holds a constant value. In the case of adding a new record, the value of this argument would be acNewRec. The last argument has to do with other values of the third argument. Here is an example that opens a form named Customers at a new record: Private Sub cmdAddCustomer_Click()
DoCmd.OpenForm "Customers"
DoCmd.GoToRecord acDataForm, "Customers", acNewRec
End Sub
Instead of writing this code, you can use the Command Button Wizard where you would select Record Operations followed by Add New Record.
The values held by a table are referred to as a record set. Before performing data entry, you must programmatically open the table. That is, you must open the record set. To make this possible in the Microsoft Access Object Library, its Database class is equipped with a method named OpenRecordset. This method can take as argument the name of the table on which you want to perform data entry. Based on this, here is an example of calling the method: Private Sub cmdDataEntry_Click()
curDatabase.OpenRecordset("Students")
End Sub
Once you have the record set, you can perform data entry on it. To support this, the OpenRecordset() method returns an object named Recordset. If you want to use the table after opening the record set, get the return value of the method. To do this, declare a variable of type Object and assign it to the return value of this method call. Here is an example: Private Sub cmdDataEntry_Click()
Dim curDatabase As Object
Dim rstStudents As Object
Set curDatabase = CurrentDb
Set rstStudents = curDatabase.OpenRecordset("Students")
End Sub
After using the record set, free the memory it was using by assigning Nothing to it. This would be done as follows: Private Sub cmdDataEntry_Click()
Dim curDatabase As Object
Dim rstStudents As Object
Set curDatabase = CurrentDb
Set rstStudents = curDatabase.OpenRecordset("Students")
. . . Use the record set here
Set rstStudents = Nothing
Set curDatabase = Nothing
End Sub
After opening then getting a record set, you can create a new record. To support the creation of a record, the Recordset class is equipped with a method named AddNew. Here is an example of calling it: Private Sub cmdDataEntry_Click()
Dim curDatabase As Object
Dim rstStudents As Object
Set curDatabase = CurrentDb
Set rstStudents = curDatabase.OpenRecordset("Students")
rstStudents.AddNew
Set rstStudents = Nothing
Set curDatabase = Nothing
End Sub
This method only indicates that you want to create a new record. To actually create a record, you must specify a value for each column of the table. To support this, the Recordset class is equipped with an indexed property. The indexed property of a record set represents an object of type Field. Once of the properties of the Field class is the Name, which is the name of a column. Therefore, when accessing the indexed property of the Recordset class, pass the name of the column an argument, the name of the column whose value you want to specify. Another property of the Field class is named Value. To specify the new value of a column, use this property to assign the desired value to the column. Here is an example of specifying a new value for a column named FirstName from a table named Students: Private Sub cmdDataEntry_Click()
Dim curDatabase As Object
Dim rstStudents As Object
Set curDatabase = CurrentDb
Set rstStudents = curDatabase.OpenRecordset("Students")
rstStudents.AddNew
rstStudents("FirstName").Value = "Helene"
Set rstStudents = Nothing
Set curDatabase = Nothing
End Sub
After adding a new record, you must ask the record set to receive the new value. To support this, the Recordset class is equipped with a method named Update. Therefore, call this method after specifying a value for each column. Here is example of calling this method: Private Sub cmdCreateTable_Click()
Dim curDatabase As Object
Dim tblStudents As Object
Dim fldFirstName As Object, fldLastName As Object
' Get a reference to the current database
Set curDatabase = CurrentDb
' Create a new table named Students
Set tblStudents = curDatabase.CreateTableDef("Students")
Set fldFirstName = tblStudents.CreateField("FirstName", dbText)
tblStudents.Fields.Append fldFirstName
Set fldLastName = tblStudents.CreateField("LastName", dbText)
tblStudents.Fields.Append fldLastName
' Add the Students table to the current database
curDatabase.TableDefs.Append tblStudents
End Sub
Private Sub cmdDataEntry_Click()
Dim curDatabase As Object
Dim rstStudents As Object
Set curDatabase = CurrentDb
Set rstStudents = curDatabase.OpenRecordset("Students")
rstStudents.AddNew
rstStudents("FirstName").Value = "Helene"
rstStudents("LastName").Value = "Mukoko"
rstStudents.Update
Set rstStudents = Nothing
Set curDatabase = Nothing
End Sub
Like the Microsoft Access Object Library, DAO relies on a record set for data entry. Therefore, before creating a new record, you must open a record set. To support this, the Database class of the DAO library is equipped with a method named OpenRecordset. When calling this method, pass the name of the table where you want to create a new record. This would be done as follows: Private Sub cmdCreateRecord_Click()
dbExercise.OpenRecordset("Employees")
End Sub
The DAO.Database.OpenRecordset() method returns a Recordset object. To do anything on the record set, get a reference to this returned object. To do this, declare an DAO.Recordset variable and assign the return value of the OpenRecordset() method to it. Here is an example: Private Sub cmdCreateRecord_Click()
Dim dbExercise As DAO.Database
Dim rstEmployees As DAO.Recordset
Set dbExercise = CurrentDb
Set rstEmployees = dbExercise.OpenRecordset("Employees")
End Sub
Once you have the record set, you can use it. For example, you can add a new record to it. To assist you with this, the DAO.Recordset class provides the AddNew method. Call this method to indicate that you want to create a new record. Here is an example: Private Sub cmdCreateRecord_Click()
Dim dbExercise As DAO.Database
Dim rstEmployees As DAO.Recordset
Set dbExercise = CurrentDb
Set rstEmployees = dbExercise.OpenRecordset("Employees")
rstEmployees.AddNew
End Sub
After calling the AddNew() method, access each desired column of the table using the indexed property of the DAO.Recordset class. The indexed property takes the name of the column as argument. The DAO.Recordset() indexed property is an object of type Field. The Field class is equipped with a property named Name. This property allows you to access a column using its name. The Field class is also equipped with a property named Value. To assign a new value for a column, assign that value to the Field.Value property. Here is an example: Private Sub cmdCreateRecord_Click()
Dim dbExercise As DAO.Database
Dim rstEmployees As DAO.Recordset
Set dbExercise = CurrentDb
Set rstEmployees = dbExercise.OpenRecordset("Employees")
rstEmployees.AddNew
rstEmployees("EmployeeNumber").Value = "824-660"
End Sub
After creating the record, you must update the record set. This is done by calling the Update() method of the Recordset class. Here is example: Private Sub cmdCreateRecord_Click()
Dim dbExercise As DAO.Database
Dim rstEmployees As DAO.Recordset
Set dbExercise = CurrentDb
Set rstEmployees = dbExercise.OpenRecordset("Employees")
rstEmployees.AddNew
rstEmployees("EmployeeNumber").Value = "824-660"
rstEmployees.Update
End Sub
After using the record set, get rid of it by assigning Nothing to it. This would be done as follows: Private Sub cmdCreateTable_Click()
Dim dbExercise As DAO.Database
Dim tblEmployees As DAO.TableDef
Dim fldEmployeeNumber As DAO.Field
Dim fldEmployeeName As DAO.Field
Dim fldEmailAddress As DAO.Field
' Specify the database to use
Set dbExercise = CurrentDb
' Create a new TableDef object.
Set tblEmployees = dbExercise.CreateTableDef("Employees")
Set fldEmployeeNumber = tblEmployees.CreateField("EmployeeNumber", DB_TEXT)
tblEmployees.Fields.Append fldEmployeeNumber
Set fldEmployeeName = tblEmployees.CreateField("EmployeeName", DB_TEXT)
tblEmployees.Fields.Append fldEmployeeName
Set fldEmailAddress = tblEmployees.CreateField("EmailAddress", DB_TEXT)
tblEmployees.Fields.Append fldEmailAddress
' Add the new table to the database.
dbExercise.TableDefs.Append tblEmployees
dbExercise.Close
End Sub
Private Sub cmdCreateRecord_Click()
Dim dbExercise As DAO.Database
Dim rstEmployees As DAO.Recordset
Set dbExercise = CurrentDb
Set rstEmployees = dbExercise.OpenRecordset("Employees")
rstEmployees.AddNew
rstEmployees("EmployeeNumber").Value = "824-660"
rstEmployees("EmployeeName").Value = "Gertrude Monay"
rstEmployees("EmailAddress").Value = "gmonay@functionx.com"
rstEmployees.Update
Set rstEmployees = Nothing
Set dbExercise = Nothing
End Sub
Notice that the Microsoft Access Object library and the Microsoft DAO Library use the same approach to perform the same operations. Only the names of classes are different. ADO uses the same steps as DAO to create a new record but it extends the approach. First, you should check whether the Recordset object would allow a new record to be added. To do this, you can call the Supports() method. Its syntax is: boolean = recordset.Supports(CursorOptions) The argument passed to this method is a member of the CursorOptionEnum enumeration. If you want to check whether the record set supports record addition, pass this argument as adAddNew. If the record set allows addition, the method returns True. Otherwise it returns False. After checking this, if the record set supports record addition, you can then assign each desired value to the appropriate column. After assigning the values, call the Update() method of the Recordset object. Here is an example that creates a new record with selected columns in a table named Videos: Private Sub cmdAddNewVideo_Click()
Dim rstVideos As ADODB.Recordset
Set rstVideos = New ADODB.Recordset
rstVideos.Open "Videos", CurrentProject.Connection, _
adOpenDynamic, adLockOptimistic, adCmdTable
If rstVideos.Supports(adAddNew) Then
rstVideos.AddNew
rstVideos("Title").Value = "Leap of Faith"
rstVideos("Director").Value = "Richard Pearce"
rstVideos("Rating").Value = "PG-13"
rstVideos.Update
End If
rstVideos.Close
Set rstVideos = Nothing
End Sub
Some controls, such as the combo box or the list box, are meant to hold a list of values. We also know that a form or a report is primarily created to show one or more records. Such controls hold their own record set. If you create a Recordset object and want to initialize it with the values held in the form where it is called, you can simply assign it Me.Recordset. Here is an example: Private Sub cmdRecordset_Click()
' Create a recordset
Dim rstVideos As Recordset
' Specify that the record set points to the records of this form
Set rstVideos = Me.Recordset
End Sub
When a form is equipped to display the values of a list, that form has a Recordset object that represents its records. Once again, remember that there are various other ways you can initialize a Recordset object. For example, if you are using ADO, to use the records of the form that is calling it, you can assign Me.Recordset to your Recordset object. Here is an example: Private Sub cmdSetOfRecords_Click()
Dim rstVideos As ADODB.Recordset
Set rstVideos = Me.Recordset
End Sub
We saw that the Windows controls on a form could be used to display data from a table. This is done by specifying a list of values in the RecordSource property of the form. To get the set of records that the RecordSource property of a form holds, you can access its RecordsetClone property. |
|
|||||||||||||||||||||||||||||||||||||||||||||||||||||||||||||||||||||||||||||||||||||||||
|
|
||||||||||||||||||||||||||||||||||||||||||||||||||||||||||||||||||||||||||||||||||||||||||