
Introduction to XML Attributes
|
|
Introduction to XML Attributes |
When studying XML elements we saw how they constitute the main objects of an XML document. We also saw that an element can be nested inside of another element. Instead of nesting an element, you can transform the nested element into being part of the nesting element and thereby giving away its element qualities. This is the basis of an attribute. An attribute is a value that is created as part of an element, making that value different from the value of a regular element. There are similarities and differences between an element and an attribute. The element and the attribute have these in common:
The differences between an element and an attribute are:
An attribute must be created inside the start-tag of an element. To manually create an attribute, type the left angle bracket of the element, followed by the name of the element, an empty space, the name of the attribute, and assign it a value as a string. Imagine you have an ISBN element as a child of a Video element as follows: <Video> <ISBN>0-7888-1623-3</ISBN> </Video> In this case, since ISBN is simply a child of the Video element, you can change the ISBN element to become an attribute of the Video element as follows: <Video ISBN="0-7888-1623-3"> Now, ISBN is an attribute of the Video element. An attribute mostly gets meaning because of its text. This text allows you to know what the attribute is holding at one particular time. One of three properties can be used to specify or to retrieve the text held by an attribute. The XmlAttribute::Value is the most commonly used property to get or set this information. Besides Value, you can also use XmlAttribute::InnerText or XmlAttribute::InnerXml to access the text of an attribute.
An element can have 0, one, or more attributes. The attributes of an element are stored in the XmlElement::Attributes property and held by a class called XmlAttributeCollection. The XmlAttributeCollection class is based on the XmlNamedNodeMap class. Before performing an attribute-related operation on an element, to find out whether the element has any attribute, you can check the value of the Boolean XmlElement::HasAttributes property. If this property produces a true value, then the element has at least one attribute; otherwise, the element doesn't have any. While a certain element may have an attribute, a sibling element with the same name may not have an attribute or may have a completely different type of attribute. Here is an XML file with attributes in some elements: <?xml version="1.0" encoding="utf-8" ?> <Videos> <Video ISBN="0-7888-1623-3"> <Title Screenplay="Marty Kaplan">The Distinguished Gentleman</Title> <Director>Jonathan Lynn</Director> <Actors> </Actors> <Length>112 Minutes</Length> <Format>DVD</Format> <Rating>R</Rating> </Video> <Video> <Title WrittenBy="Charlie Peters">Her Alibi</Title> <Director>Bruce Beresford</Director> <Length>94 Mins</Length> <Format>DVD</Format> <Rating>PG-13</Rating> </Video> </Videos> Remember that you can include white spaces to make your code easy to read. This means that you can type an attribute on the next line of its element name. In the previous lesson, we saw that every element must be closed. We saw that you can close an element with an end-tag as follows: <Video><ISBN>0-7888-1623-3</ISBN></Video> We also saw that you can close an element locally as follows: <Video />. If you create an attribute in an empty element, you can also close it by typing the indicative forward slash before the right angle bracket and after an empty space. Here is an example: <Video ISBN="0-7888-1623-3" /> To support attributes, the System::Xml namespace provides the XmlAttribute class which is derived from XmlNode. One of the two most important properties of an attribute is its name, represented by Name. Every attribute must have a name, which is used to identify the attribute. For one thing, you must be able to locate an attribute in an element, for another, if an element has many attributes, you need to be able to identify one of them by name.
As mentioned already, an attribute primarily belongs to an element. This means that, when creating an attribute, you must specify what element it would belong to. To support the attributes of an element, the XmlElement class is equipped with the SetAttribute() method which is overloaded in two versions. The first version of this method has the following syntax: public: virtual void SetAttribute(String* name, String* value); The first argument is the name of the new attribute and the second argument will be its text. Before adding an attribute, you should first identify its parent element. Here is an example that adds an attribute to the root element: System::Void btnCreateAttribute_Click(System::Object * sender, System::EventArgs * e)
{
// Open the XML file
XmlDocument *docXML = new XmlDocument;
docXML->Load(S"Videos.xml");
// Create an attribute and add it to the root element
docXML->DocumentElement->SetAttribute(S"FileDesc", S"Personal Video Collection");
docXML->Save(S"Videos.xml");
}
From the above Videos.xml file, this code would result in: <?xml version="1.0" encoding="utf-8"?>
<Videos FileDesc="Personal Video Collection">
<Video ISBN="0-7888-1623-3">
<Title Screenplay="Marty Kaplan">The Distinguished Gentleman</Title>
<Director>Jonathan Lynn</Director>
<Actors>
</Actors>
<Length>112 Minutes</Length>
<Format>DVD</Format>
<Rating>R</Rating>
</Video>
<Video>
<Title WrittenBy="Charlie Peters">Her Alibi</Title>
<Director>Bruce Beresford</Director>
<Length>94 Mins</Length>
<Format>DVD</Format>
<Rating>PG-13</Rating>
</Video>
</Videos>
To support attribute addition, the XmlDocument class is equipped with the CreateAttribute() method, which is overloaded in three versions. The first version of this method has the following syntax: public: XmlAttribute* CreateAttribute(String* name); This method expects the name of the attribute as argument. If it succeeds, this method produces an XmlAttribute object. To add the new attribute to an element, you can call the XmlElement::SetAttributeNote() method. This method is overloaded in two versions. One of the versions (the first) uses the following syntax: public: virtual XmlAttribute* SetAttributeNode(XmlAttribute* newAttr); This method expects an XmlAttribute as a constant pointer. Here is an example that looks for a particular video in a collection and adds an ISBN attribute to it: System::Void btnCreateAttribute_Click(System::Object * sender, System::EventArgs * e)
{
// Open the XML file
XmlDocument *docXML = new XmlDocument;
docXML->Load(S"Videos.xml");
// Create a new attribute
XmlAttribute *atrXML = docXML->CreateAttribute(S"ISBN");
atrXML->Value = S"0-7907-3900-3";
// Get a list of elements whose names are Video
XmlNodeList *nodVideos = docXML->GetElementsByTagName(S"Video");
// Since we will look for a specific video, get the list of all titles
XmlNodeList *nodTitles = docXML->GetElementsByTagName(S"Title");
// Visit each title
for(int i = 0; i < nodTitles->Count; i++)
{
// Look for a video whose title is "Her Alibi"
if( nodTitles->ItemOf[i]->InnerText->Equals(S"Her Alibi") )
{
// Once you find that video, add the new attribute to it
dynamic_cast<XmlElement *>(nodVideos->ItemOf[i])->SetAttributeNode(atrXML);
}
}
// Update the XML file
docXML->Save(S"Videos.xml");
}
From the above Videos.xml file, this code would result in: <?xml version="1.0" encoding="utf-8"?>
<Videos FileDesc="Personal Video Collection">
<Video ISBN="0-7888-1623-3">
<Title Screenplay="Marty Kaplan">The Distinguished Gentleman</Title>
<Director>Jonathan Lynn</Director>
<Actors>
</Actors>
<Length>112 Minutes</Length>
<Format>DVD</Format>
<Rating>R</Rating>
</Video>
<Video ISBN="0-7907-3900-3">
<Title WrittenBy="Charlie Peters">Her Alibi</Title>
<Director>Bruce Beresford</Director>
<Length>94 Mins</Length>
<Format>DVD</Format>
<Rating>PG-13</Rating>
</Video>
</Videos>
|
|
|
 |
||||||||||||||||||||||||
|
#pragma once using namespace System; using namespace System::ComponentModel; using namespace System::Collections; using namespace System::Windows::Forms; using namespace System::Data; using namespace System::Drawing; using namespace System::Xml; #include "NewContinent.h" |
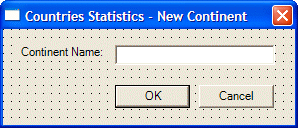
System::Void btnNewContinent_Click(System::Object *  sender, System::EventArgs *  e)
{
	 NewContinent *frmContinent = new NewContinent;

	 // Open the XML file
	 XmlDocument *xmlDocContinents = new XmlDocument;
	 xmlDocContinents->Load(S"Countries.xml");

	 // Display the New Continent dialog box and find out if the user clicked OK
	 if( frmContinent->ShowDialog() == DialogResult::OK )
	 {
		 if( frmContinent->txtContinentName->Text->Equals(S"") )
			 return;

		 // Create an element that the new attribute will be added to
		 XmlElement *xmlNewContinent = xmlDocContinents->CreateElement(S"Continent");

		 // Create a Continent element and set its value to
		 // that of the New Continent dialog box
		 xmlNewContinent->SetAttribute(S"Name", frmContinent->txtContinentName->Text);

		 // Add the element and its attribute to the document
		 xmlDocContinents->DocumentElement->AppendChild(xmlNewContinent);

		 // Save the XML file
		 xmlDocContinents->Save(S"Countries.xml");
	 }
}
|
#pragma once

#include "NewCountry.h"

namespace Countries1
{
	. . . No Change

	private: System::Void btnNewCountry_Click(System::Object *  sender, System::EventArgs *  e)
			 {
				 NewCountry *frmCountry = new NewCountry;

				 frmCountry->Show();
			 }

	};
}
|
Once an attribute has been created, to identify the element it belongs to, you can access its XmlAttribute::OwnerElement property. This property produces an XmlElement value.
If an element has an attribute you don't want or that you don't need anymore, you can delete that attribute. You have various options, two are available through the XmlElement class. The attributes of an XmlElement are considered stored in an indexed list (in the next sections, we will see that the attributes are stored in a collection) with the most left attribute at index 0, the second from left at index 1, and so on. Based on this, to remove an attribute by locating it based on its index, you can call the XmlElement::RemoveAt() method. Its syntax is: public: virtual XmlNode* RemoveAttributeAt(int i); When calling this method, if an attribute exists at position i, it will be deleted and the method would return it. If there is no attribute at that index, the method doesn't do anything and it returns 0. Using the XmlElement::RemoveAt() method to delete an attribute can be uncertain because you would not know whether there is an attribute at the specified position. An alternative is to specify the name of the attribute you want to delete. To support this, the XmlElement class is equipped with the RemoveAttribute() method, which is overloaded with two versions. One of the versions (the first) of this method uses the following syntax: public: virtual void RemoveAttribute(String* name); This method accepts as argument the name of the attribute to remove. Another technique you can use consists of defining an XmlAttribute object and submitting to its XmlElement parent to delete. To do this, you can use the XmlElement::RemoveAttributeNode() method. Its syntax is: public: virtual XmlAttribute* RemoveAttributeNode(XmlAttribute* oldAttr); When calling this method, pass the attribute object as argument. If the attribute exists, it would be removed and the method would return the deleted attribute. If the attribute doesn't exist, nothing would happen. |
|
|
System::Void btnNewContinent_Click(System::Object *  sender, System::EventArgs *  e)
{
	 // Open the XML file
	 XmlDocument *xmlDocContinents = new XmlDocument;
	 xmlDocContinents->Load(S"Countries.xml");

	 // Since we are planning to create new elements and their attributes
	 // delete all continents
	 XmlElement *elmRoot = xmlDocContinents->DocumentElement;
	 elmRoot->RemoveAll();

	 // Save the XML file
	 xmlDocContinents->Save(S"Countries.xml");
}
|
|
|
||
| Previous | Copyright © 2004-2010 FunctionX, Inc. | Next |
|
|
||