Introduction to Cursors

Introduction to Cursors
Cursors for an Application
Introduction
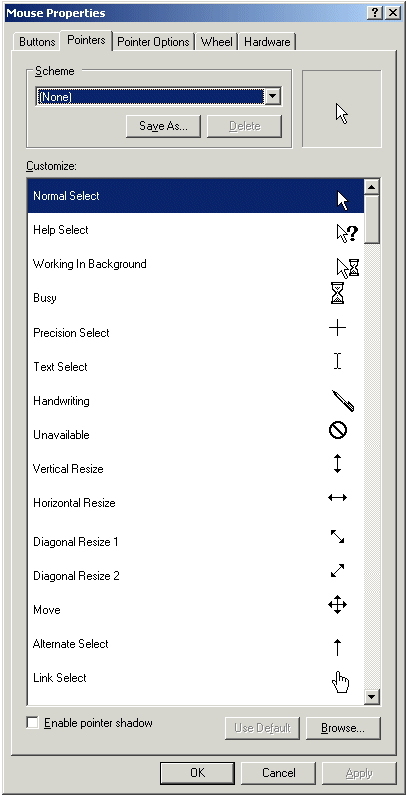
A cursor is a small picture that represents the position of the mouse on a computer screen. As most operating systems are graphic-oriented, when they install, they create some standard or regularly used cursors. In Microsoft Windows, the set of cursors can be seen by opening the Control Panel window and double-clicking the Mouse icon. This opens the Mouse Properties dialog box where you can click the Pointers tab to see a list of standard cursors installed by Windows:
To support cursors, the .NET Framework provides two classes. One of the classes used for cursors is called Cursors:
public static class Cursors
This sealed class mostly contains a list of available cursors as properties. Another technique consists of using a cursor not listed in the Properties window. A cursor is based on the Cursor class:
public sealed class Cursor : IDisposable, System.Runtime.Serialization.ISerializable
Both the Cursors and the Cursor classes are defined in the System.Windows.Forms namespace that is part of the System.Windows.Forms.dll library.
![]() Practical Learning: Introducing Cursors
Practical Learning: Introducing Cursors
Creating a Cursor
A cursor is primarily represented in Microsoft Windows as a (resource) file. This means that, to get a cursor, you can design one. Fortunately, Microsoft Windows and the .NET Framework provide many cursors ready to be used. Otherwise, you can create and design your own cursor.
To create a cursor, you can use use Microsoft Visual Studio. To start, on the main menu, you can click Project -> Add New Item... In the middle list, you can click Cursor File, give it a name, and click Add.
A cursor is a Windows file that has the .cur extension.
![]() Practical Learning: Creating a Cursor
Practical Learning: Creating a Cursor


Characteristics of a Cursor
Accessing a Cursor
There are two main ways you can use a cursor in your application. The easiest cursors are listed in the Cursor field of the Properties window for the control whose cursor you want to change. The available cursors are:
 |
 |
 |
 |
You can select one of these cursors in the Properties window and assign it to a control. These cursors are defined in a class called Cursors. This simple class mostly contains only a list of available cursors as properties. All these cursors are represented as static properties. Therefore, to use one of these cursors, call the name of the class, Cursors, followed by the class access operator ".", followed by the name of the cursor as it appears in the above list.
The Cursor class provides four constructors. One of them allows you to specify the path where the cursor is located. This constructor has the following syntax:
public Cursor(String filename);
The argument passed to this constructor is the name or the location of the cursor as a file. After calling this constructor to initialize a Cursor variable, the cursor is ready. You can then use it as you see fit. For example, you can assign it to the Cursor property of a control.
When the cursor of a control has been changed, the control fires a CursorChanged event. This event is of type EventArgs.
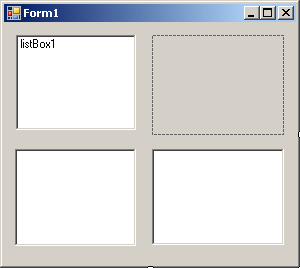
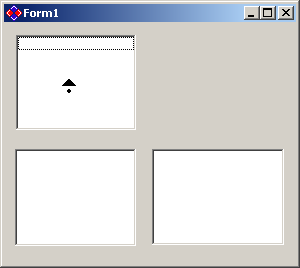
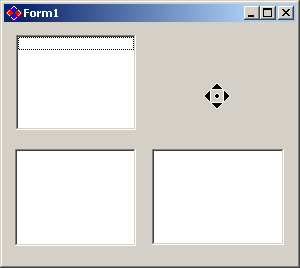
![]() Practical Learning: Using Cursors
Practical Learning: Using Cursors
private void Form1_Load(object sender, EventArgs e)
{
System.Drawing.Icon icoMain = new System.Drawing.Icon("diamond.ico");
Icon = icoMain;
System.Windows.Forms.Cursor curPush = new System.Windows.Forms.Cursor("push.cur");
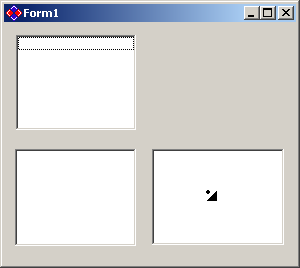
panel1.Cursor = Cursors.NoMove2D;
treeView1.Cursor = curPush;
richTextBox1.Cursor = Cursors.PanSE;
} |
 |
 |
 |
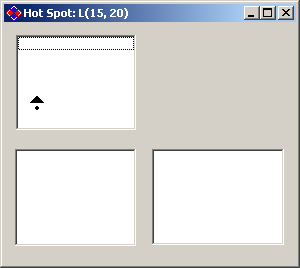
The Hot Spot of a Cursor
Besides showing the current position of the mouse, depending on the application, at one time, the user may need to click. Because a cursor is primarily confined to a rectangular shape, a cursor must specify which one of its sections would lead the clicking. The area that directs or holds the clicking on a cursor is referred to as its hot spot. The person who designs a cursor must also specify its hot spot. This means that the hot spots have already been specified for all the built-in cursors of Microsoft Windows and the cursor that ship with the .NET Framework.
If you are visually creating a cursor, to specify its hot spot, on the Image Editor toolbar, you can click the Set Hot Spot ![]() . Then, on the cursor, click the point that will act as the hot spot.
. Then, on the cursor, click the point that will act as the hot spot.
On an existing cursor, to know the coordinates of the hot spot, access the value of its HotSpot property. The Cursor.HotSpot property is of type Point.
![]() Practical Learning: Creating a Hot Spot for a Cursor
Practical Learning: Creating a Hot Spot for a Cursor

private void Form1_MouseMove(object sender, MouseEventArgs e)
{
    Text = "Hot Spot: F(" +
           Cursor.HotSpot.X.ToString() +
           ", " + Cursor.HotSpot.Y + ")";
}private void listBox1_MouseMove(object sender, MouseEventArgs e)
{
Text = "Hot Spot: L(" +
listBox1.Cursor.HotSpot.X.ToString() +
", " + listBox1.Cursor.HotSpot.Y + ")";
}private void panel1_MouseMove(object sender, MouseEventArgs e)
{
Text = "Hot Spot: P(" +
panel1.Cursor.HotSpot.X.ToString() +
", " + panel1.Cursor.HotSpot.Y + ")";
}private void treeView1_MouseMove(object sender, MouseEventArgs e)
{
Text = "Hot Spot: T(" +
treeView1.Cursor.HotSpot.X.ToString() +
", " + treeView1.Cursor.HotSpot.Y + ")";
}private void richTextBox1_MouseMove(object sender, MouseEventArgs e)
{
Text = "Hot Spot: R(" +
richTextBox1.Cursor.HotSpot.X.ToString() +
", " + richTextBox1.Cursor.HotSpot.Y + ")";
} |
|
 |
 |
 |
 |
The Size of a Cursor
A cursor is a picture of size 32 x 32 pixels. To know the size of an existing cursor, you can get the value of the Size property of the Cursor object. The Cursor.Size property is of type Size.
To specify the rectangle in which the cursor much be confined, you can create a Rectangle object and assign it to the Clip property of a cursor. To know the rectangle in which a cursor is confined, get the value of its Clip property. The Cursor.Clip property is of type Rectangle.
The Position of a Cursor
While the user is moving the mouse on a control, the cursor moves also, which, by its purpose, is designed to show the current position of the mouse. In some application, at one particular time, you may want to know the coordinates of the mouse position. To provide you with this information, the Cursor class is equipped with a property named Position. The Position property is of type Point, which gives you to left (X) and the top (Y) coordinates of the mouse. Here is an example that displays the position of the mouse on the title bar of a form:
private void Exercise_MouseMove(object sender, MouseEventArgs e)
{
    Text = Cursor.Position.X.ToString() +
           ", " +
           Cursor.Position.Y.ToString();
}
Showing or Hiding a Cursor
If at any time you want to hide a cursor, you can call the Cursor.Hide() method. Its syntax is:
public static void Hide();
To display the cursor again, you can call the Cursor.Show() method. Its syntax is:
public static void Show();
![]() Practical Learning: Ending the Lesson
Practical Learning: Ending the Lesson
|
|
|||
| Previous | Copyright © 2010-2024, FunctionX | Thursday 25 Apil 2024, 22:15 | Next |
|
|
|||