Introduction to Enumerations

Introduction to Enumerations
Fundamentals of Enumerations
Introduction
An enumeration is a group of names where each name holds a constant number (integer). The idea is that, instead of using meaningless numbers, a name represents a number and the name is more meaningful because it is explicit. To use this group of constant integers, you must create or use a group called an enumeration that itself has a name.
![]() Practical Learning: Introducing Enumerations
Practical Learning: Introducing Enumerations
namespace Chemistry04
{
    public class Element
    {
        public string Symbol { get; set; }
        public string ElementName { get; set; }
        public int AtomicNumber { get; set; }
        public double AtomicWeight { get; set; }

        public Element(int number = 1)
        {
            AtomicNumber = number;
        }

        public Element(string symbol)
        {
            Symbol = symbol;
        }

        public Element(int number, string symbol, string name, double mass)
        {
            Symbol = symbol;
            ElementName = name;
            AtomicWeight = mass;
            AtomicNumber = number;
        }
    }
}
Creating an Enumeration
To let you create an enumeration, the C# language provides a keyword named enum. Type it followed by the name of the enumeration. Add a body delimited by curly brackets. In the body of the enumeration, create the list of members where each member has a specific name. Therefore, the formula to create an enumeration is:
access-level enum Enumeration_Name { member1, member2, member_n }
Like a class, an enumeration can use an access level (private, public, or internal) to indicate its scope. The name of the enumeration follows the rules and suggestions of the names of classes. That name is followed by the body of the enumeration that contains the name of each item or member. The names of the members or items follow the rules and suggestions of the names of classes. To manually create an enumeration, type its code. Here is an example:
public class RealEstate
{
    enum PropertyType { Unknown, SingleFamily, TownHouse, Condominium }
}
To make the code easy to read, especially if the enumeration contains many members, you can put each curcly bracket on its own line, you can put all members on the same line, some members on same lines, or each member on its own line. Here is an example:
public class PoliticalParty
{
    private enum Alignment
    {
        FarLeft,
        Left,
        CenterLeft,
        Center,
        CenterRight,
        Right,
        FarRight
    }
}
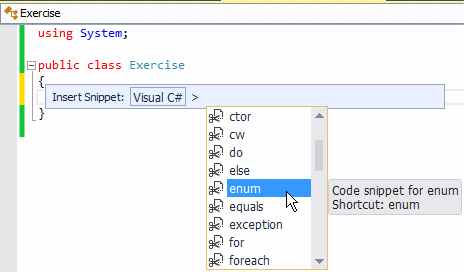
If you are working from Microsoft Visual Studio, to use a code snippet, right-click where you want to add the enumeration and click Insert Snippet... Double-click Visual C#. In the list, double-click enum:
![]() Practical Learning: Creating an Enumeration
Practical Learning: Creating an Enumeration
public enum Phase
{
    Gas,
    Liquid,
    Solid,
    Unknown
}

namespace Chemistry04
{
    public class Element
    {
        . . .
    }
}
A Variable of an Enumeration Type
After creating an enumeration, you can declare a variable from it. An enumeration can be created inside (in the body of) a class or outside. If you are planning to use an enumeration from only one class, create it inside that class without specifying its access level or by applying private. Such an enumeration is considered private.
To declare a variable of an enumeration, use its name followed by a name for the variable. Here is an example:
public class RealEstate
{
    enum PropertyType { Unknown, SingleFamily, TownHouse, Condominium }

    public RealEstate()
    {

    }

    PropertyType type;
}
If you try using a private enumeration outside its class, you would receive an error. If you are planning to use an enumeration from more than one class, you can create it inside or outside a class. If you want to access an enumeration from more than one class, you can create it outside the class. Here is an example:
enum PropertyType { Unknown, SingleFamily, TownHouse, Condominium }

public class RealEstate
{
    PropertyType type;
}

public class Exercise
{
    PropertyType category;
}
In this case, you can optionally mark the enumeration as public or internal. You can also create the enumeration inside a class. In this case, you must apply the public or internal access level. To access such an enumeration, you must qualify it from the name of its class. Here are examples:
public class Management
{
    public enum PropertyType { Unknown, SingleFamily, TownHouse, Condominium }
}

public class RealEstate
{
    Management.PropertyType type;
}

public class Exercise
{
    Management.PropertyType category;
}
Initializing an Enumeration Variable
After declaring a variable for an enumeration, to initialize it, specify which member of the enumeration would be assigned to the variable. You can only assign a member of the enumeration. To indicate the member you want, on the right side of the assignment operator, qualify the desired member from its enumeration. Here are examples:
public class PoliticalParty
{
    private enum Alignment
    {
        FarLeft,
        Left,
        CenterLeft,
        Center,
        CenterRight,
        Right,
        FarRight
    }

    // Blah blah blah

    Alignment policies = Alignment.Right;
}

public class Management
{
    public enum PropertyType { Unknown, SingleFamily, TownHouse, Condominium }
}

public class RealEstate
{
    Management.PropertyType type = Management.PropertyType.SingleFamily;
}
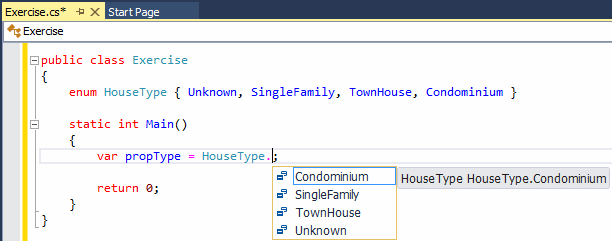
Just as done with the other types, you can use the var keyword to declare a variable of an enumeration type. This implies that you must immediately initialize the variable
Remember that you can get assistance from the Intellisence:
Accessing the Members of an Enumeration
There are various ways you can use an enumeration. One way is to find out what value the declared variable is currently holding.
Displaying the Value of an Enumeration
We already know that you cannot display the value of a numeric variable (int, double) directly in Windows control: you must convert the value to a string. In the same way, you cannot display the value of an enumeration directly in a text box. The solution is to call the ToString() method to conver the value of the variable.
Enumerations and Classes
An Field of an Enumeration Type
Once an enumeration exists, it becomes a type like any other. For example, you can create a field of an enumeration in a class. To create a field that is of an enumeration type, follow the same rules as done for the primitive types: the name of the enumeration, followed by the name of the variable, and followed by a semi-colon. Here is an example:
public enum HouseType
{
    Unknown,
    SingleFamily,
    TownHouse,
    Condominium
}

public class House
{
    HouseType propertyType;
}
A Method that Returns an Enumeration
You can create a method that returns a member of an enumeration. When creating the method, type the name of the enumeration to the left of the name of the method. In the body of the method, do what you want. Before the closing curly bracket, return a member qualified from the name of the enumeration. Here is an example:
public class PoliticalParty
{
    private enum Alignment
    {
        FarLeft,
        Left,
        CenterLeft,
        Center,
        CenterRight,
        Right,
        FarRight
    }

    Alignment IndicateAbortionPrinciple()
    {
        Alignment choice = Alignment.CenterLeft;

        return choice;
    }
}
If you create a private enumeration (an enumeration created in the body of a class, as private or without an access level), only private methods that returns it can access that enumeration. A public method that returns an enumeration cannot access a private enumeration. As a result, the following code produces an error:
public class PoliticalParty
{
    private enum Alignment
    {
        FarLeft,
        Left,
        CenterLeft,
        Center,
        CenterRight,
        Right,
        FarRight
    }

    public Alignment IndicateAbortionPrinciple()
    {
        Alignment choice = Alignment.CenterLeft;

        return choice;
    }
}
Therefore, if you decide to create an enumeration inside a class, it may be a good idea to make it public because when a private method returns a public enumeration, there is no problem.
An Enumeration as Parameter
As mentioned already, once an enumeration has been created, it becomes a type. You can use an enumeration as a type for a parameter. You use the same approach of any data type. Here is an example:
public class PoliticalParty
{
    private enum Alignment
    {
        FarLeft,
        Left,
        CenterLeft,
        Center,
        CenterRight,
        Right,
        FarRight
    }

    void Abort(Alignment pregnancy)
    {

    }
}
A private method that uses a local enumeration can access it only if the enumeration is private. If a local enumeration is private, if a public method uses it as parameter, there would be an error. This means that the following code doesn't work:
public class PoliticalParty
{
    private enum Alignment
    {
        FarLeft,
        Left,
        CenterLeft,
        Center,
        CenterRight,
        Right,
        FarRight
    }

    public void Abort(Alignment pregnancy)
    {

    }
}
As mentioned previously, it may be a good idea to simply make your enumerations public.
An Enumerated Property
Since an enumeration is a data type, a property can be created from it. To create a property of an enumeration type, use the same steps as for a primitive data type. If you are planning to relay its value to a local field, the member variable must be the same type as the property. Here is an example:
public enum PropertyType { Unknown, SingleFamily, TownHouse, Condominium }

public class RealEstate
{
    PropertyType pt;

    public RealEstate(PropertyType category)
    {
        pt = category;
    }

    public PropertyType Type
    {
        get
        {
            return pt;
        }
        set
        {
            pt = value;
        }
    }
}
If the property doesn't need to process anything or to valid the values passed to it, you can make create it as an automatic property. Here is an example:
public enum PropertyType { Unknown, SingleFamily, TownHouse, Condominium }

public class RealEstate
{
    public RealEstate(PropertyType type)
    {
        Category = type;
    }

    public PropertyType Category { get; set; }
}
A static property of an enumeration type is created the same way, using the static keyword. Here are examples:
public enum Alignment
{
    FarLeft, Left, CenterLeft,
    Center,
    CenterRight, Right, FarRight
}

public class PoliticalParty
{
    private static Alignment align;

    static public Alignment Affiliation
    {
        get
        {
            return align;
        }

        set
        {
            align = value;
        }
    }

    public static Alignment Policy { get; set; }
}
![]() Practical Learning: Using an Enumeration
Practical Learning: Using an Enumeration
public enum Phase
{
    Gas,
    Liquid,
    Solid,
    Unknown
}

namespace Chemistry04
{
    public class Element
    {
        public string Symbol { get; set; }
        public string ElementName { get; set; }
        public int AtomicNumber { get; set; }
        public double AtomicWeight { get; set; }
        public Phase Phase         { get; set; }

        public Element(int number = 1)
        {
            AtomicNumber = number;
        }

        public Element(string symbol)
        {
            Symbol = symbol;
        }

        public Element(int number, string symbol, string name, double mass)
        {
            Symbol = symbol;
            ElementName = name;
            AtomicWeight = mass;
            AtomicNumber = number;
        }
    }
}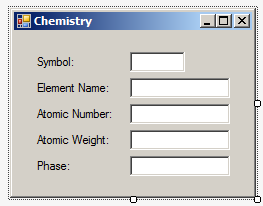
| Control | (Name) | Text |
| Label | Symbol: | |
| TextBox | txtSymbol | |
| Label | Element Name: | |
| TextBox | txtElementName | |
| Label | Atomic Number: | |
| TextBox | txtAtomicNumber | |
| Label | Atomic Weight: | |
| TextBox | txtAtomicWeight | |
| Label | Phase: | |
| TextBox | txtPhase |
using System.Diagnostics.Eventing.Reader;
using System.Windows.Forms;

namespace Chemistry04
{
    public partial class Form1 : Form
    {
        public Form1()
        {
            InitializeComponent();

            Element mg = Create();

            Present(mg);
        }

        Element Create()
        {
            Element elm = new Element(12, "Mg", "Magnesium", 24.305);

            elm.Phase = Phase.Solid;

            return elm;
        }

        void Present(Element obj)
        {
            txtSymbol.Text = obj.Symbol;
            txtElementName.Text = obj.ElementName;
            txtAtomicNumber.Text = obj.AtomicNumber.ToString();
            txtAtomicWeight.Text = obj.AtomicWeight.ToString();
            txtPhase.Text = obj.Phase.ToString();
        }
    }
}
namespace Chemistry04
{
    public enum Phase
    {
        Gas,
        Liquid,
        Solid,
        Unknown
    }

    public class Element
    {
        public string Symbol       { get; set; }
        public string ElementName  { get; set; }
        public int    AtomicNumber { get; set; }
        public double AtomicWeight { get; set; }
        public Phase  Phase        { get; set; }

        public Element(int number = 1)
        {
            AtomicNumber = number;
        }

        public Element(string symbol)
        {
            Symbol = symbol;
        }

        public Element(int number, string symbol,
                       string name, double mass, Phase phase)
        {
            Phase = phase;
            Symbol = symbol;
            ElementName = name;
            AtomicWeight = mass;
            AtomicNumber = number;
        }
    }
}using System.Windows.Forms;
namespace Chemistry04
{
public partial class Form1 : Form
{
public Form1()
{
InitializeComponent();
Element al = Create();
Present(al);
}
Element Create()
{
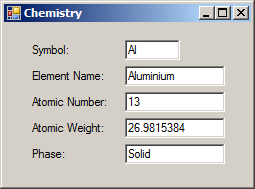
return new Element(13, "Al", "Aluminium", 26.9815384, Phase.Solid);
}
void Present(Element obj)
{
txtSymbol.Text = obj.Symbol;
txtElementName.Text = obj.ElementName;
txtPhase.Text = obj.Phase.ToString();
txtAtomicNumber.Text = obj.AtomicNumber.ToString();
txtAtomicWeight.Text = obj.AtomicWeight.ToString();
}
}
}
using System.Windows.Forms;
namespace Chemistry04
{
public partial class Form1 : Form
{
public Form1()
{
InitializeComponent();
Present(Create());
}
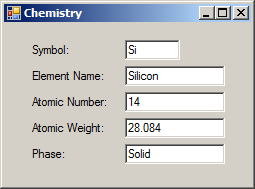
Element Create() => new Element(14, "Si", "Silicon", 28.084, Phase.Solid);
void Present(Element obj)
{
txtSymbol.Text = obj.Symbol;
txtElementName.Text = obj.ElementName;
txtPhase.Text = obj.Phase.ToString();
txtAtomicNumber.Text = obj.AtomicNumber.ToString();
txtAtomicWeight.Text = obj.AtomicWeight.ToString();
}
}
}
Introduction to Built-In Enumerations
Introductory to Visual Enumerated Properties
Enumerations provide a convenient way to name and identify constant values. As a result, the .NET Framework uses enumerations in all of its namespaces. In order to use an enumeration, you must know the library and the namespace in which the enumeration is defined.
Remember that every Windows control is based on a class. The class of every Windows controls is equipped with various types of properties, including enumerated properties. To assist you in visually setting the value of an enumerated property, the Properties window is equipped with various types of fields.
![]() Practical Learning: Introducing Built-In Enumerations
Practical Learning: Introducing Built-In Enumerations
New Instruction:From now on, in our lessons, to ask you to create a new project, we may instruct you to "Create a new Windows Forms application named ..." or "Create a new Windows Forms project named ..." or "Start a new Windows Forms application/project named ...". In that case, follow the above instructions and name the project with the indicated name. |
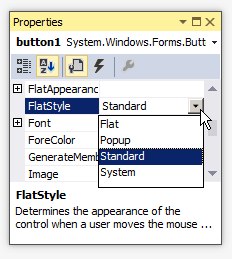
List-Based Fields
Some of the fields of the Properties window appear as combo boxes. Most (if all of) those properties use an enumerated property. When you click the arrow of the combo box, a list appears and displays the members of the enumeration:
To change the value of the field, that is, to visually specify the value of the property:
![]() Practical Learning: Introducing Text-Based Fields
Practical Learning: Introducing Text-Based Fields
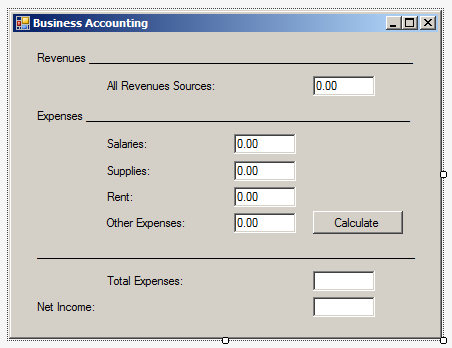
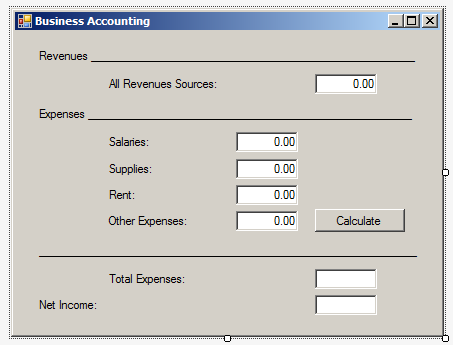
| Control | (Name) | Text |
| Label | Revenues ____________ | |
| Label | All Revenues Sources: | |
| TextBox | txtRevenuesSources | 0.00 |
| Label | Expenses ____________ | |
| Label | Salaries: | |
| TextBox | txtSalaries | 0.00 |
| Label | Supplies: | |
| TextBox | txtSupplies | 0.00 |
| Label | Rent: | |
| TextBox | txtRent | 0.00 |
| Label | txtOtherExpenses: | |
| TextBox | txtOtherExpenses | 0.00 |
| Button | btnCalculate | Calculate |
| Label | ______________________ | |
| Label | txtTotalExpenses: | |
| TextBox | txtTotalExpenses | |
| Label | txtNetIncome: | |
| TextBox | txtNetIncome |
Area-Selection Fields
For some fields, if you click the arrow of the value, a window appears:
From that window, you can select the desired option.
The Built-In Color Enumeration
To help you use colors in your applications, the .NET Framework provides an enumeration named Color. It is defined in the System.Drawing namespace. All of its members are easily recognizable names of colors such as Black, White, Red, Blue, Blue, Yellow, etc.

Common Properties of Controls
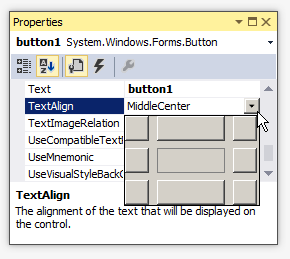
The Text Alignment of a Text Box
Some human languages have a policy on how numbers should be aligned with regards to their contenir. For example in the English language, a numeric value is usually aligned to the right side, such as to the right of a text box.
To support the alignment of the value of a text box, the class of the text box is equipped with a property named TextAlign. The TextAlign property is based on an enumeration named HorizontalAlignment:
public System.Windows.Forms.HorizontalAlignment TextAlign { get; set; }
The HorizontalAlignment enumeration has three members defined as follows:
| Value | Member | Description |
| 0 | Left | The value is aligned to the left side |
| 1 | Right | The value is aligned to the left side |
| 2 | Center | The value is aligned to the center |
To let you specify the alignment of the content of a text box, the Properties window of a Text Box control is equipped with a field named TextAlign. After selecting a text box on a form, you can set the alignment in the Properties window. To programmatically specify the value of a text box, access its TextAlign property and set the desired value.
![]() Practical Learning: Aligning Text
Practical Learning: Aligning Text
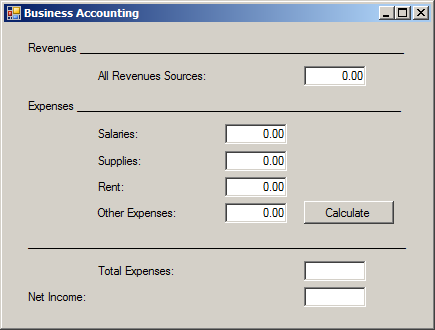
| Control | (Name) | Text | TextAlign |
| Label | Revenues ____________ | ||
| Label | All Revenues Sources: | ||
| TextBox | txtRevenuesSources | 0.00 | Right |
| Label | Expenses ____________ | ||
| Label | Salaries: | ||
| TextBox | txtSalaries | 0.00 | Right |
| Label | Supplies: | ||
| TextBox | txtSupplies | 0.00 | Right |
| Label | Rent: | ||
| TextBox | txtRent | 0.00 | Right |
| Label | txtOtherExpenses: | ||
| TextBox | txtOtherExpenses | 0.00 | Right |
| Button | btnCalculate | Calculate | |
| Label | ______________________ | ||
| Label | txtTotalExpenses: | ||
| TextBox | txtTotalExpenses | Right | |
| Label | Net Income: | ||
| TextBox | txtNetIncome | Right |
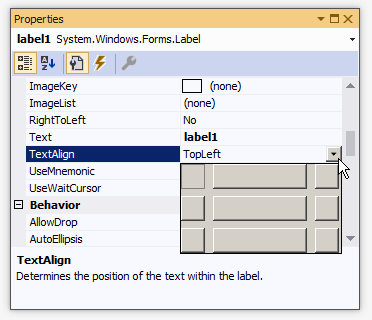
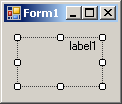
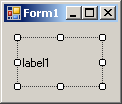
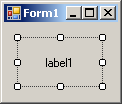
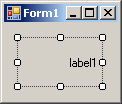
The Content Alignment of a Control
When a control can be resized, or it has been configured to be sizable, as it would be the case for a label or a button, you can specify in what part of its confined borders the text should display. To support this characteristic, the classes of those controls are equipped with a property named TextAlign. To specify the alignment of text during design, access the Properties window for a control and use the TextAlign field:
The TextAlign property is from an enumeration named ContentAlignment. The members and results of this enumeration are:
| TopLeft | TopCenter | TopRight |
 |
 |
 |
| MiddleLeft | MiddleCenter | MiddleRight |
 |
 |
 |
| BottomLeft | BottomCenter | BottomRight |
 |
 |
 |
To programmatically specify the text alignment of a control, access its TextAlign property and assign it the desired member of the ContentAlignment enumeration.
Control Docking
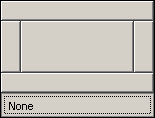
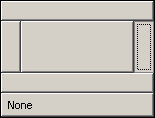
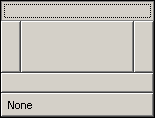
When a control is added to a host, depending on the control, it may be automatically positioned where the mouse landed. In some cases, you will want the control to be attached to a border or to a corner of its parent. To support the characteristic, the classes of the Windows controls are equipped with a property named Dock. This property is based on an enumeration named DockStyle.
To visually set the docking style of a control, select the object on a form. In the Properties window, click the arrow of the Dock field:
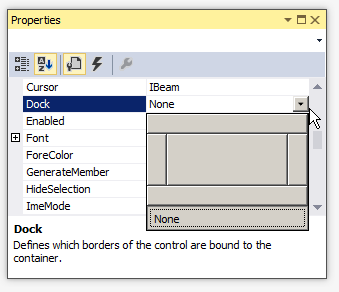
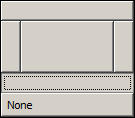
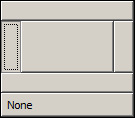
As you can see, the Dock option displays a window from which you can select the desired options(s). The members of the DockStyle enumeration are:
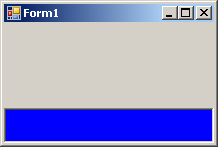
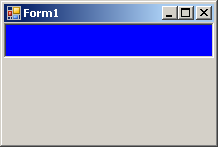
Bottom: The control will be attached to the bottom border of its parent:
 |
 |
Fill: The control will use the whole client area of its parent.
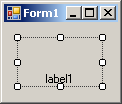
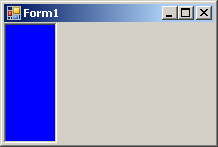
Left: The control will be attached to the left border of its parent:
 |
 |
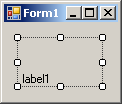
None: The control will be kept where it was positioned on the parent:
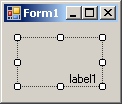
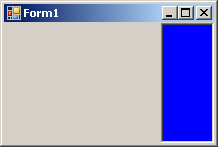
Right: The control will be attached to the right border of its parent:
 |
 |
Top: The control will be attached to the top border of its parent:
 |
 |
To programmatically specify the docking option of a control, access its Dock property and assign the desired member of the DockStyle enumeration. Here is an example:
public class Exercise : Form
{
    private Button btnSubmit;

    private void InitializeComponent()
    {
        btnSubmit = new Button();
        btnSubmit.Text = "Submit";
        btnSubmit.Dock = DockStyle.Right;
    }
}
![]() Practical Learning: Ending the Lesson
Practical Learning: Ending the Lesson
|
|
||
| Previous | Copyright © 2001-2021, FunctionX | Next |
|
|
||