
The Properties of a Class
|
|
The Properties of a Class |
Properties Fundamentals
Introduction
A property is a member of a class that acts as a relay between the class and an object outside the class, that is, an object that communicates with the class, such as providing a value to the class. As such, and unlike a regular member variable, a property can act as the "door" that validates, evaluates, accepts and/or rejects a value passed to an object of the class, or a value assigned to a member of the class.
To make a property validate the value of a member variable of a class, it must be associated to a local member variable that itself should (must) be hidden from outside the class. Such a local member can be created using the Dim keyword so that the objects outside the class cannot "see" it.
After declaring a local variable using Dim, you must then create a property in the class and set up a relationship between both so that the property can play its role.
To create a property, you use the Property keyword. With regards to their roles, there are three types of properties.
 Practical Learning: Introducing Classes Properties
Read-Only Properties
A property is referred to as read-only if its role is only to make available the value of the member variable it represents. To create a read-only property, use a formula as follows:
[Public | Private | Friend] [Static]Property Get property-name() As data-type

End Property
The Property Get expression is required. It is followed by the name of the property and empty parentheses. You must also indicate the type of value the property must produce. The creation of a property ends with an End Property line.
The section between the Property Get line and the End Get line is the body of the property. In it, define what you want the property to produce. Because this property appears like a function, to indicate its return value, before the last line, assign the return value to the name of the property. The simplest way consists of assigning the local variable to the name of the property. Here is an example:
Public Property Get HourlySalary() As Double
   HourlySalary = hSalary
End Property
When the clients of a class access a read-only property, they can only retrieve the value of the property but they cannot change it. Therefore, if you create a read-only property, you should provide the ability to specify the value of the member variable. To do this, you can create an appropriate method whose role would only be used to initialize the property.
Once a read-only property has been created, other classes or procedures can read its value.
Practical
Learning: Introducing Read-Only Properties
Public Property Get HourlySalary() As Double
   HourlySalary = hSalary
End Property
Dim hSalary As Double

Public Property Get HourlySalary() As Double
   HourlySalary = hSalary
End Property

Public Sub Create(ByVal salary As Double)
    hSalary = salary
End Sub
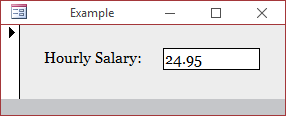
Private Sub Form_Load()
    Dim se As New SalaryEstimation

    se.Create 24.95

    txtHourlySalary = se.HourlySalary

    Set se = Nothing
End Sub
Dim hSalary As Double
Public Property Get HourlySalary() As Double
HourlySalary = hSalary
End Property
Public Sub Create(ByVal salary As Double)
hSalary = salary
End Sub
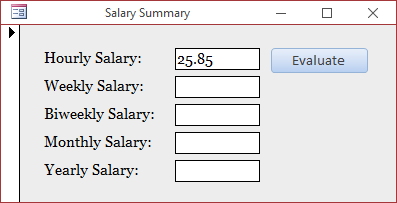
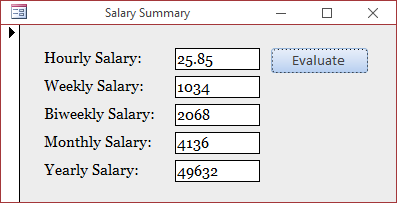
Public Property Get WeeklySalary() As Double
WeeklySalary = HourlySalary * 40
End Property
Public Property Get BiWeeklySalary() As Double
BiWeeklySalary = WeeklySalary * 2#
End Property
Public Property Get MonthlySalary() As Double
MonthlySalary = WeeklySalary * 4#
End Property
Public Property Get YearlySalary() As Double
YearlySalary = MonthlySalary * 12#
End Property
Private Sub cmdEvaluate_Click()
    Dim estimate As SalaryEstimation
    Dim hr As Double

    hr = CDbl(txtHourlySalary)
    Set estimate = New SalaryEstimation

    estimate.Create hr

    txtWeeklySalary = estimate.WeeklySalary
    txtBiWeeklySalary = estimate.BiWeeklySalary
    txtMonthlySalary = estimate.MonthlySalary
    txtYearlySalary = estimate.YearlySalary

    Set estimate = Nothing
End Sub
Write-Only Properties
A property is referred to as write-only if the clients of the class can change the value of that property but cannot read its value. The formula to create a write-only property uses the Let keyword as follows:
[Public | Private | Friend] [Static] Property Let property-name(ByVal value As data-type)

End Property
This time, the property must use a parameter, passed in its parentheses. Here is an example:
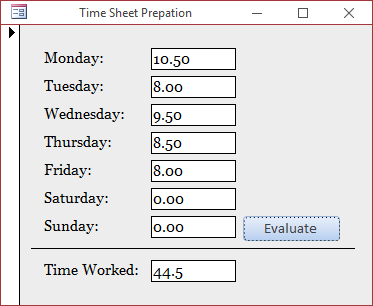
Class Module: TimeSheet
Dim mon As Double

Public Property Set Monday(ByVal d As Double)

End Property
The minimum operation you can perform with a write-only property is to assign it a value that would be provided by the outside world. To do this, you can assign the argument to a local member variable that the property represents.
Practical
Learning: Introducing Write-Only Properties
Dim mon As Double
Dim tue As Double
Dim wed As Double
Dim thu As Double
Dim fri As Double
Dim sat As Double
Dim sun As Double
Public Property Let Monday(ByVal value As Double)
mon = value
End Property
Public Property Let Tuesday(ByVal value As Double)
tue = value
End Property
Public Property Let Wednesday(ByVal value As Double)
wed = value
End Property
Public Property Let Thursday(ByVal value As Double)
thu = value
End Property
Public Property Let Friday(ByVal value As Double)
fri = value
End Property
Public Property Let Saturday(ByVal value As Double)
sat = value
End Property
Public Property Let Sunday(ByVal value As Double)
sun = value
End Property
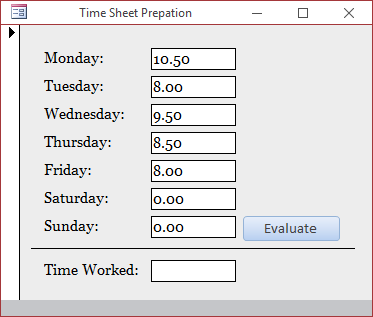
Public Property Get TimeWorked() As Double
TimeWorked = mon + tue + wed + thu + fri + sat + sun
End Property
Private Sub cmdCalculateTimeWorked_Click()
    Dim ts As New TimeSheet

    Dim mon As Double, _
        tue As Double, _
        wed As Double, _
        thu As Double, _
        fri As Double, _
        sat As Double, _
        sun As Double

    mon = CDbl(txtMonday)
    tue = CDbl(txtTuesday)
    wed = CDbl(txtWednesday)
    thu = CDbl(txtThursday)
    fri = CDbl(txtFriday)
    sat = CDbl(txtSaturday)
    sun = CDbl(txtSunday)

    ts.Monday = mon
    ts.Tuesday = tue
    ts.Wednesday = wed
    ts.Thursday = thu
    ts.Friday = fri
    ts.Saturday = sat
    ts.Sunday = sun

    txtTimeWorked = ts.TimeWorked

    Set ts = Nothing
End Sub
Read/Write Properties
A property is referred to as read-write if it allows external objects and/or procedures to read its value or to change it when necessary. To create a read-write property, you must implement both the Property Get and the Property Let properties, and both properties must have the same name. Each of the properties uses the formulas we reviewed above:
[Public | Private | Friend] [Static]Property Get property-name() As data-type

End Property
[Public | Private | Friend] [Static]Property Let property-name(ByVal value As data-type)

End Property
When implementing the property, provide the necessary functionality in the Property Get and the Property Set sections as we reviewed them.
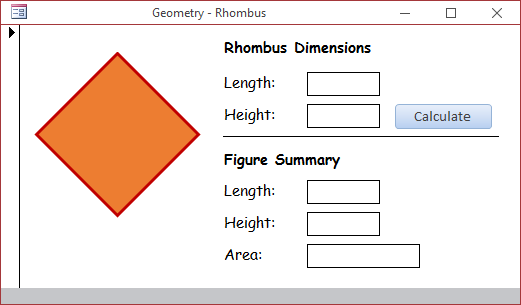
Practical
Learning: Introducing Read/Write Properties
Dim dLen As Double
Dim dHgt As Double

Public Property Get Length() As Double
    Length = dLen
End Property

Public Property Let Length(value As Double)
    dLen = value
End Property

Public Property Get Height() As Double
    Height = dHgt
End Property

Public Property Let Height(value As Double)
    dHgt = value
End Property

Public Property Get Area()
    Area = dLen * dHgt / 2#
End Property
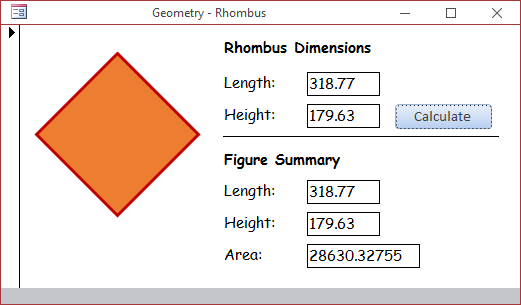
Private Sub cmdCalculate_Click()
    Dim p As Double
    Dim q As Double
    Dim area As Double
    Dim r As New Rhombus

    p = CDbl(txtLength)
    q = CDbl(txtHeight)

    r.Length = p
    r.Height = q
    area = r.area

    txtHorizontal = r.Length
    txtVertical = r.Height
    txtArea = area

    Set r = Nothing
End Sub

The Types of Properties
Introduction
So far, we created properties that supported decimal numbers. Indeed, any primitive data type can be used to create a property. This includes natural numbers and strings.
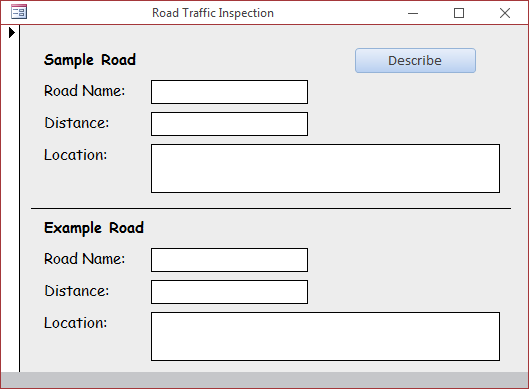
Practical
Learning: Introducing Read/Write Properties
Dim name As String
Dim length As Single
Dim summary As String

Public Property Let RoadName(ByVal value As String)
    name = value
End Property

Public Property Get RoadName() As String
    RoadName = name
End Property

Public Property Let Distance(ByVal value As Single)
    length = value
End Property

Public Property Get Distance() As Single
    Distance = length
End Property

Public Property Let Description(ByVal value As String)
    summary = value
End Property

Public Property Get Description() As String
    Description = summary
End Property
Private Sub cmdDescribe_Click()
    Dim rd As Road

    Set rd = New Road

    rd.RoadName = "I-76"
    rd.Distance = 434.87
    rd.Description = "From an interchange with I-71 west of Akron, Ohio, east to I-295 in Bellmawr, New Jersey."

    txtRoadName1 = rd.RoadName
    txtDistance1 = CStr(rd.Distance) & " miles"
    txtLocation1 = rd.Description

    Set rd = New Road

    rd.RoadName = "US 322"
    rd.Distance = 494
    rd.Description = "From Cleveland, Ohio east to Atlantic City, New Jersey"

    txtRoadName2 = rd.RoadName
    txtDistance2 = CStr(rd.Distance) & " miles"
    txtLocation2 = rd.Description

    Set rd = Nothing
End Sub

An Object as a Property
As seen for a primary type, a property can use a class type. For example, you can pass an object to a class as property. In this case, you would create a property using the Set keyword. The formula to create a write-only property for an object uses the Set keyword as follows:
[Public | Private | Friend] [Static]Property Set property-name(ByVal value As data-type)
    Set value = something"
End Property
Once again, you should first declare a local variable. This time, it should be a reference to an object. Then, in the body of the property, you can assign the argument to the local object using the Set operator. Here is an example:
Class Module: Employee
Option Compare Database
Option Explicit

Public FirstName As String
Public LastName As String
Class Module: Payroll
Dim empl As Employee

Property Set Member(ByVal value As Employee)
     Set empl = value
End Property
Because you are using a reference type, it is a good idea to initialize the object when the class will be accessed and to de-allocate its memory when it will not be needed anymore. This can be done as follows:
Dim empl As Employee

Private Sub Class_Initialize()
    Set empl = New Employee
End Sub

Property Set Member(ByVal value As Employee)
     Set empl = value
End Property

Private Sub Class_Terminate()
    Set empl = Nothing
End Sub
Outside the class, you can assign an object to the property using the Set operator. Here is an example:
Private Sub Command5_Click()
    Dim pay As New Payroll
    Dim staff As New Employee

    staff.FirstName = "Joshua"
    staff.LastName = "Killion"

    Set pay.Member = staff

    Set pay = Nothing
End Sub
Built-In Classes/Objects and their Properties
A Microsoft Access database is an object of type Application. In your code, to declare a variable of this type, you can type:
Dim app As Application
If you want to refer to such an object outside of Microsoft Access, you must qualify it with the Access object. For example, from an application such as Microsoft Word, to declare a variable that refers to a Microsoft Access database, the above declaration would be made as:
Dim app As Access.Application
Even in Microsoft Access, you can still use Access.Application.
To assist you with getting the name of the current database, the Application class is equipped with a property named CurrrentObjectName. This property simply produces the name of the database that called it, without the extension.
To let you know the Microsoft Access version of the current application, the Application class is equipped with a property named Version. In Microsoft Access 2007, this property produces 12.0.
When working in a Microsoft Access application, the database that is currently opened is identified as the CurrentDb object. This object is a child of (it is a property of) the Application object. The CurrentDb object allows you to refer to the current database in your code.
One of the ways you can get a reference to the current database is to declare a variable of type Object and Set it to the CurrentDb object. This can be done as follows:
Private Sub cmdReference_Click()
    Dim curDatabase As Object

    Set curDatabase = CurrentDb
End Sub
Alternatively, and this is necessary if you are working outside of Microsoft Access, first declare a variable of type Application or Access.Application, then assign that the CurrentDb property of the Application object by qualifying it. This can be done as follows:
Private Sub cmdReference_Click()
    Dim curDatabase As Object
    Dim curApplication As Application

    Set curDatabase = curApplication.CurrentDb
End Sub
The DoCmd Object
To assist you in performing the most common operations or actions of a database (an action performed on a database is also called a command), the VBA version of Microsoft Access provides a class or object named DoCmd. This object can be used by itself or as a property of the Application class. The DoCmd class contains only methods.
Because Microsoft Access is a visual application, you will usually perform most of your operations visually by clicking, dragging, and dropping some things. Some other operations you will have to perform with code. One of the methods of the DoCmd class is called DoMenuItem. Its syntax is:
DoMenuItem(ByVal MenuBar As Variant, _
	   ByVal MenuName As Variant, _
	   ByVal Command As Variant, _
	   ByVal Subcommand As Variant, _
	   ByVal Version As Variant)
To assist you in programmatically performing SQL operations in Microsoft Access, the DoCmd class is equipped with a method named RunSQL. Its syntax is:
Sub RunSQL(ByVal SQLStatement As Variant, Optional ByVal UseTransaction As Variant)
This method takes two arguments. The first one is required and contains what you want to use. The second argument is optional and has to do with transactions.
The other methods of the DoCmd class/object are:
| AddMenu | ApplyFilter | Beep | CancelEvent |
| Close | CopyDatabaseFile | CopyObject | DeleteObject |
| DoMenuItem | Echo | FindNext | FindRecord |
| GoToControl | GoToPage | GoToRecord | Hourglass |
| Maximize | Minimize | MoveSize | OpenDataAccessPage |
| OpenDiagram | OpenForm | OpenFunction | OpenModule |
| OpenQuery | OpenReport | OpenStoredProcedure | |
| OpenTable | OpenView | OutputTo | PrintOut |
| Quit | RefreshRecord | Rename | RepaintObject |
| Requery | Restore | RunCommand | RunMacro |
| RunSQL | Save | SelectObject | SendObject |
| SetMenuItem | SetWarnings | ShowAllRecords | ShowToolbar |
| TransferDatabase | TransferSpreadsheet | TransferSQLDatabase | TransferText |
Practical
Learning: Ending the Lesson
|
|
||
| Previous | Copyright © 2002-2022, FunctionX, Inc. | Next |
|
|
||